
This post may contain affiliate links. Please read our disclosure policy.
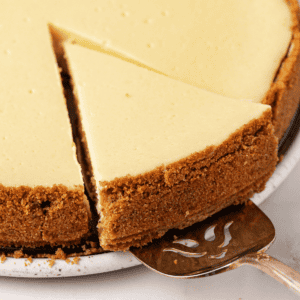
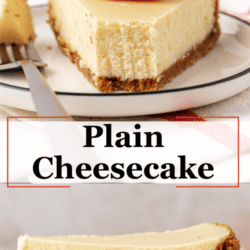
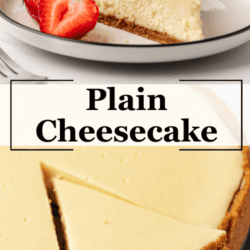
This classic plain cheesecake recipe has earned over 1 million page views, proving its reputation as the ultimate go-to cheesecake. With just four simple ingredients in the batter, I retested it to eliminate the fussy water bath, and now you’ll get the same smooth, crack-free cheesecake with a much easier steam method.
Readers agree it’s a standout! Anne shared, “My Mother-in-Law, whom I’ve cooked for 40 years, said this was my BEST cheesecake ever.” Gayle added, “I’ve tried other recipes. This one is hands down the best.”
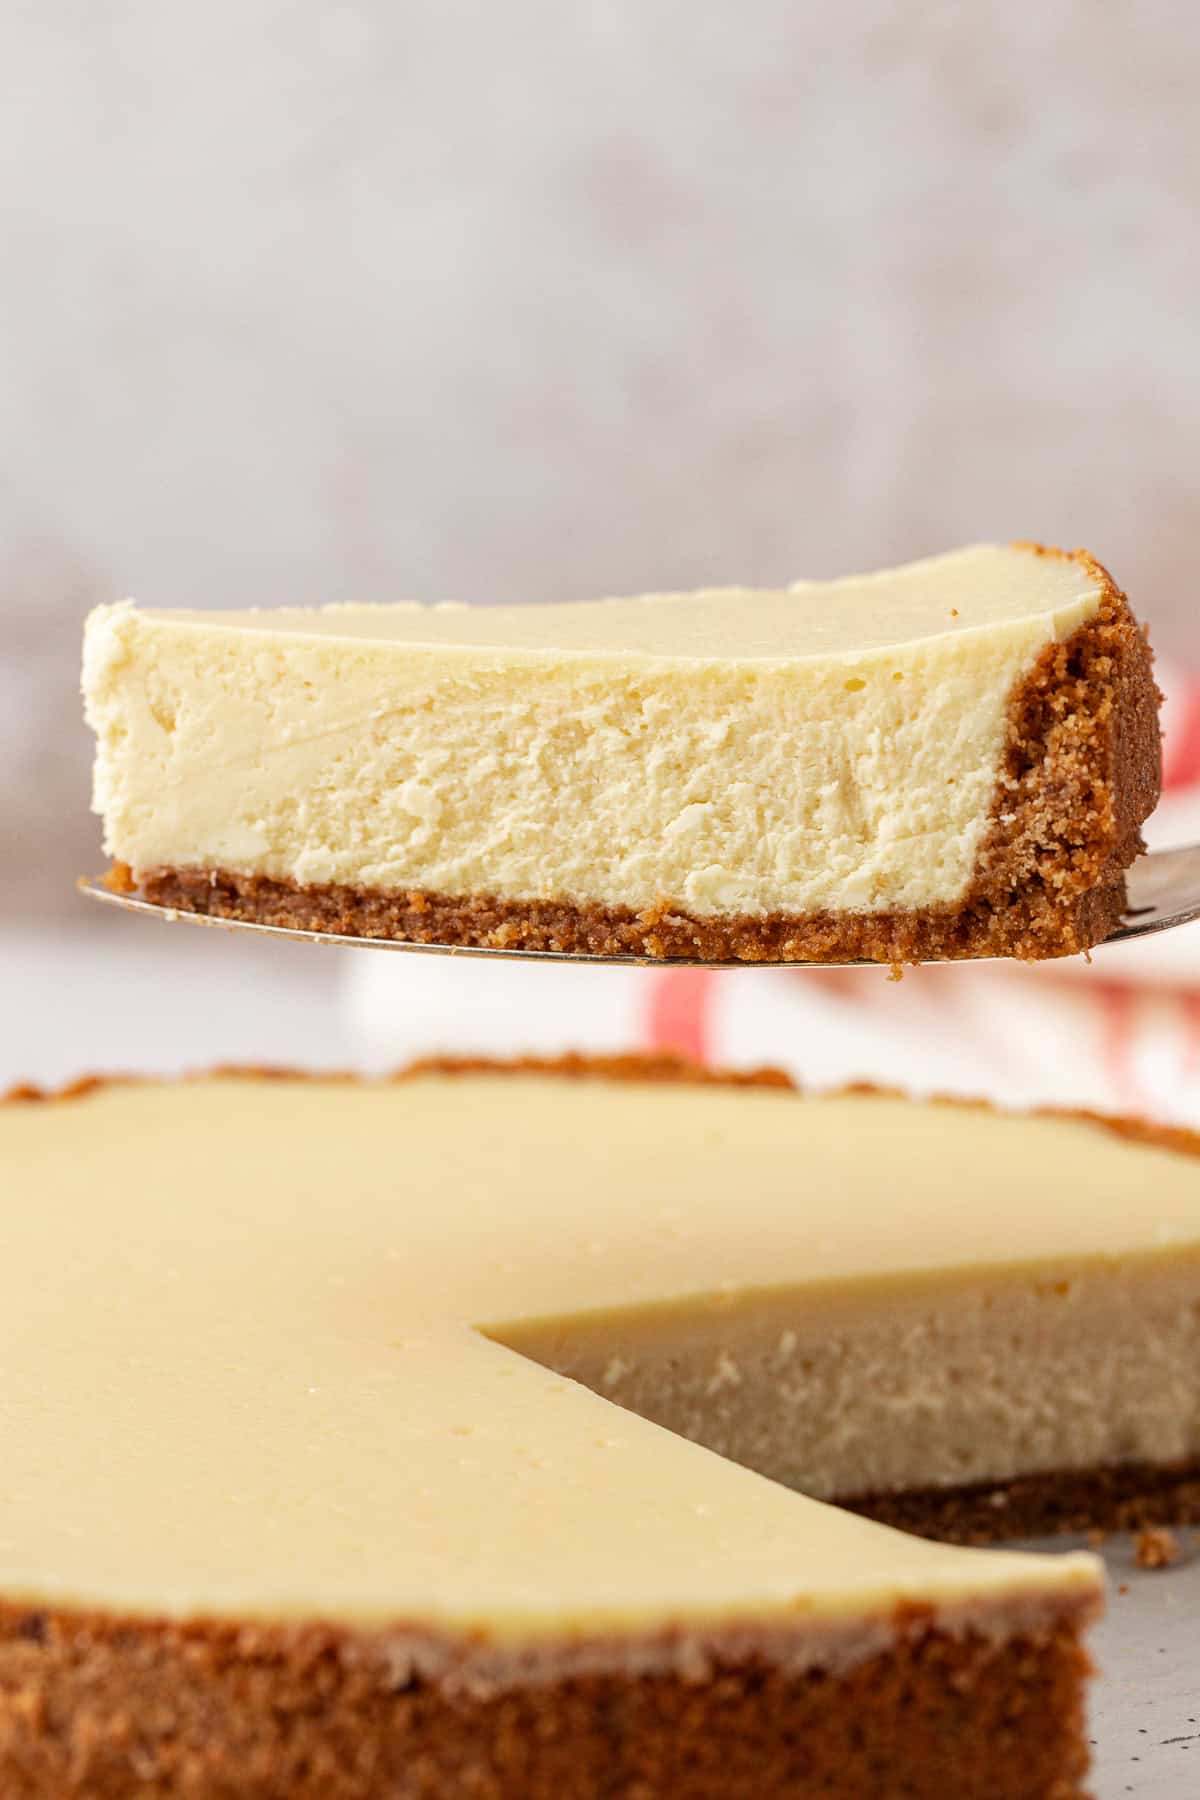
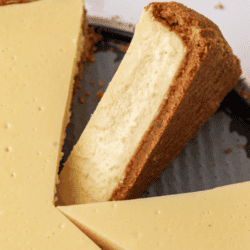
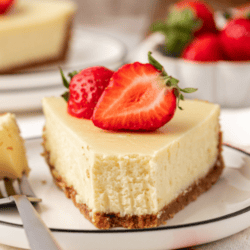
Complete with a buttery graham cracker crust, this timeless cheesecake is sure to impress your guests and earn rave reviews at every gathering. Whether you’re a seasoned baker or a beginner, you’ll create a dessert that’s as beautiful as it is delicious.
This is the absolute best recipe I’ve ever made! Most recipes leave my cheesecake with brown tops! Not this one! We use this in our cheesecake business. It also freezes really well!
-Stephanie

Why you’ll love this Classic Cheesecake Recipe
This cheesecake recipe is the perfect combination of simplicity and sophistication. With just four basic ingredients in the batter, it’s easy enough for beginners yet delivers bakery-quality results that will impress even the most discerning dessert lovers.
The step-by-step instructions, including tips for mastering cheesecake using a steam bath, NOT a water bath, make it virtually foolproof. Whether it’s a holiday gathering or a casual dinner party, this cheesecake’s creamy texture, perfectly balanced sweetness, and buttery graham cracker crust are guaranteed to steal the show.
Plus, rave reader reviews prove it’s a recipe you can trust to wow every time!
Homemade Cheesecake Ingredients
Our original cheesecake recipe only calls for 4 ingredients!
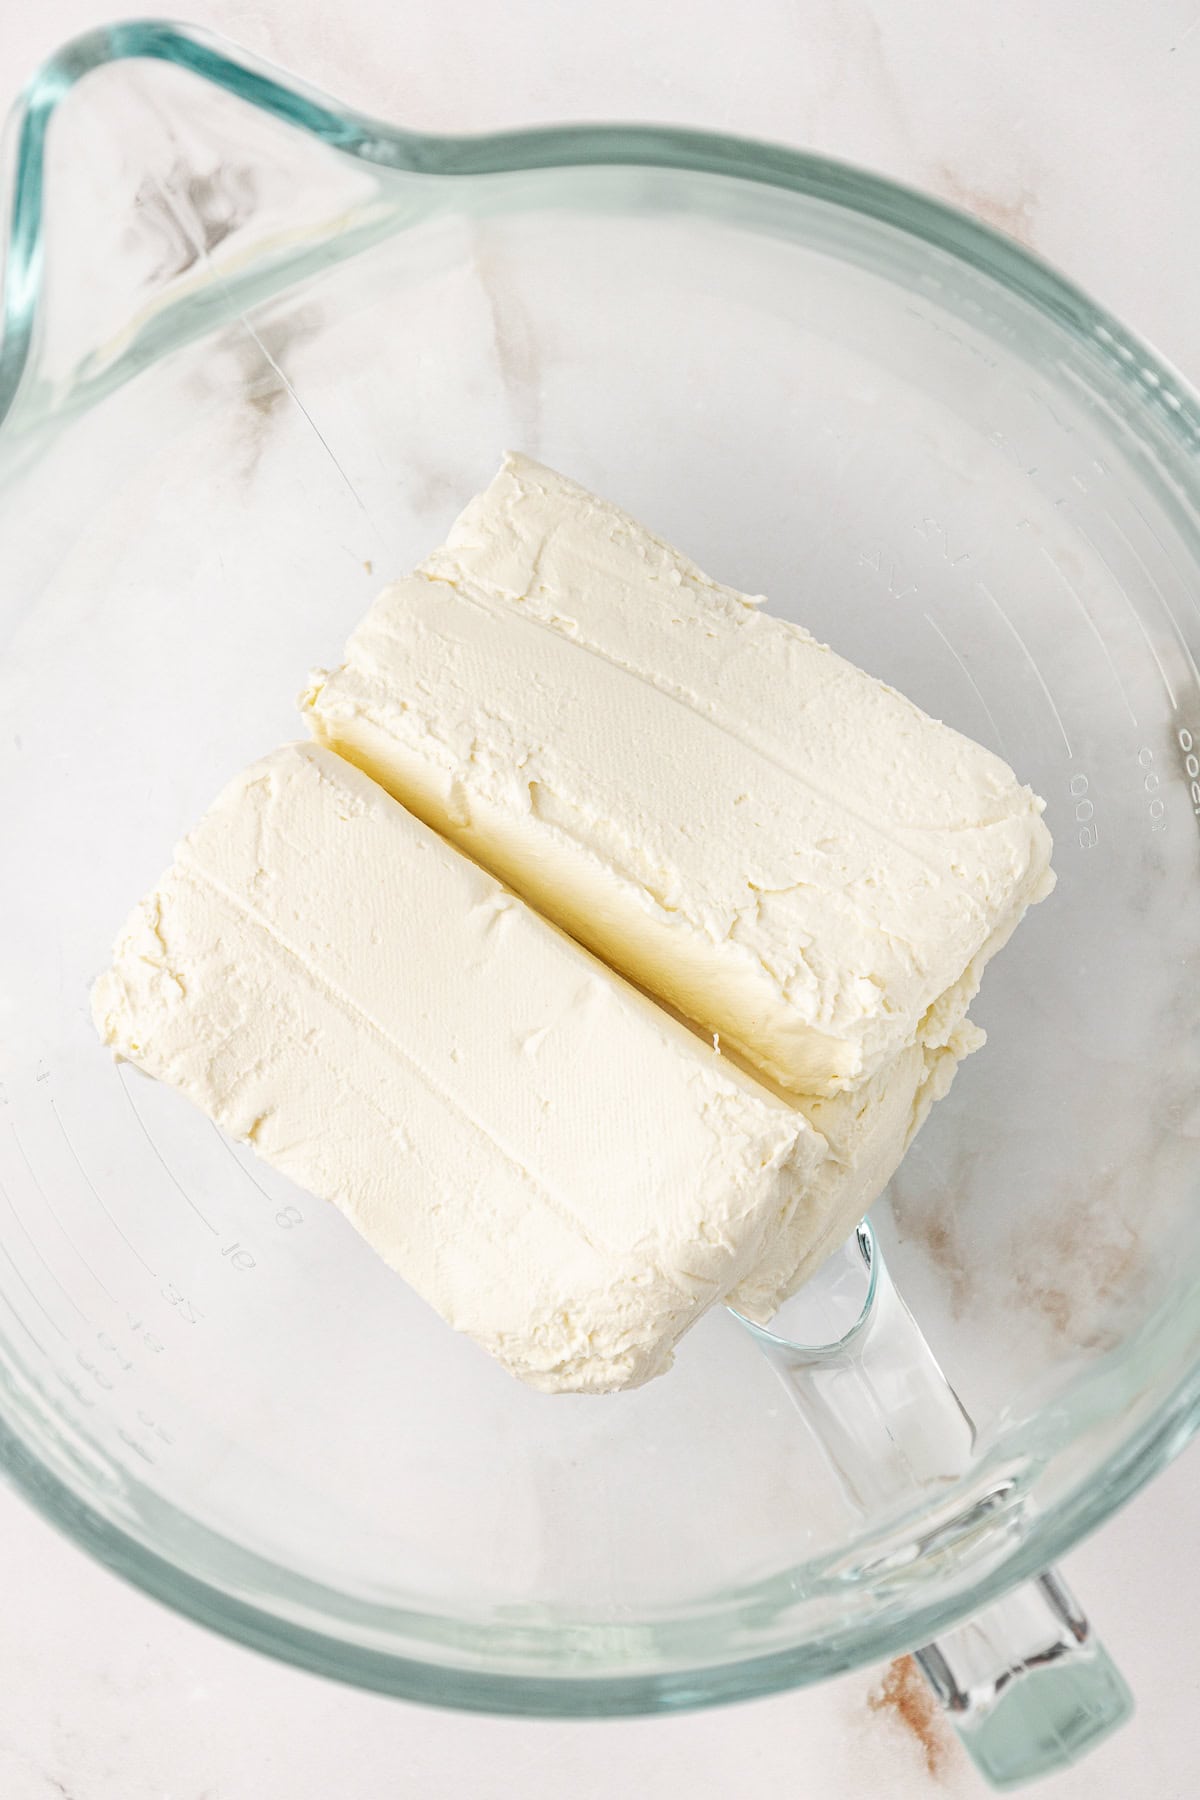
- cream cheese: use three 8 oz packages. Be sure to use full fat, not low fat, cream cheese for best results.
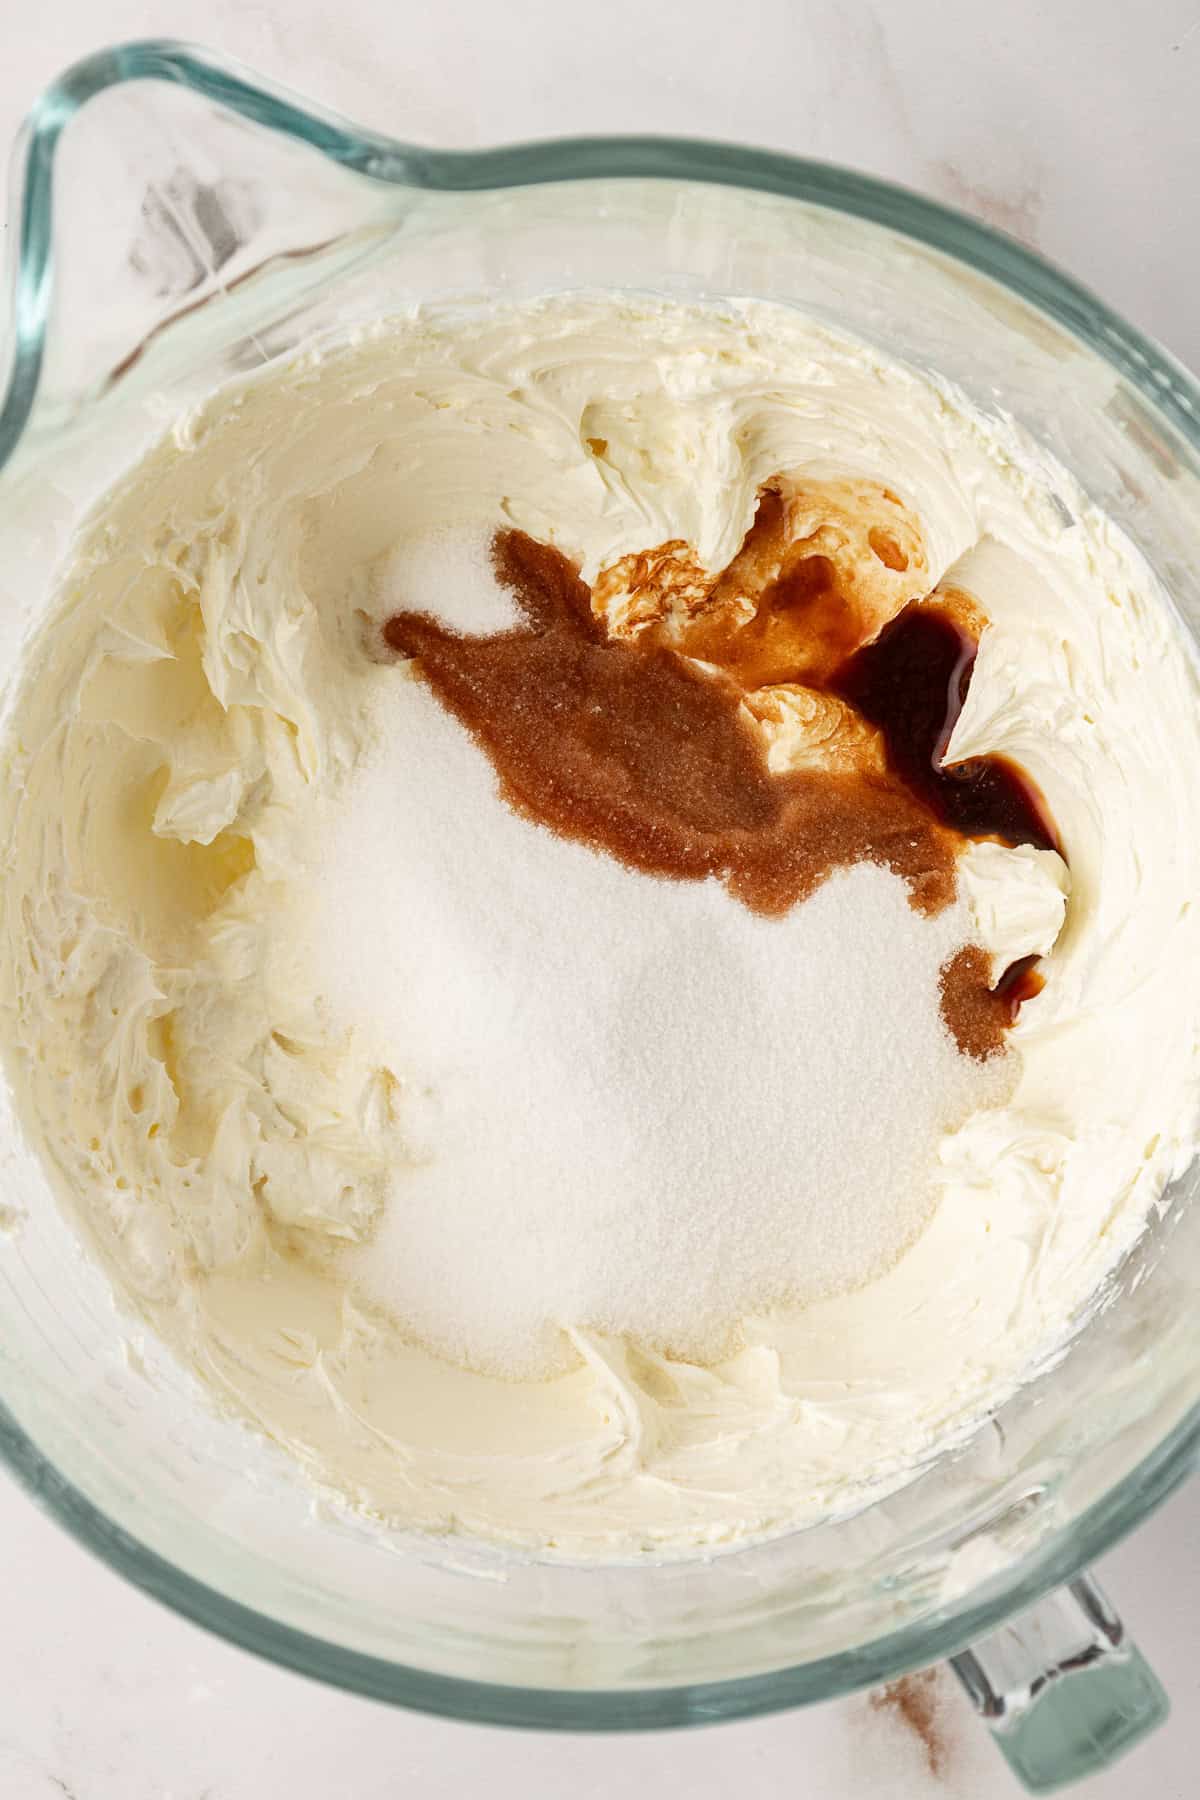
- sugar: helps to balance the tanginess of the cream cheese.
- vanilla extract: just a teaspoon, but it enhances the flavor.
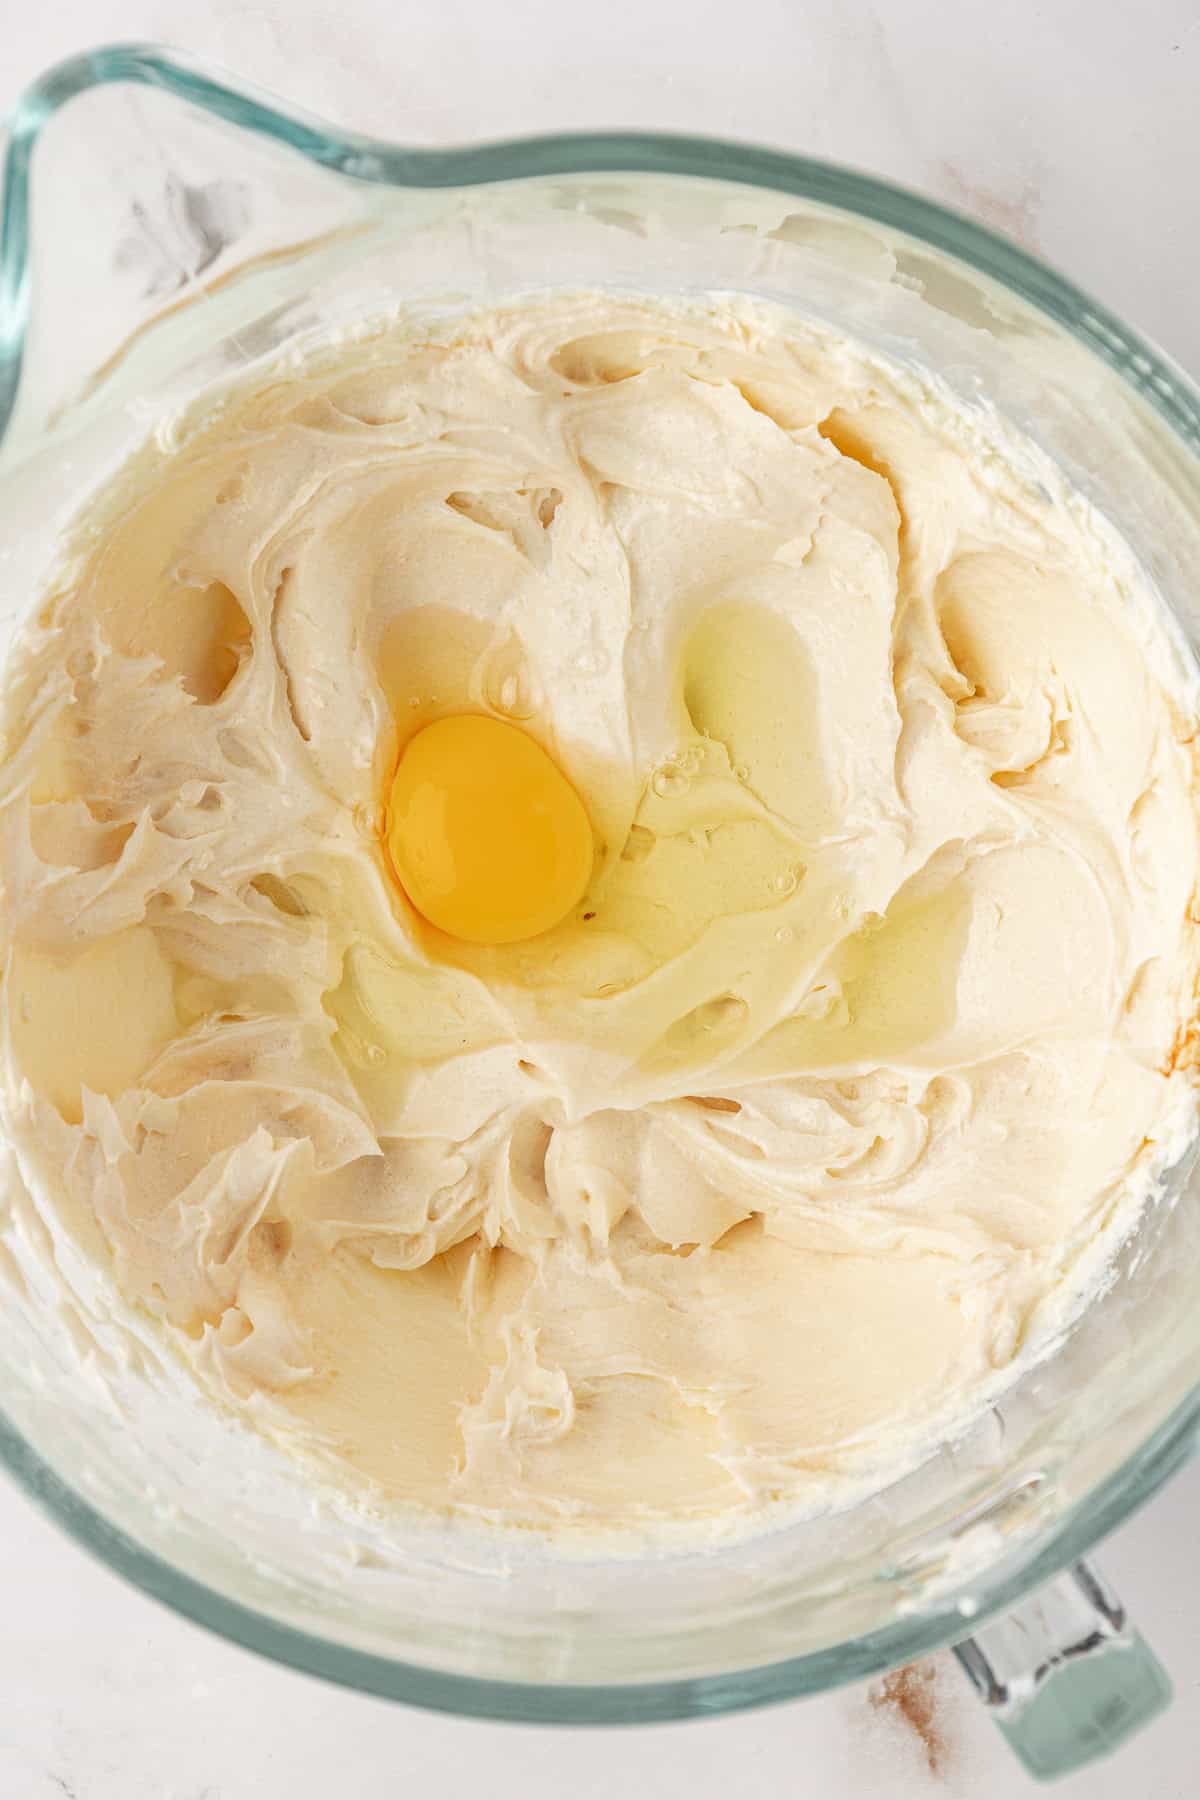
- eggs: use large eggs. Eggs are the last ingredient that get mixed into the cheesecake batter. Be sure to mix them in, one at a time, just until the yolk breaks. Over beating the eggs is the number one cause of air bubbles and large cracks, which means there’s too much air in the cheesecake.
For the Graham Cracker Crust
- graham cracker crumbs: use store bought or make your own
- brown sugar: adds a deep rich flavor to the crust and helps to bind the crumbs and butter together
- cinnamon: adds a little warmth and spice without being overwhelming
- butter: this most crucial ingredient in binding the crust together
Cheesecake Recipe Pro Tip
Did you know you can buy a box of graham cracker crumbs in the baking aisle of your grocery store?
They are usually near the pre-made graham cracker pie crusts. I love using the store bought graham cracker crumbs because it saves time!
However, you can use whole graham crackers and blend them yourself in a blender or food processor until you get fine crumbs.
How to Make Graham Cracker Crust for Homemade Cheesecake
Everyone loves a buttery graham cracker crust, this is exactly how to make it!
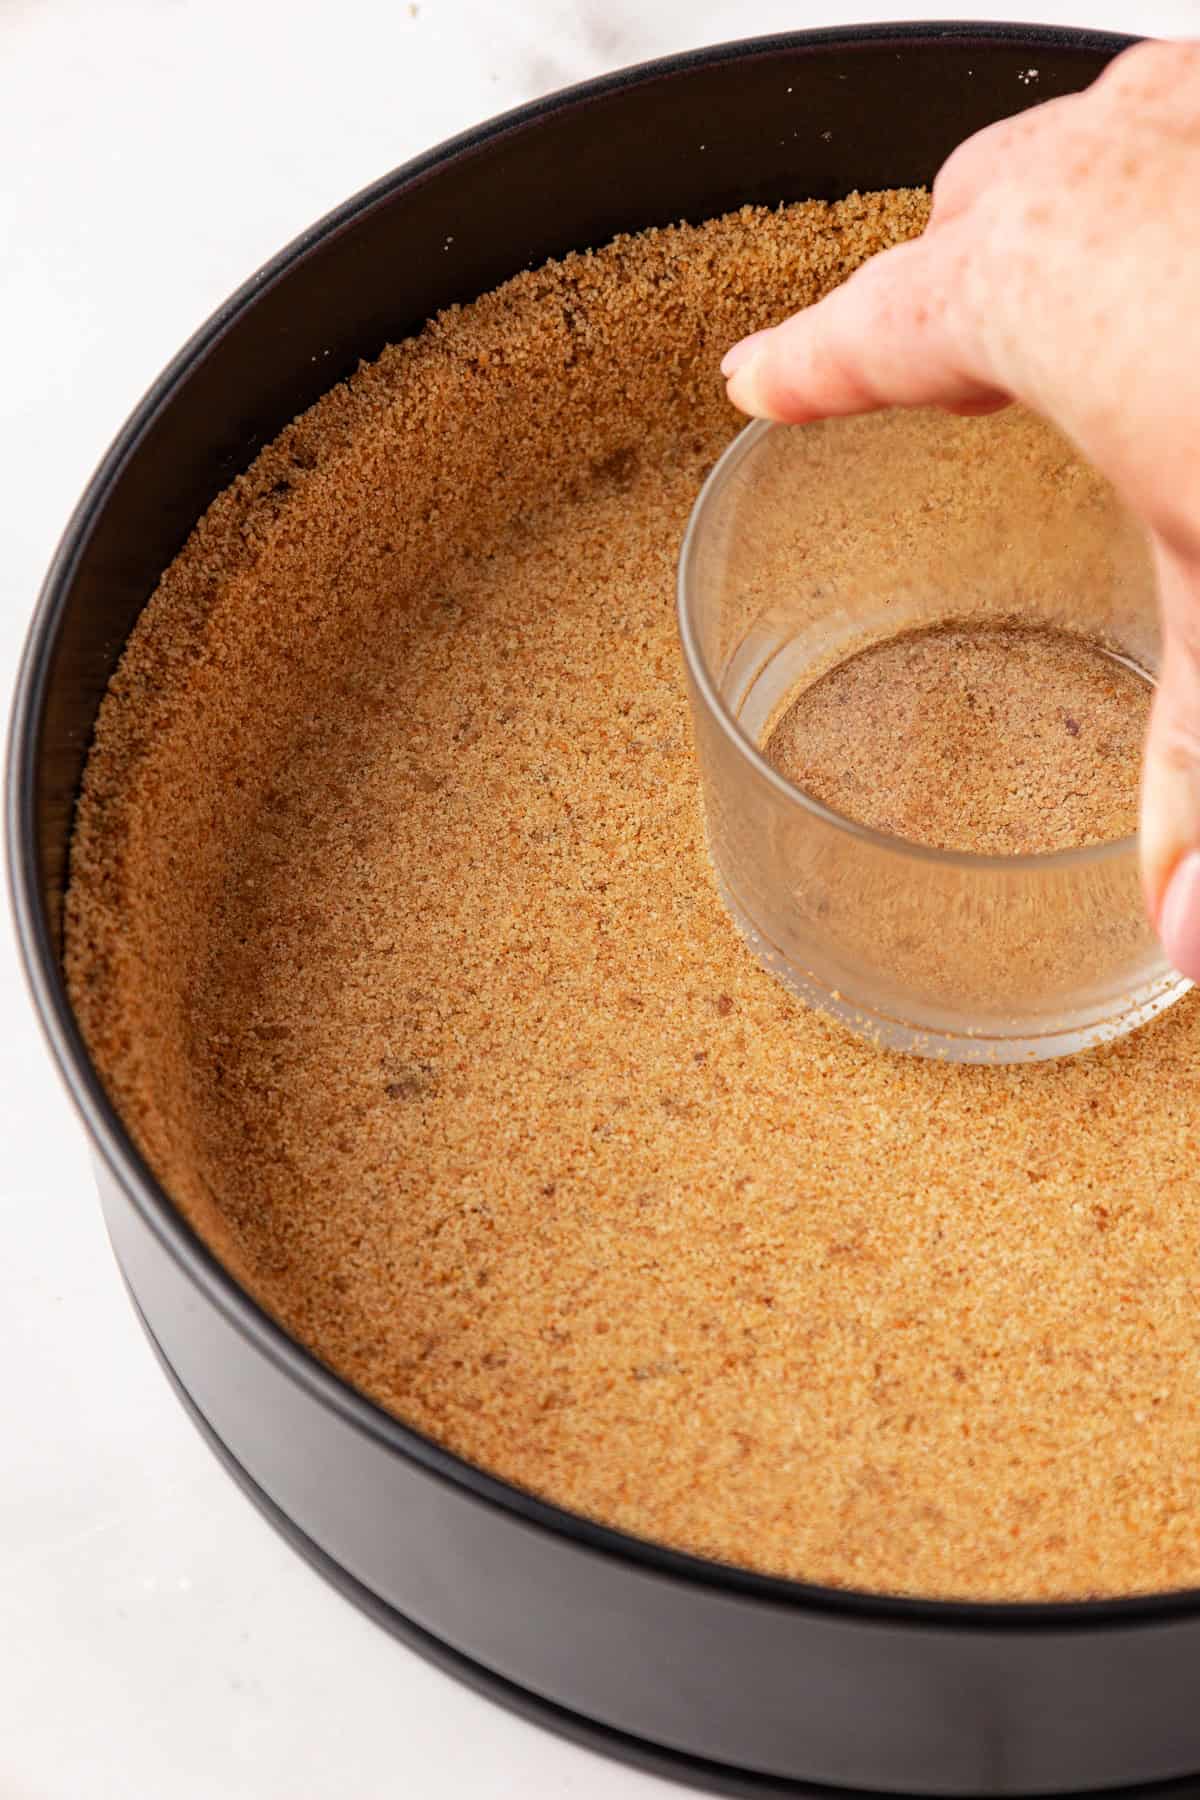
Mix all the crust ingredients together and then firmly press the crust into the bottom and up the sides of the springform pan. Use the bottom of a measuring cup or bottom of a glass cup to help pack the crust.

The Most Important Rule for this Cheesecake Recipe
Every single cheesecake recipe I have on my site, I include two critical tips. Here are the 2 most important details to follow when making cheesecake..
1. Steam bath
2. Don’t rush the cooling process
Keep reading below for details on each tip!
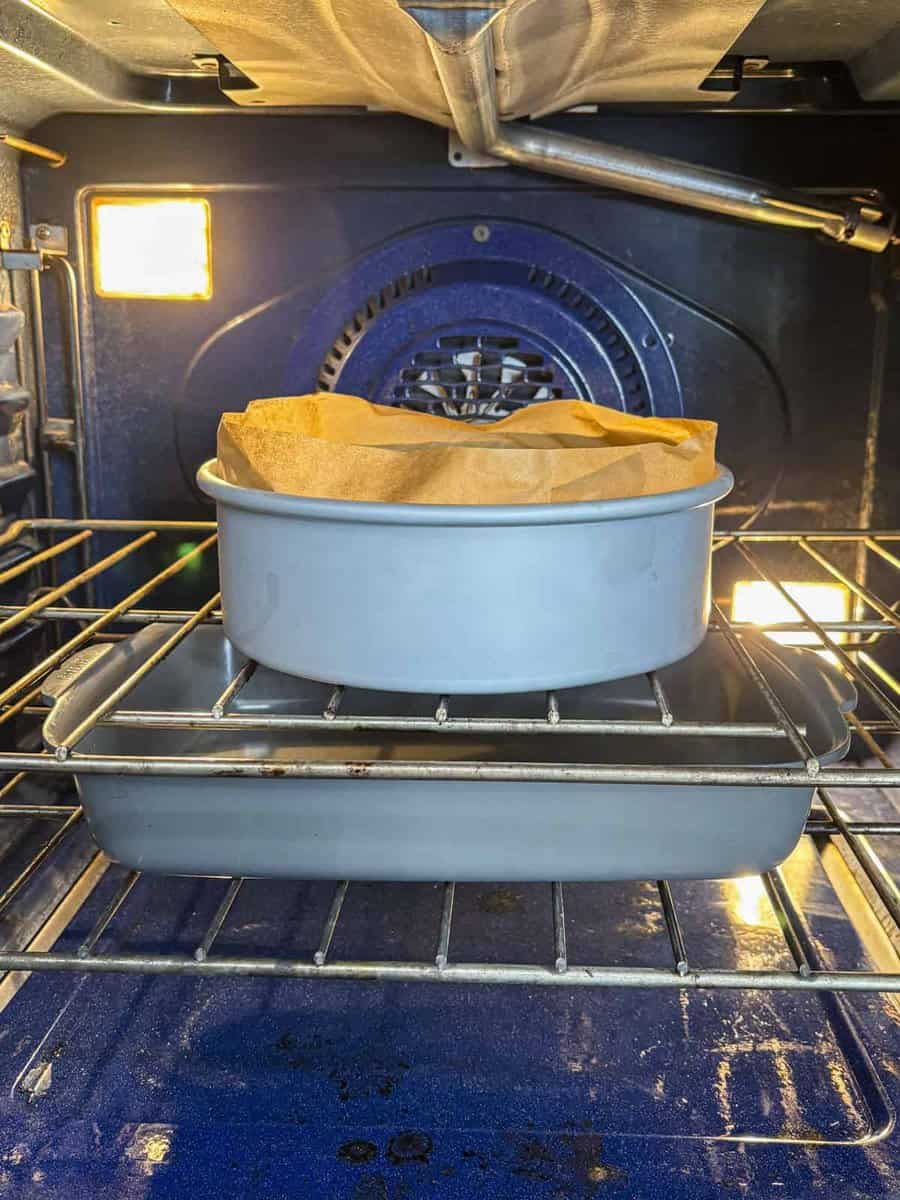
I re-tested this recipe without a traditional water bath and found an easier way. After prebaking the crust, you’ll place a roasting pan or 9×13 pan filled with a few inches of water in the oven. Let the water heat up and create steam before you slide in the cheesecake. This mimics the properties of a water bath, gentle, even heat and a moist environment, but with far less hassle.
How to make Cheesecake
Crust
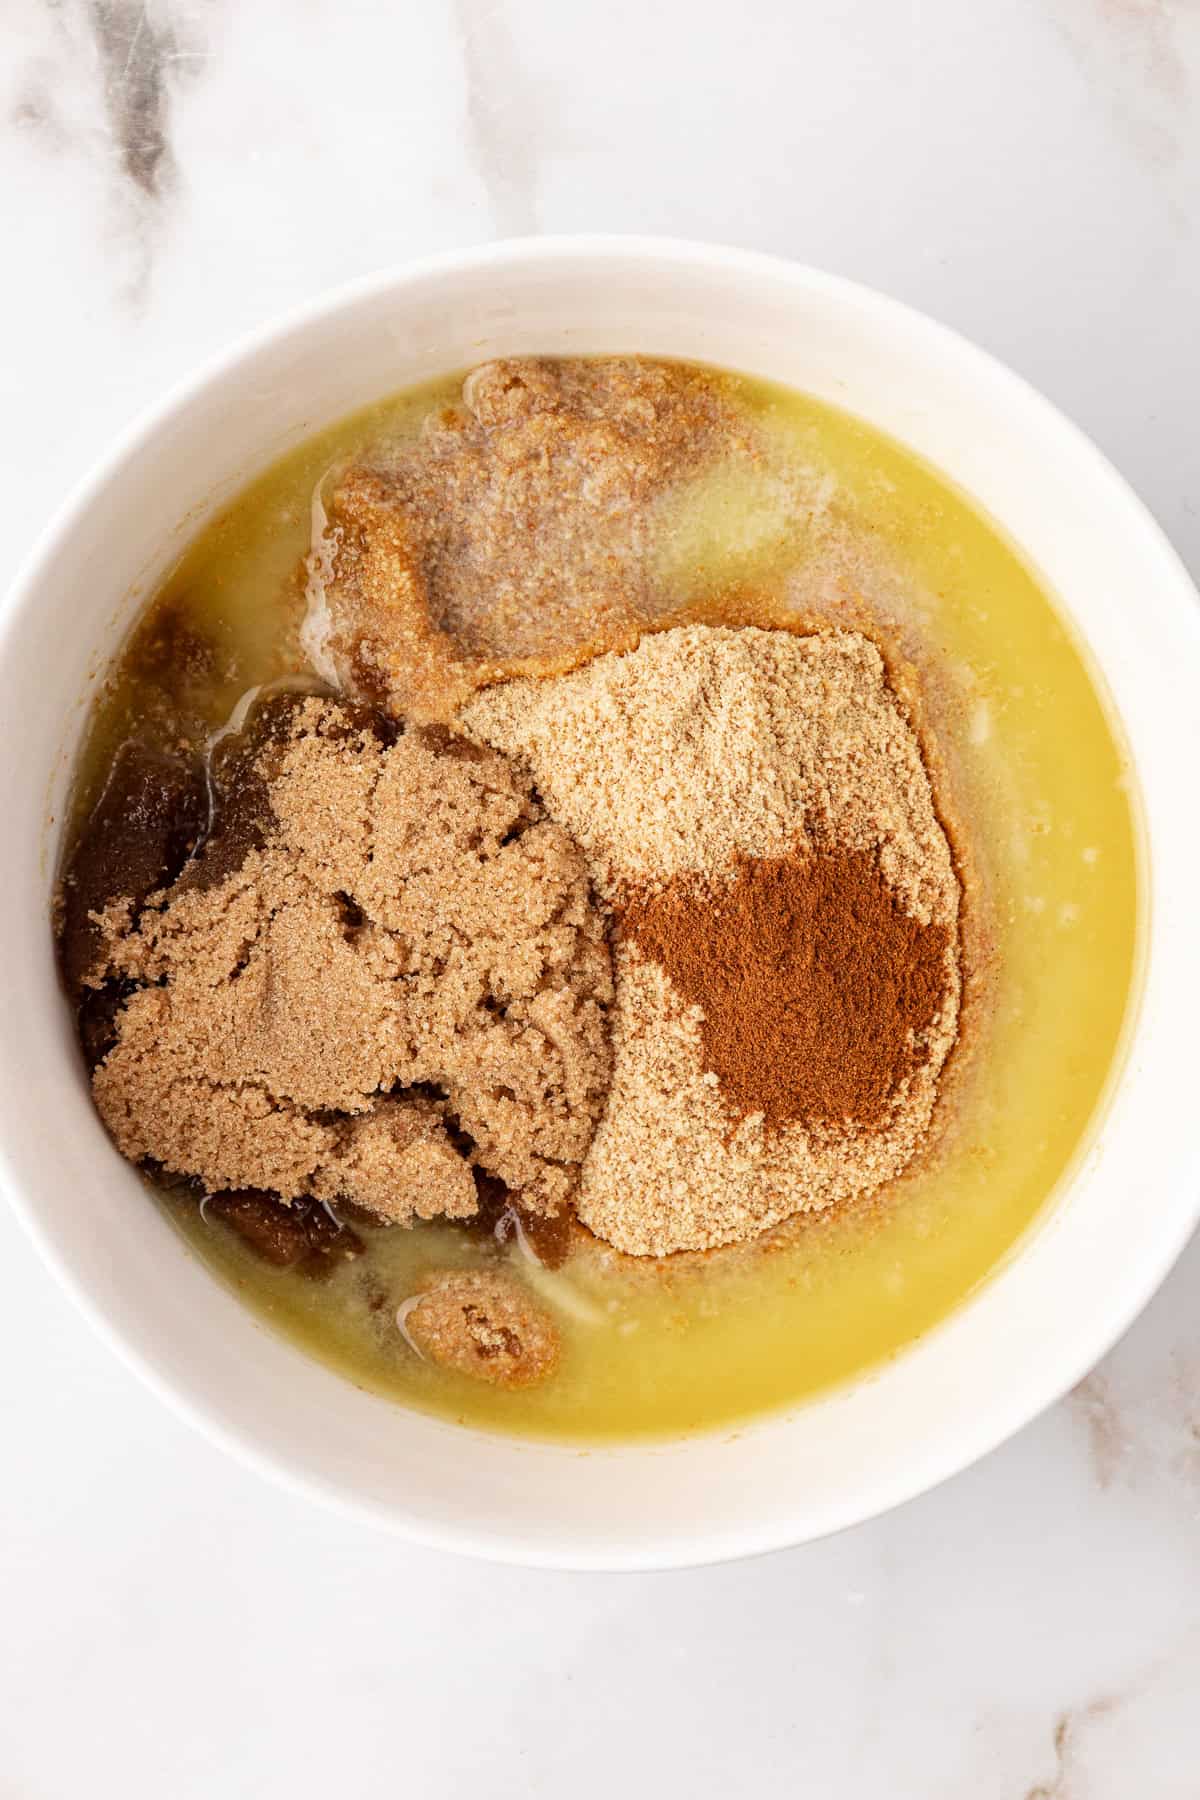
- In a small bowl, combine the graham cracker crumbs with the brown sugar, cinnamon and melted butter, mix well until incorporated.
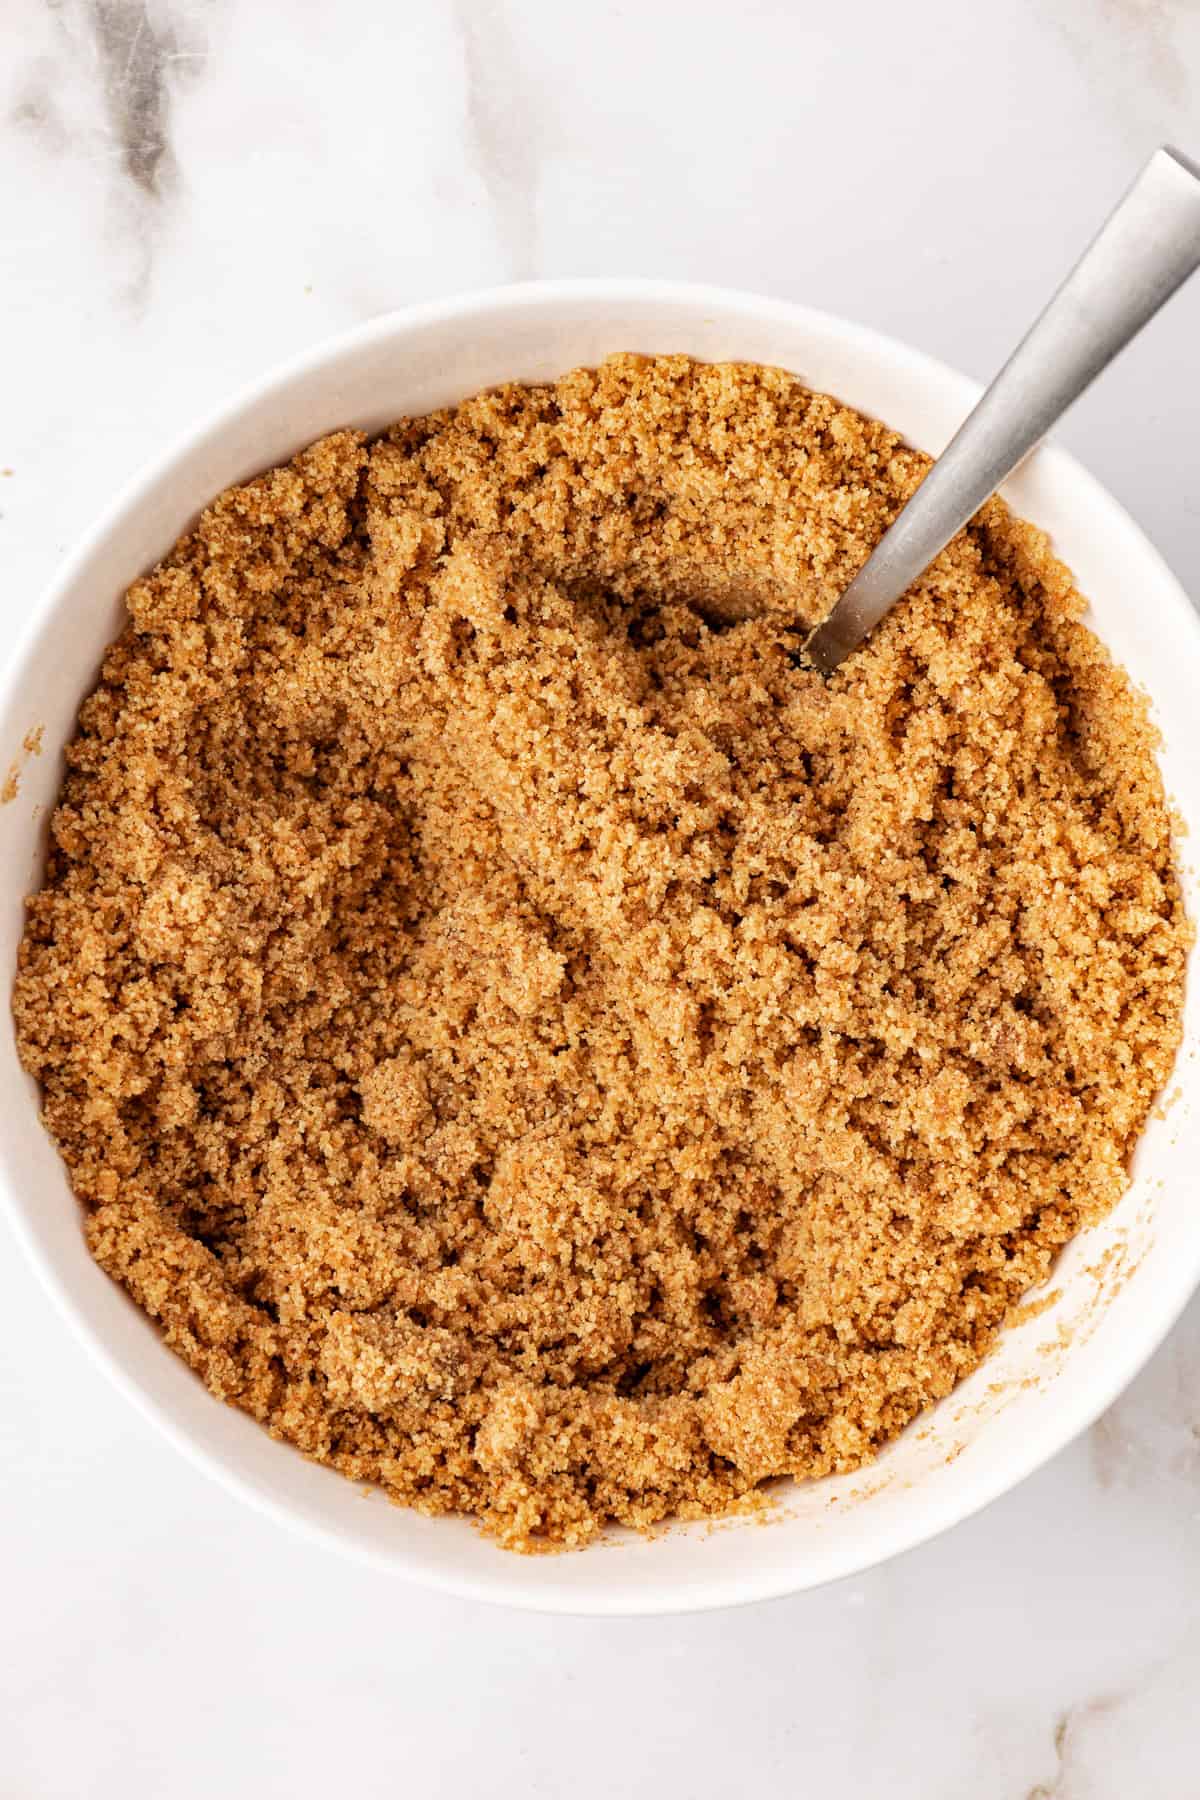
- Add the crumbs to a 8 or 9 inch springform pan, distribute them evenly, using a cup or the bottom of something flat to press the crumbs into the pan.
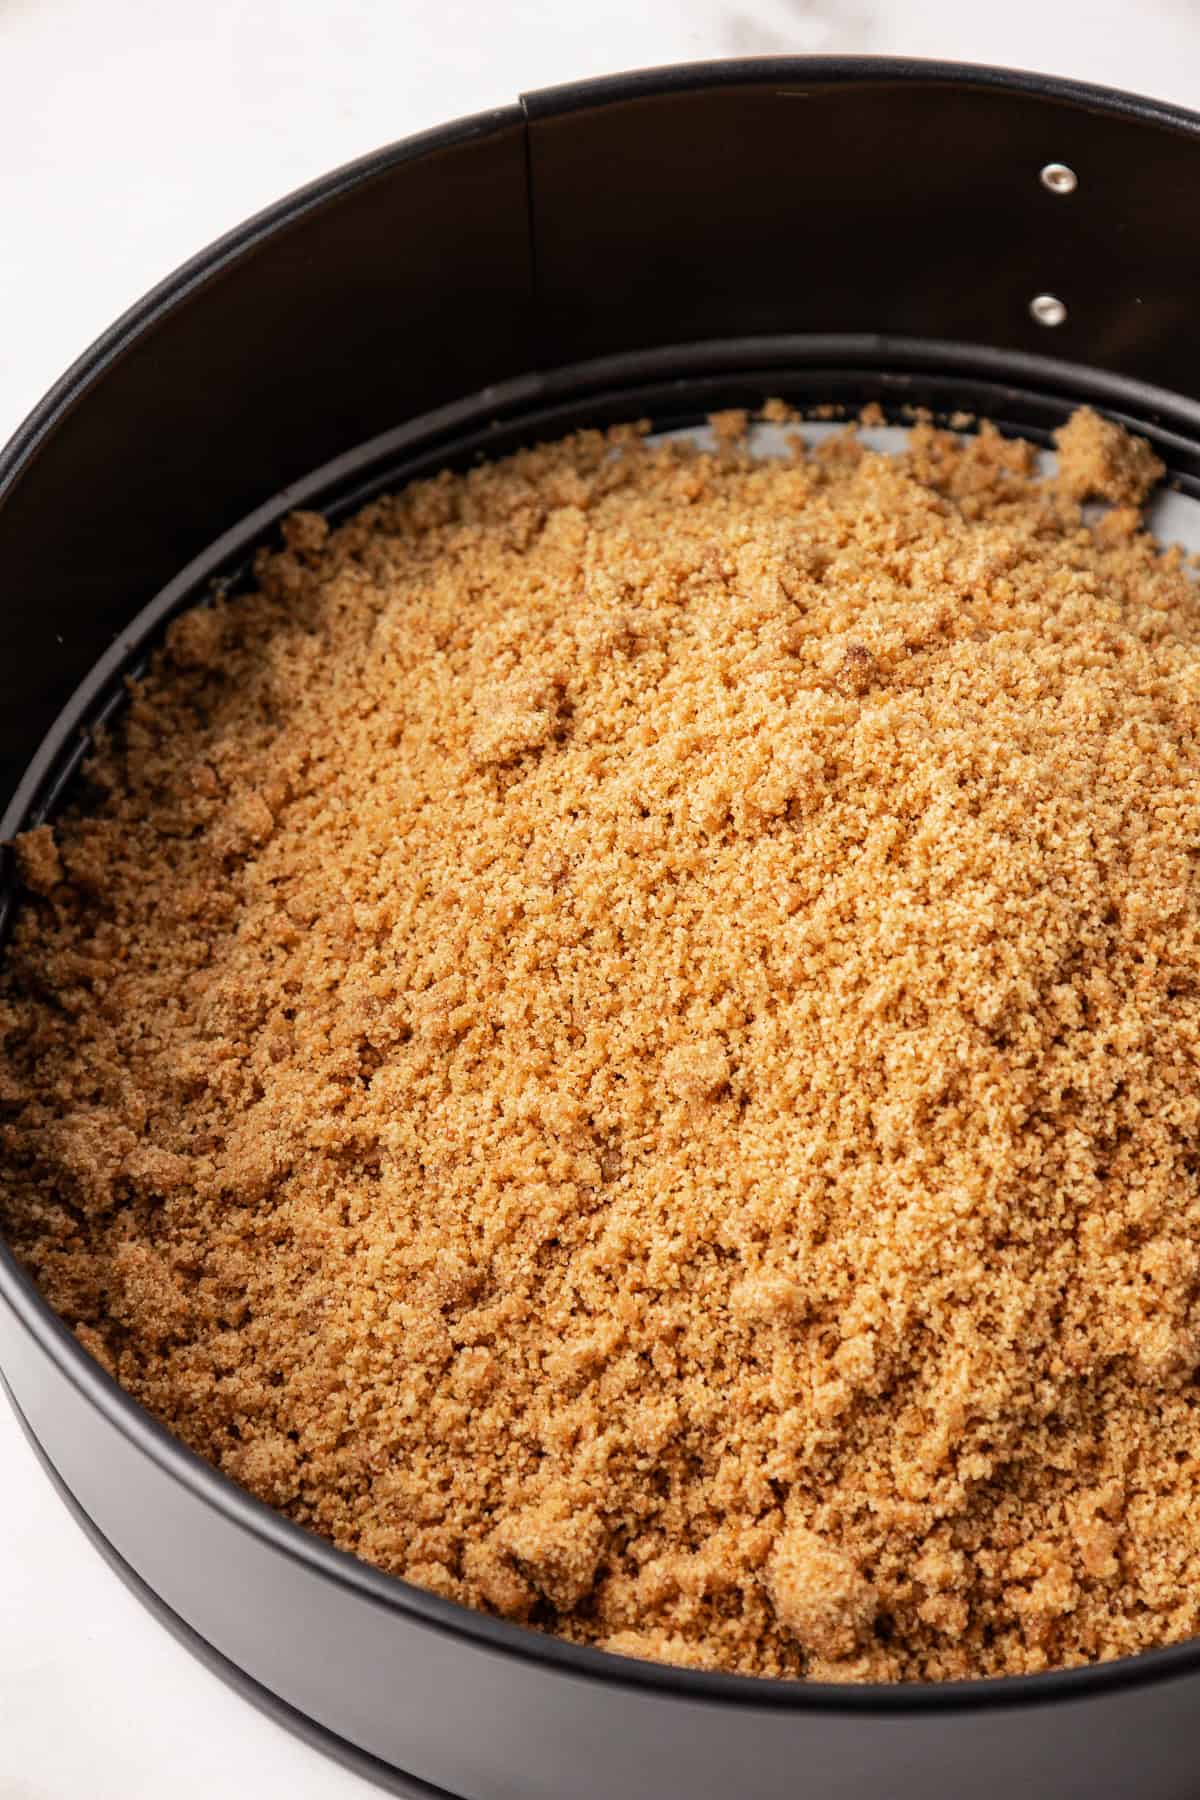
- Place the pan in the oven, pre-bake the crust for 8-10 minutes or until golden.
- Remove the pan from the oven, and allow it to cool to room temperature before adding the cheesecake mixture. Turn the oven down to 325ºF.
Cheesecake
- Instead of a water bath, place a roasting pan or 9×13 inch pan filled with a few inches of water on the bottom rack of the oven.
- In a large mixing bowl, beat the 3 packages of cream cheese until smooth. Add in the sugar, and vanilla extract, beat again. Add in the eggs, mixing for 1 minute.
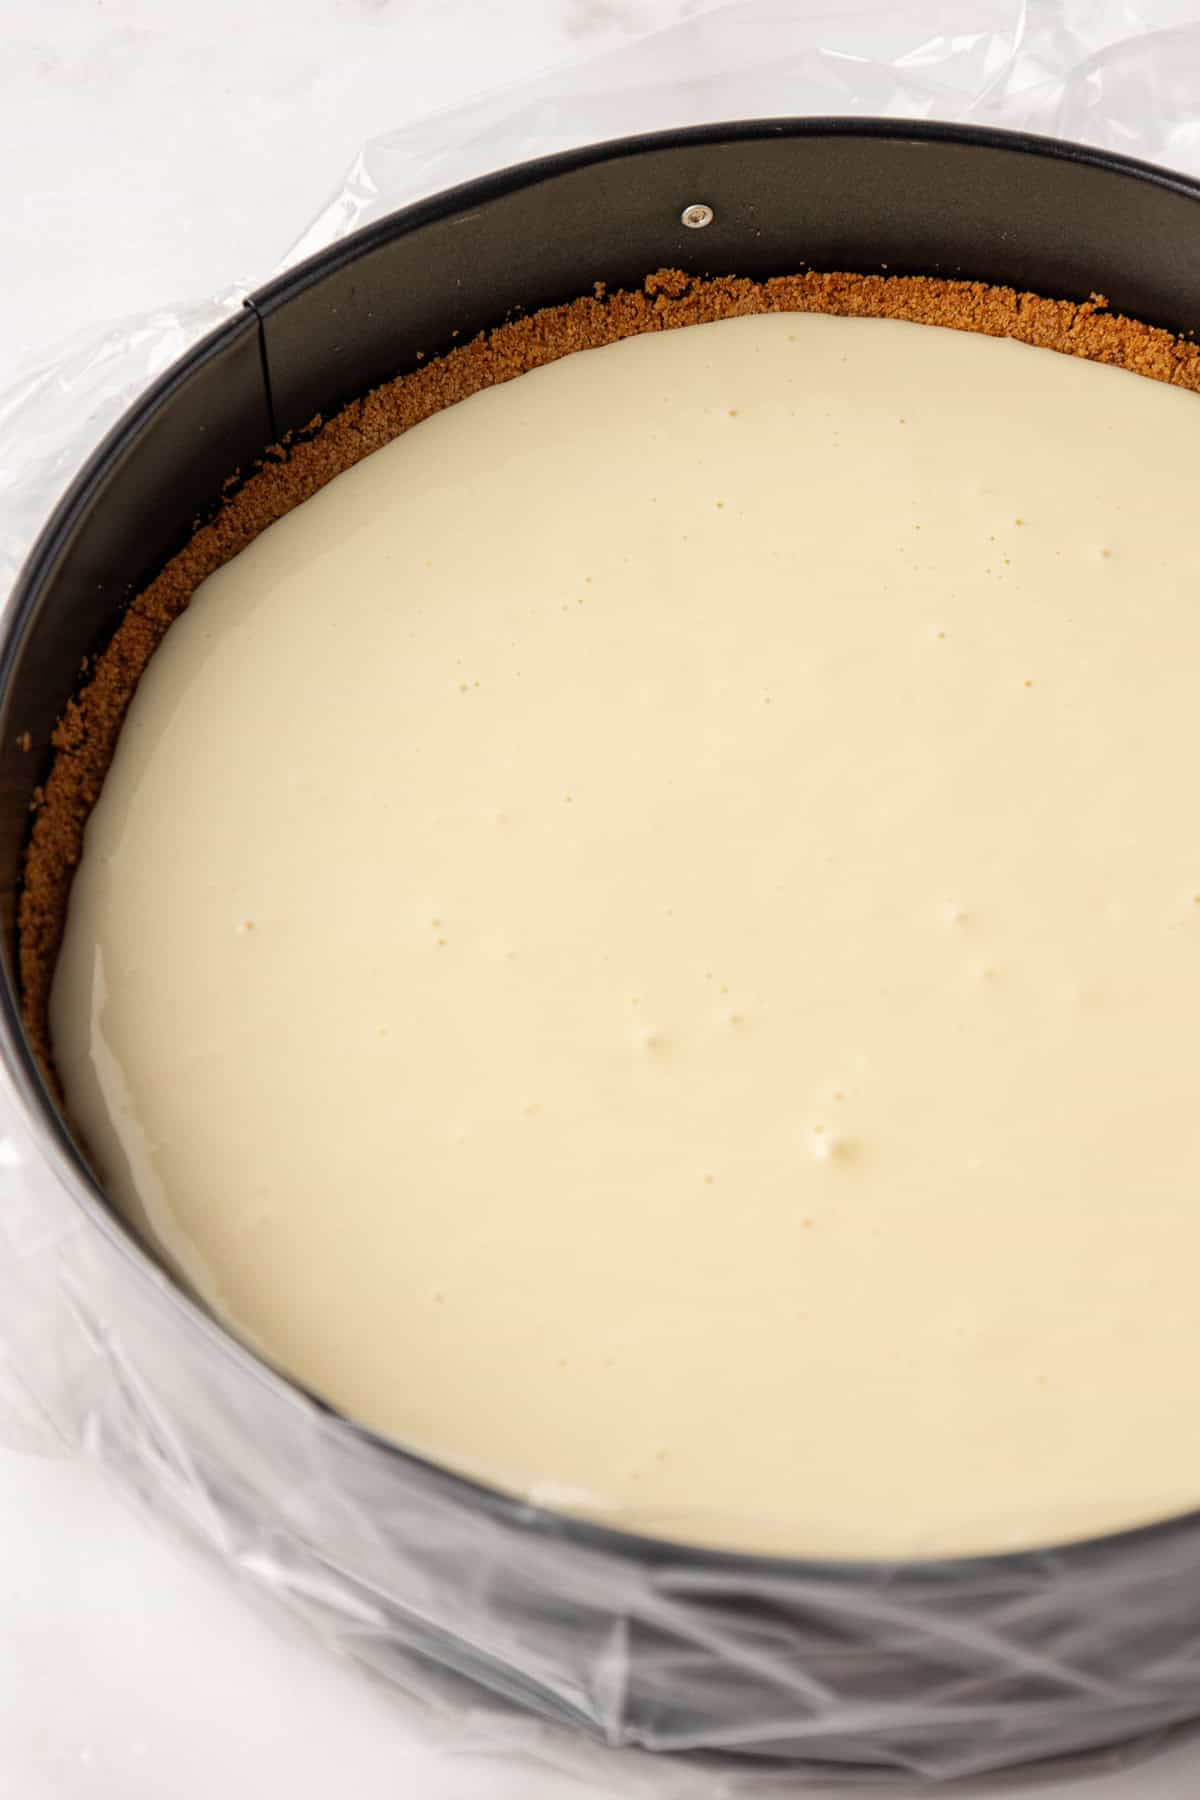
- Transfer to pan. Pour the cheesecake mixture on top of the cooled crust.
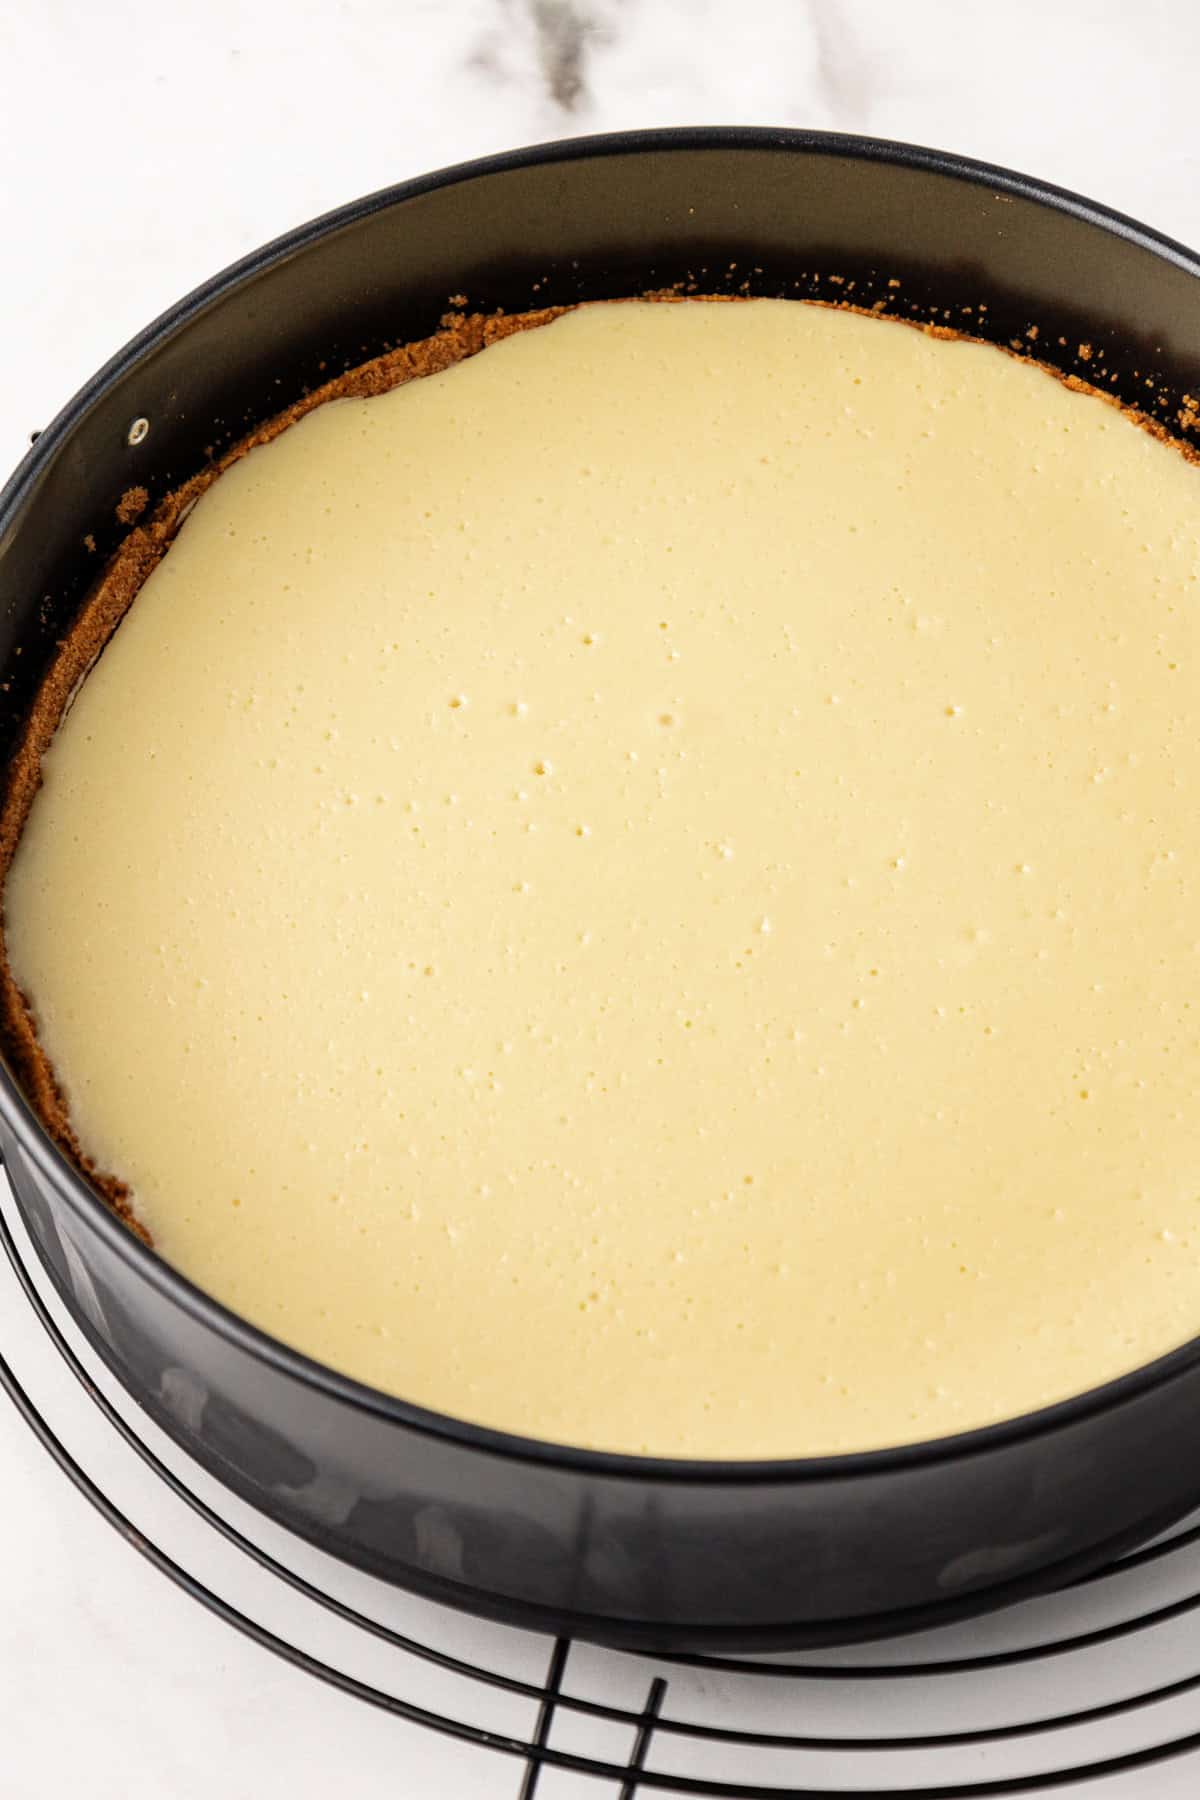
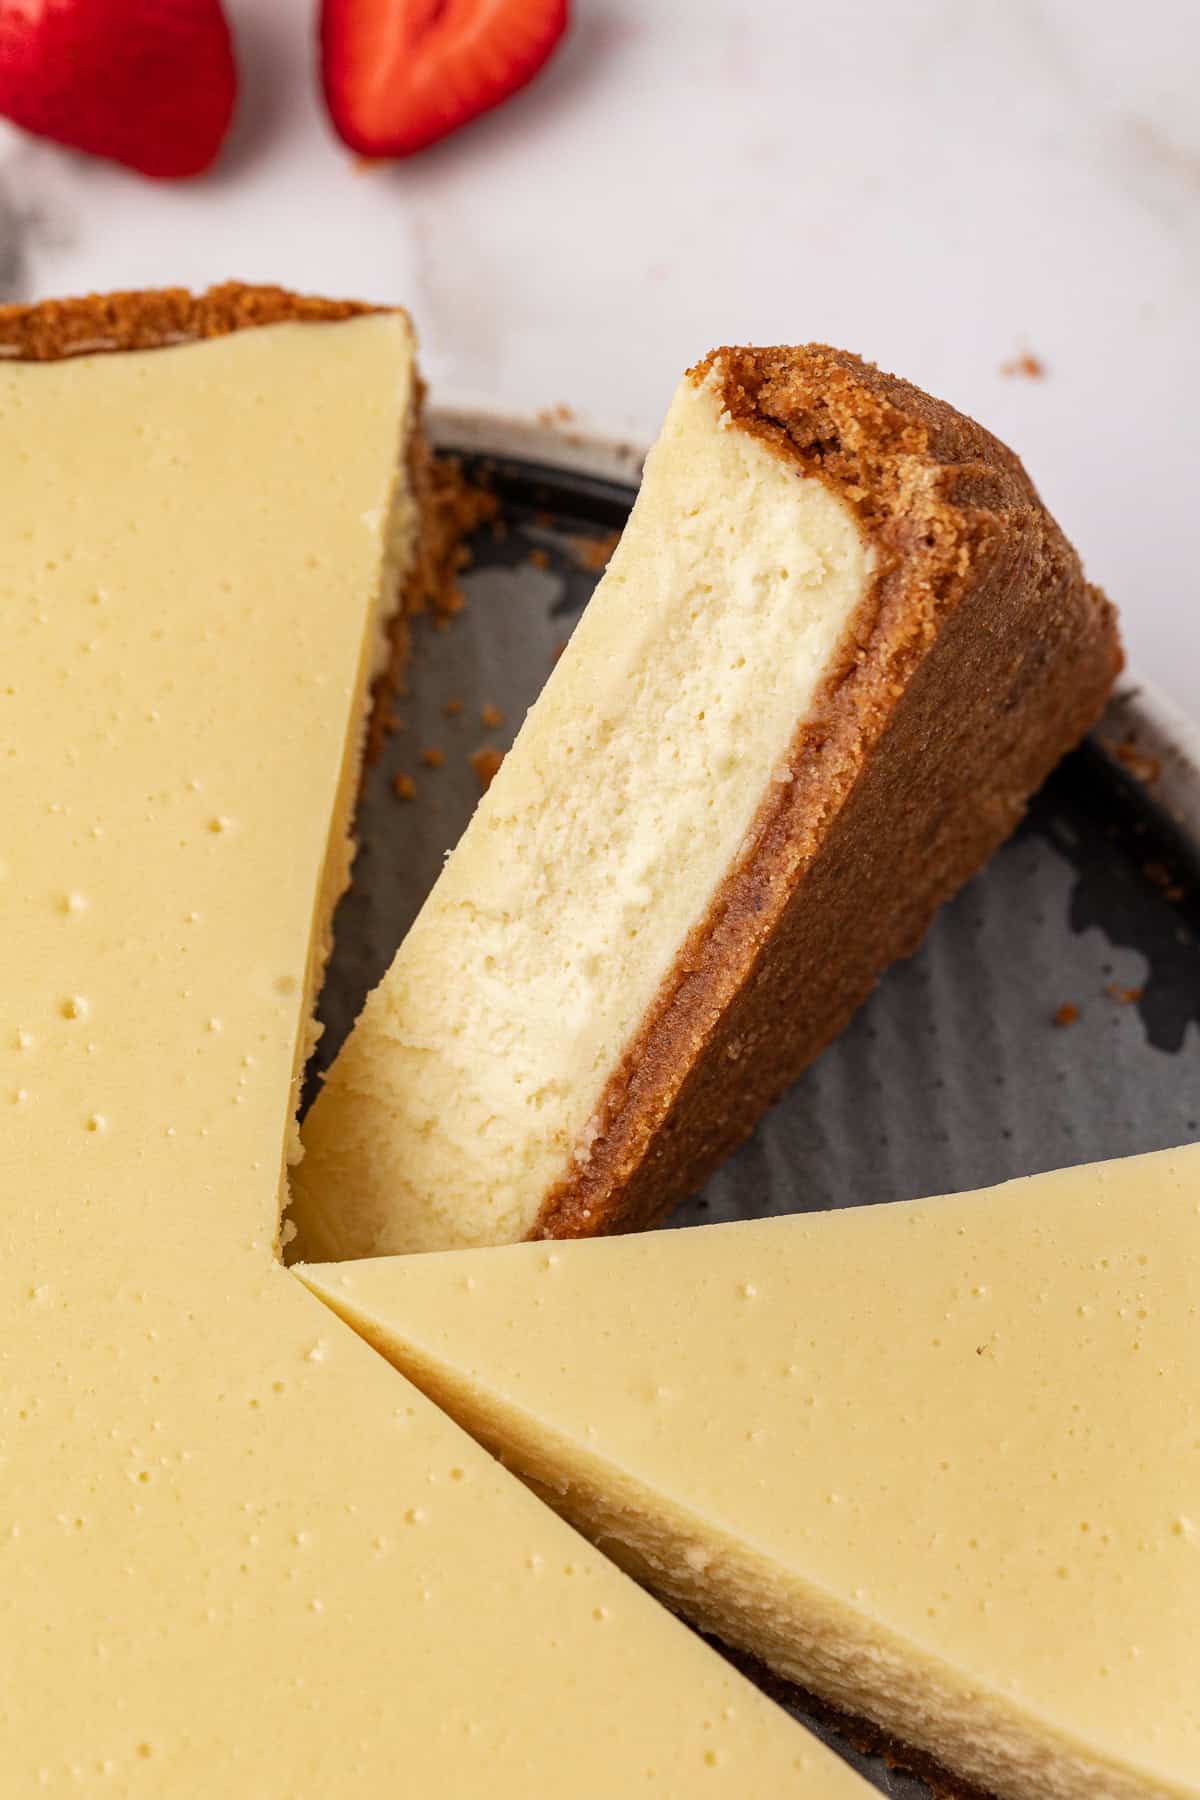
- Bake. Place the cheesecake on the rack above the pan of water and bake for 60-70 minutes. The cheesecake is done when the center wobbles a little when you jiggle the pan. The edges of the cheesecake should look firmer than the center.
- Cool. Once the cheesecake looks done, turn the oven off and open the oven door a little. Allow the cheesecake to cool to room temperature inside the oven before removing – this could be 60-90 minutes.
- Rest. Once cool, remove the cheesecake from the oven. Allow it to continue to rest at room temperature, then cover the pan in plastic wrap and place in the fridge for at least 6 hours or overnight.
- Remove from mold. Before serving, carefully unmold the cheesecake from the pan.
- Top, cut, and serve. Add your desired toppings, cut and serve. Store leftovers in the fridge.
How to Make a Steam Bath for Homemade Cheesecake
Place a roasting pan or 9×13 inch pan filled with a few inches of water on the bottom rack of the oven.
How to Prevent your Cheesecake Water Bath from Leaking
If you prefer to make a water bath instead of a steam bath, this is the best trick ever to prevent your cheesecake water bath from leaking and ruining your cheesecake.
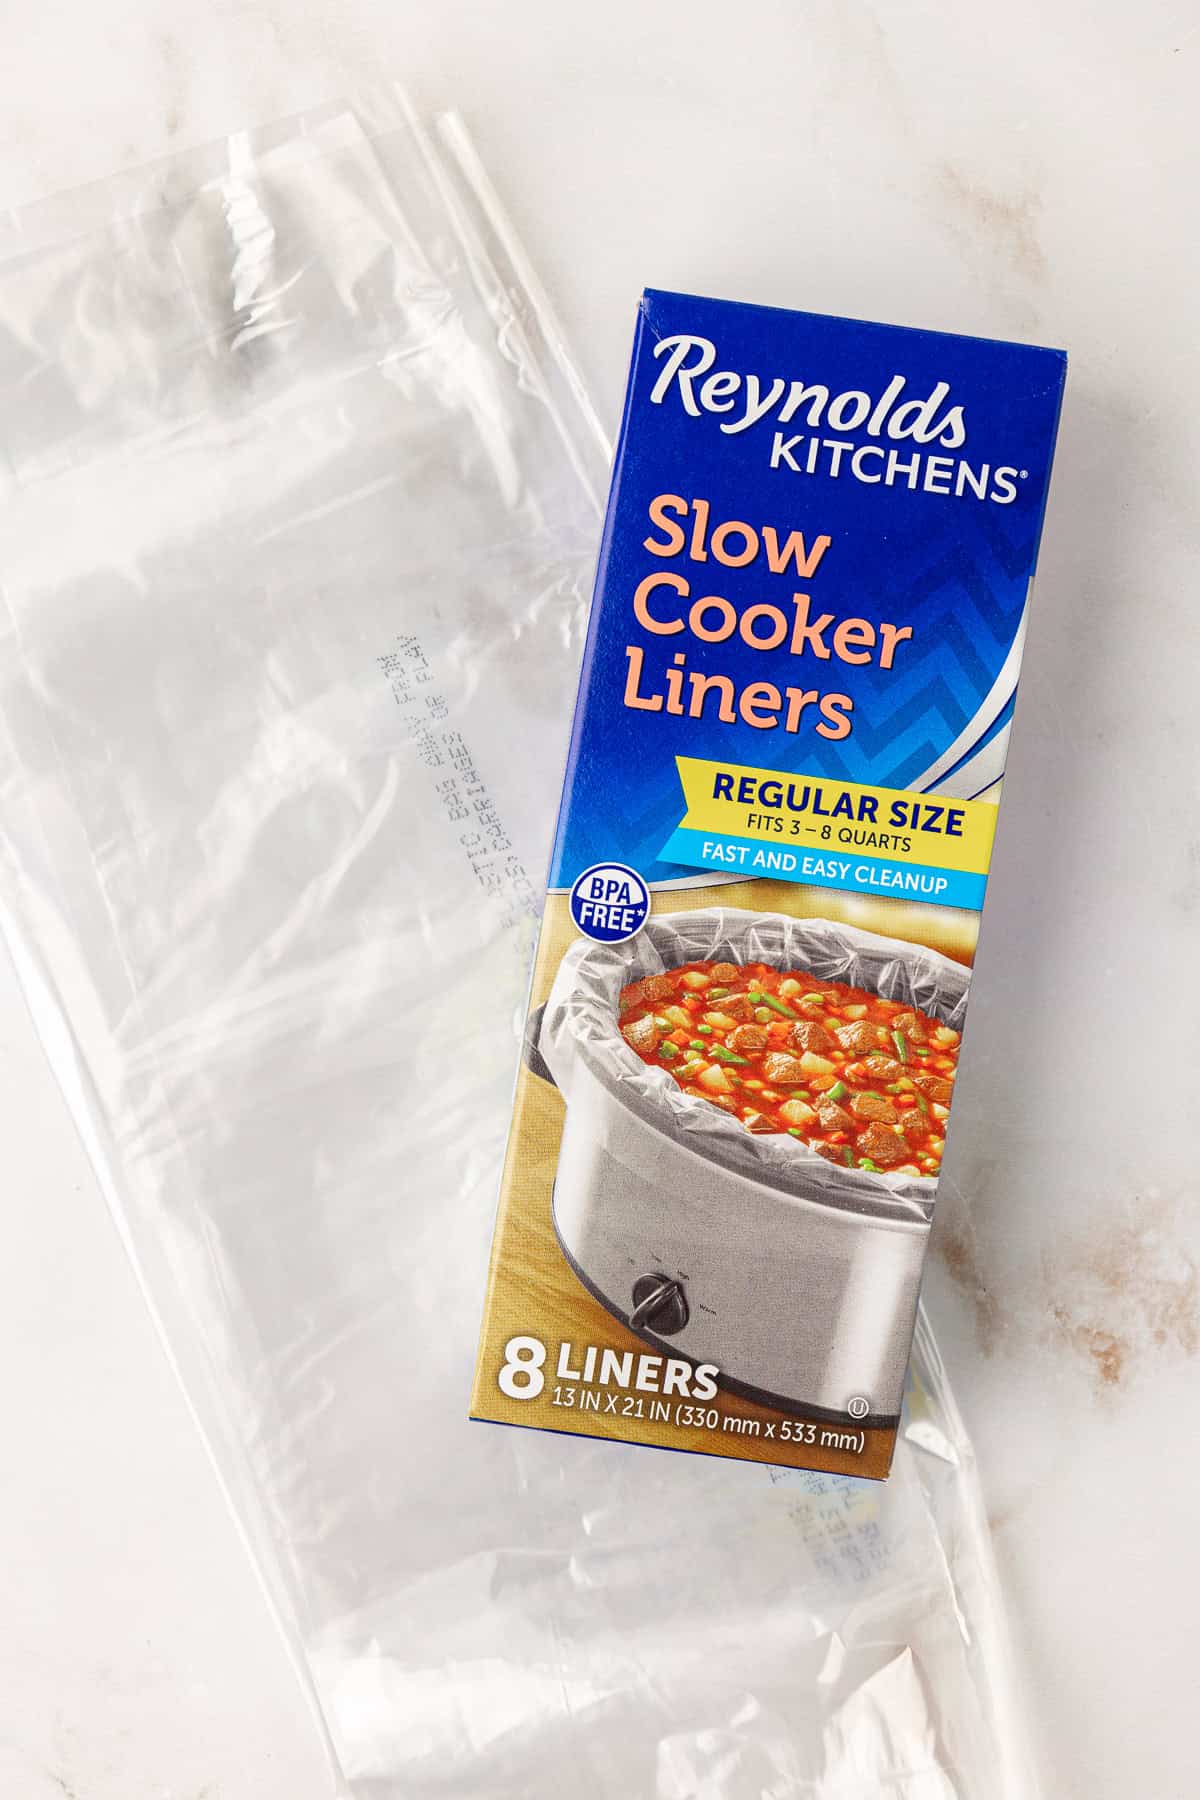
Place the springform pan inside a large oven safe turkey bag or slow cooker liner bag and roll down the top of the bag so it doesn’t cover the cheesecake.
If you have a lot of excess bag space, twist one side tight and knot it so the bag is tight around the pan. Place the springform pan that’s inside the bag in the large roasting pan and fill with water.
The water bath will not leak into your cheesecake!
Why do you put a cheesecake in a water bath or steam bath?
Putting a cheesecake in a steam bath or water bath, also known as a “bain-marie” or “water bath,” serves a couple of important purposes during the baking process:
- Even and Gentle Heating: A steam bath or water bath provides a gentle and even heat source for the cheesecake. The water absorbs and distributes heat, preventing the direct heat from the oven’s elements from hitting the delicate cheesecake mixture. This helps to ensure that the cheesecake bakes evenly without developing overcooked or cracked surfaces.
- Preventing Cracking: Cheesecakes are prone to cracking due to the drastic temperature changes and potential drying out of the surface during baking. The moist environment created by the water bath helps prevent rapid temperature changes and minimizes the chances of cracks forming on the surface of the cheesecake.
- Moisture Control: The steam generated by the steam bath or water bath adds moisture to the oven, which reduces the likelihood of the cheesecake’s top becoming too dry and forming a hard crust. A moist environment contributes to a creamy and smooth texture.
What happens if I don’t put my cheesecake in a steam bath or water bath?
While it’s possible to bake a cheesecake without a steam bath or water bath, using one is a common practice among bakers to achieve the best results. If you choose not to use a steam bath or water bath when baking a cheesecake, a few potential outcomes can occur:
- Uneven Baking: Without the gentle and even heat distribution provided by a water bath, the cheesecake might bake unevenly. The edges could become overcooked or dry, while the center remains undercooked or too soft.
- Surface Cracking: Cheesecakes are more likely to develop cracks on the surface when baked without a steam bath or water bath. Rapid temperature changes and drying out of the top layer can lead to unsightly cracks forming as the cheesecake cools.
- Texture Issues: The absence of the moist environment created by a water bath might result in a slightly drier and less creamy texture, especially on the top layer of the cheesecake.
- Less Smooth Appearance: A water bath helps ensure a smoother appearance on the surface of the cheesecake. Without it, you might notice a slightly rougher or uneven texture on the top.
Classic Cheesecake Recipe: How to Cool
Remember, don’t rush the cooling process.
Once the plain cheesecake is done baking turn the oven off, crack the oven door and keep the cheesecake in the oven.
A slow cooling process will help prevent the cheesecake from cracking. Don’t forget to refrigerate your cheesecake over night before serving.

Best Cheesecake Recipe Tips
- Allow the cream cheese to come to room temperature before beating it. Room temperature cream cheese is easier to whip.
- The eggs are the last ingredient that get mixed into the cheesecake batter. Be sure to mix them in, one at a time, just until the yolk breaks. Over beating the eggs is the number one cause of air bubbles and cracking.
- Using a different size springform pan will alter the baking time. I used a 8 inch springform pan.
- Allow the cheesecake to cool in the oven (with the door cracked) for 1 hour.
How to tell if Cheesecake is Done
To determine when a cheesecake is done baking, follow these steps:
Check the Edges: Gently jiggle the cheesecake pan. The edges of the cheesecake should be set and firm, while the center may still have a slight jiggle.
Check the Center: Insert a toothpick or a thin knife into the center of the cheesecake, about an inch from the edge. It should come out mostly clean with a few moist crumbs clinging to it. The center should not appear liquidy or runny.
Check the Temperature: If you have an instant-read thermometer, insert it into the center of the cheesecake. The internal temperature should be around 150-155°F (65-68°C) when it’s done.
Look for Light Baking: The cheesecake should be slightly puffed and have a light golden color on top. Avoid overbaking, as this can lead to cracks or a dry texture.

Storing This Recipe for Cheesecake
Store cheesecake in the refrigerator, preferably covered with plastic wrap or an airtight container to prevent drying out and absorbing odors. If your cheesecake has a fruit topping, add it after the cheesecake has been refrigerated. Cheesecake can typically be stored for up to 5 days.
How to Freeze a Whole Cheesecake
- Cool the cheesecake completely before freezing. You can allow it to cool on the counter or you can place it in the fridge over night to chill before freezing.
- Use a knife to remove the outer springform ring. Use the knife to gently remove the cheesecake from the bottom of the pan. Place the cheesecake on a round cardboard circle that’s been covered in aluminum foil. Make sure the cardboard circle is the same size as the cheesecake.
- Wrap the entire cheesecake (without any toppings) well in plastic wrap. Then wrap the cheesecake in aluminum foil for extra protection. Place in the freezer for up to 3 months.
- To thaw, place the cheesecake in the fridge overnight. Add toppings before serving.
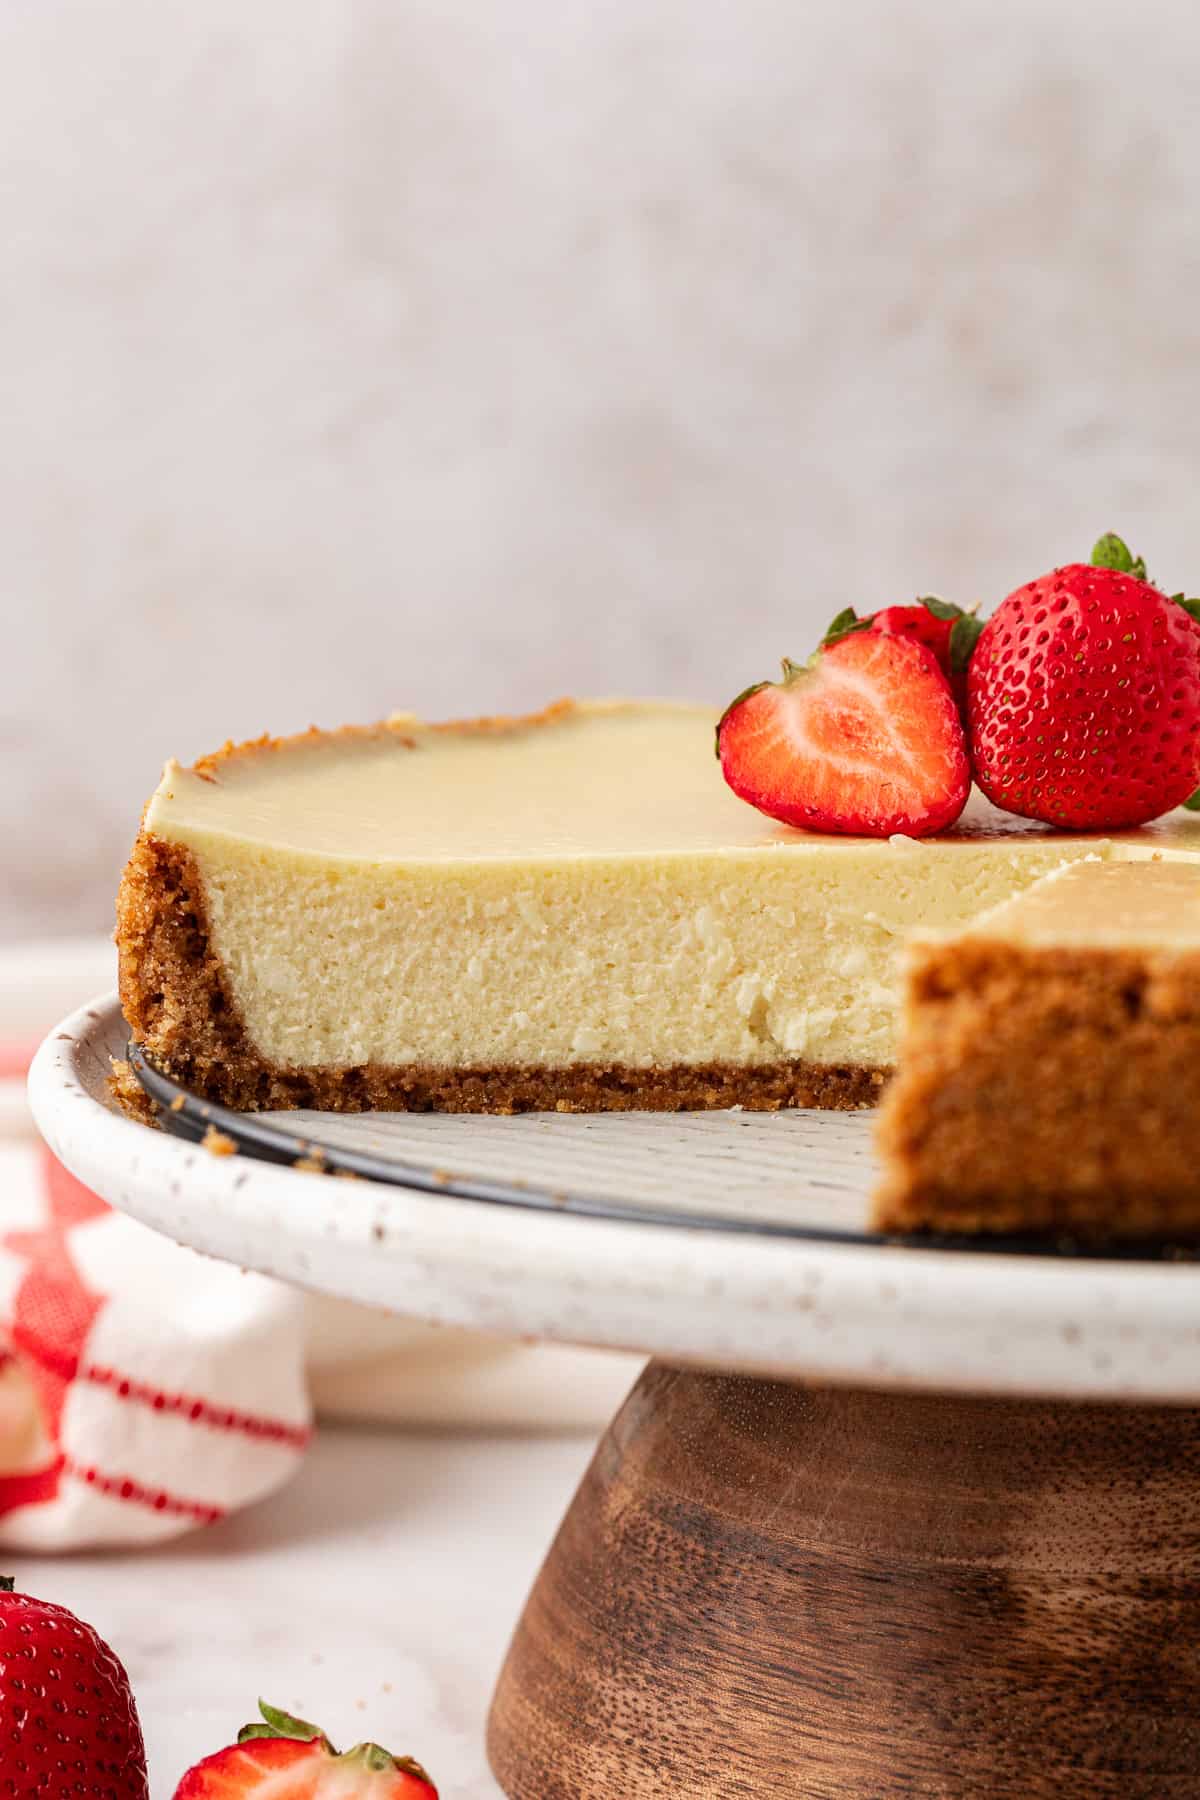
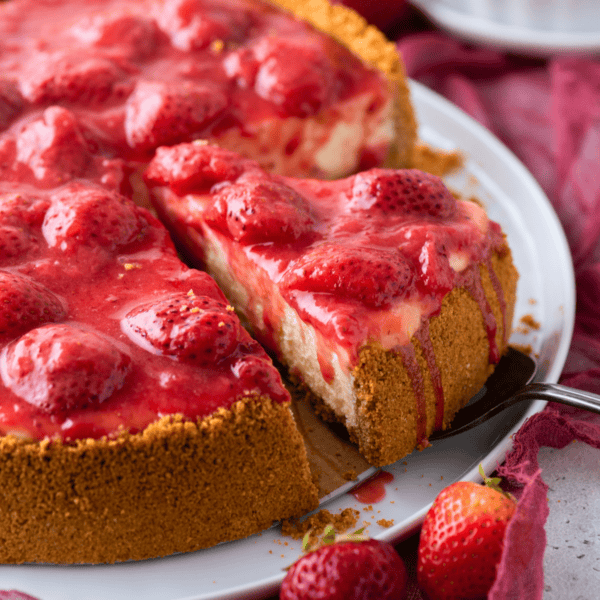
Toppings for this Homemade Cheesecake Recipe
- fresh fruit (strawberries, blueberries, blackberries, raspberries, mango, pineapple, etc.)
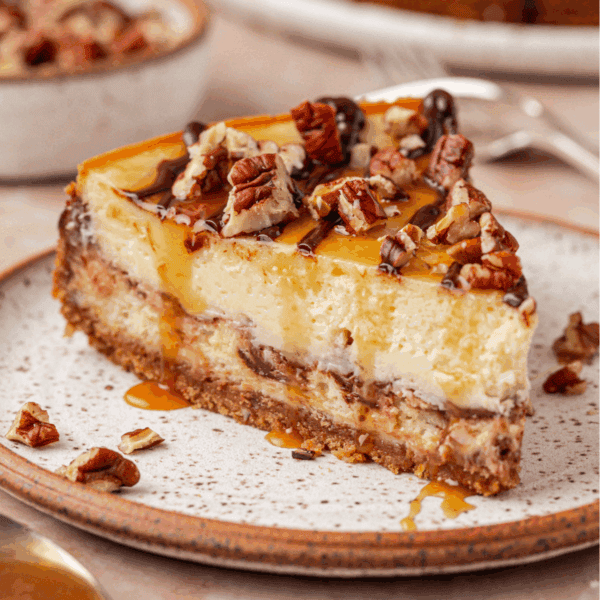
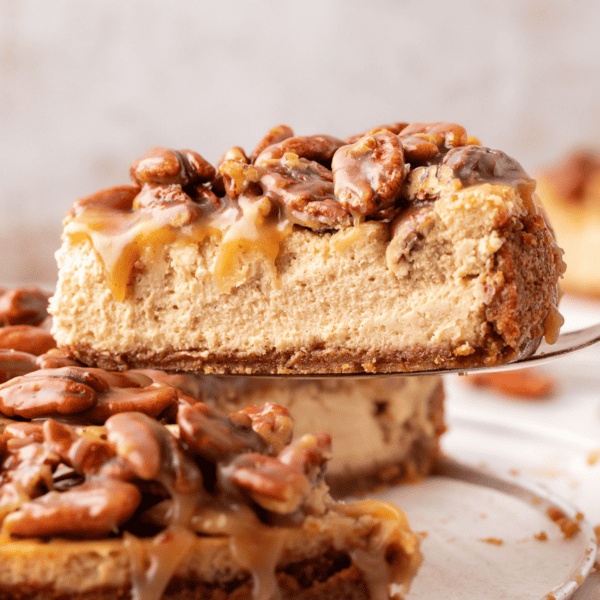
- chocolate ganache (follow the ganache recipe from our espresso cheesecake)
- caramel sauce
- strawberry sauce
- chocolate whipped cream
- crushed candy pieces (like peanut butter cups, M&Ms, snickers, etc)
Classic Cheesecake Recipe FAQs
The main difference between New York-style cheesecake and regular cheesecake lies in their texture and ingredients. New York-style cheesecake is known for its rich and dense texture, achieved by using cream cheese as the main ingredient and often sour cream or heavy cream for added richness. It’s typically baked in a high crust, resulting in a tall and creamy cake. Regular cheesecake, while also using cream cheese as a base, might have variations like ricotta or cottage cheese and can have a lighter texture. It may also have different regional styles and variations based on the type of cream cheese used and additional ingredients.
There are many types of cheesecake, but three common categories include:
New York-style Cheesecake: Known for its dense and creamy texture, New York-style cheesecake is made with cream cheese, often with sour cream or heavy cream. It has a rich flavor and is typically baked in a high crust.
Italian-style Cheesecake: This type often uses ricotta cheese as a primary ingredient, resulting in a lighter and slightly grainier texture compared to cream cheese-based cheesecakes. It’s also typically less sweet and might include citrus zest or liqueurs for flavor.
No-Bake Cheesecake: This type doesn’t require baking and is set in the refrigerator. It’s usually made with cream cheese or a mix of cream cheese and whipped cream, creating a light and airy texture. It’s often simpler to prepare and can have various flavorings and toppings.
Cream cheese is the most common and widely used cheese for making cheesecake. It provides the creamy and smooth texture that’s characteristic of cheesecake.
Avoid over-mixing the batter, skipping the steam bath or water bath for even baking, opening the oven door during baking, using cold ingredients, and rushing the cooling process. These actions can lead to cracks, uneven texture, and other undesirable outcomes in your cheesecake.
More Dessert Recipes
Tap stars to rate!
Homemade Cheesecake Recipe
Ingredients
Crust
- 2 cups (220-230g) graham cracker crumbs, (14-16 crackers)
- ¼ cup (54g) brown sugar
- ¼ tsp cinnamon
- 6 Tbsp (86g) unsalted butter, melted
Cheesecake
- 24 oz (678g) full-fat cream cheese, room temperature
- 1 cup (198g) granulated sugar
- 1 tsp vanilla extract
- 3 large eggs
Video
Instructions
Crust
- Preheat the oven to 350°F. For a cheesecake that releases cleanly every time, line both the bottom and sides of your 8 or 9-inch springform pan with parchment paper. The parchment keeps the crust from sticking and prevents the edges of the cheesecake from clinging to the pan as it bakes and cools. When it’s time to unmold, you’ll get smooth sides and an easy lift, no fighting with the pan or losing chunks of crust.
- If using whole graham crackers, pulse or blend them into crumbs. In a small bowl, mix the graham cracker crumbs, brown sugar, cinnamon, and melted butter. Transfer the mixture to an 8 or 9-inch springform pan. Use the bottom of a cup to evenly distribute and pack the crumbs. If desired, press some crumbs up the sides of the pan.2 cups (220-230g) graham cracker crumbs, 1/4 cup (54g) brown sugar, 1/4 tsp cinnamon, 6 Tbsp (86g) unsalted butter
- Bake the crust in the oven for 8-10 minutes, or until golden. Remove the pan and allow it to cool to room temperature. Reduce the oven temperature to 325°F. Instead of a water bath, place a roasting pan or 9×13 inch pan filled with a few inches of water on the bottom rack of the oven.
Cheesecake
- In a stand mixer or using a hand mixer, beat the cream cheese until smooth, about 2-3 minutes.24 oz (678g) full-fat cream cheese
- Add in the sugar and vanilla extract, beat again.1 cup (198g) granulated sugar, 1 tsp vanilla extract
- Add in the eggs, ONE at a time, beating after each one. Beat the mixture for 1 additional minute.3 large eggs
- Pour the cheesecake mixture on top of the cooled crust.
- Set the springform pan in a large roasting pan and carefully fill it with about 1 inch of water.
- Place the cheesecake on the rack above the pan of water and bake for 60-70 minutes. The cheesecake is done when the center wobbles a little when you jiggle the pan. The edges of the cheesecake should look firmer than the center.
- Once the cheesecake looks done, turn the oven off and open the oven door a little. Allow the cheesecake to cool to room temperature inside the oven before removing – this could be 60-90 minutes.
- Once cool, remove the cheesecake from the oven. Allow it to continue to rest at room temperature, then cover the pan in plastic wrap and place in the fridge for at least 6 hours or overnight.
- To Serve: Before serving, carefully unmold the cheesecake from the pan, using a small spatula to assist with any sticking parts. The cheesecake should naturally separate from the pan. Add your desired toppings, cut, and serve.
Notes


This cheesecake is absolutely fabulous! It turned out perfect all 4 times I made it.
I would love to make a chocolate swirl one. Have you a recipe for one of those?
Thank you
Mary from Georgia
Hi Mary! I’ll add the chocolate swirl cheesecake to my idea list!
Hi! Any suggestions on how to adjust the recipe when using a 10 inch springform pan please?
Hi Martyna! The bake time would be different and the cheesecake will definitely not be as tall as I used a 8 inch pan.
Literally the BEST cheesecake recipe! I didn’t use the turkey bag method. However, I did add a pan of water to the oven to create moisture…..worked like a charm. No cracks! Thank you for a wonderful recipe! I’ll be making it again this weekend….it’s a huge hit every time!
This is the absolute best cheesecake recipe! I’m patiently waiting for it to bake as I type this!. I made this recipe last spring and it was a HUGE HIT! I baked it in a 9 inch spring form pan. I’ve had great success with using a 9×13 (lower rack of my oven) filled with water to stave off any cracking. It worked great! Thank you for this wonderful recipe. ❤️💚
I’m so silly and didn’t read the overnight part!! Ahhh! Is there a way I can put it in the freezer for a certain amount of hours?? If so how many !
Hi Clarissa! I’m so sorry! It’s critical for it to chill in the fridge overnight – do not freeze it!
Hi I am a cheesecake lover!! I make all kinds but I just recently learned about the water bath. I have to say I am not a fan of them, so the trick I used is to put a large roasting pan of water under my cheesecake on the second wrack of my oven!! It works just as well plus let it cool in the oven with the door slightly ajar for an hour. 8 inch bake 65-75 min 9inch 65-70 10 inch 65min. I must say there were no cracks or splits in the cake!
I followed the recipe that is shown in print. After making the cheesecake, and putting it in the oven, I come back to look at the recipe for the final instructions. I decided to look at the video(which I normally do on all recipes). Looking at the video, I see that u added parchment paper and sprayed the sides of the pan. NO WHERE in the printed recipe does it say to do that. That is a VERY IMPORTANT step that u left out. My cheesecake has about 10 more minutes to cook, then cooling. I thought it was odd that the pan was not sprayed or anything, but I followed it anyway. Now, my cheesecake probably won’t come out of the pan! I’ll let u know what happens.
Hi Hazel! The step of adding a piece of parchment paper in the bottom of the pan when adding the crust is not necessary at all and doesn’t effect the recipe at all! I no longer bake my cheesecakes with one.
Would a crockpot liners work the same as a turkey bag? I love this idea and have liners already on hand.
YES!
November challenge accepted! The bath technic was easier than I thought and I followed your instructions step by step. Thank you!!
This is my go to cheesecake recipe. I’ve made it several times and it’s always a hit. Super easy and delicious. My newest flavor is dark chocolate raspberry.