
This post may contain affiliate links. Please read our disclosure policy.
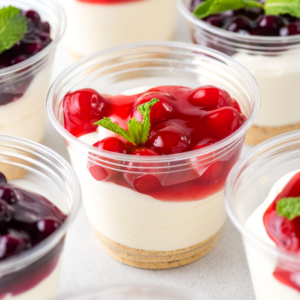
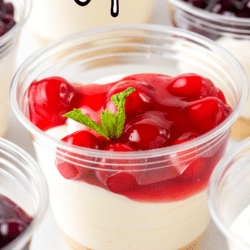
Cheesecake cups are the perfect no-bake dessert to keep in your back pocket for entertaining! With just 6 ingredients, a simple graham cracker crust, creamy cheesecake filling, and your choice of topping, you can’t go wrong!

I made these for a dinner party and got great reviews! I topped them with some fresh fruits (strawberries, blueberries and raspberries).
-Betty
Cheesecake Cups
Do you ever find yourself a few hours away from dinner or an event and realize you forgot about dessert?
Or you just can’t decide what dessert to take to a gathering? Keep this cheesecake cup recipe in your back pocket for those moments.
Made with just 6 ingredients, plus your desired topping, these no bake cheesecake cups require just 15 minutes of hands-on time and an hour to chill.
You can whip them up just before guests arrive, pop them in the fridge, and they’ll be chilled and ready by the time dessert rolls around.
There are endless ways to customize them too, so you can make them for every occasion and every season. Or just use whatever you have in the cupboard or fridge to save a trip to the store.

Why You’ll Love These No Bake Cheesecake Cups
Here are a few reasons why I love making these no bake cheesecake cups.
- Super easy! This is likely the easiest cheesecake recipe you’ll ever make. No need to mess with a waterbath or pie pan or even muffin tins. Everything is assembled right in the cup!
- Ready to serve. No slicing needed. Just hand each guest one of these cups and a spoon.
- Short chill time. Since these are so small, they need to chill just for an hour or two before serving. Perfect when you need a last minute dessert.
- Easy to customize. You can make these personal cheesecake cups your own by changing the crust or adding different toppings. You never have to make them the same way twice. I provided lots of suggestions below.

What you’ll need for Cheesecake in a Cup
These no bake cheesecake cups are made with just 6 ingredients, plus your desired toppings! Scroll down to the recipe box for the full ingredient list.
- Graham cracker crumbs – You can buy the crumbs at the store (near the store bought pie crusts) or just use a blender to crush regular graham crackers.
- Cream cheese – It’s essential to use full-fat cream cheese when making no bake cheesecake. Otherwise, the filling will not be thick and stable.
- Heavy whipping cream – The heavy whipping cream helps to stabilize the cheesecake filling.
- Powdered sugar – Sweetens the filling.
- Lemon juice – A splash of fresh lemon juice enhances the other flavors but does not make this cheesecake citrusy.
- Vanilla extract – Adds a light flavor to the cheesecake.
Can I Use A Different Crust?
You can easily switch up these no bake cheesecake cups by using any of the following as your crust:
- Whole or crushed Nilla wafer
- Whole or crushed Oreos
- Whole or crushed gingersnap cookies
Each of those is the perfect size to drop one into the bottom of the cup instead of making crumbs, but it’s up to you!
How to Make Cheesecake Cups
This easy no bake dessert comes together in just a few easy steps. Just be sure to prepare with enough time for them to chill before serving.


- Prepare the crust. Fill the bottom of the cups with graham cracker crumbs. I used 2 tablespoons for 9 oz cups but if your cups are smaller, 1 tablespoon is enough.
- Beat the cream cheese. Beat the cream cheese and a cup of powdered sugar until smooth and creamy. Set aside.
- Make the whipped cream. Add the heavy whipping cream, remaining powdered sugar, lemon juice, and vanilla extract to a chilled metal or glass bowl. Beat until the whipped cream forms stiff peaks, about 4 to 5 minutes.
- Combine the two fillings. Add the cream cheese to the whipped cream. Mix on low until combined. You shouldn’t be able to tell what is cream cheese and what is whipped cream.
- Fill the cups. Transfer the filling to a piping bag. Pipe into the cups, filling each one 3/4th full.
- Chill. Refrigerate the cheesecake cups for 1 to 2 hours, so the filling has time to set.
- Top and serve. Top the no bake cheesecake with your desired toppings, like pie filling or crushed candy, and enjoy. See topping ideas below!

Topping Ideas
There are endless ways to customize the topping on your individual cheesecake cups. You can even do a few different toppings to give people options. Here are a few ideas:
- Pie filling (like cherry, blueberry, or raspberry)
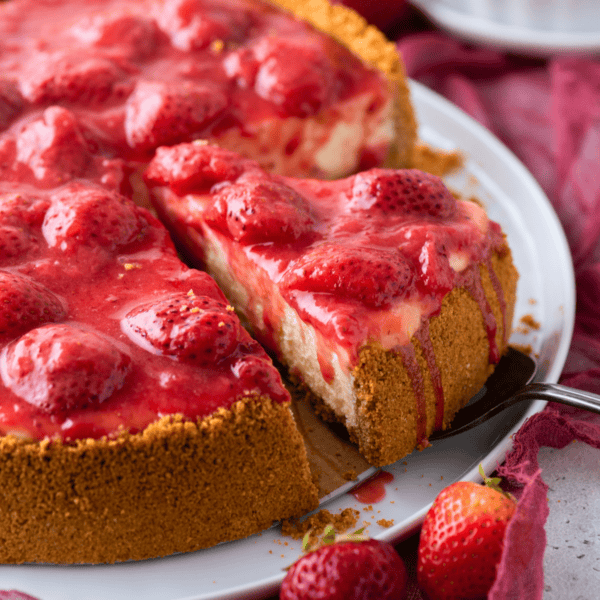
- Homemade strawberry sauce
- Chocolate ganache
- Oreo crumbs (with or without the chocolate ganache)
- Chopped candies
- Lemon curd
- Sautéed apples
- Chocolate shavings
- Mint chips

Tips for Cheesecake in a Cup
These cheesecake cups are pretty straightforward to make but here are a few tips to make them even easier.
- What size cups should I use? This depends on how big you’d like your dessert to be, or how many people you’re serving. I used large 9 oz cups and was able to make 8 cups with this recipe. If you use smaller cups, like 4 oz or 6 oz, you can make 12 to 14 cheesecake cups with this recipe.
- How many graham cracker crumbs do I need? This depends on the size cups you choose to use. For 9 oz cups, you’ll want 2 tablespoons of graham cracker crumbs for each. For smaller cups, 1 tablespoon each will work.
- Cover the cups with plastic for longer chilling times. If you make these cheesecake cups more than 2 hours in advance, I recommend covering them with plastic wrap. This helps prevent the top from forming a little crust
How to Store Cheesecake Dessert Cups
Cheesecake cups should be stored in the fridge. I find the easiest way to do so is to put them all on a baking sheet, especially if using smaller cups. If they’ll be refrigerated for more than 2 hours, be sure to cover the tops with plastic wrap.
You can make these a day ahead of time and store them in the fridge overnight. Leftovers should be enjoyed within 2 days. Note that the longer they are refrigerated, the softer the crust will become.
More like these No Bake Cheesecake Cups
- Classic Cheesecake
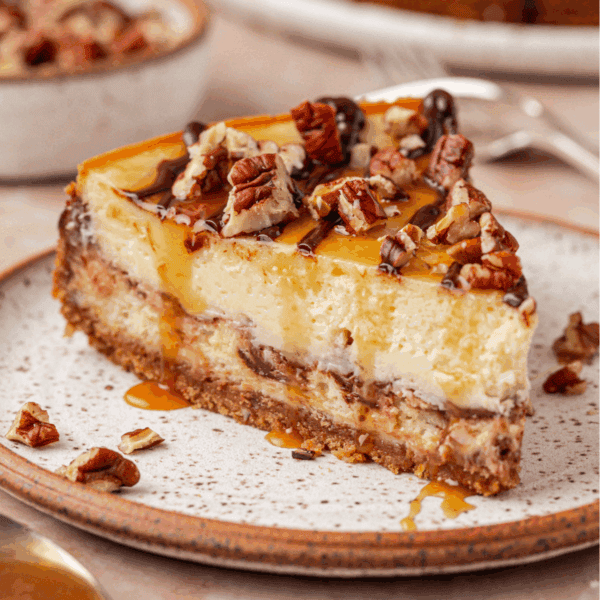
- Turtle Cheesecake
- Coffee Cheesecake
- Cheesecake Brownies
- Chocolate Cheesecake Football Shooters
More Recipes
Tap stars to rate!
Easy Cheese Cake Cups Recipe
Ingredients
- Graham cracker crumbs
- 16 oz full fat cream cheese, 2 8 oz packages, room temperature
- 2 cups (473ml) heavy whipping cream, equal to 1 pint
- 1 ½ cups (169g) powdered sugar, divided into 1 cup and 1/2 cup
- 1 Tbsp fresh lemon juice
- 2 tsp vanilla extract
Video
Instructions
- The size of cup you use will determine how much graham cracker crumb to put in the bottom. The cup size will also determine the number of servings. I used large 9 oz cups and was able to make 8 cups.
- If using 9 oz cups, place 2 tablespoons of graham cracker crumbs in the bottom of 8 cups. If you are using smaller cups, between 4-6 oz, place 1 tablespoon of crumbs in 12-16 cups.Graham cracker crumbs
- Place a metal or glass mixing bowl in the freezer for 15 minutes, this bowl will be used in step 5.
- In a different mixing bowl, beat the cream cheese and 1 cup powdered sugar with an electric mixer until smooth and creamy, 1-2 minutes. Set aside.16 oz full fat cream cheese, 1 ½ cups (169g) powdered sugar
- Remove the metal mixing bowl from the freezer. Add the heavy whipping cream, 1/2 cup powdered sugar, fresh lemon juice and vanilla extract and beat with an electric mixer until the whipping cream has stiff peaks, about 4-5 minutes.2 cups (473ml) heavy whipping cream, 1 ½ cups (169g) powdered sugar, 1 Tbsp fresh lemon juice, 2 tsp vanilla extract
- Add the cream cheese to the whipped cream and mix them together on low spee for 1-2 minutes or just until you can’t tell which is the cream cheese and which is the whipped cream.
- Place the cheesecake filling in a piping bag (or ziplock bag with the corner cut off) and pipe the cheesecake into the cups, filling about 3/4ths full.
- Refrigerate the cheesecake cups for 1-2 hours. For longer refrigeration, I recommend covering the cups with plastic wrap. You can refrigerate these over night and serve the next day.
- Top the cheesecake with your desired topping – cherry pie filling, blueberry pie filling, homemade strawberry sauce, chocolate ganache, oreo crumbs, chopped candies, etc.
Notes
whole oreo, whole gingersnap cookie, or crushed nilla wafers, crushed oreos or
crushed gingersnap cookies. Topping variations – top the cheesecake with fresh fruit, raspberry puree or pie
filling, lemon curd, sautéed apples, chocolate shavings, crushed candy bars, mint
chips, etc.


How long do they last in the fridge?
You can make these a day ahead of time and store them in the fridge overnight. Leftovers should be enjoyed within 2 days. Note that the longer they are refrigerated, the softer the crust will become.
Love this recipe. So easy and delicious. I really like how you write your recipe. Instead of having to scroll back up you just tell me the directions and also add the ingredients and amount underneath. Amazing. Thank you!
I made these cups for the first time over the weekend. Absolutely amazing! I loved the consistency of the cheesecake, as I find many recipes that have cheesecake consistency too runny/thin. Also the graham cracker at the bottom was still crispy after being in the fridge for 2 days! These were so good! I used traditional cherry topping, but will definitely be experimenting with other toppings! Thank you for sharing ❤️
Made 6 of these but used an 8 oz wide mouth canning jar. To let daughter take to work. They tasted really good. She said they were light so she ate whole thing.
Now need to make more with rest of cheescake filling. Thank you.