
This post may contain affiliate links. Please read our disclosure policy.
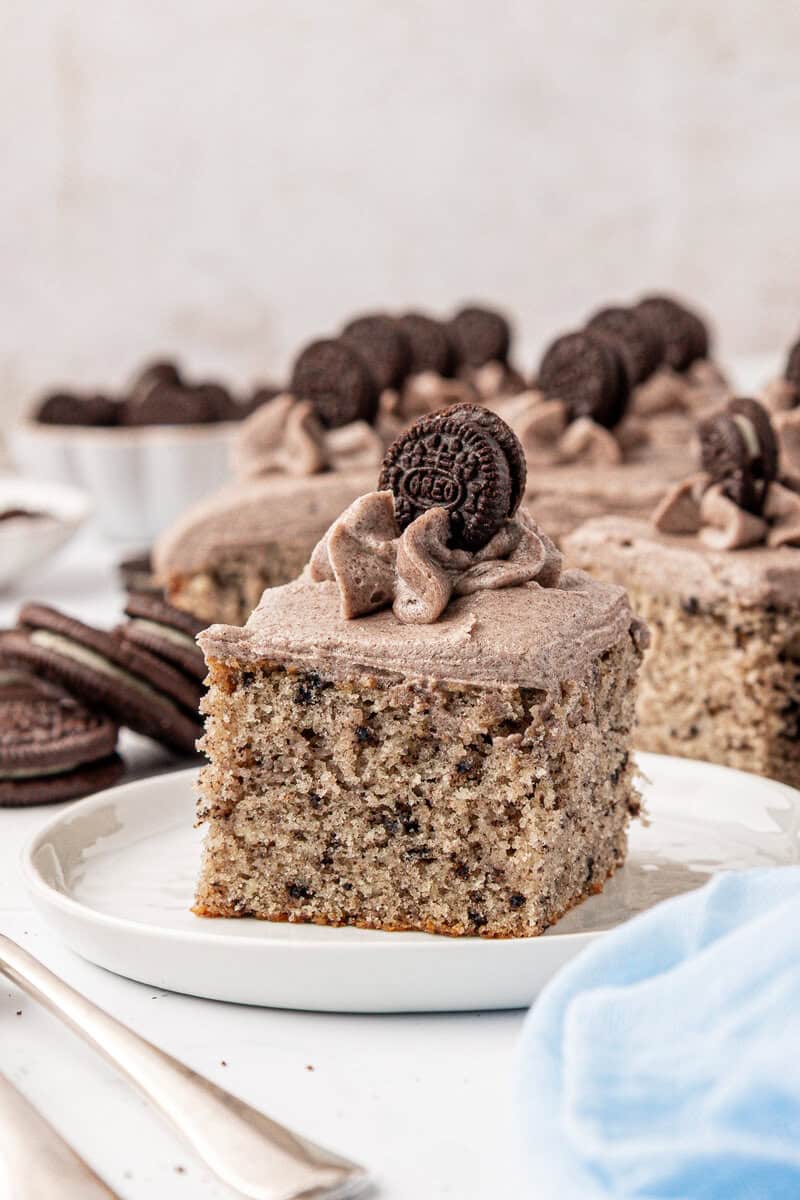
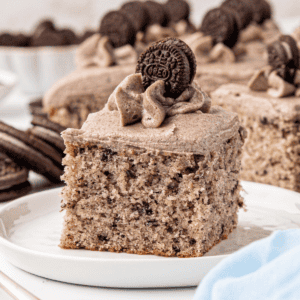
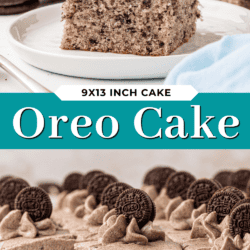
The problem with most oreo cakes is that the Oreo flavor only shows up in one place — usually just the frosting. This recipe puts Oreos in the batter and blends them into the buttercream so you get cookies and cream flavor in every layer of every bite. It’s a from-scratch white cake baked in one 9×13 pan, part of my tested 9×13 series, and it’s genuinely easier than it looks. One pan, no layers, and it’s always the first dessert gone.
Why This Oreo Cake Works (And Why the 9×13 Pan Is the Right Call)
Layer cakes are beautiful. They’re also genuinely hard — uneven layers, crumb coat anxiety, frosting that slides before it sets. The 9×13 pan removes all of that, and for an oreo cake specifically, it’s actually the better choice.
A single thick layer means the crushed Oreo pieces have room to distribute evenly through the batter. You get cookies in every bite, not just wherever you happened to slice. The cake bakes more evenly without the fuss of rotating layers, and it’s so much easier to frost — one flat surface, no crumb coat, done. If you’re making this for a birthday or a potluck, you can bake, cool, and frost it in a few hours with most of that time completely hands-off.
This recipe is part of my 9×13 cake series — a collection of single-pan cakes built on the same tested white cake base. Each one is designed to be reliable, to actually taste from scratch, and to look intentional without requiring a day’s worth of work. The oreo version is one of my favorites in the series. It’s the one my husband’s coworkers asked about. It’s the one that was gone by 9am.
The White Cake Base — Why It Matters for Oreo Cake
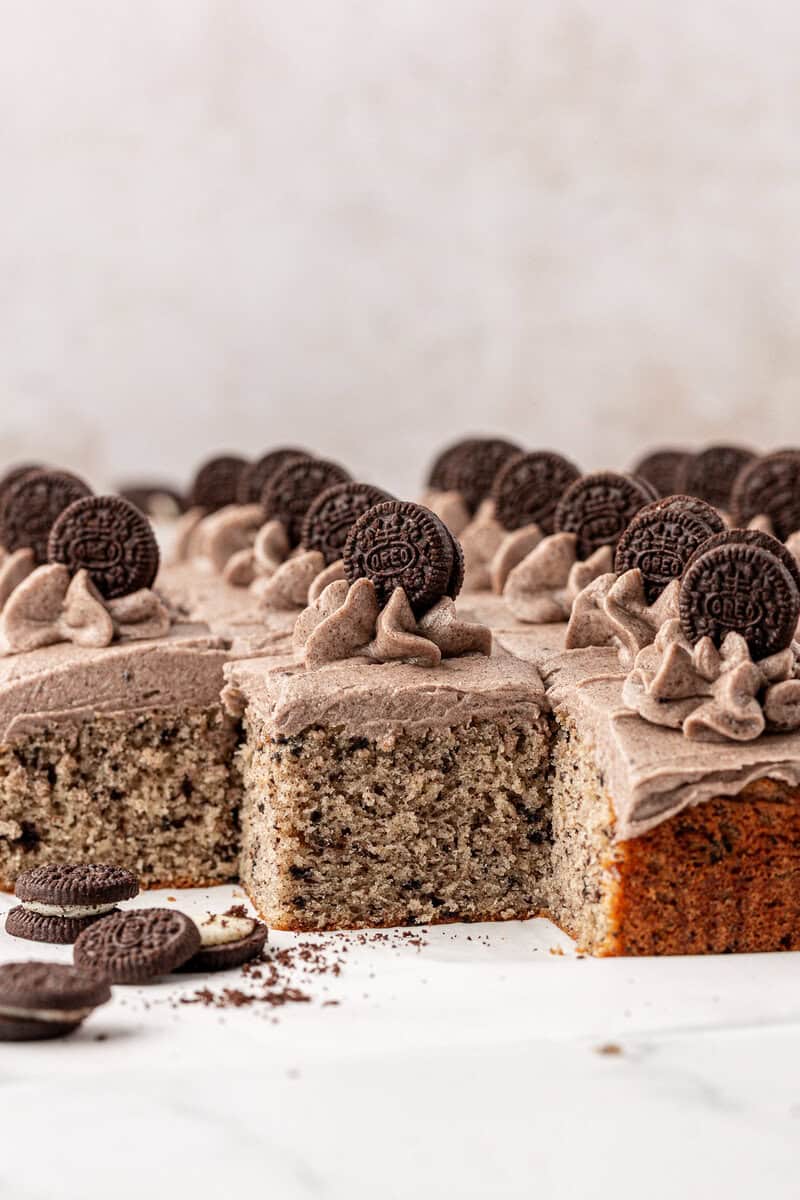
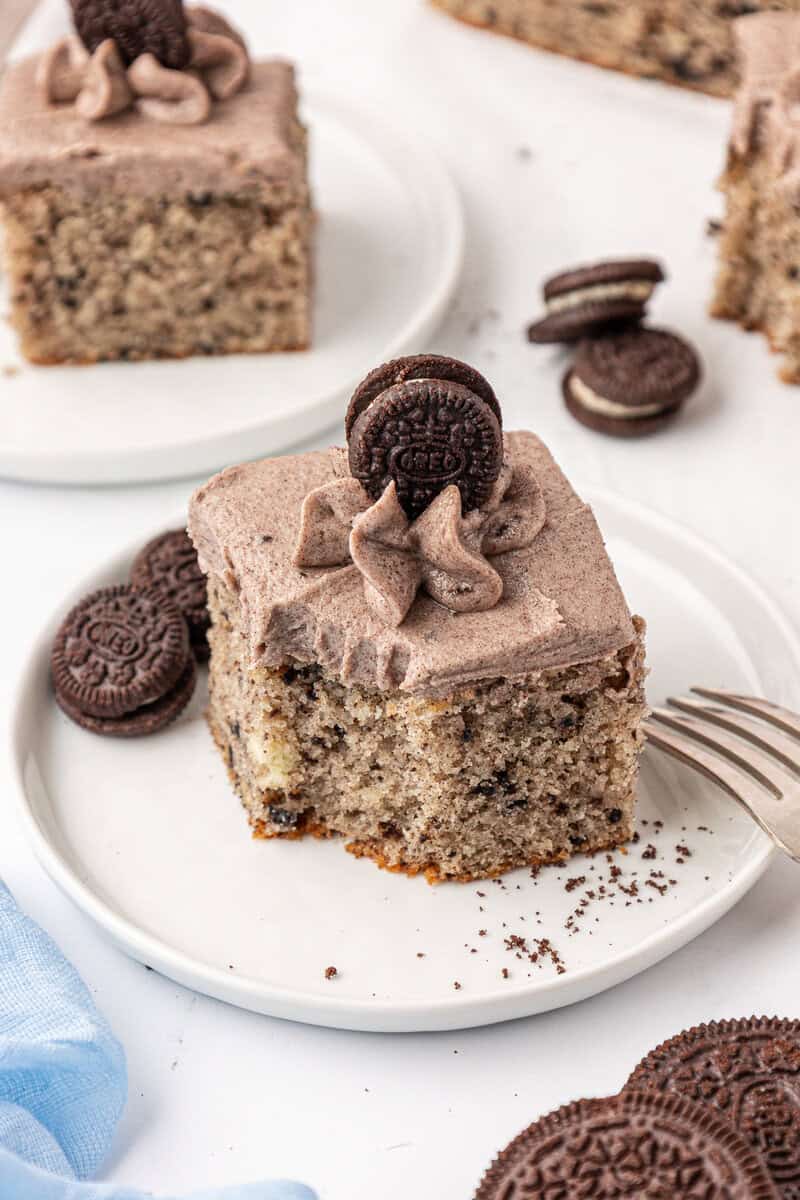
Most oreo cake recipes start with chocolate cake or yellow cake. I went the other direction on purpose. A white cake base — egg whites only, no yolks — keeps the crumb light in both texture and color, which means the dark Oreo pieces are visible in every slice. With a yellow or chocolate base, the cookies disappear into the batter. Here, you can actually see them.
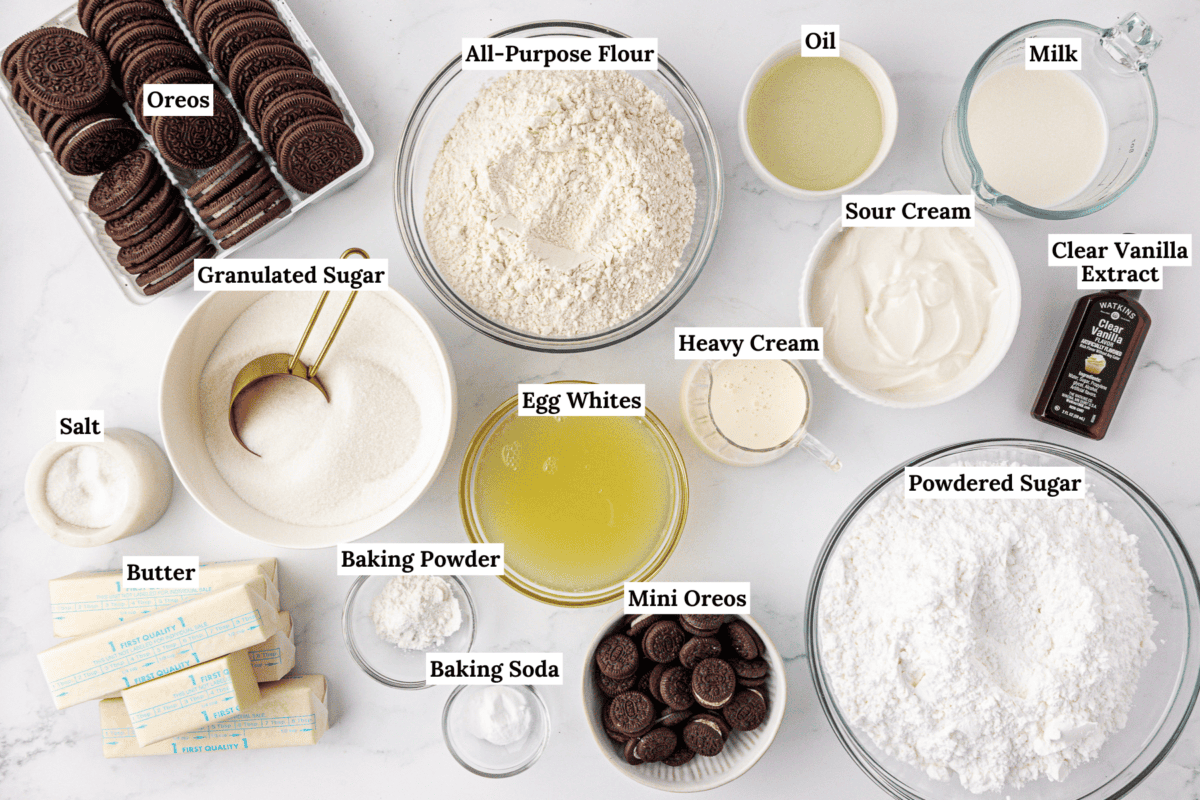
The batter uses both butter and oil, plus sour cream. Butter gives flavor and structure. Oil keeps the crumb tender and moist even after the cake cools. Sour cream adds moisture and a slight tang that balances the sweetness — it also makes the batter thick, which matters more than you’d think (more on that in a moment).
Clear vanilla extract keeps the color clean. Regular vanilla has a yellow tint from the vanillin; clear vanilla doesn’t. Small detail, real difference when you’re going for that white crumb with dark cookie contrast.
Two Ways to Use Oreos (And Why Both Matter)
This recipe uses Oreos two different ways, and the distinction is intentional.
In the batter: roughly crushed cookies, folded in at the end. You want pieces — crumbs, not powder — so you get visible chunks of cookie in every slice. Crush them in a zip-top bag with a rolling pin. You’re looking for uneven pieces, some larger and some smaller, which gives the cake texture and that classic cookies and cream look when you cut into it.
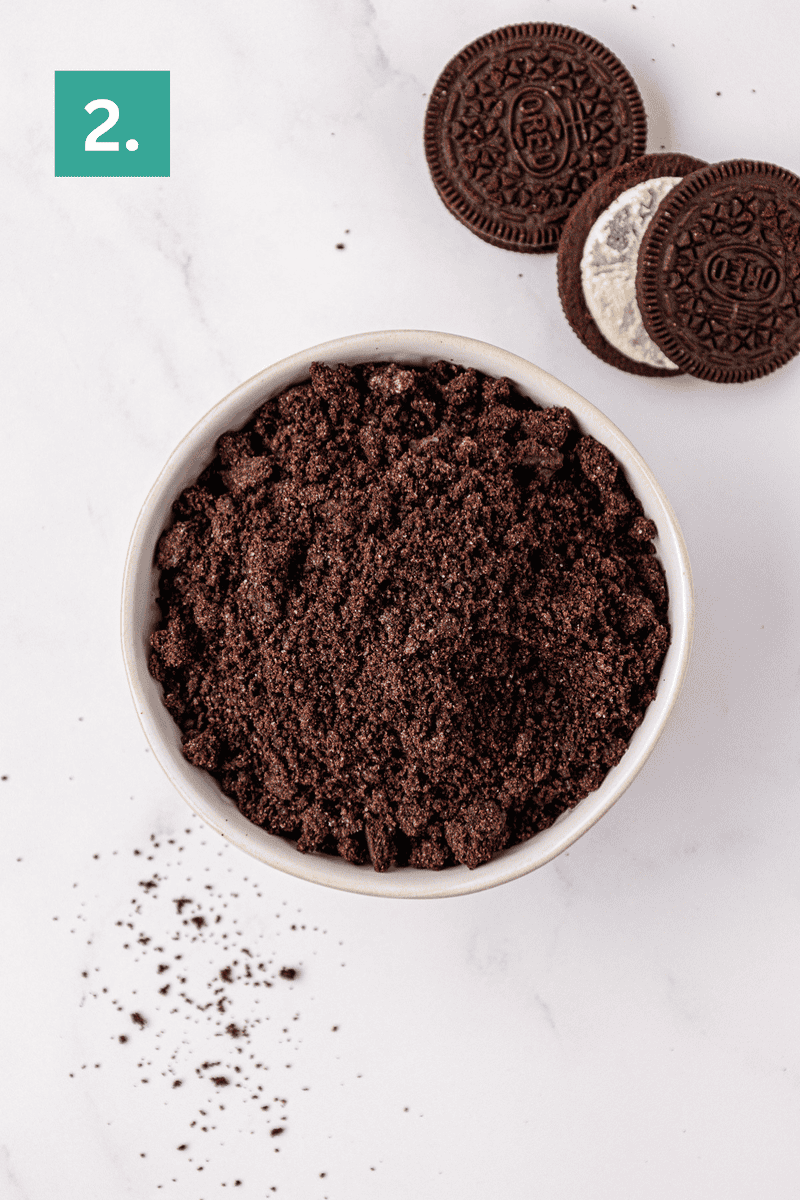
In the frosting: Oreos blended into finer crumbs — cream filling and all. This is different from just folding crushed cookies into buttercream, which gives you a chunky frosting that’s hard to spread and even harder to pipe. Powdered Oreos incorporate smoothly into the butter and sugar, giving you true cookies and cream flavor throughout every bite of frosting without any texture issues. The filling is part of the flavor — don’t remove it.
And the question everyone has: do the Oreo pieces sink to the bottom of the cake? In this recipe, no. The batter is thick enough — thanks to the sour cream and the butter-oil combination — that the crushed pieces stay suspended where you fold them in. You’ll get cookie pieces throughout the full height of the slice, not pooled at the bottom.
How to Make Oreo Sheet Cake
Follow my easy step-by-step instructions below, or jump to the recipe card for the full recipe.
Oreo Cake
Prep oven and pan: Preheat the oven to 350ºF (180ºC). Prepare a 9×13 inch pan with non-stick cooking spray or parchment paper. Set aside.
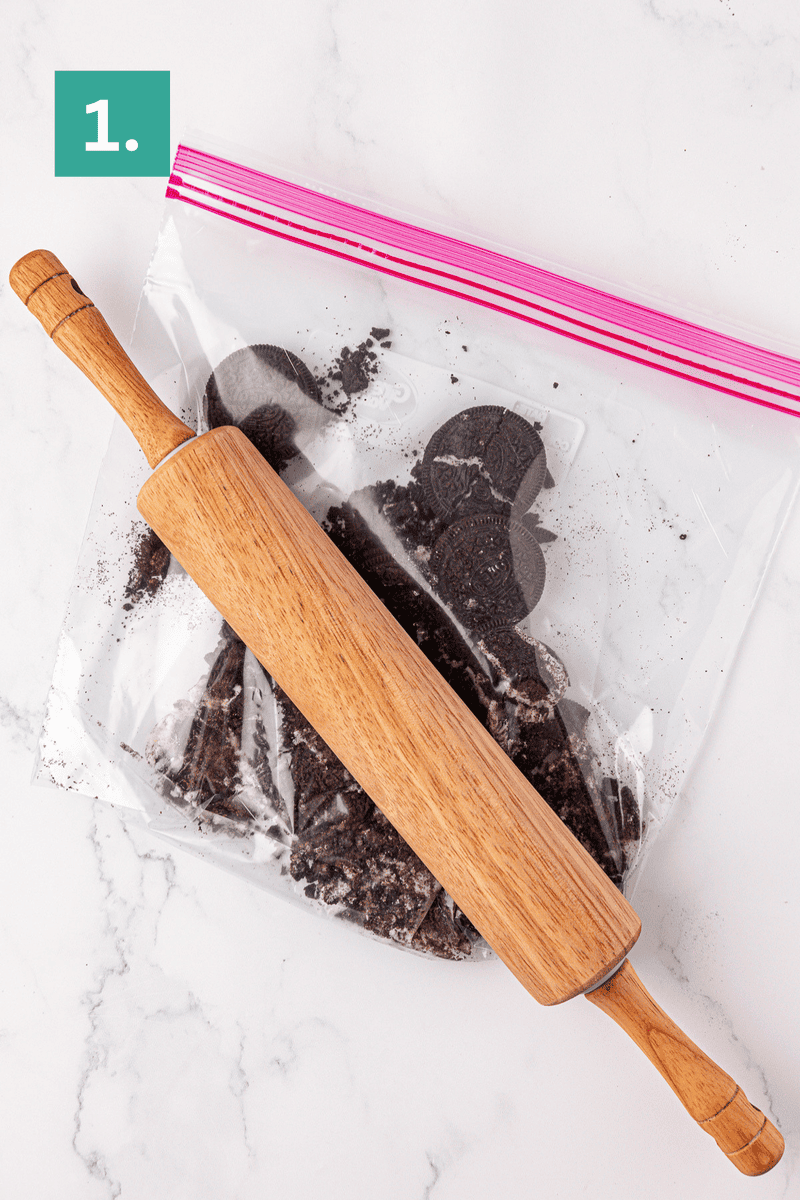
Crush oreos: Place the oreos in a ziploc bag and crush using a rolling pin, meat tenderizer or the bottom of a cup.
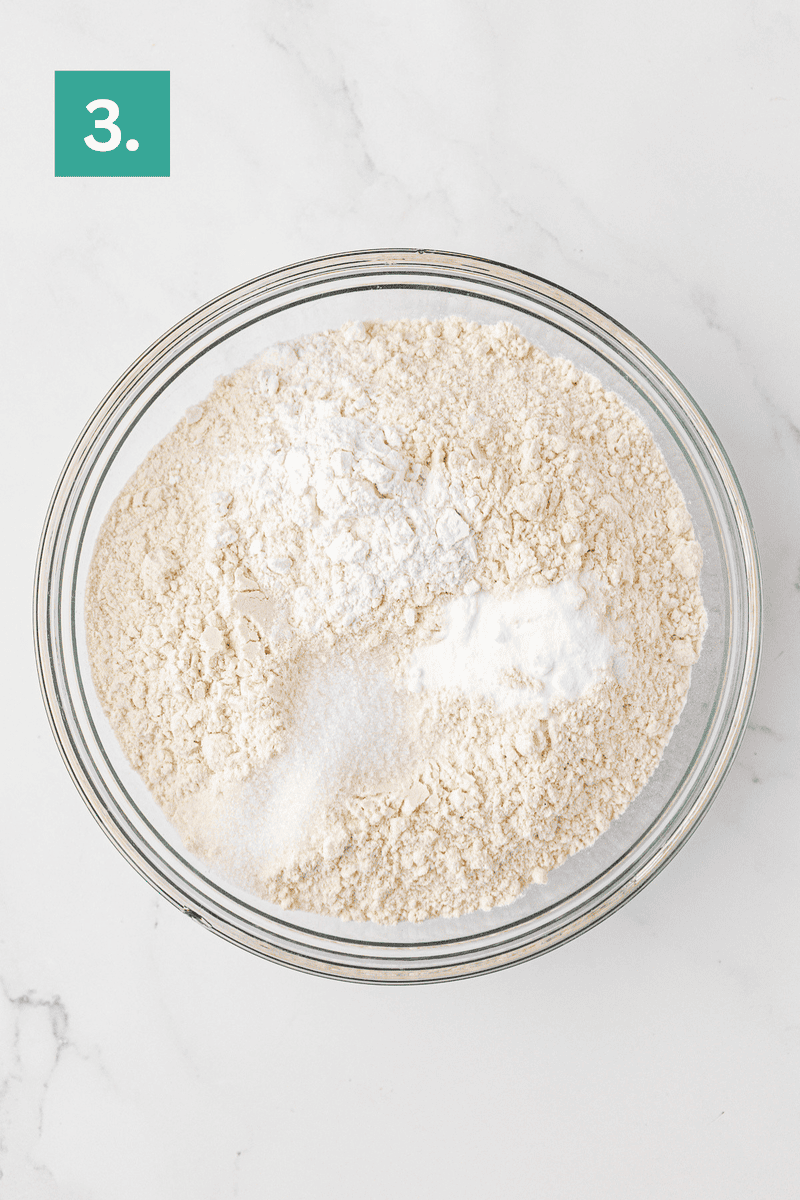
Combine dry ingredients: In a small mixing bowl combine the flour, baking powder, baking soda, and salt.
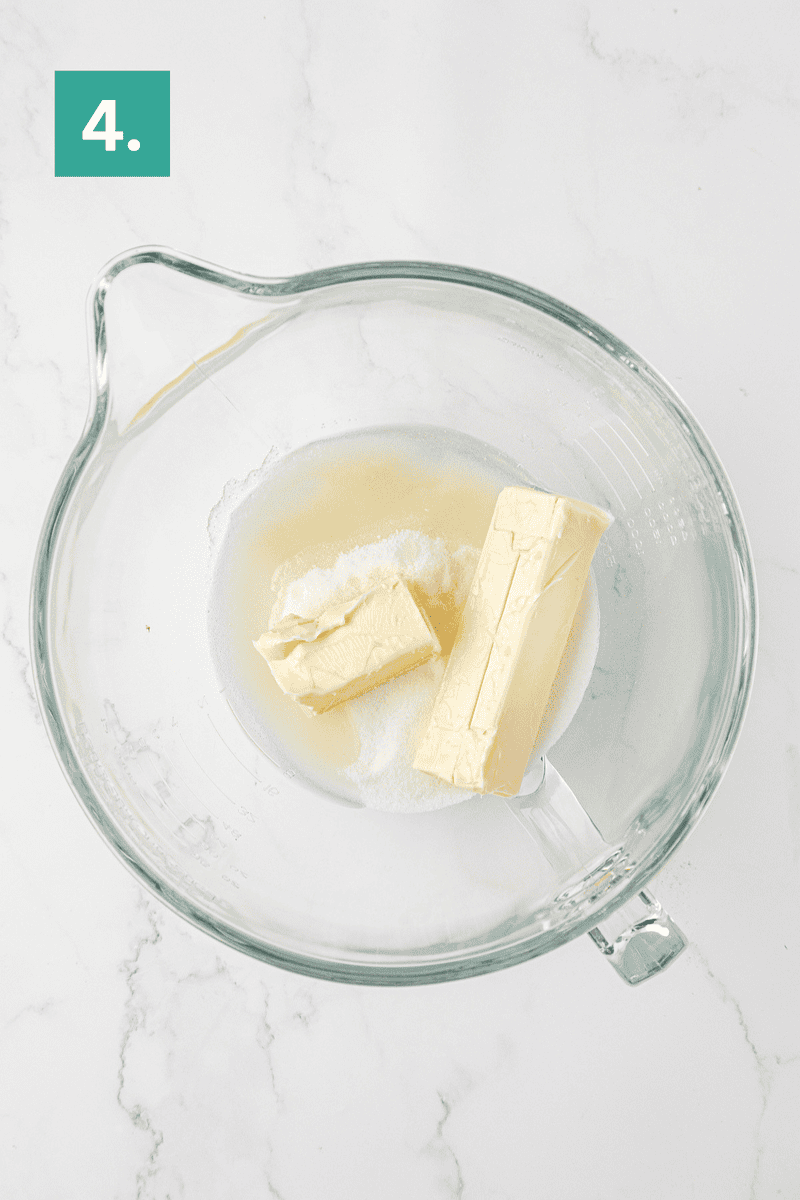
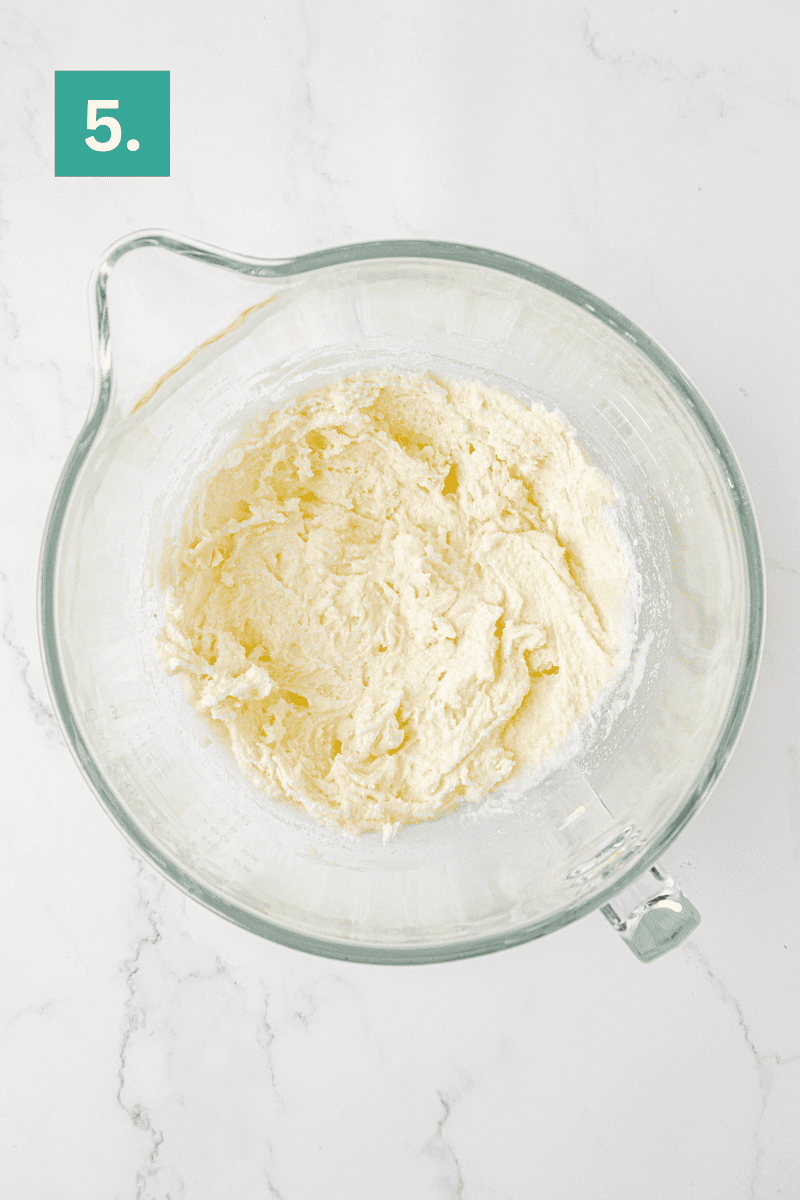
Begin combining wet ingredients: In a large mixing bowl combine the butter, sugar, and vegetable oil, beat using an electric mixer, 1-2 minutes until fluffy.
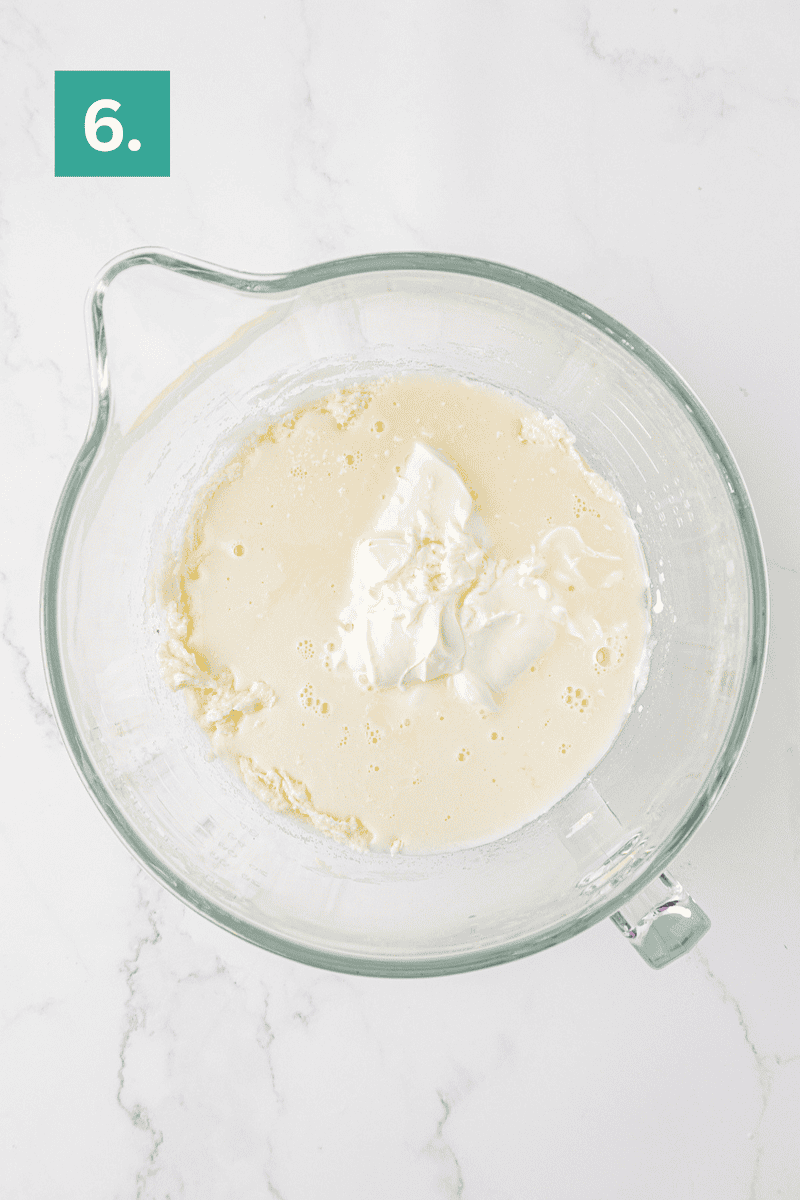
Mix in remaining wet ingredients: Add in the egg whites, sour cream, milk, and vanilla extract. Beat with the electric mixer.
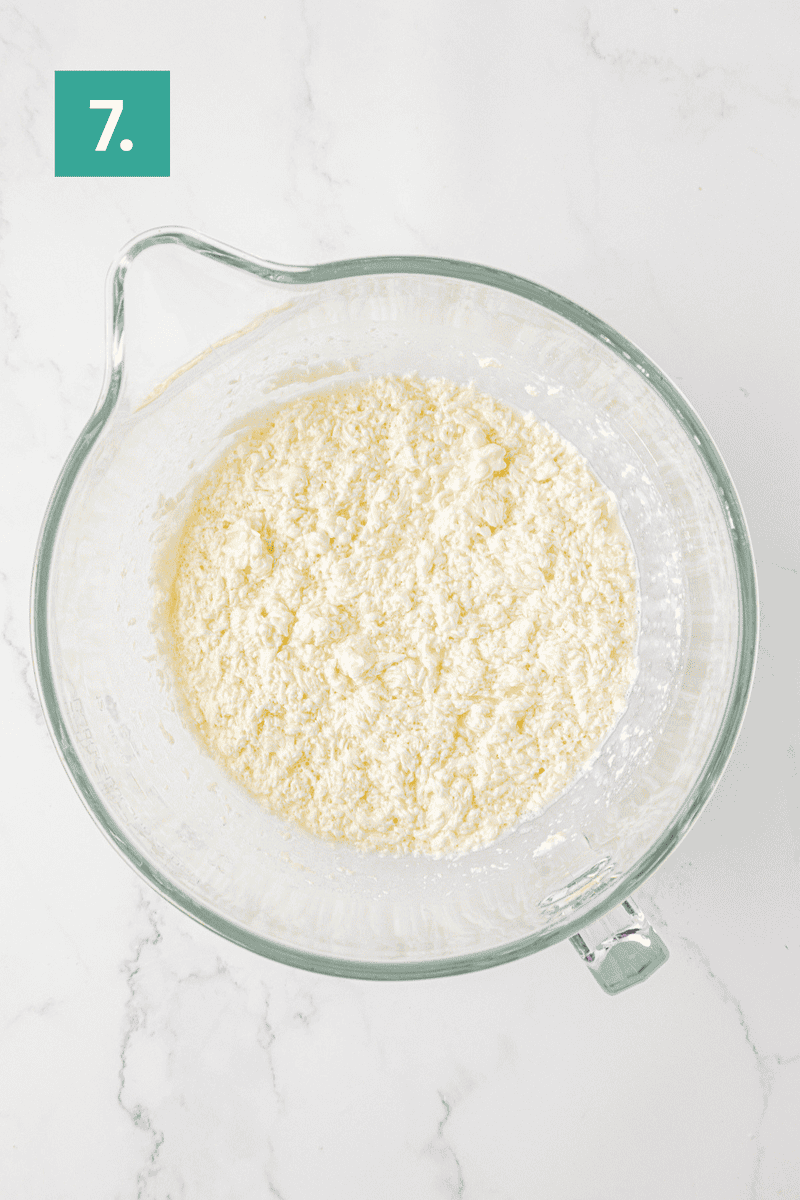
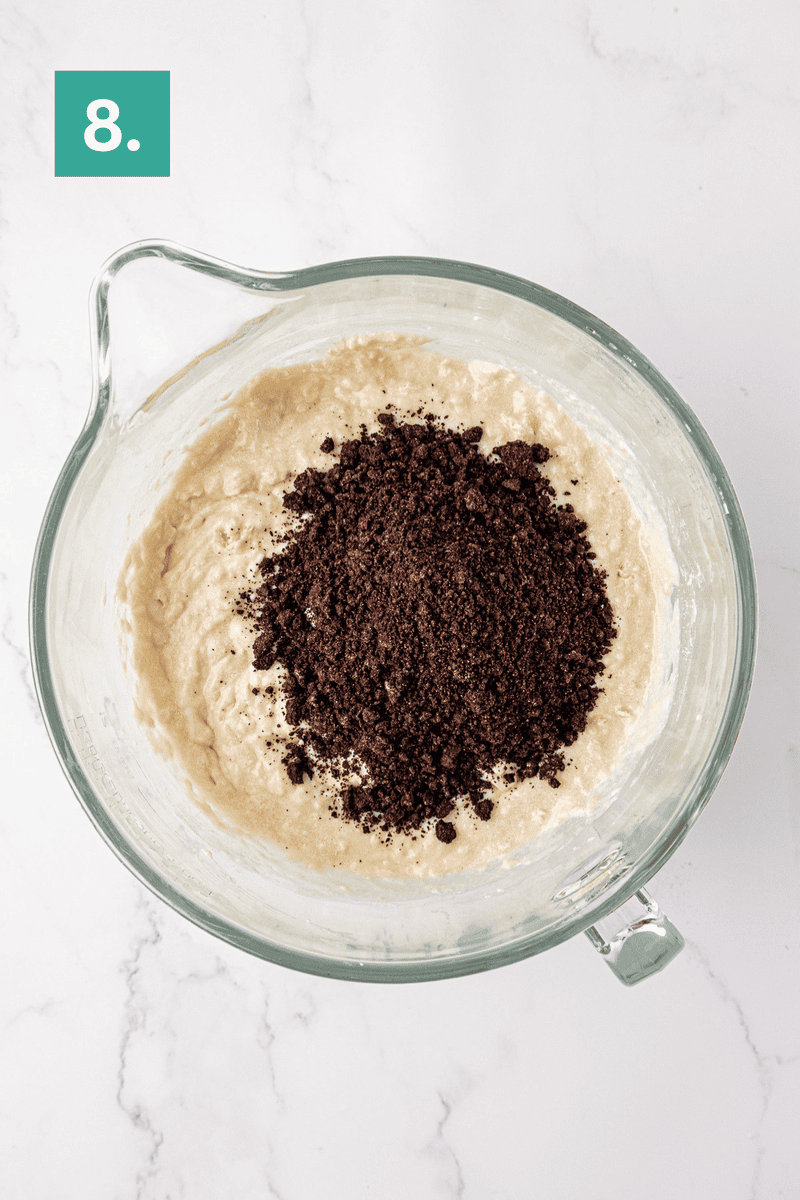
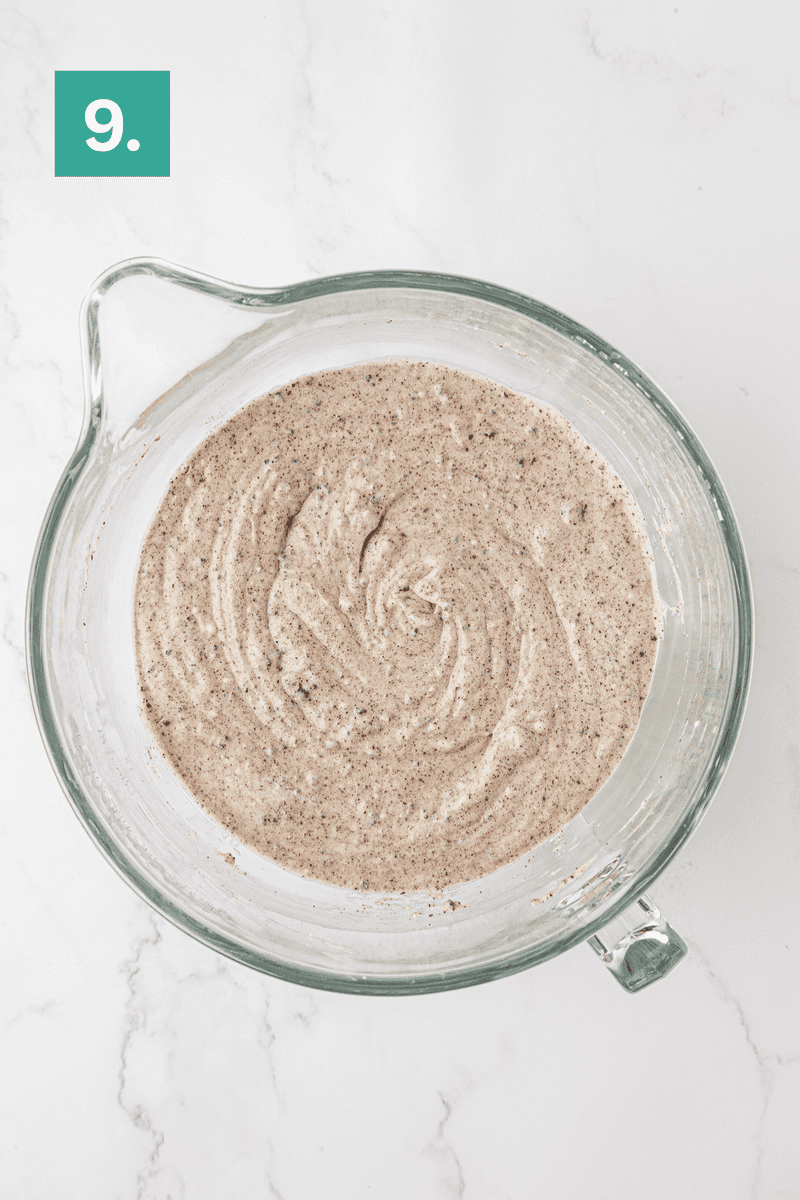
Combine all ingredients: Gradually add the flour mixture and the crushed oreos to the wet ingredients, mixing just until the flour is incorporated.
Transfer batter: Pour the batter into the prepared pan and spread evenly with a spatula.

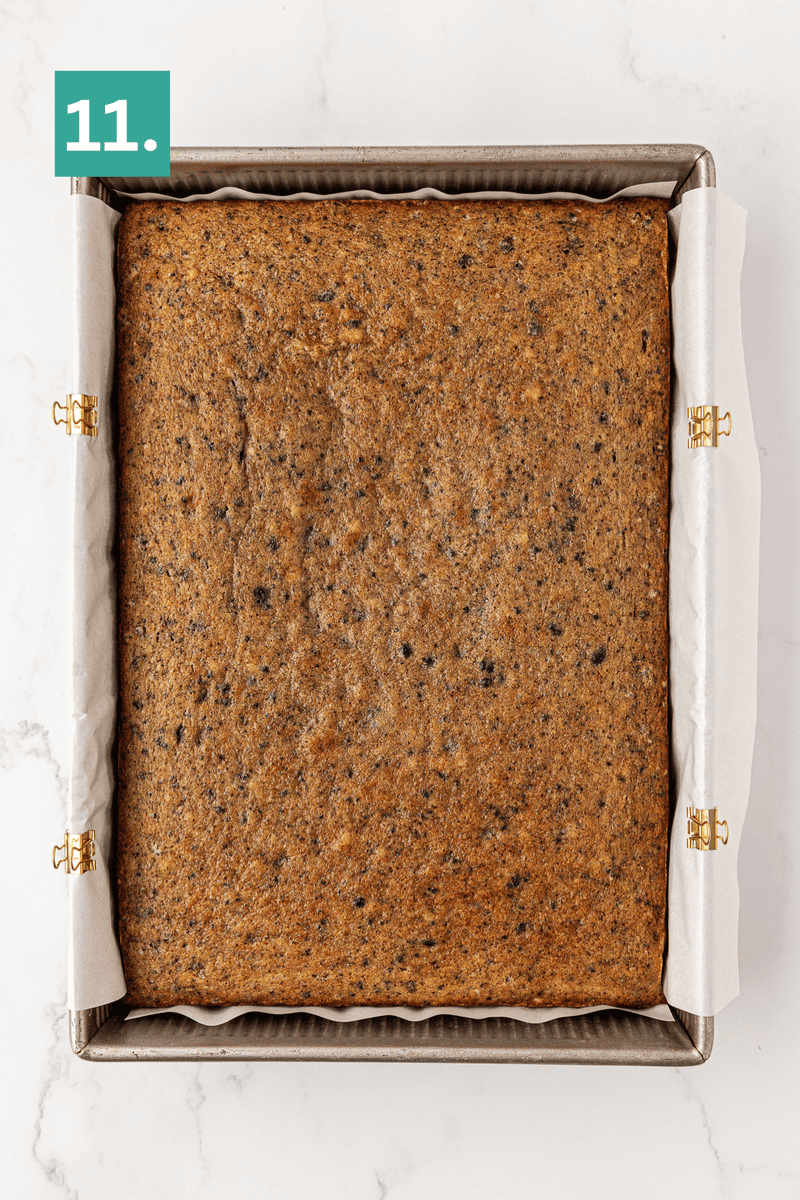
Bake: Bake for 32-39 minutes or until a toothpick inserted into the center comes out clean. Light pans take longer to bake than dark pans.
Cool: Allow the cake to cool completely before frosting.
Oreo Frosting
Crush oreos: Place the oreos in a ziploc bag and crush using a rolling pin, meat tenderizer or the bottom of a cup. Alternatively, place the oreos in a food processor or blender, pulse into crumbs. The oreos that go into the frosting should be finer than the oreos in the cake, but small pieces are okay!
Begin combining ingredients: In a mixing bowl, combine the butter, vanilla extract and salt, beat using an electric mixer until fluffy, 1-2 minutes.
Mix in powdered sugar: Gradually add 4 cups of powdered sugar mixing on low until combined.
Mix in remaining ingredients: Add in ¼ cup of heavy cream, beating on high until the frosting is whipped and fluffy.
Taste test: Taste to determine if you want more powdered sugar.
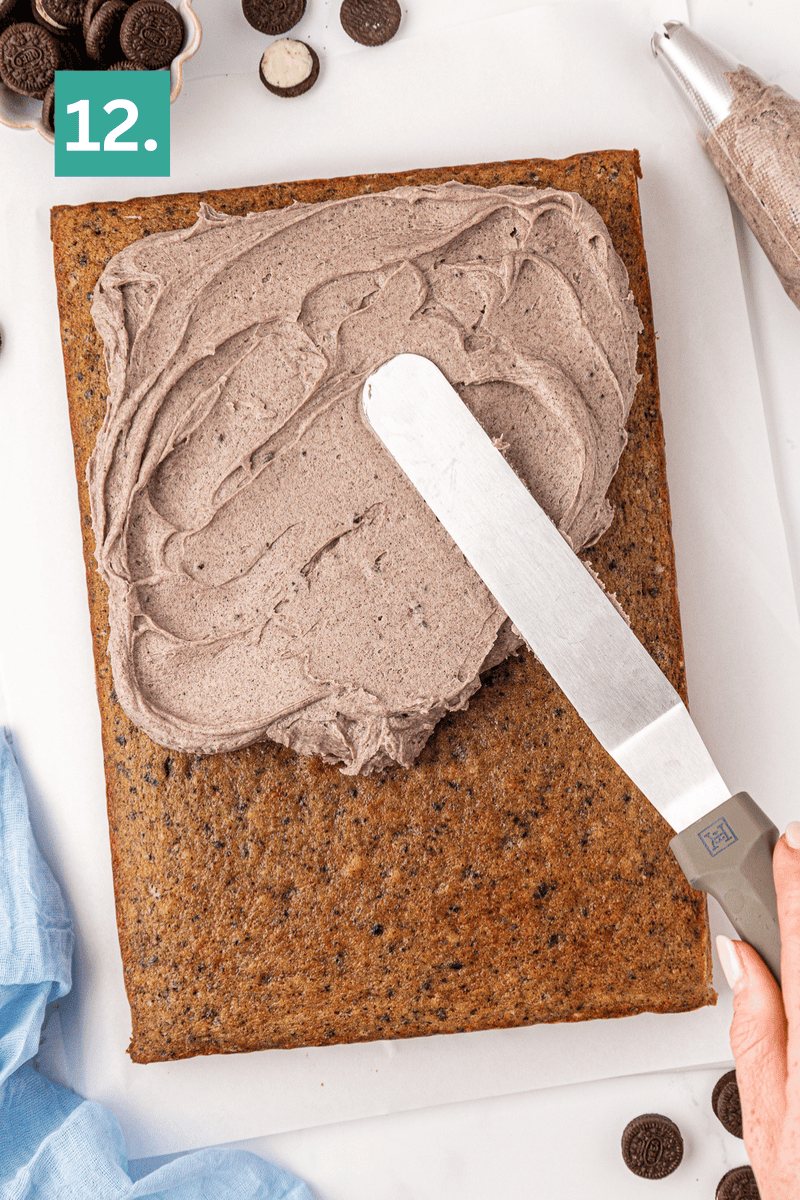
Spread: Reserve ¾ cup of frosting for decorating and spread the rest of the frosting over the cake.
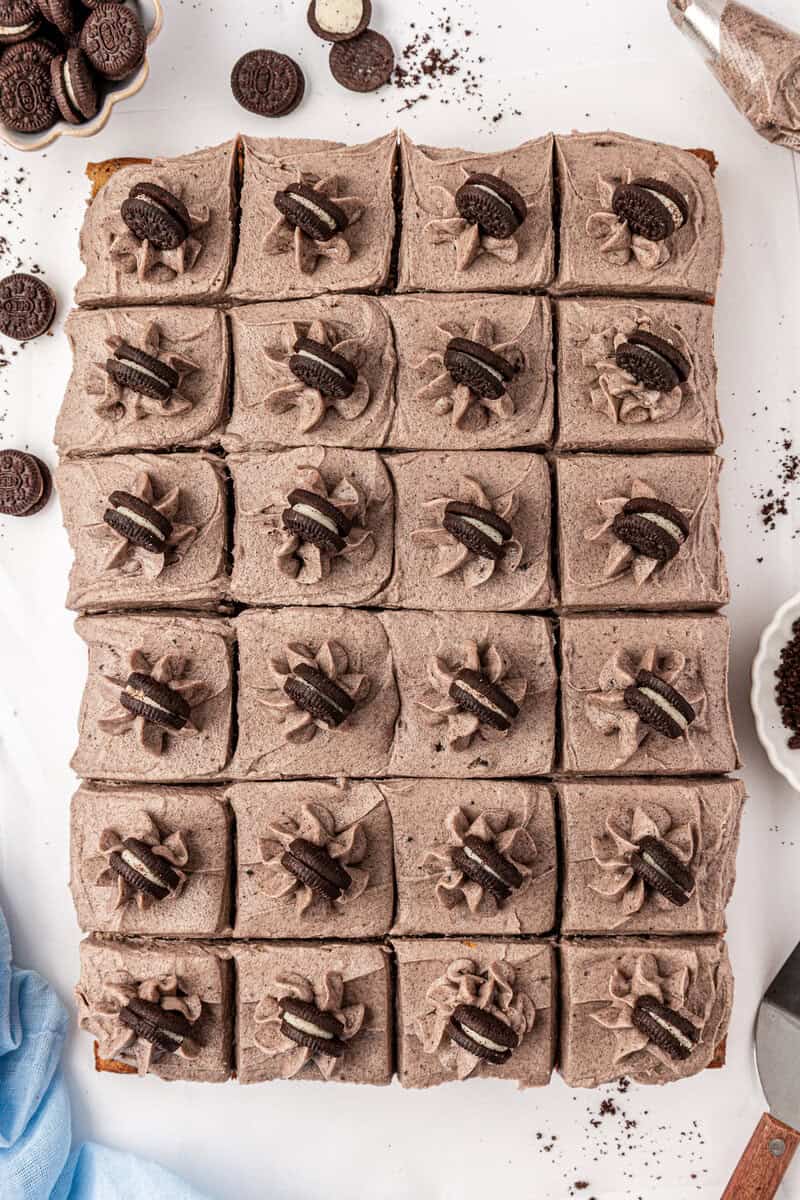
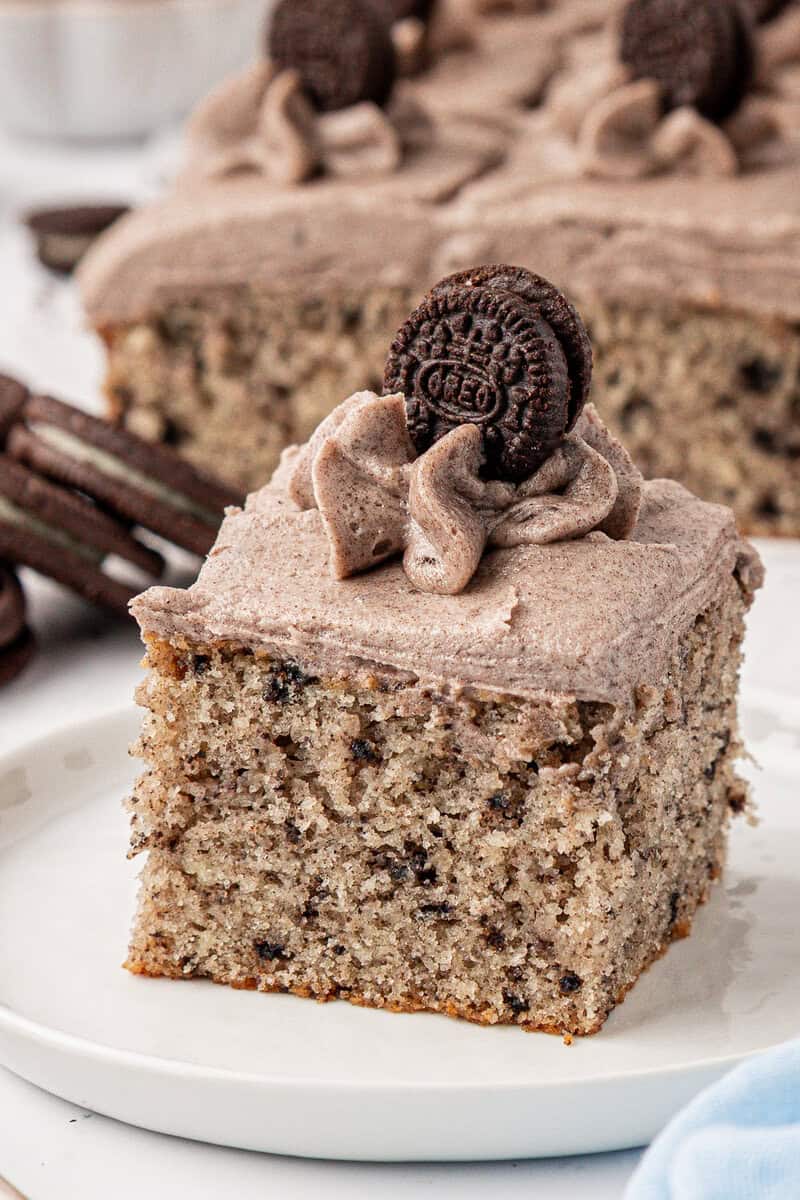
Tip: For an extra fancy presentation, after I evenly spread the oreo frosting over the cake, I lightly sprinkled oreo crumbs on the top. Then I cut the cake into squares and in the center of each piece I added a frosting swirl and a mini oreo.
How to Make the Oreo Buttercream
The key to this frosting is blending the Oreos into a fine, uniform crumbs — filling and all — before adding them to the butter base. No visible chunks. It turns the frosting a light gray-brown with dark flecks, which is exactly what cookies and cream frosting should look like.
Start with 4 cups of powdered sugar and taste before adding more — the Oreo powder adds sweetness, so you may not need the full range. Add heavy cream a tablespoon at a time until thick, spreadable, and fluffy. Before you frost the cake, set aside ¾ cup for the piping swirls on top. Much easier to do it before you spread the rest across the pan.

How to Decorate (Simple to Impressive)
The base decoration is straightforward: spread the frosting evenly across the cooled cake, then lightly sprinkle Oreo crumbs over the top. That alone looks intentional and finished.
For something that looks more polished — great for a birthday presentation — cut the cake into squares first, then add a small frosting swirl to the center of each piece using the reserved ¾ cup of frosting, and press a mini Oreo into each swirl. Decorating after cutting means every piece gets its own clean swirl, and the crumb lines are already set before you start piping. It’s a small step that makes the cake look bakery-level without much extra effort.
If you want the full layer cake experience with ganache and piped frosting, my Oreo Layer Cake is the one for celebrations.
Make-Ahead and Storage
- Make ahead: The cake layer bakes well a day ahead — cover it tightly once completely cooled and store at room temperature. Frost the day of or the day before serving.
- Room temperature: Once frosted, cover and store at room temperature for up to 2 days.
- Refrigerator: Store covered in the refrigerator for up to 5 days. Let it sit at room temperature for 20–30 minutes before serving — cold buttercream is noticeably firmer and less flavorful.
- Freezer: The unfrosted cake freezes well. Wrap tightly in plastic wrap and then foil and freeze for up to 2 months. Thaw at room temperature before frosting. I don’t recommend freezing the frosted cake — the buttercream can weep and the Oreo crumbs on top get soft.
Frequently Asked Questions
They soften slightly as the cake bakes, which is exactly what you want — they become part of the crumb rather than staying hard and crunchy. They don’t turn mushy or fall apart. You’ll get a slight cookie texture in every bite, not a crisp crunch.
Yes. The extra filling blends right into the frosting powder and adds a little more sweetness. For the batter, Double Stuf works fine — just crush them the same way.
Use a 1:1 gluten-free flour blend, such as King Arthur’s Gluten Free Measure for Measure Flour, and gluten-free Oreos. I’ve also made this recipe with gluten free flour with awesome results.
Nothing — they’re the same thing. Oreo is the brand name; cookies and cream describes the flavor. This recipe uses Oreos specifically, but the terms are used interchangeably.
Yes. A 9×13 cake is sometimes called a sheet cake (technically a quarter sheet), which just means it’s a single flat layer baked in a rectangular pan — as opposed to a layered round or square cake. Same cake, different name depending on who you ask.
More Oreo Recipes:
Tap stars to rate!
9×13 Oreo Cake (Cookies and Cream Sheet Cake)
Ingredients
Oreo Cake
- 10 oreos, crushed
- 2 ½ cups (300g) all-purpose flour
- 2 tsp baking powder
- ½ tsp baking soda
- 1 tsp salt
- ¾ cup (170g) unsalted butter, room temperature
- 1 ¾ cups (346g) granulated sugar
- ¼ cup (50g) vegetable oil
- 5 large egg whites, room temperature
- 1 cup (227g) sour cream
- ½ cup (113g) milk, I used whole milk
- 1 Tbsp clear vanilla extract
Oreo Frosting
- 10 oreos, blended into fine crumbs
- 1 ½ cups (339g) unsalted butter, room temperature
- 1 Tbsp vanilla extract
- ⅛ tsp salt
- 4-6 cups (454–681g) powdered sugar
- ¼ cup (56g) heavy cream, more as needed, can substitute milk
- Mini oreos, for decorating
Video
Instructions
Oreo Cake
- Preheat the oven to 350ºF (180ºC). Prepare a 9×13 inch pan with non-stick cooking spray or parchment paper. Set aside.
- Place the oreos in a ziploc bag and crush using a rolling pin, meat tenderizer or the bottom of a cup.
- In a small mixing bowl combine the flour, baking powder, baking soda, and salt.2 ½ cups (300g) all-purpose flour, 2 tsp baking powder, ½ tsp baking soda, 1 tsp salt
- In a large mixing bowl combine the butter, sugar, and vegetable oil, beat using an electric mixer, 1-2 minutes until fluffy.¾ cup (170g) unsalted butter, 1 ¾ cups (346g) granulated sugar, ¼ cup (50g) vegetable oil
- Add in the egg whites, sour cream, milk, and vanilla extract. Beat with the electric mixer.5 large egg whites, 1 cup (227g) sour cream, ½ cup (113g) milk, 1 Tbsp clear vanilla extract
- Gradually add the flour mixture and the crushed oreos to the wet ingredients, mixing just until the flour is incorporated.10 oreos
- Pour the batter into the prepared pan and spread evenly with a spatula.
- Bake for 32-39 minutes or until a toothpick inserted into the center comes out clean. Light pans take longer to bake than dark pans.
- Allow the cake to cool completely before frosting.
Oreo Frosting
- Place the oreos in a ziploc bag and crush using a rolling pin, meat tenderizer or the bottom of a cup. Alternatively, place the oreos in a food processor or blender, pulse into crumbs. The oreos that go into the frosting should be finer than the oreos in the cake, but small pieces are okay!
- In a mixing bowl, combine the butter, vanilla extract and salt, beat using an electric mixer until fluffy, 1-2 minutes.1 ½ cups (339g) unsalted butter, 1 Tbsp vanilla extract, ⅛ tsp salt
- Gradually add 4 cups of powdered sugar mixing on low until combined.4-6 cups (454–681g) powdered sugar
- Add in ¼ cup of heavy cream, beating on high until the frosting is whipped and fluffy.¼ cup (56g) heavy cream
- Taste to determine if you want more powdered sugar. Mix in the crushed oreos.10 oreos
- Reserve ¾ cup of frosting for decorating and spread the rest of the frosting over the cake.
- For an extra fancy presentation, after I evenly spread the oreo frosting over the cake, I lightly sprinkled oreo crumbs on the top. Then I cut the cake into squares and in the center of each piece I added a frosting swirl and a mini oreo.Mini oreos
Notes


Why when I go to print the picture is not on the recipe?
Hi Christi! We decided to not include a photo when printing the recipe as to not use up more printer ink!
What tip did you use to top the cake off with?
The swirl is using the wilton 1M tip!
Can this recipe be used for cake Pops
Yep! Sounds like it would be delicious.
Can we do this without an electric mixer?
Hi Marie! Do you have a hand mixer? It’s important to beat the butter and sugar together well.
For the crushed oreos, are you using the whole cookie or removing the filling?
The whole cookie with the filling!
could we get fine oreo crumbs from a blender
Yes! A blender works great for that!
Hi Beth
Thanks for the recipe.
How many days does the Oreo cake stay fresh and moist?
Can I bake it 2 days before my sons party?
For the best and freshest cake, I would recommend baking it the day of. The day before the party would be okay, but I don’t recommend 2 days before!
It turned out amazing! Thanks for the recipe. Made it for my daughter’s birthday and everyone thought I bought it from a store.
I made this Cake for my daughters 25th birthday .She’s a picky eater(autism). We all love this cake and she could not get enough! The texture and taste is beyond and each day the leftovers got even better. BRAVO BETH