
This post may contain affiliate links. Please read our disclosure policy.
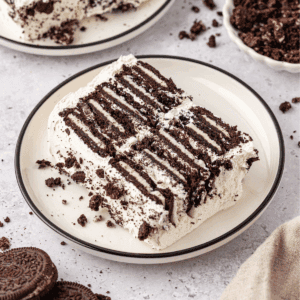
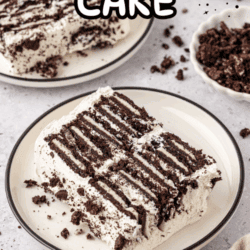
No-bake, no fuss, just pure cookies-and-cream magic! This Oreo icebox cake is a recipe I’ve tested and trusted for years. Minimal effort, maximum crowd-pleasing payoff.
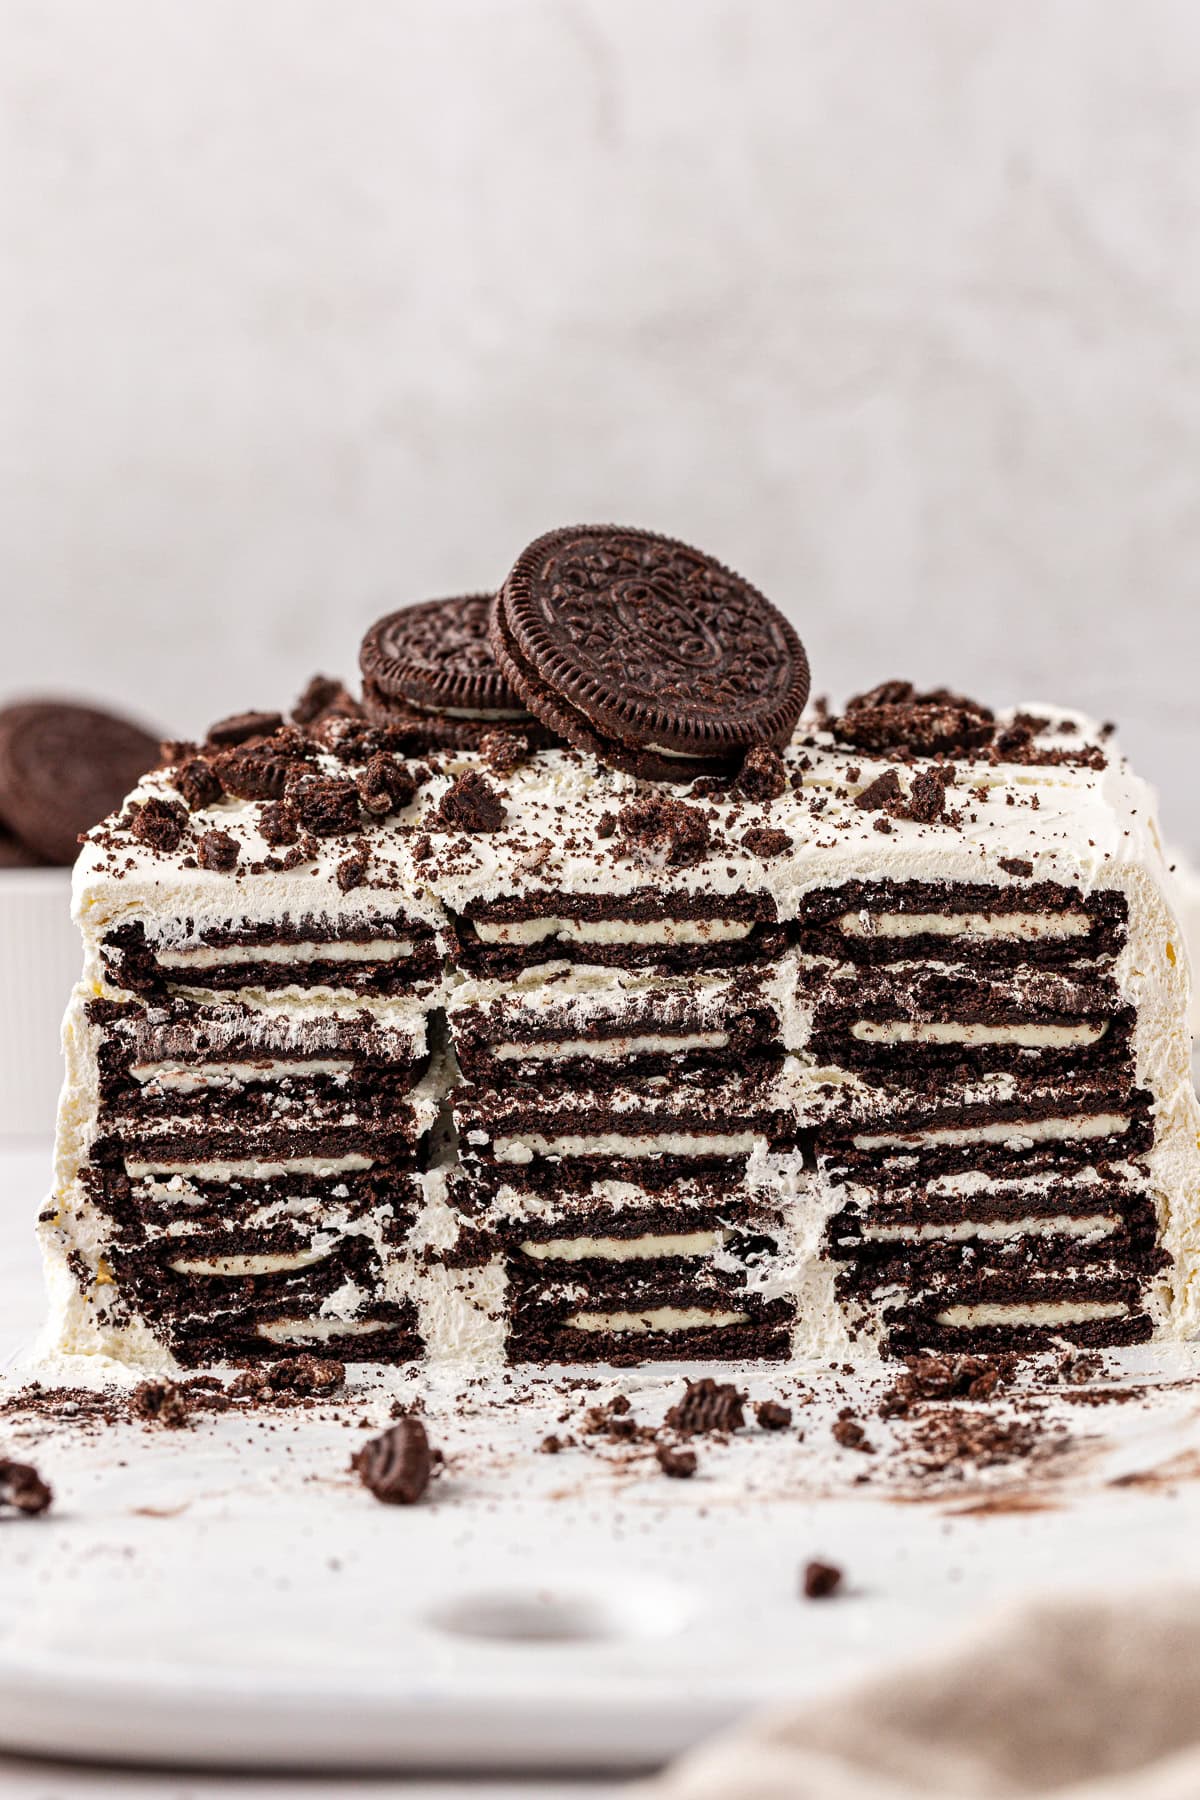
This no-bake Oreo icebox cake is proof that you don’t need a mixer or even an oven to make a dessert everyone will rave about. I’ve made icebox cakes for years, and I’ve tested all kinds of combinations, but this one takes the crown. Why? Because we’re using America’s favorite cookie: Oreos.
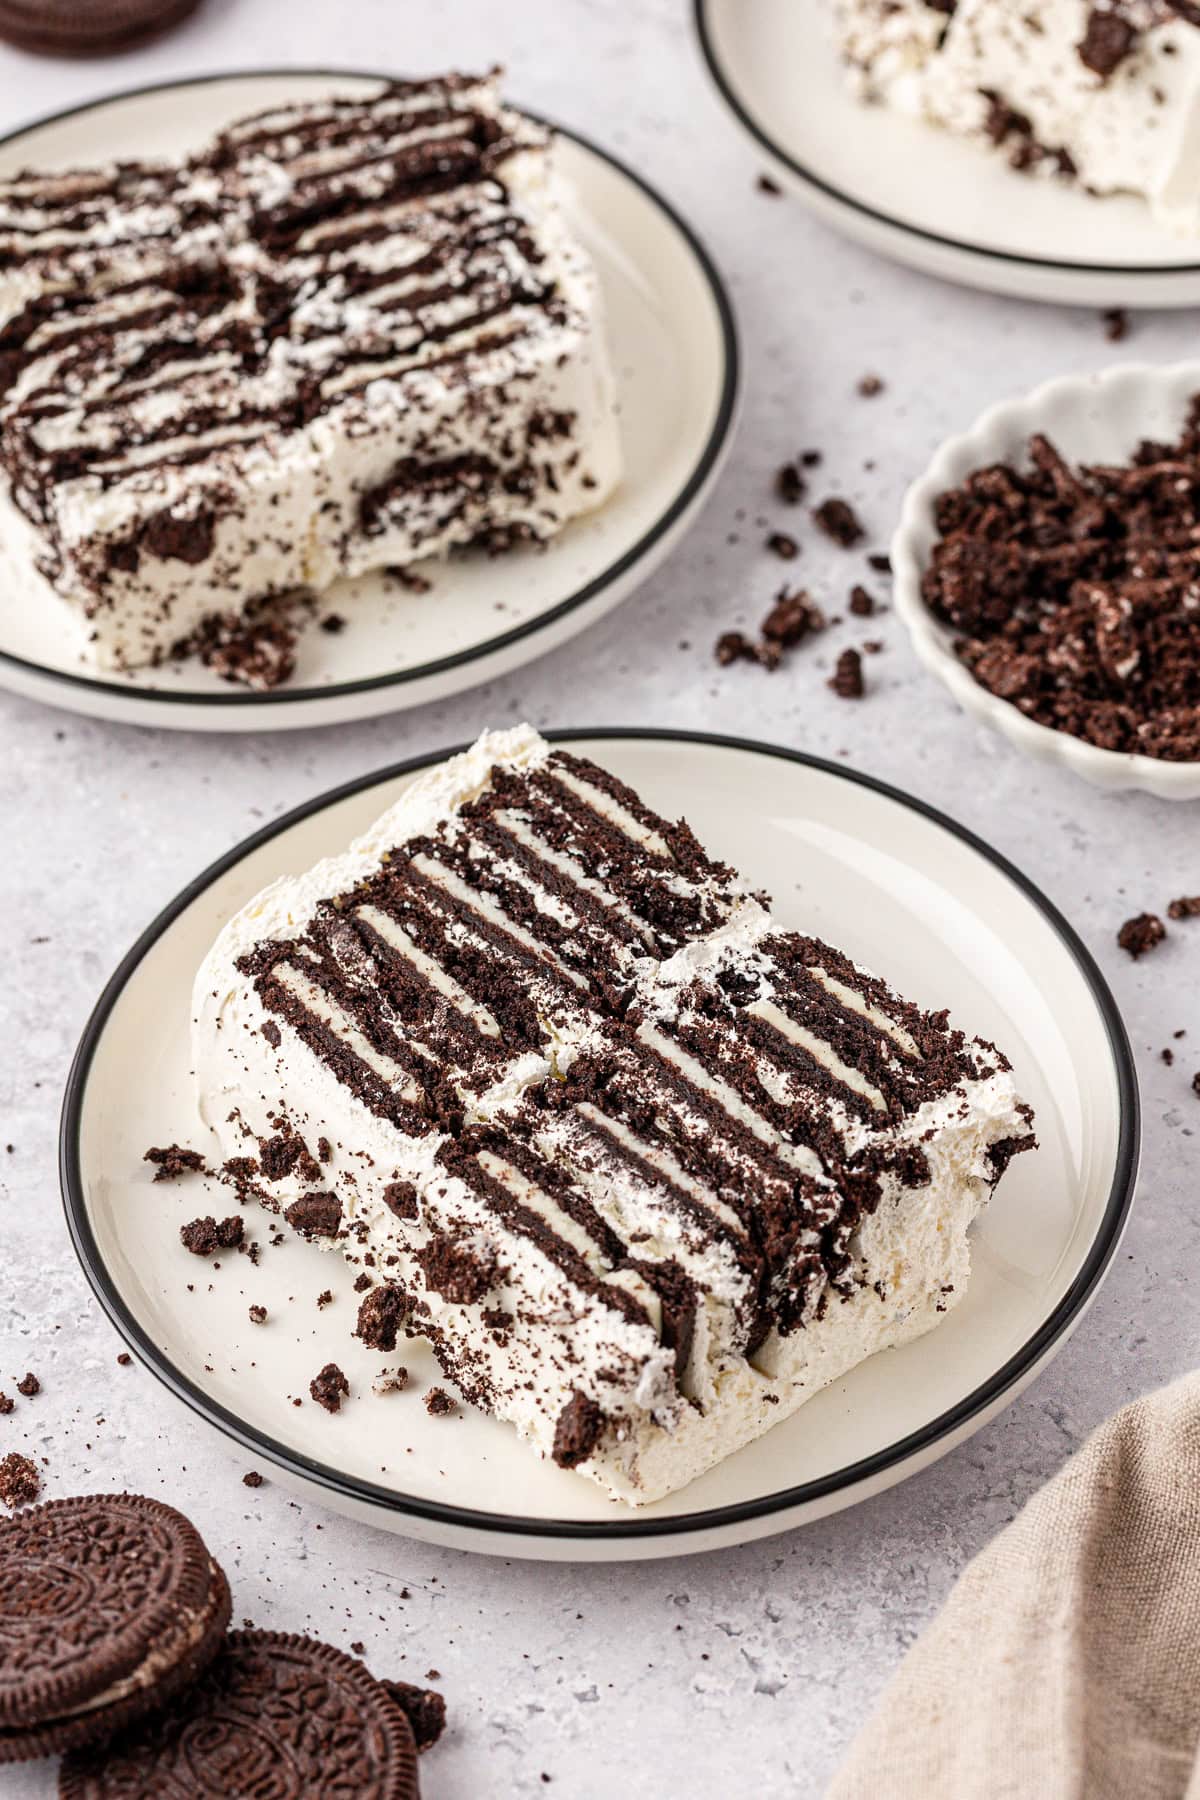
With just three ingredients and a little time in the fridge, you’ll get a chilled, sliceable cake with perfectly softened layers and a nostalgic cookies-and-cream flavor that tastes way more impressive than the effort involved. I’ve carefully tested the ratios to make sure the texture is just right. Each cookie layer softens to the consistency of cake, with Cool Whip acting as the creamy, dreamy frosting.
If you’ve ever doubted that a no-bake dessert could be showstopping, this is the one that changes your mind. Whether you’re a beginner baker or just don’t want to turn on the oven, this Oreo icebox cake delivers every time and it’s a recipe you’ll come back to all summer long.

Why do they call it an Icebox Cake?
The classic icebox cake got its name back in the 1920s and ’30s when people used iceboxes (think before refrigerators) to keep food cold. These no-bake desserts were made by layering cookies or wafers with whipped cream, then chilling them in the icebox. As they sat, the cookies softened into a cake-like texture. The name stuck, and even though we now use modern refrigerators, we still call them icebox cakes.
How to Make Icebox Cake
Follow my easy steps to make a no bake icebox cake like a pro:
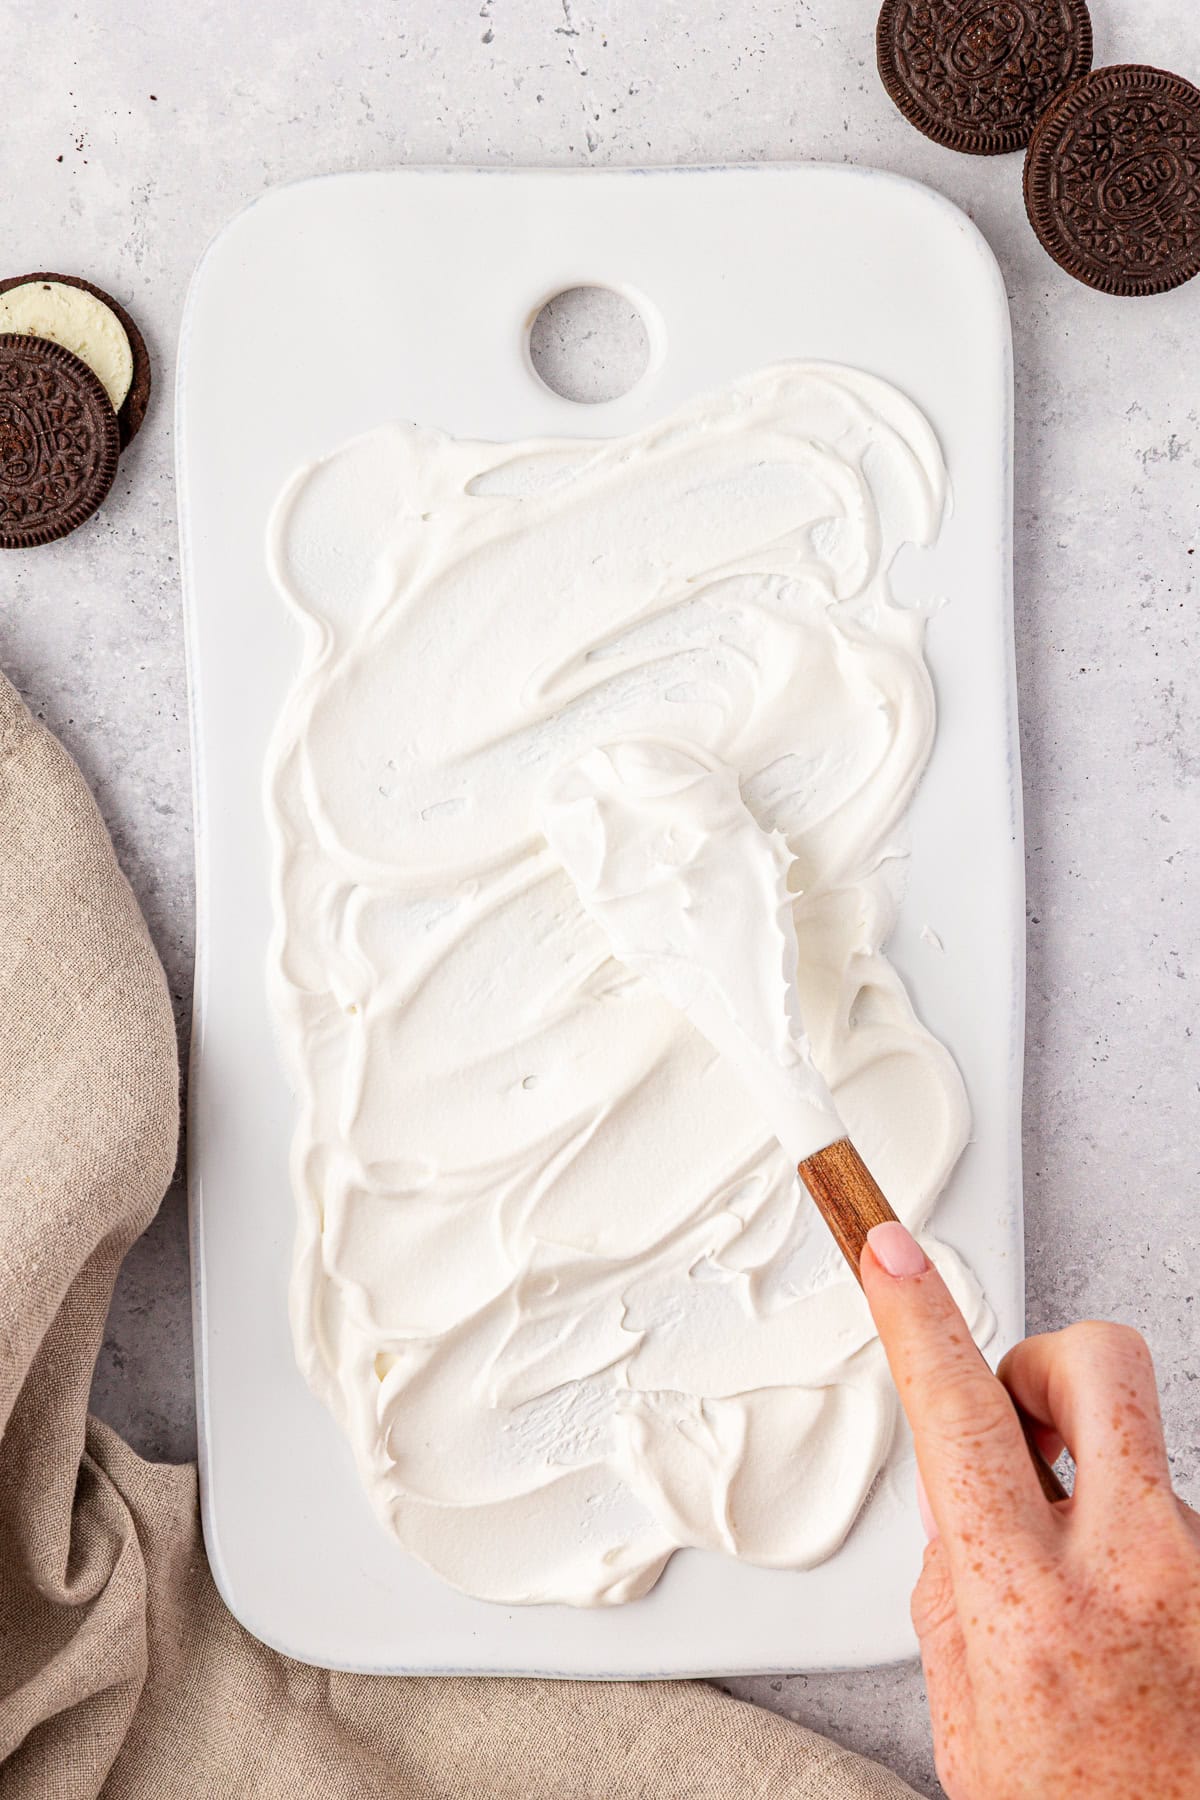
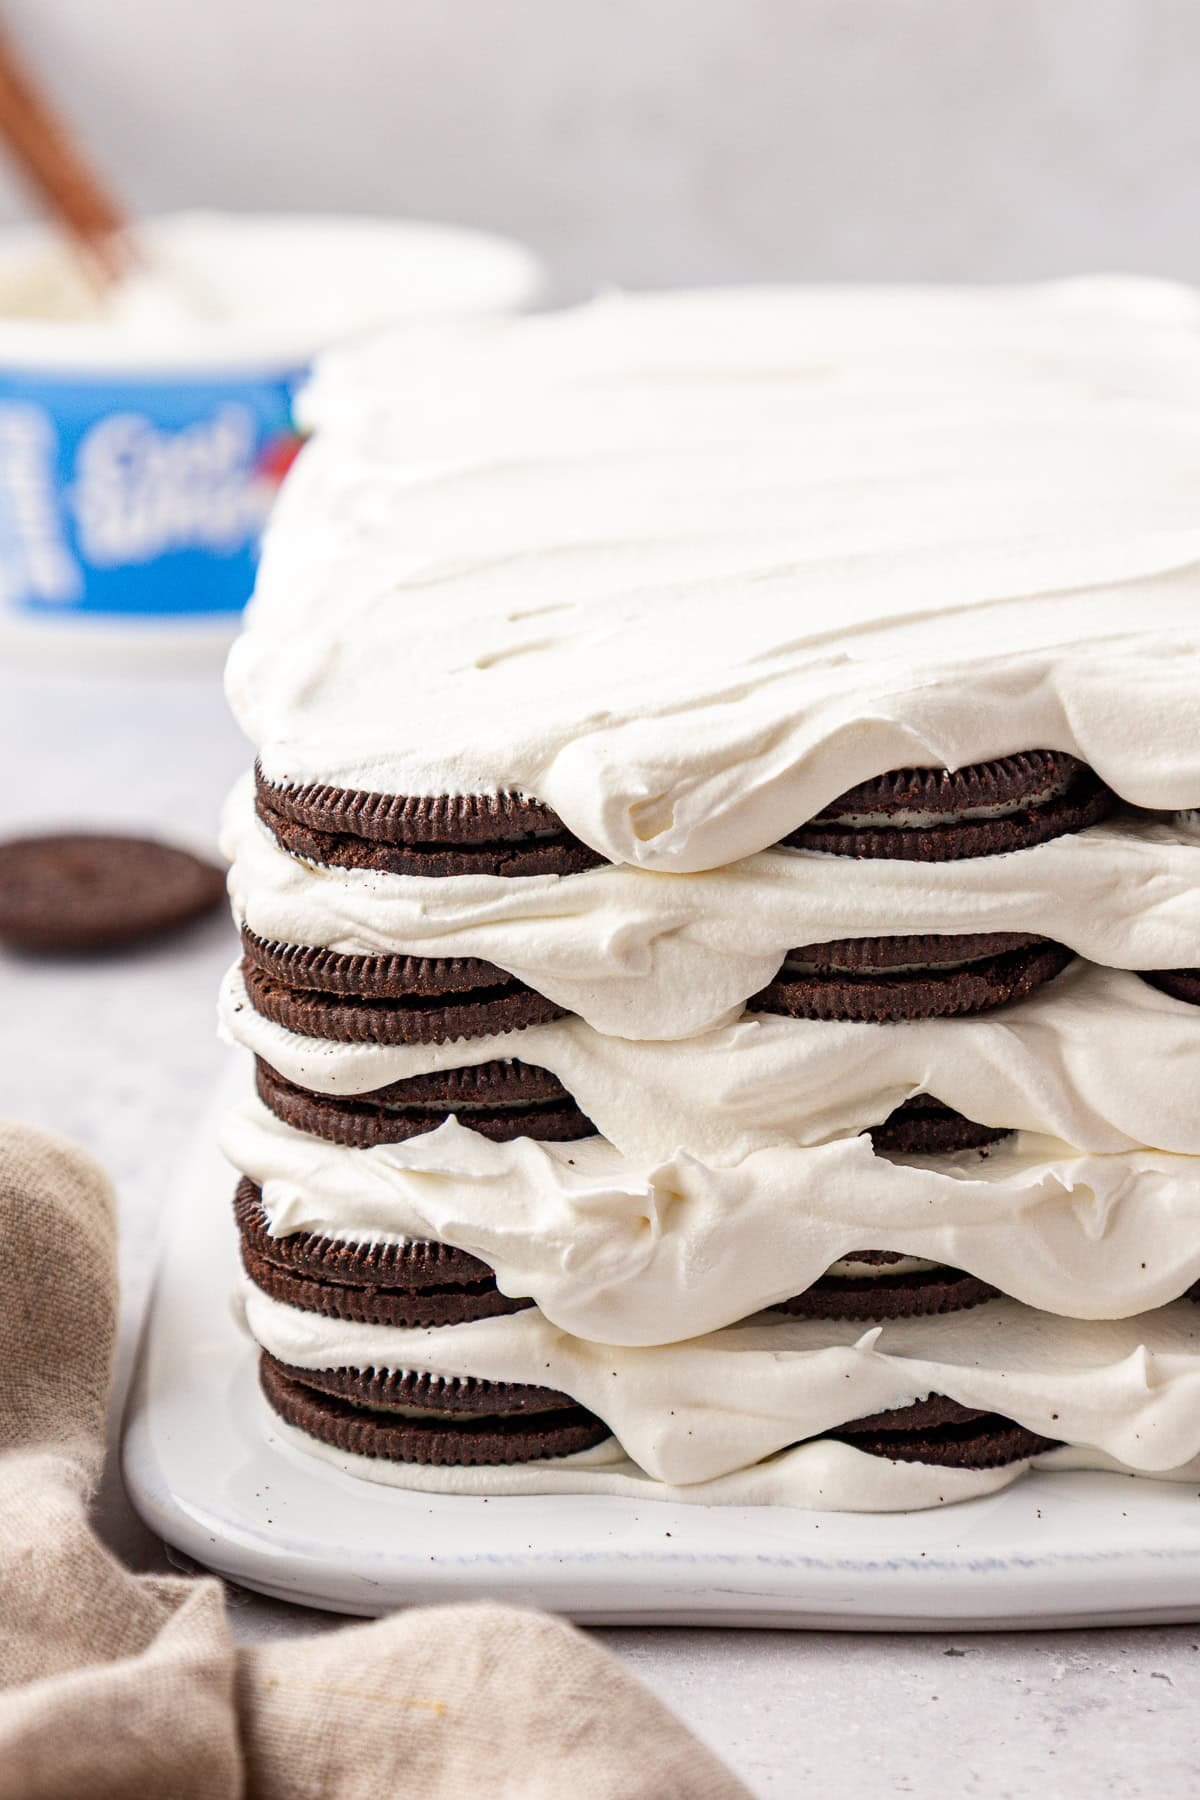
- Spread Cool Whip. On a serving platter, spread a small amount of Cool Whip in a rectangular shape—this will help hold the first layer in place.
- Dip oreos in milk. Place the milk in a container – you will dip each oreo in the milk before assembling. This will help soften the cookie, otherwise the oreos will still be crunchy after refrigerating.
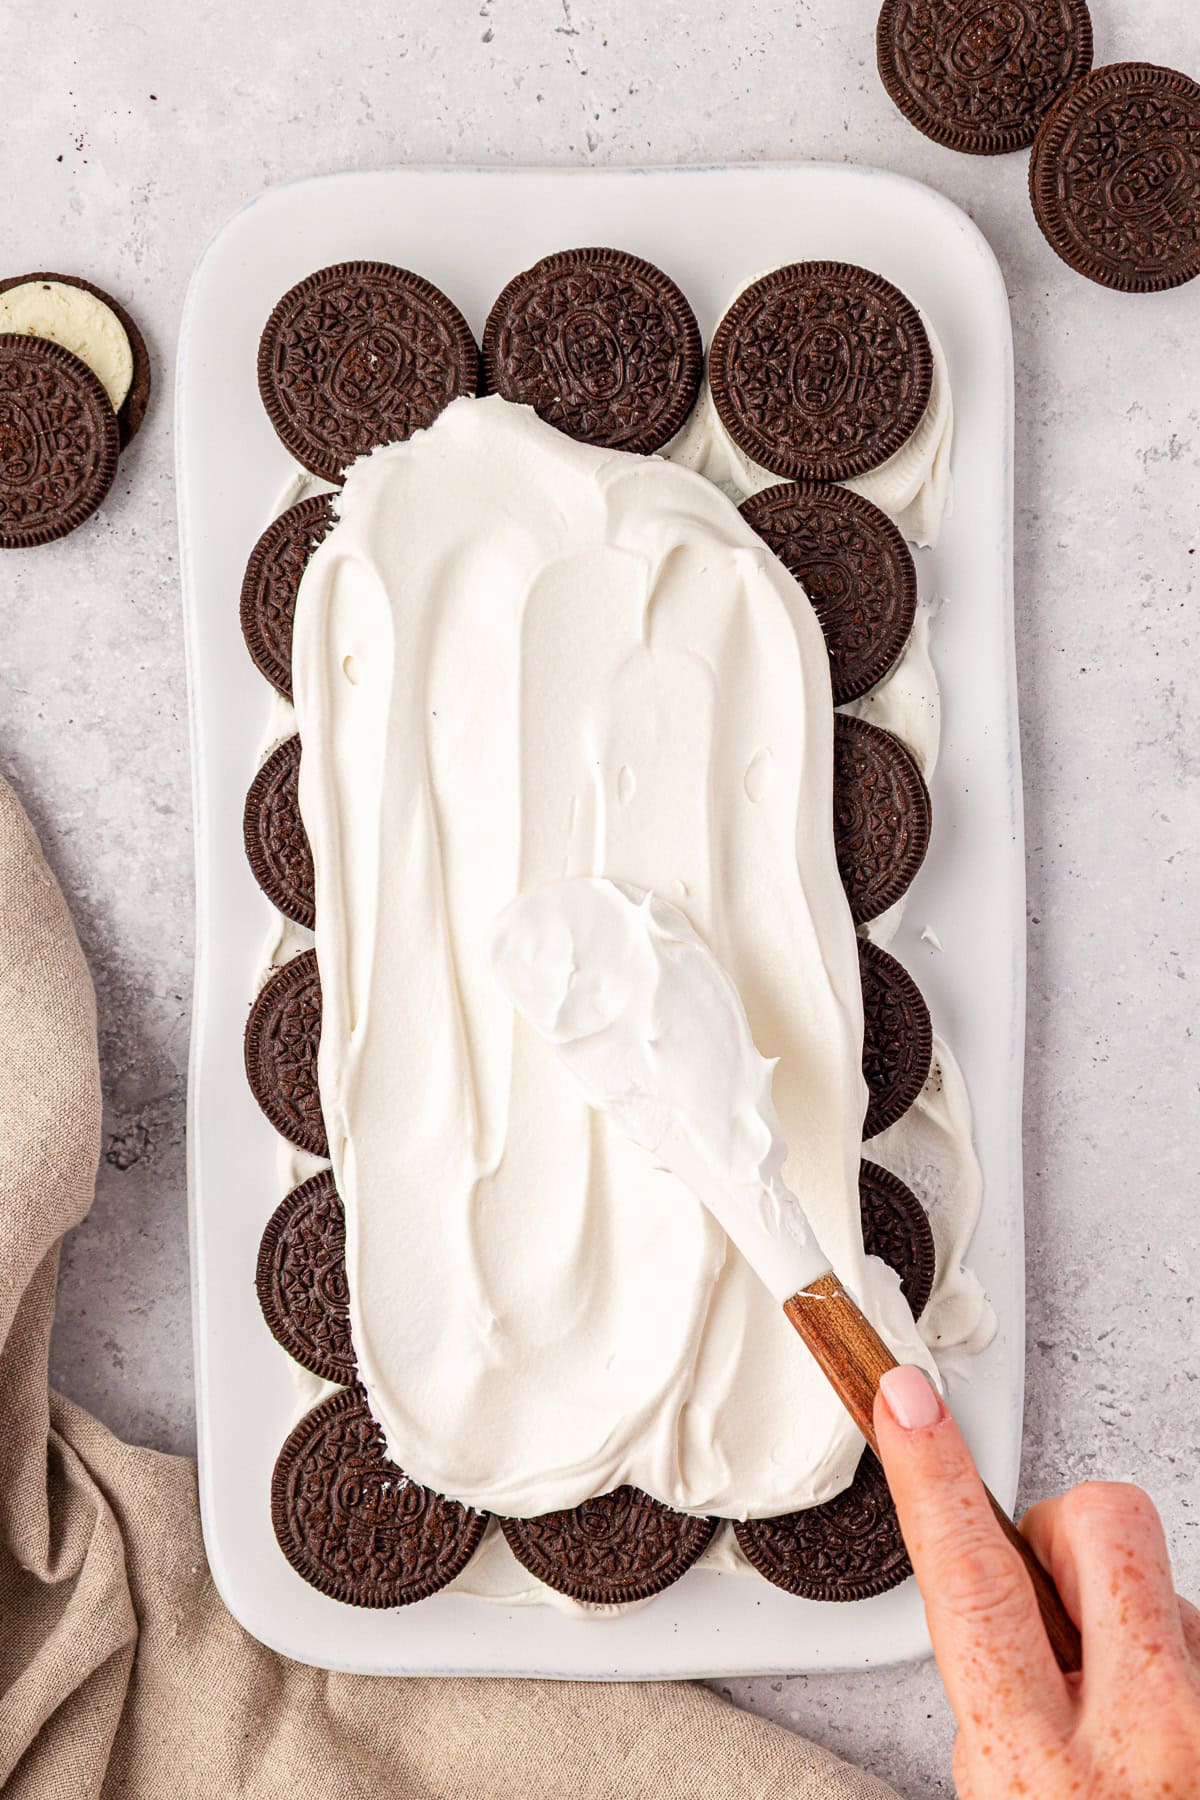
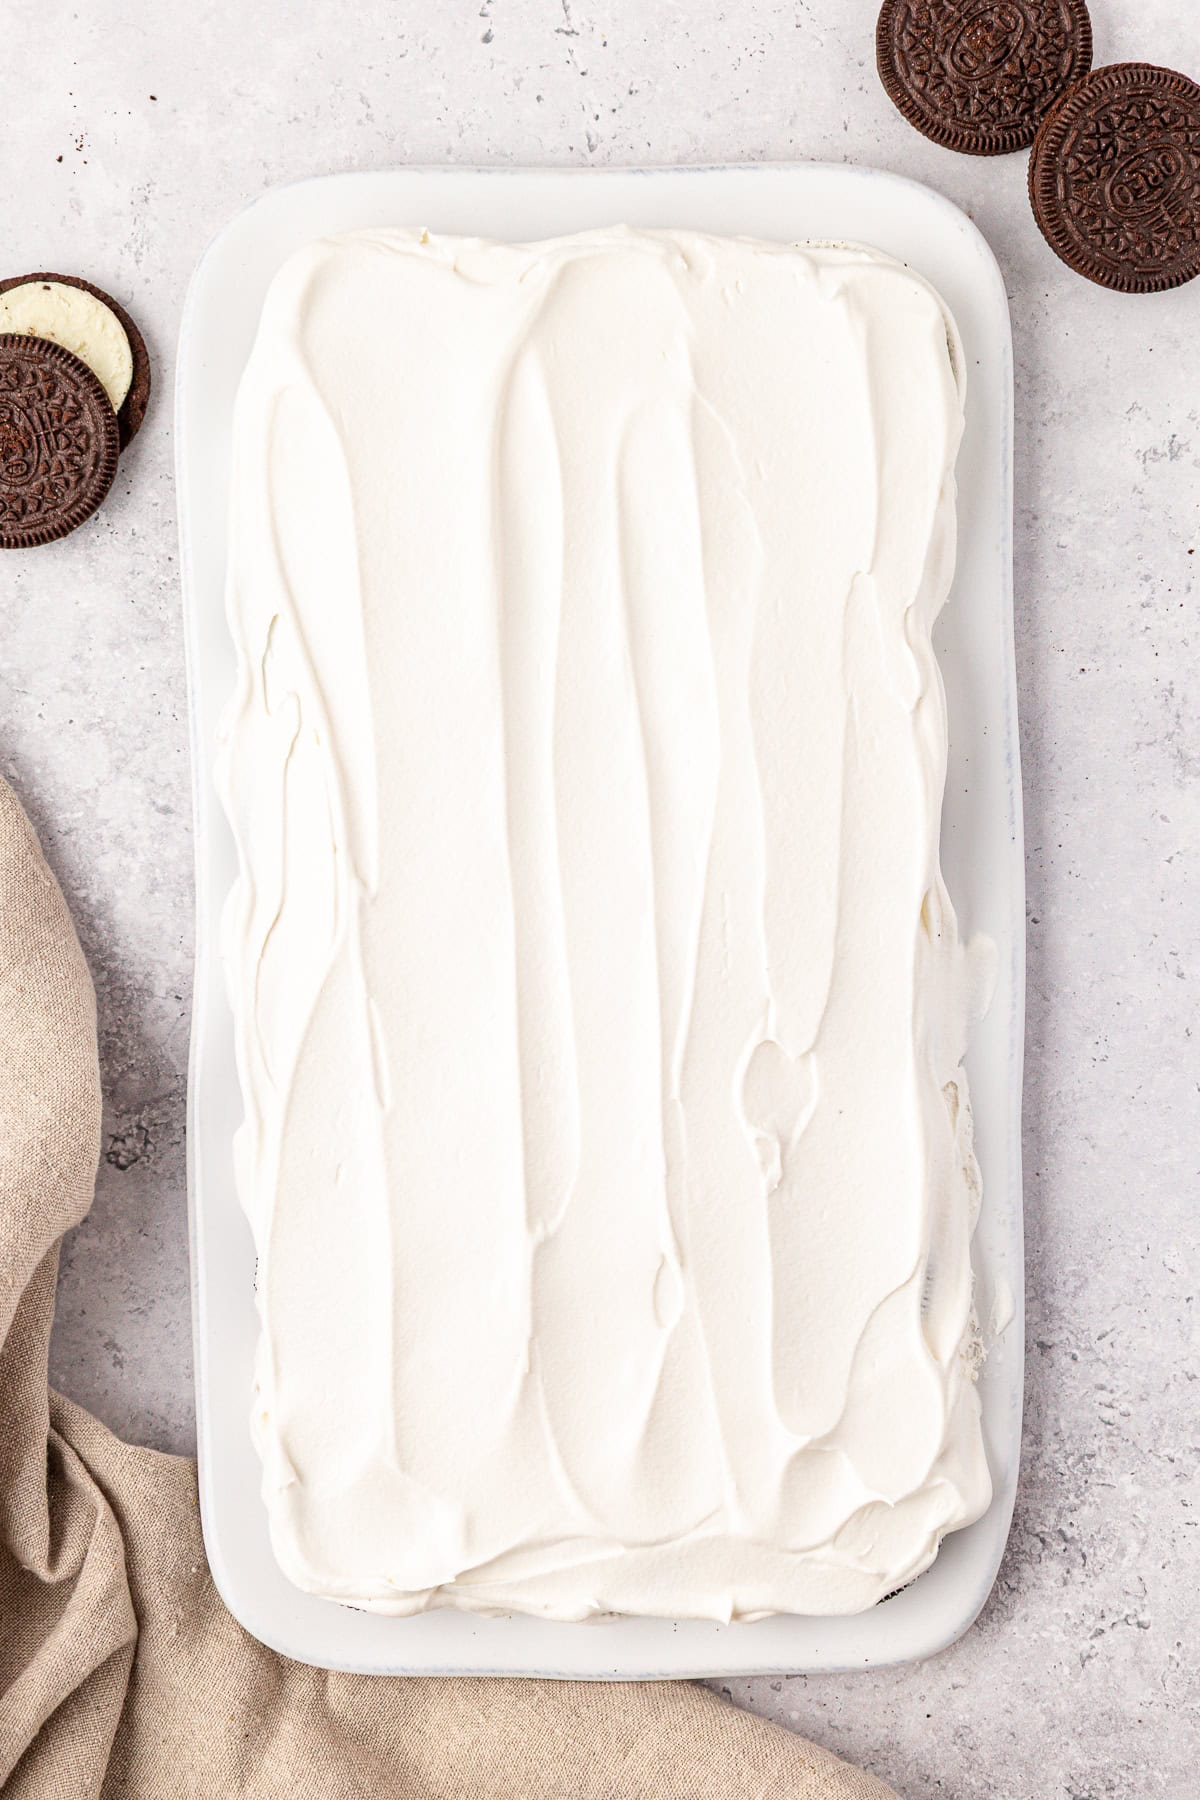
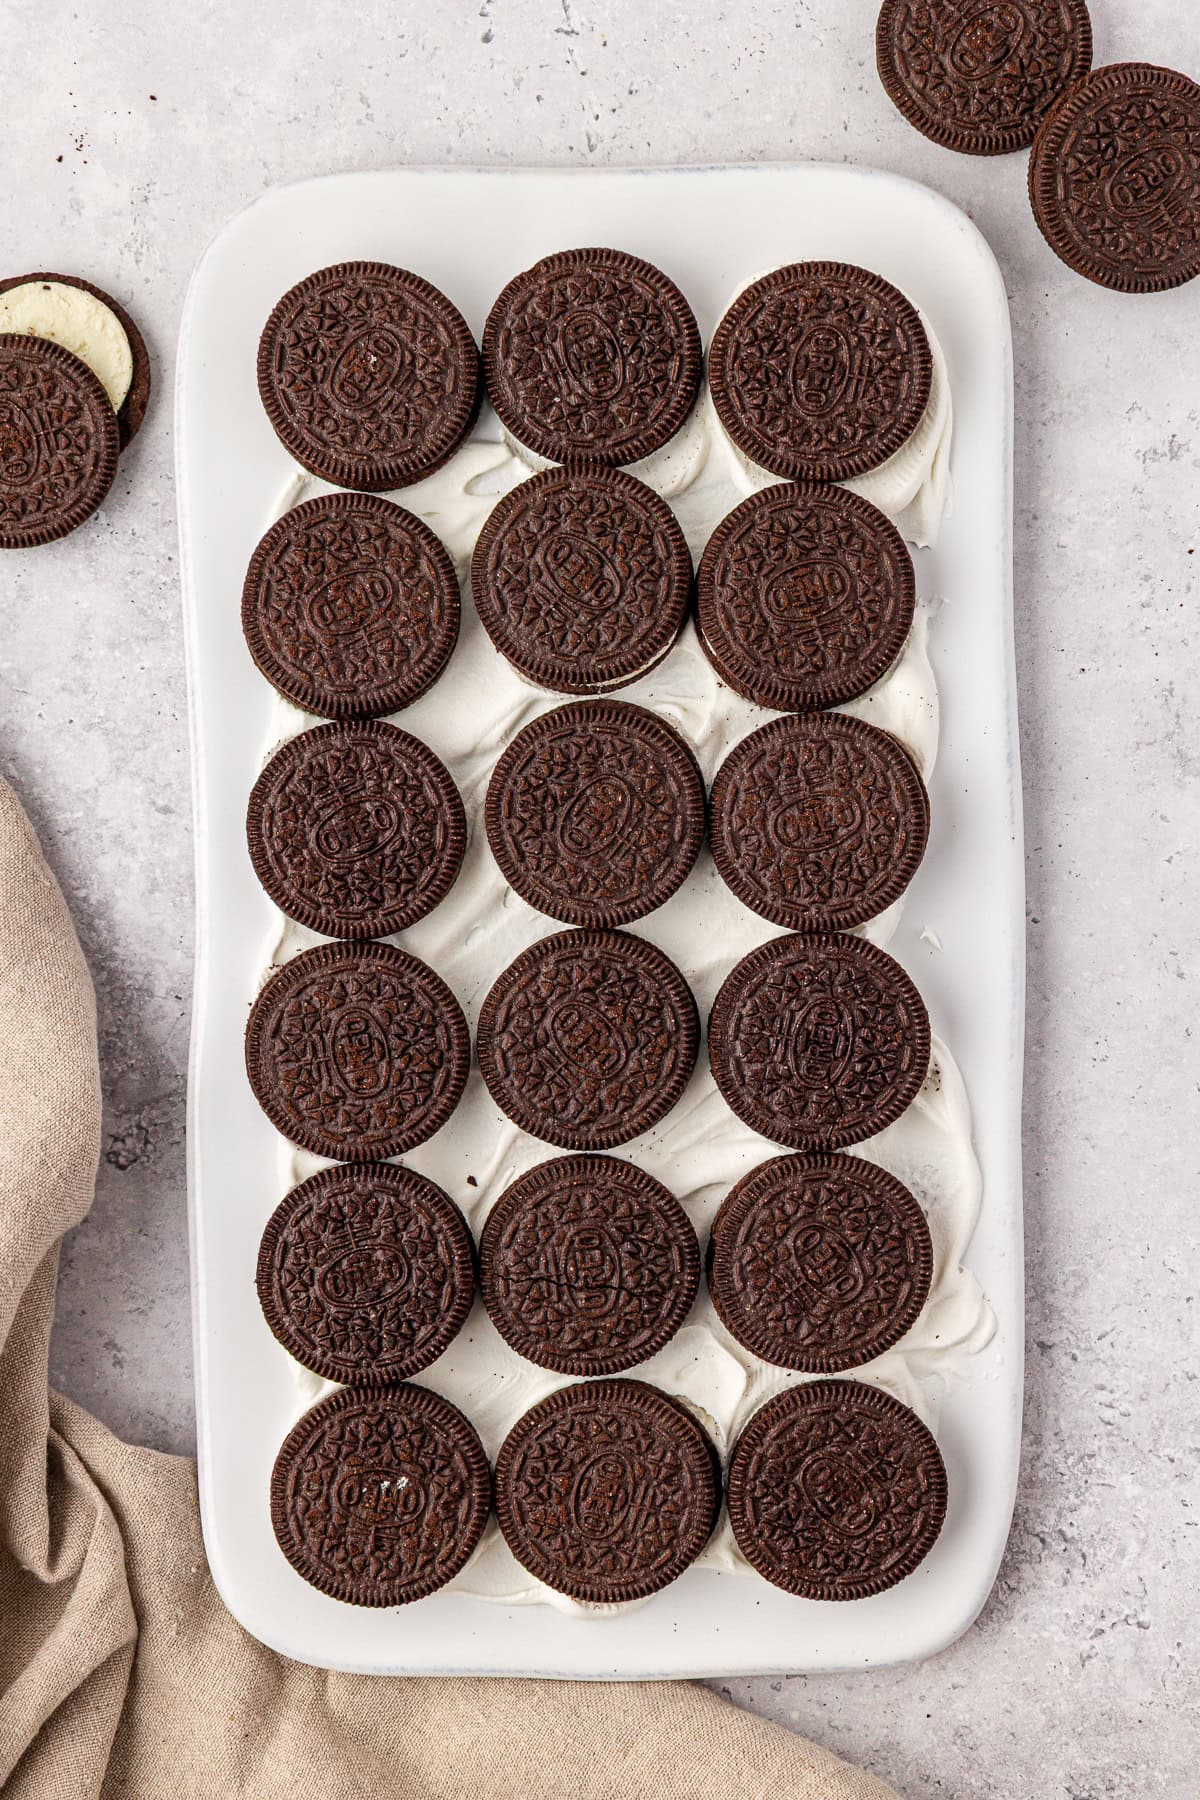
- Layer oreos and Cool Whip. Arrange 18 Oreos on top of the cool whip in a 3×6 rectangle. Spread a layer of Cool Whip over the Oreos to cover them completely.
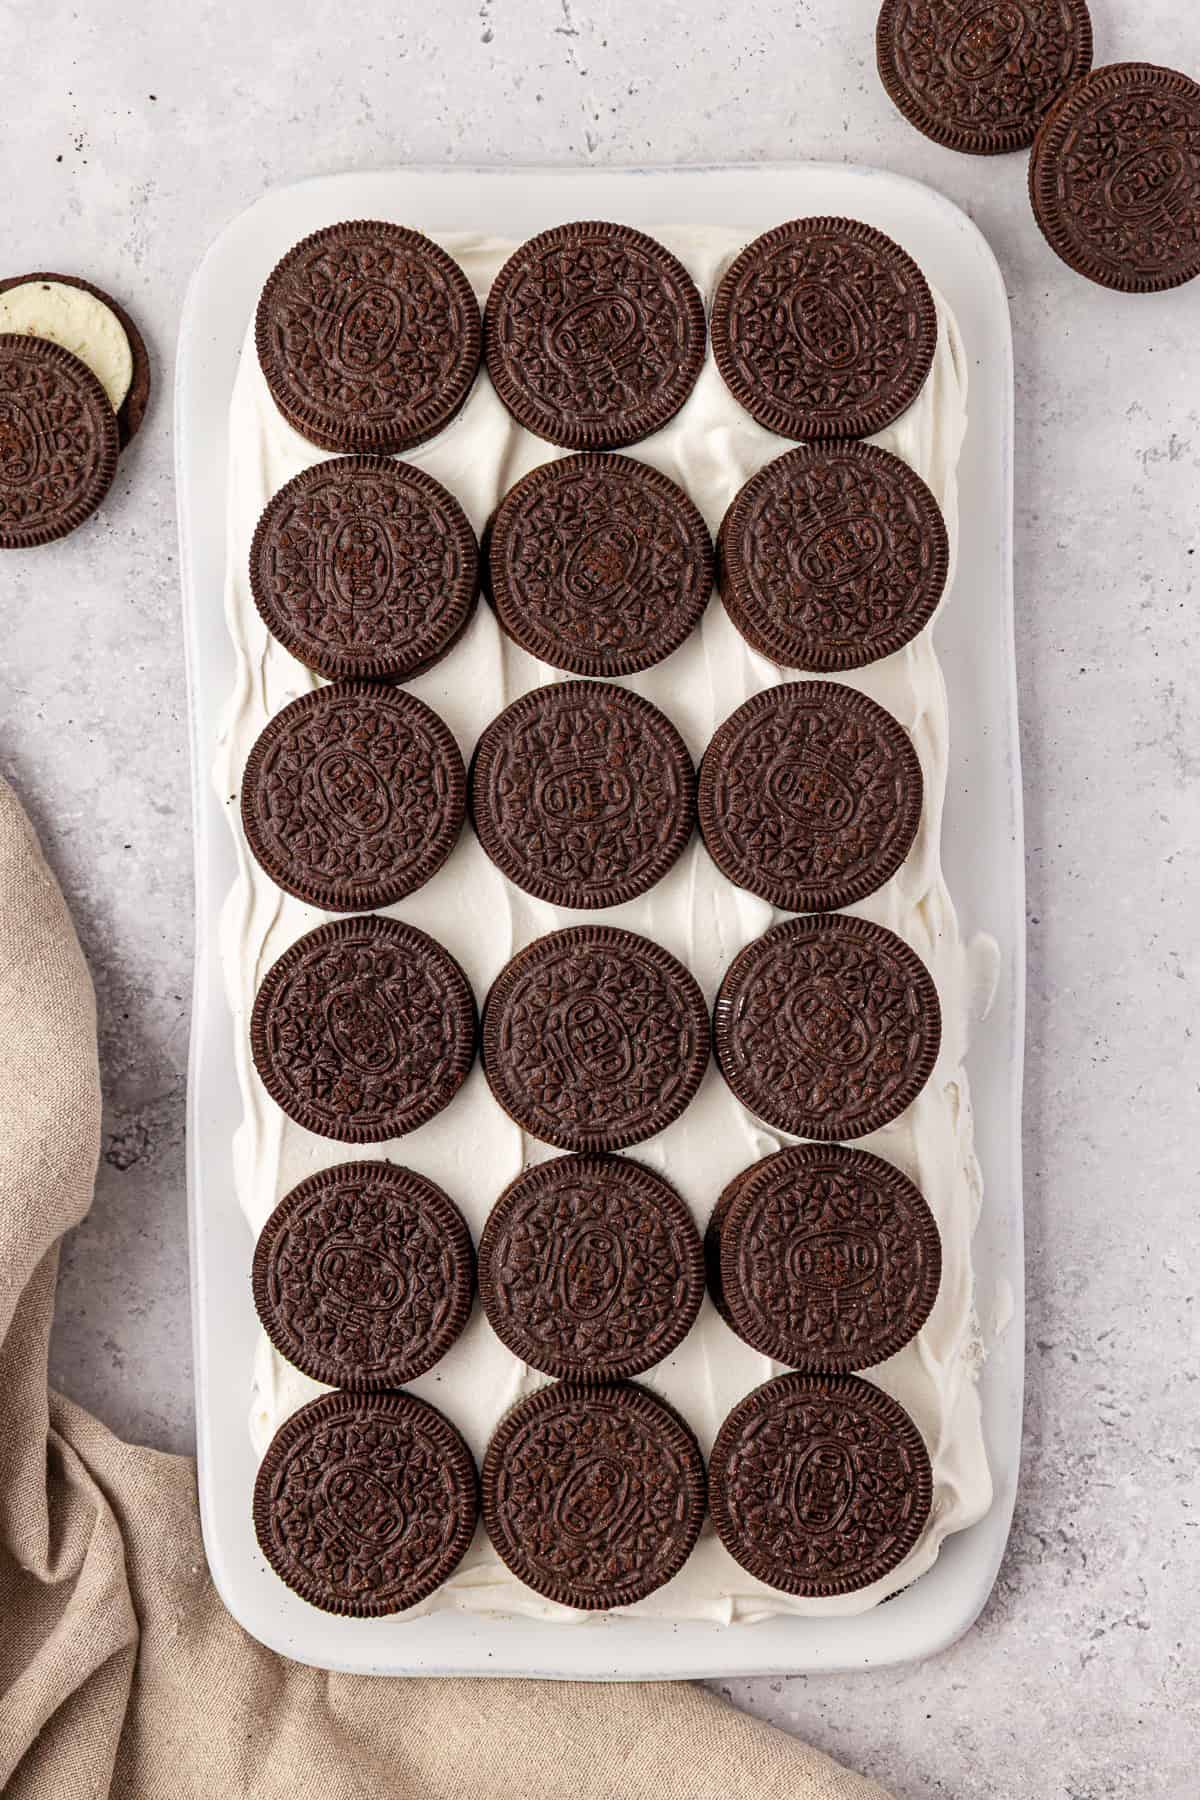
- Repeat the process, dipping oreos in milk and alternating layers of Oreos and Cool Whip.
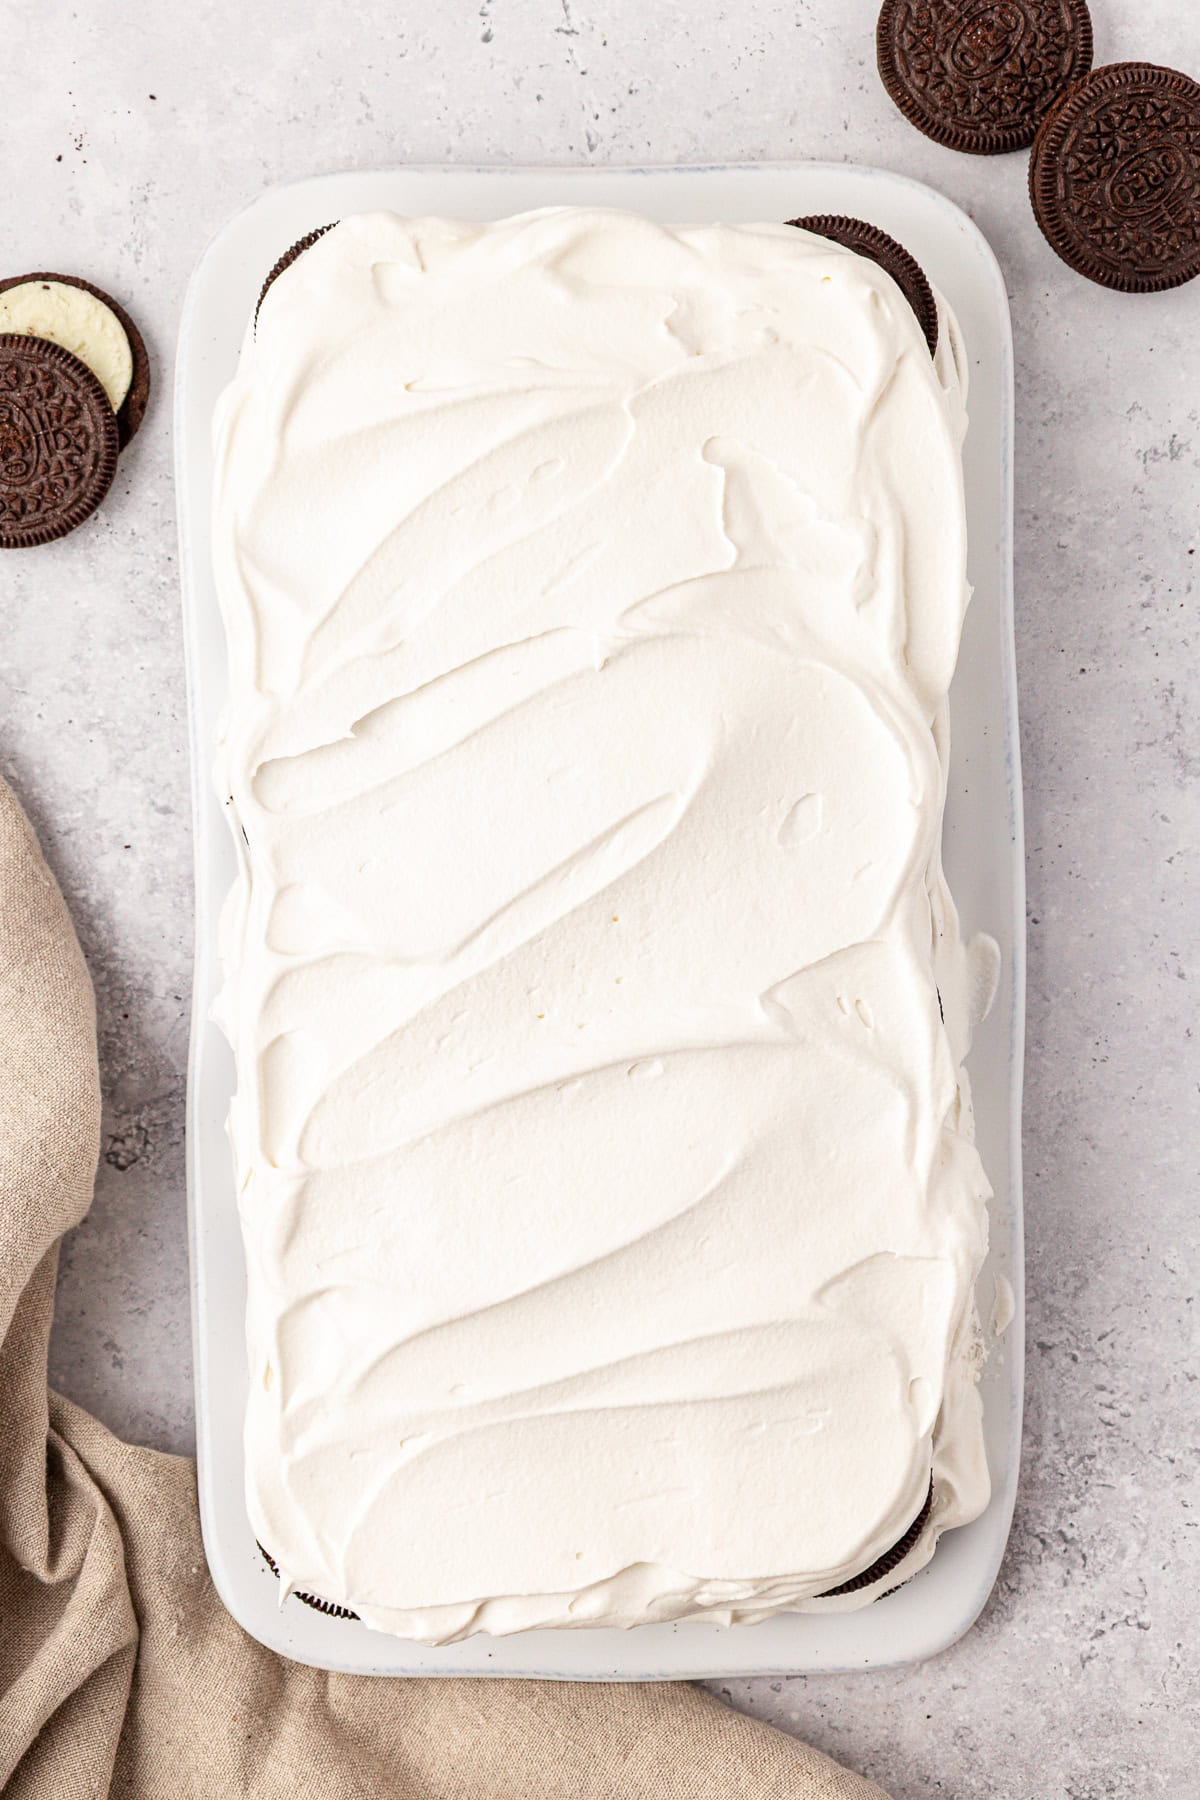
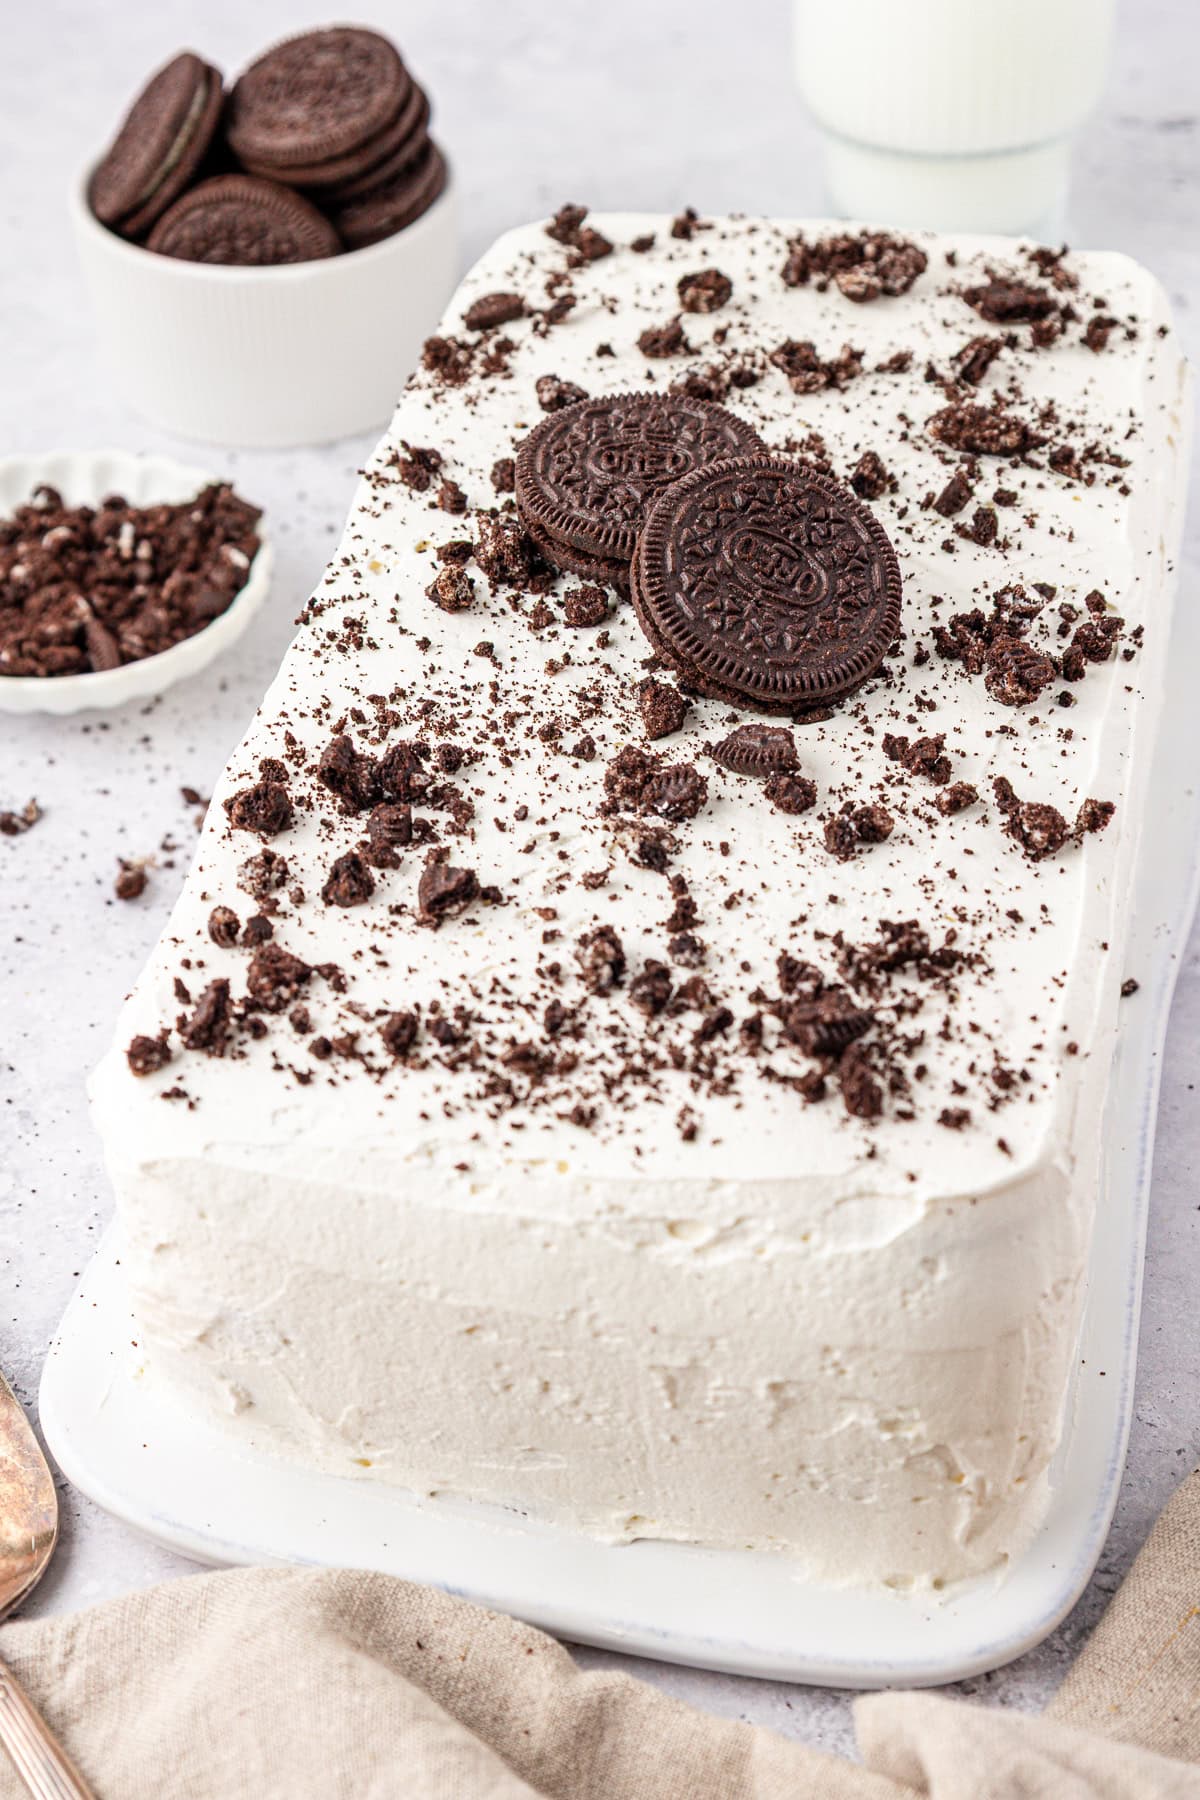
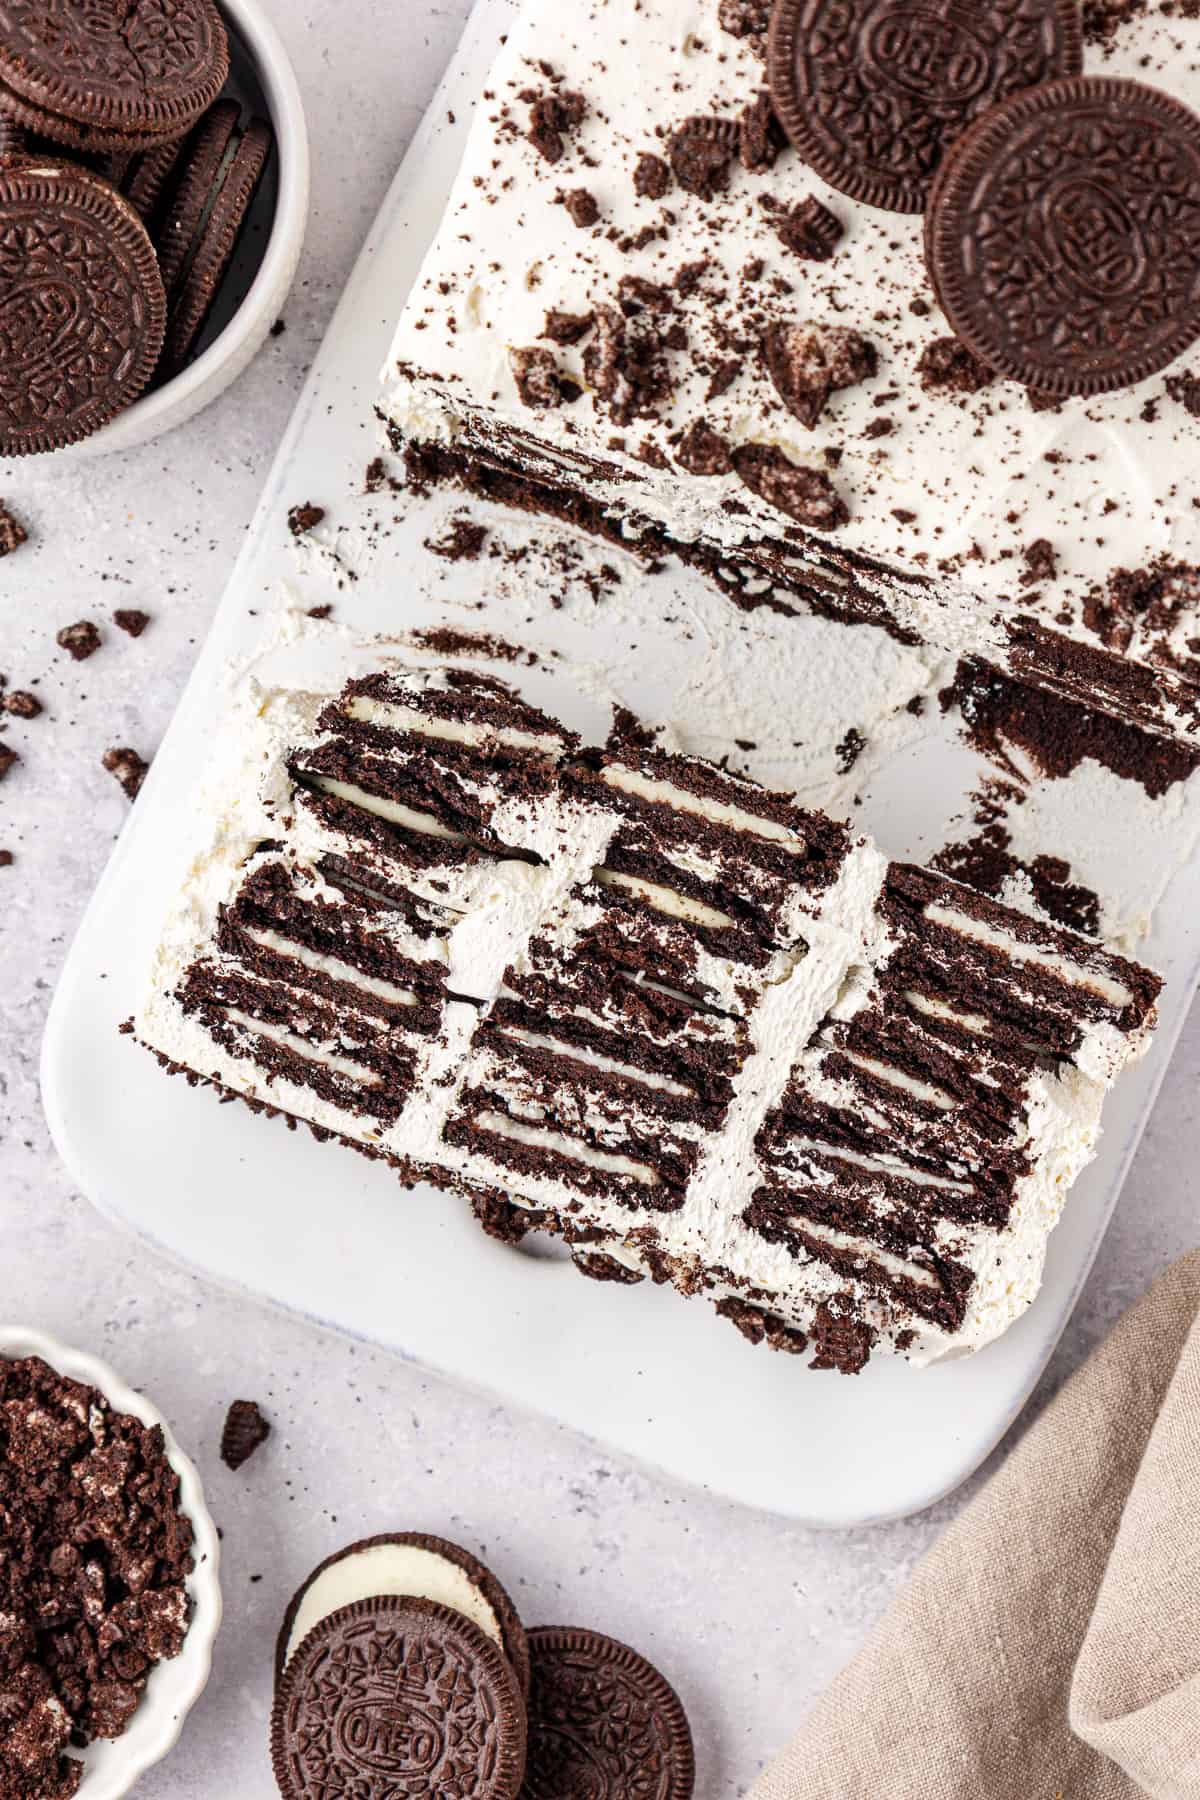
- Top and chill. Once all layers are assembled (I got 5 layers of Oreos), cover the entire cake with a final layer of Cool Whip. Refrigerate for at least 9 hours to allow the cookies to soften. Before serving, add crushed oreos, chocolate sauce or chocolate shavings.
Variations & Substitutions
If you want to change up this recipe, it’s easy to customize. Here are some ideas:
- Change the cookies: You could swap the oreos for layers of graham crackers, chocolate graham crackers, vanilla wafers, or biscoff cookies.
- Get creative with the garnish: You can top the cake with anything you like. Some ideas are chocolate chips, chocolate curls, sprinkles, or fresh fruit.
How to Store Icebox Cake
To store icebox cake, cover it tightly with plastic wrap or place it in an airtight container and keep it in the refrigerator. It will stay good for 3–4 days, but the layers will continue to soften over time.
Another perk to this no bake dessert recipe is that you can freeze it! First, wrap it tightly in plastic wrap and then in aluminum foil, or store it in a freezer-safe container. It will keep well for up to 3 months. When ready to serve, let it thaw in the fridge for a few hours or overnight.
More No-Bake Dessert Recipes
Tap stars to rate!
Icebox Cake Recipe
Ingredients
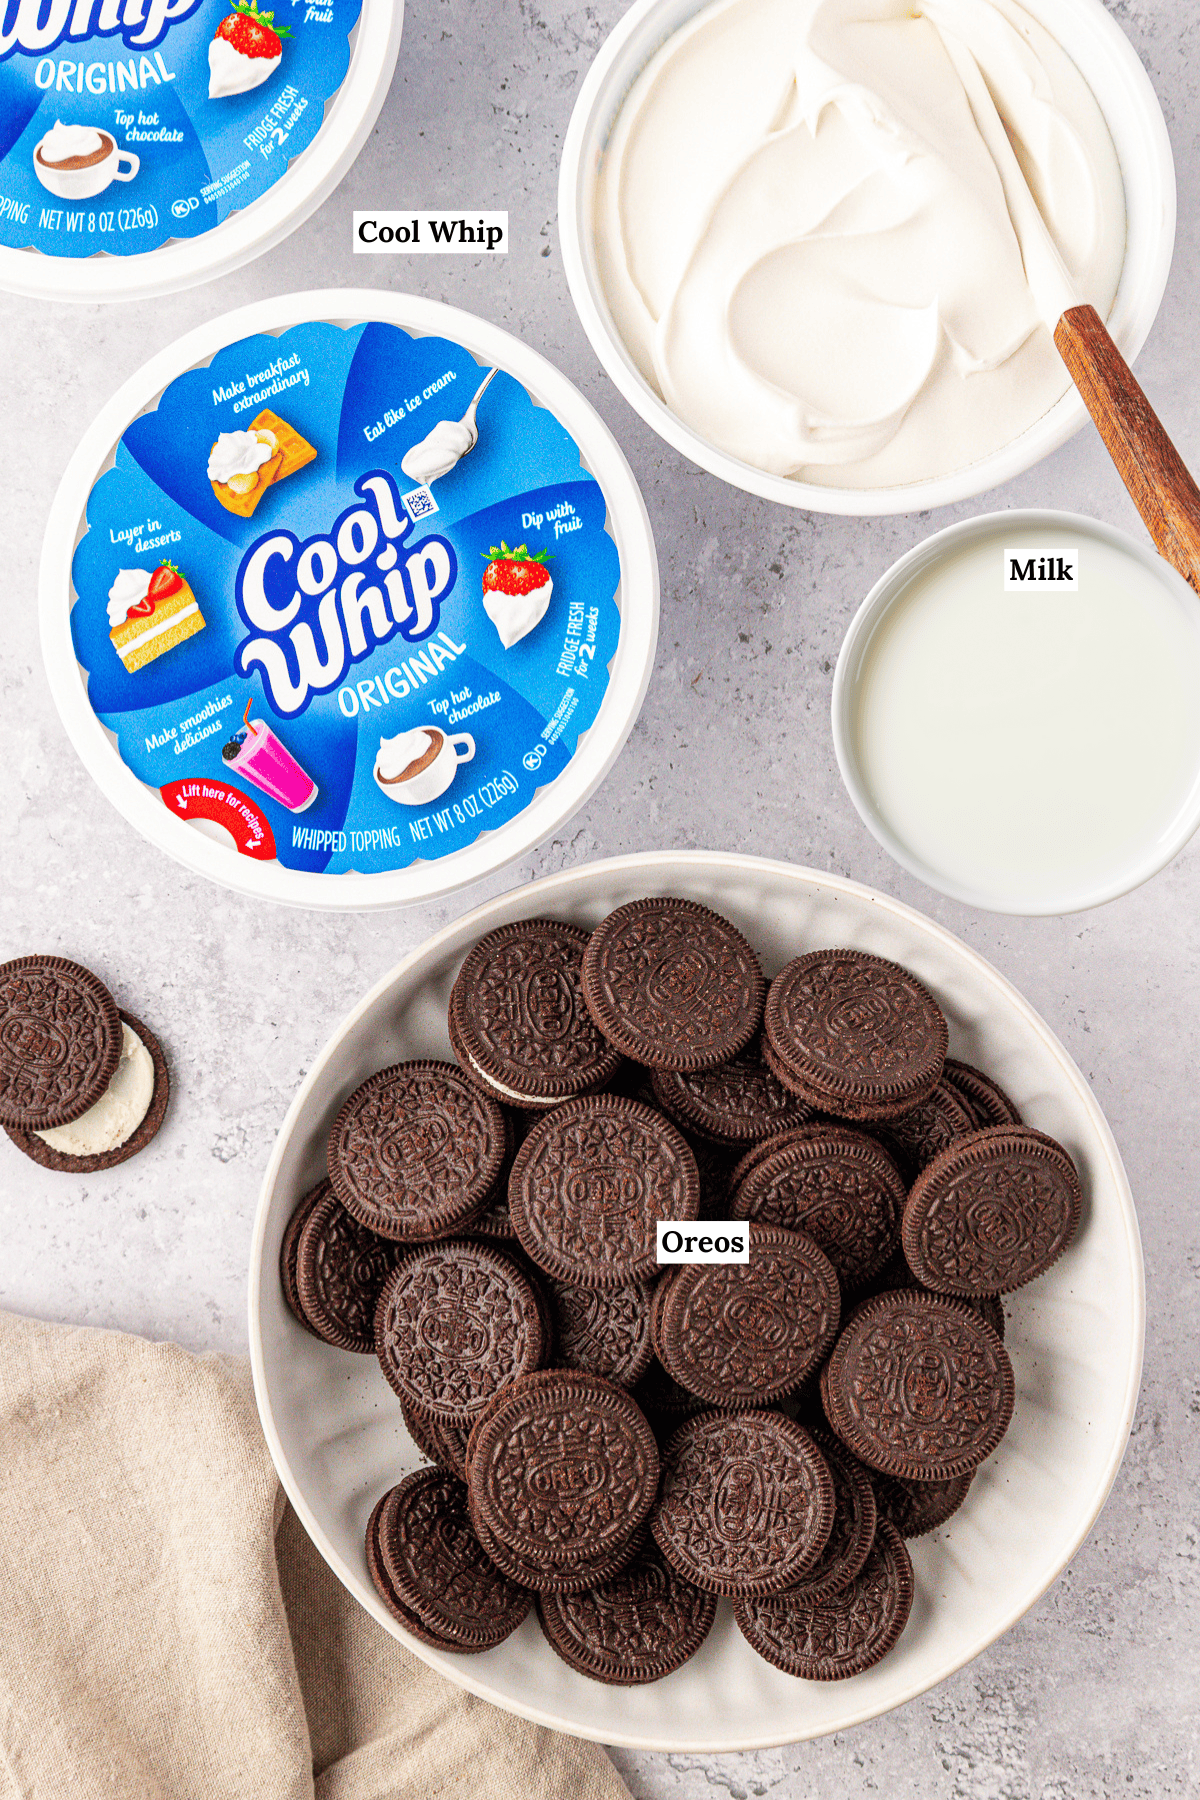
- 2 cups (473ml) milk
- 3 (8oz) containers cool whip
- 2 (18.12oz) packages Oreos, Family Size
- Additional oreos, chocolate sauce or chocolate shavings for decoration
Video
Instructions
- On a serving platter, spread a small amount of Cool Whip in a rectangular shape—this will help hold the first layer in place.3 (8oz) containers cool whip
- Place the milk in a container – you will dip each oreo in the milk before assembling. This will help soften the cookie, otherwise the oreos will still be crunchy after refrigerating.2 cups (473ml) milk
- Arrange 18 Oreos on top of the cool whip in a 3×6 rectangle. Spread a layer of Cool Whip over the Oreos to cover them completely.2 (18.12oz) packages Oreos
- Repeat the process, dipping oreos in milk and alternating layers of Oreos and Cool Whip.
- Once all layers are assembled (I got 5 layers of Oreos), cover the entire cake with a final layer of Cool Whip. Refrigerate for at least 9 hours to allow the cookies to soften. Before serving, add crushed oreos, chocolate sauce or chocolate shavings.Additional oreos


What are the dimensions of the platter you used?
About 12 inches by 7 inches!
Beth,
How do you get it from the “platter” to the serving plate, or to the freeze?
Hi Lori! You build the icebox cake on the platter / serving plate and place that in the freezer.