
This post may contain affiliate links. Please read our disclosure policy.
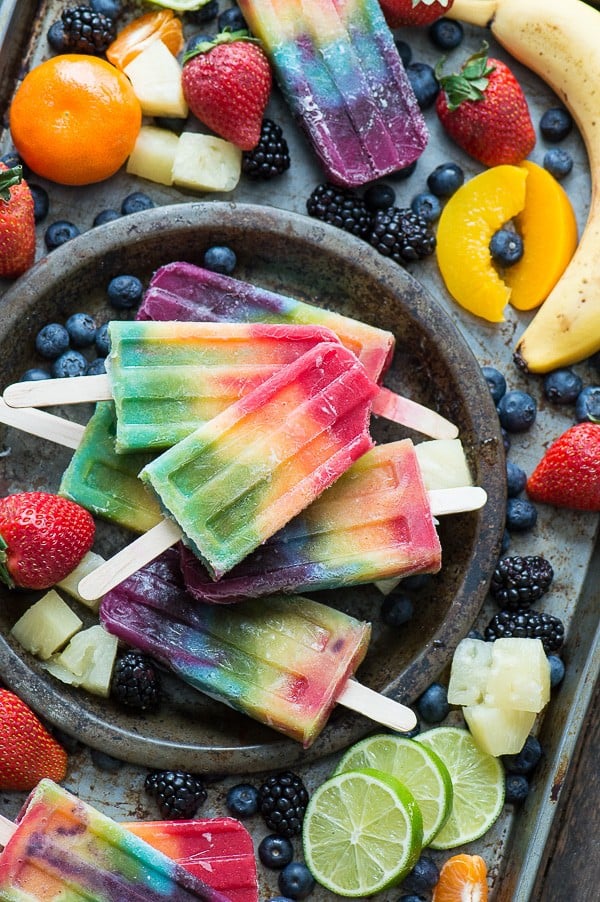
Outstanding 7 layer rainbow popsicles! Make your own homemade rainbow popsicles with lots of fresh fruit!
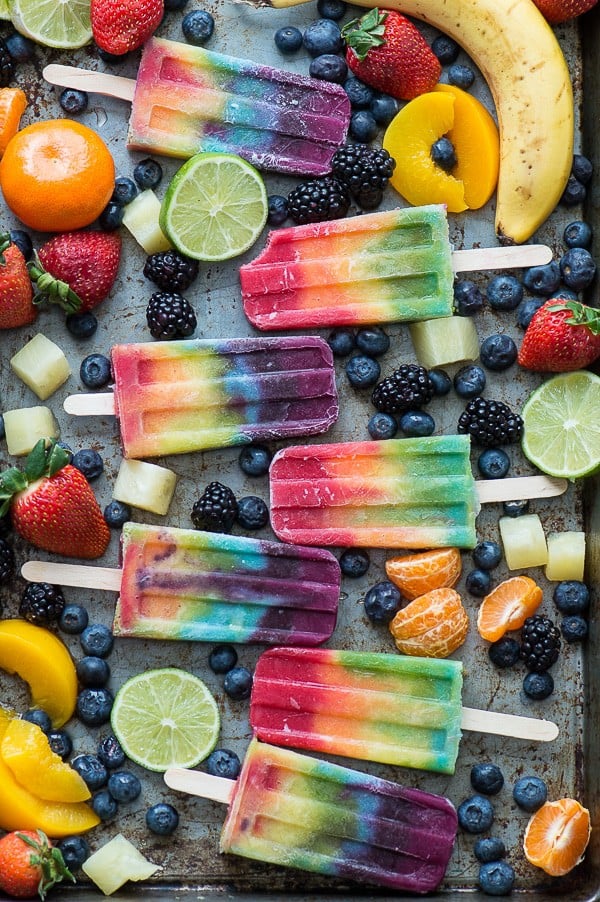
Awesome colors and fruity too! Very summer refreshing!
-Tin
We have a double whammy! Last week we shared our recipe for rainbow smoothies and today we’re sharing a recipe for rainbow popsicles! One fun recipe – 2 great ideas!
I like to think of it like muffins and bread. You can make banana bread muffins or banana bread out of the same batter. Same thing here – rainbow smoothie or rainbow popsicles but the base recipe is the same!
In the rainbow smoothie recipe I talked a lot about how to make the smoothies, what kind of ingredients you’ll need, and how to layer the smoothie.
Today I’m going to talk about taking this recipe from a smoothie and making it into a popsicle!
Popsicle Molds
In order to make popsicles at home you’ll need a popsicle mold and popsicle sticks. I rounded up 8 fun molds that will definitely get us excited about popsicle season!
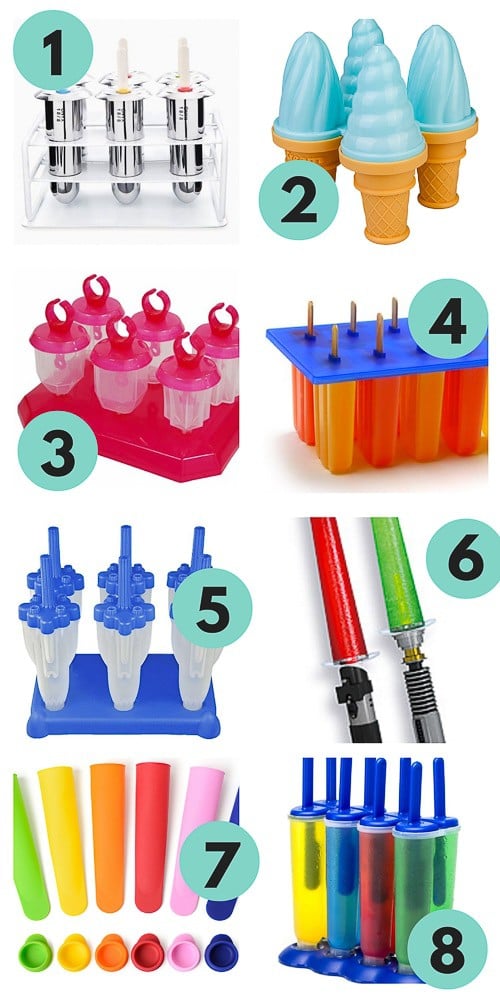
#1 – Stainless Steel Popsicle Mold – they kind of look like spaceships!
#2 – Ice Cream Cone Mold – how fun?!
#3 – Ring Pop Mold – hello 1990s!!
#4 – Standard Popsicle Mold – this is the one I own and love it!
#5 – Rocket Popsicle Mold – I could definitely see myself buying this one when we have kids!
#6 – Star Wars Lightsaber Popsicle Mold – GREAT idea!
#7 – Squeezable mold – with a cap so you can save the popsicle for late!
#8 – Double popsicle mold – 2 popsicles in one, share one or eat them both!
So fun, I think I want all of them now!!

Base Smoothie Ingredients
Each layer in our rainbow smoothie uses similar ingredients. Some of the most common base ingredients in each layer includes:
- frozen banana
- greek yogurt
- liquid for blending, like milk, almond milk or water
- frozen fruit – each layer calls for a different fruit depending on the color we’re trying to achieve
Tips for Making Rainbow Popsicles
Layering the smoothies in the mold is easy. Use a spoon or tablespoon to scoop the smoothie mixture into the mold.
It’s natural for the layers to blend a bit, but I have noticed that spooning the smoothies into the mold versus pouring the smoothie in from a glass leaves better results.
Once the molds are filled, freeze the popsicles overnight.

How to remove popsicles from mold
To get the rainbow popsicles to release from the mold, fill your kitchen sink with room temperature water. Place the mold in the water, making sure the water does not go above the top of the mold.
Allow the mold to sit in the water for a few seconds.
Begin to wiggle a popsicle free. If it feels tough, allow them to set in the water a few more seconds.
Once all of the popsicles are removed from the mold, enjoy or wrap the extras in plastic wrap and return to the freezer.

Here’s the best part, most likely you’ll have leftover smoothie (unless you’re making 30+ popsicles at one time) so you can enjoy a rainbow smoothie while you wait for your rainbow popsicles to freeze!
If you’re doing a rainbow themed party or preschool lesson, put this rainbow bread on the list of things to make!
If you’re looking for an easier version of rainbow popsicles, try fresh fruit popsicles!
Have leftover beets? Make ABC Juice!
Looking for more summer recipes?
Watermelon cupcakes – perfect cupcake for a summer birthday
Lemon sugar cookies – I like to call this cookie “the summer” cookie
Strawberry whipped cream – add this to cake & cupcakes, fruit crisp, or cookies
Tap stars to rate!
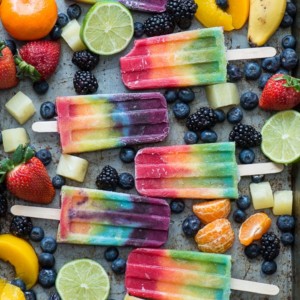
Rainbow Popsicles
Equipment
Ingredients
RED LAYER
- 1 frozen banana
- ½ cup (113g) greek yogurt, vanilla or plain
- ½ cup frozen raspberries
- ½ cup frozen strawberries
- water or liquid for blending
ORANGE LAYER
- 1 frozen banana
- ½ cup (113g) greek yogurt, vanilla or plain
- ½ cup frozen peaches
- 1 small orange
- ¼ cup frozen mango
- water or liquid for blending
YELLOW LAYER
- 2 frozen bananas
- ½ cup (113g) greek yogurt, vanilla or plain
- 1 cup frozen pineapple
- water or liquid for blending
GREEN LAYER
- 2 frozen bananas
- ½ cup (113g) greek yogurt, vanilla or plain
- 1 handful, or more spinach
- 1 cup frozen pineapple
- water or liquid for blending
BLUE LAYER
- 2 frozen bananas
- ½ cup (113g) greek yogurt, vanilla or plain
- 1 cup frozen pineapple
- small amount of blue food coloring
- water or liquid for blending
PURPLE LAYER
- 1 frozen banana
- ½ cup (113g) greek yogurt, vanilla or plain
- 1 cup frozen mixed berries
- water or liquid for blending
MAGENTA LAYER
- 1 frozen banana
- ½ cup (113g) greek yogurt, vanilla or plain
- ½ cup sliced canned beets
- 1 cup frozen strawberries or raspberries
Video
Instructions
FOR EACH SMOOTHIE
- Place all the ingredients in a blender and blend until smooth. Add more liquid to help it blend if it’s too thick.
- Transfer the smoothie to a bowl or container, rinse the blender and prep the next smoothie.
TO ASSEMBLE THE RAINBOW POPSICLES
- Carefully layer each color smoothie in a popsicle mold in rainbow order.
- Layering the smoothies in the mold is easy. Use a spoon or tablespoon to scoop the smoothie mixture into the mold. It’s natural for the layers to blend a bit, but I have noticed that spooning the smoothies into the mold versus pouring the smoothie in from a glass leaves better results.
- Once the molds are filled, add the sticks and freeze the popsicles overnight.
- To get the popsicles to release from the mold, fill your kitchen sink with room temperature water. Place the mold in the water, making sure the water does not go above the top of the mold.
- Allow the mold to sit in the water for a few seconds.
- Begin to wiggle a popsicle free. If it feels tough, allow them to set in the water a few more seconds.
- Once all of the popsicles are removed from the mold, enjoy or wrap the extras in plastic wrap and return to the freezer.
Notes


How about blue flowering pea tea in place of blue dye?
OMG these have to be the most gorgeous popsicles I’ve ever seen!
Thank you for giving our Rainbow Bread recipe a shout-out, that was so kind of you.
They look like neon colors
Will have to try this with blue green ales in place of the blue dye!.. we have a severe red dye sensitivity in our home so try to avoid all dyes. Love this! They are so beautiful!