
This post may contain affiliate links. Please read our disclosure policy.
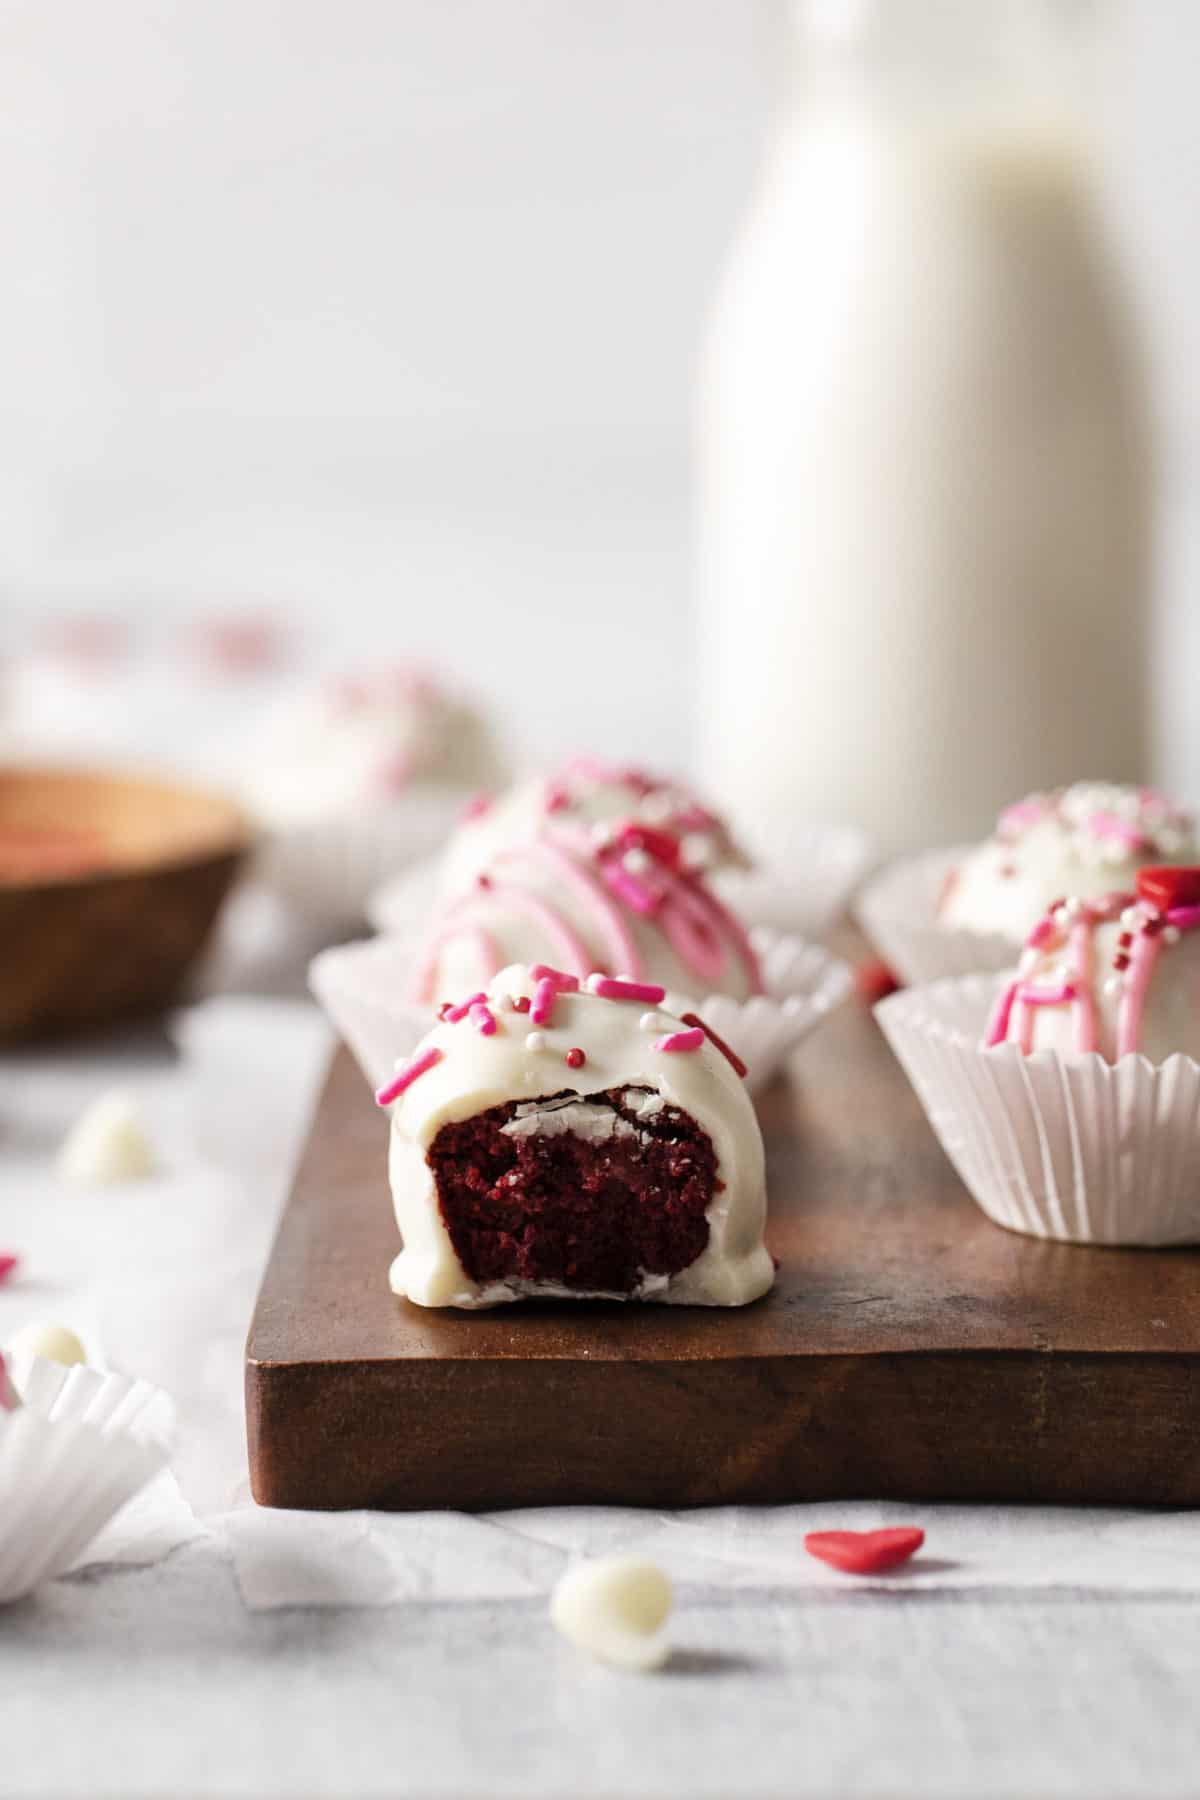
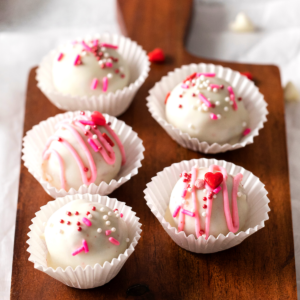
Red velvet cake pops are an easy Valentine’s Day dessert! Use a box of red velvet cake mix and store bought frosting to make simple red velvet truffles. Celebrate with Valentine’s cake pops!
Love red velvet? Make our red velvet cookies. Feeling in the mood for chocolate? Try homemade chocolate cake or chocolate whipped cream.
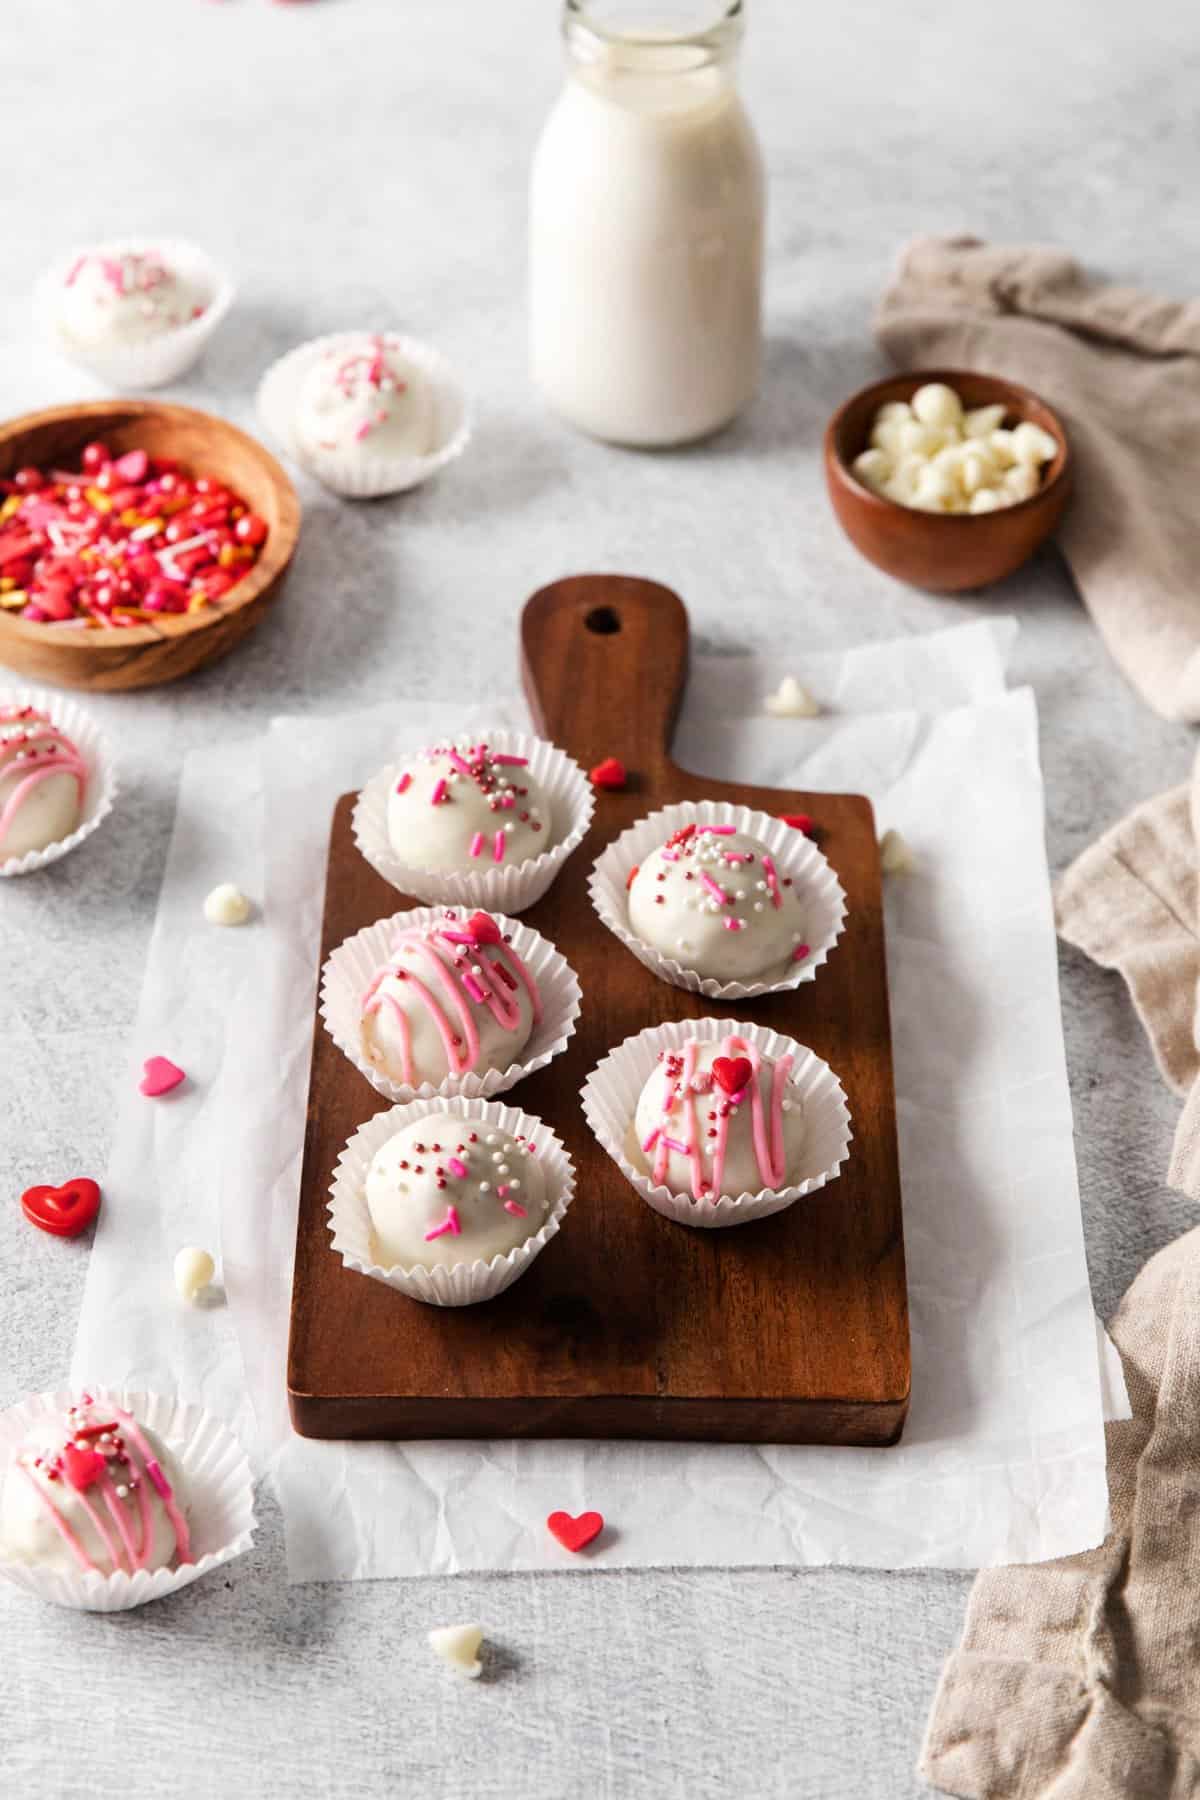
Cake balls are a festive treat for Valentine’s Day! Instead of making homemade red velvet cake and homemade cream cheese frosting, I opted for a box of red velvet cake mix and store bought frosting.
Those two swaps significantly cut down on the total time required.
Be sure to browse your local grocery store to find cute Valentine’s Day sprinkles – Target always has a fun selection!
How to make cake pops
- Bake cake
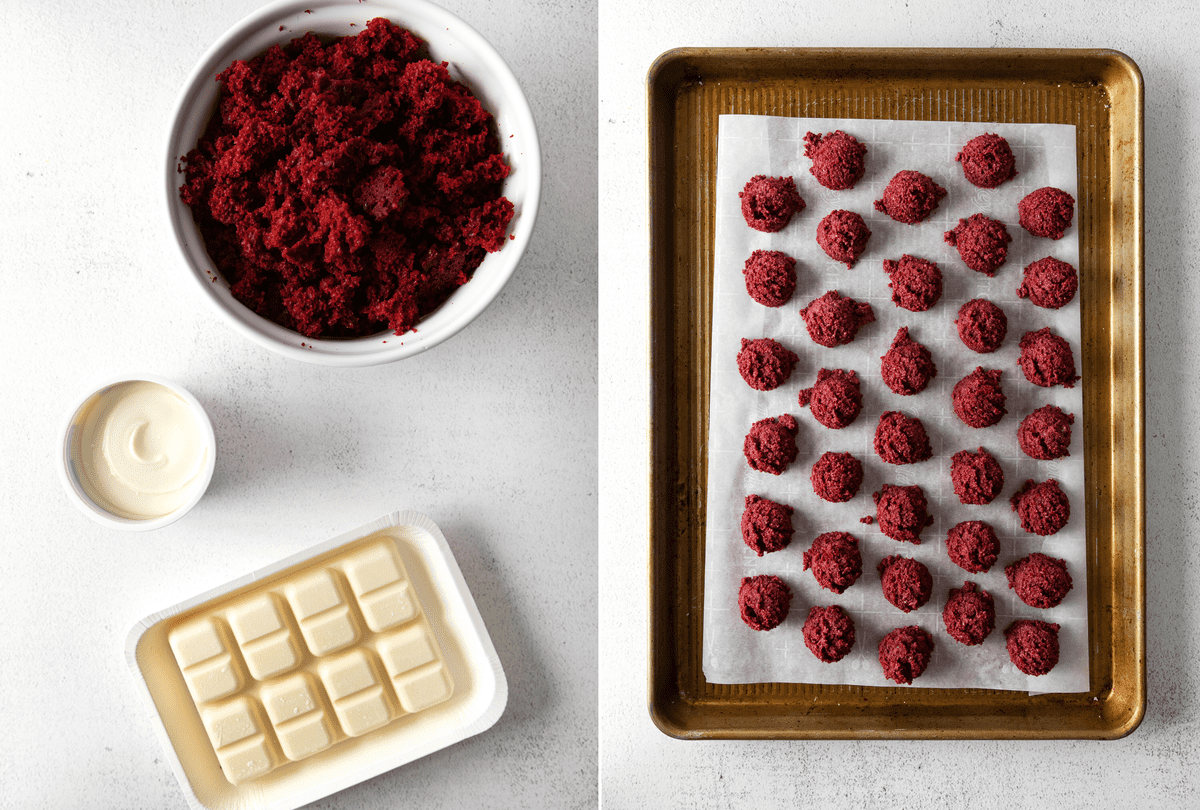
- Crumble cake into pieces
- Mix cake with frosting
- Drop tablespoon sized balls on baking sheet
- Refrigerate for 30 minutes
- Roll balls between hands to smooth
- Dip in chocolate and let harden
Temperature of cake balls
It’s important that cake balls are’t too cold or frozen before you dip them.
If you dip truffles that are frozen or very cold, the chocolate coating will crack as it sets because of the extreme temperature change.
The best way to avoid cracking is to place the balls in the fridge to chill for 30 minutes, then dip them.
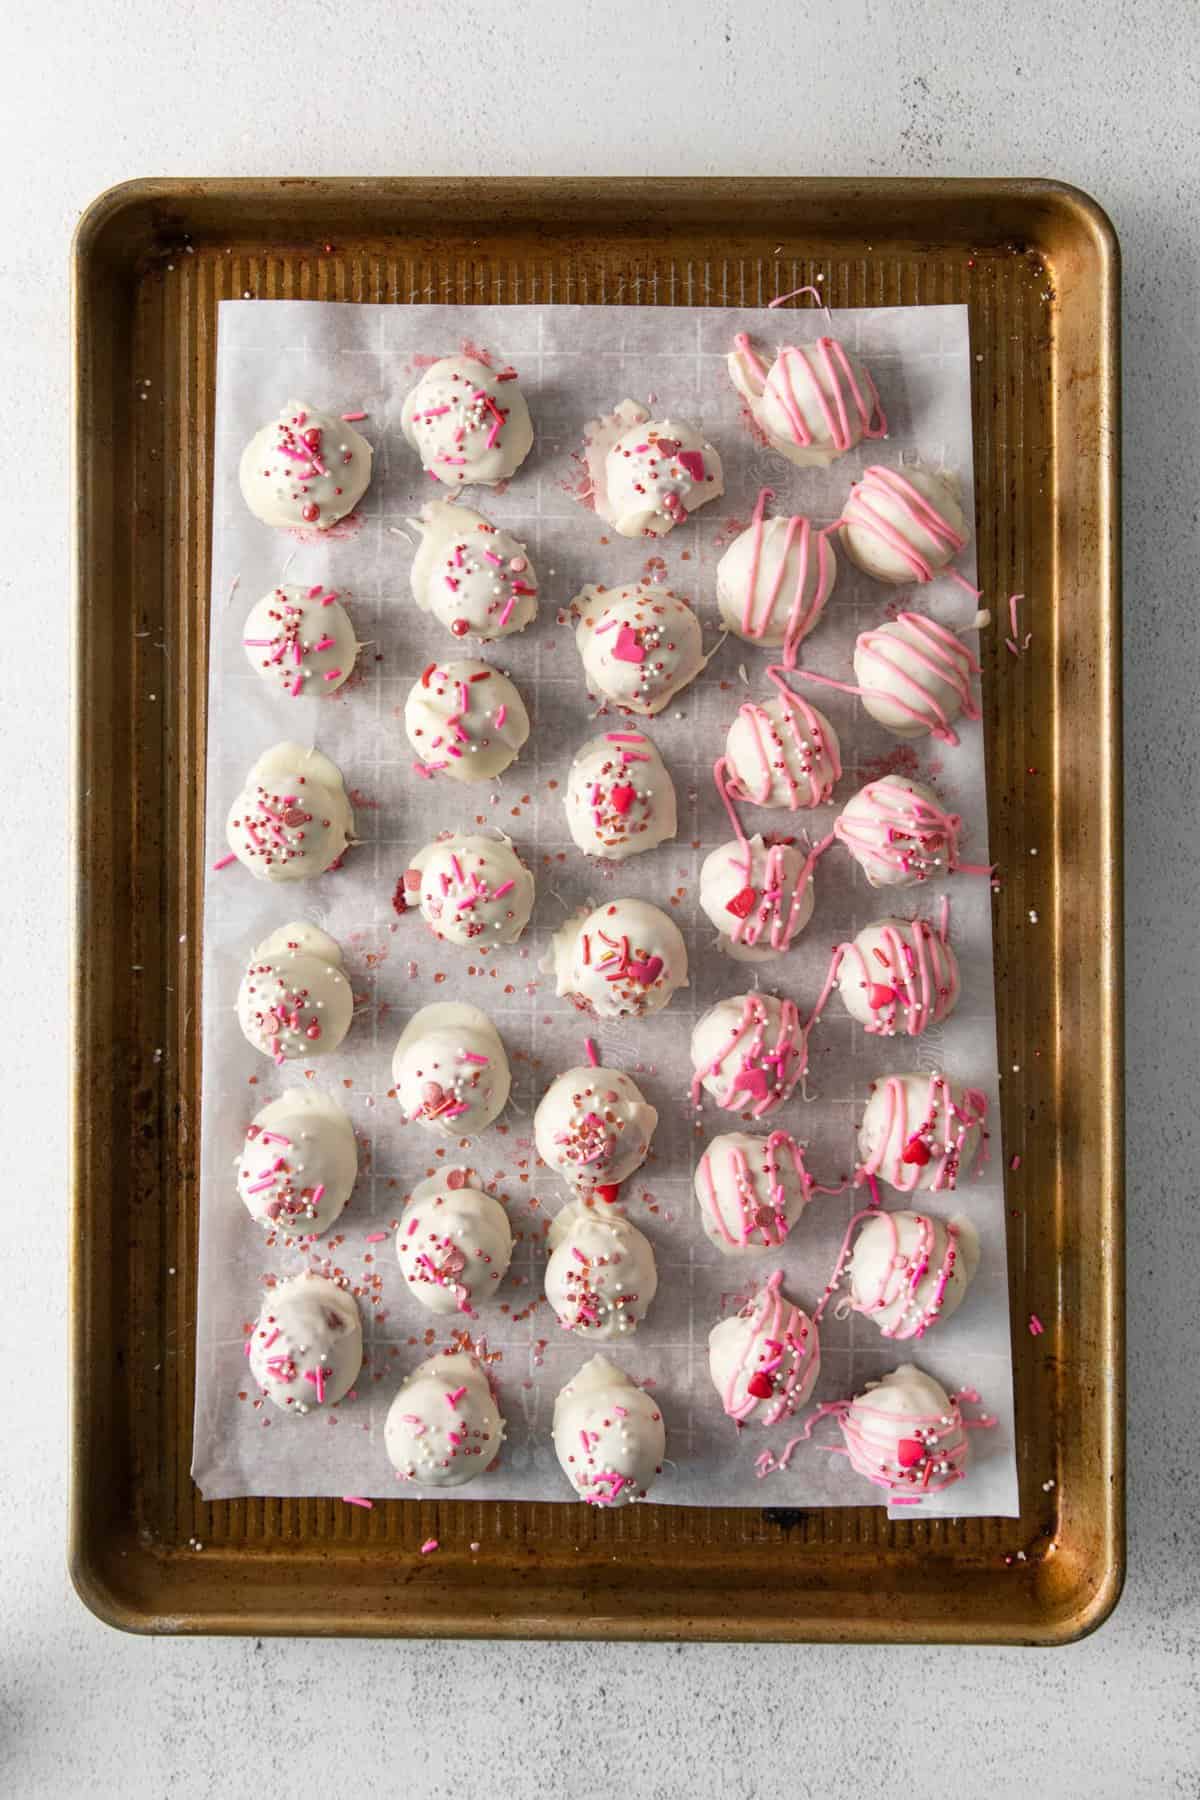
Cake pop dipping tips
Only remove a few red velvet cake pops from the fridge at a time to dip. Keeping the balls cold will help the dipping process go smoother.
To dip, place 1 ball in the pot with melted chocolate. Use a spoon to spoon chocolate on top, if needed.
To remove the ball, use a fork to lift it out of the chocolate.
To remove excess chocolate from the ball on the fork, scrape the bottom of the fork on the edge of the pot, then put the ball back on the silicone baking mat.
Do cake balls need to be refrigerated?
According to the FDA, cream cheese can be left out at room temperature for up to 2 hours. For longer storage, store them in an airtight container in the fridge.
Cake pops on a stick
If you’d like to create cake pops on a stick, dip the stick 1/2 inch into the melted chocolate and insert into the center of the ball. Insert the stick about halfway into the cake ball.
Transfer the melted chocolate into a tall, narrow cup. Dip each cake pop in the chocolate. Place the stick on a piece of styrofoam while the chocolate hardens.

Valentine’s Day Treats
- Maraschino Cherry Chocolate Chip Cookies
- Cut Out Sugar Cookies
- Chocolate Cheesecake
- Easy Chocolate Mousse
Tap stars to rate!
Red Velvet Cake Pops
Equipment
Ingredients
- 1 box 15.25 oz red velvet cake mix, prepared according to the box directions
- 1 container 16 oz cream cheese frosting, store bought container
- 1 package 16 oz white chocolate almond bark
- sprinkles
Instructions
- Prepare the cake according to the package directions. Bake in a 9×13 inch pan. Allow it to cool completely before making the truffles.1 box 15.25 oz red velvet cake mix
- Once the cake has cooled, crumble it into small pieces and place it in a large bowl.
- Transfer the cream cheese frosting to a microwave safe bowl and microwave it for 15-20 seconds, or just until it is thinned and pourable.1 container 16 oz cream cheese frosting
- Add the warm frosting to the crumbled cake and stir until the mixture comes together in a soft dough.
- Scoop out 1 tablespoon sized balls and place them on a silicone mat or parchment paper lined baking sheet.
- Refrigerate the balls for 30 minutes. You can refrigerate them longer if needed.
- Melt the white chocolate bark according to the package directions. Meanwhile, once the balls are cold, roll them between your hands to create smooth, even balls. Return the balls to the fridge. Only remove a few at a time to dip, keeping the balls cold will help the dipping process go smoother.1 package 16 oz white chocolate almond bark
- To dip, place 1 ball in the pot with melted chocolate. Use a spoon to spoon chocolate on top, if needed. To remove the ball, use a fork to lift it out of the chocolate. To remove excess chocolate from the ball on the fork, scrape the bottom of the fork on the edge of the pot, then put the ball back on the silicone baking mat. Continue this process until all the balls are dipped. I like to let each ball sit for about 1-3 minutes before adding sprinkles – that way the pieces don’t fall off the ball because the chocolate isn’t too hot. If you want to drizzle them with pink chocolate, add pink food coloring to the remaining chocolate.sprinkles
- Allow them to harden at room temperature. Serve and enjoy. Store in the fridge for up to three days.
Notes


Great Recipe, can’t wait to try it for our Christmas Dinner.
Can you use a different frosting rather than the White Chocolate? I’m not a fan of White Chocolate..
You can use whatever frosting you prefer!