
This post may contain affiliate links. Please read our disclosure policy.
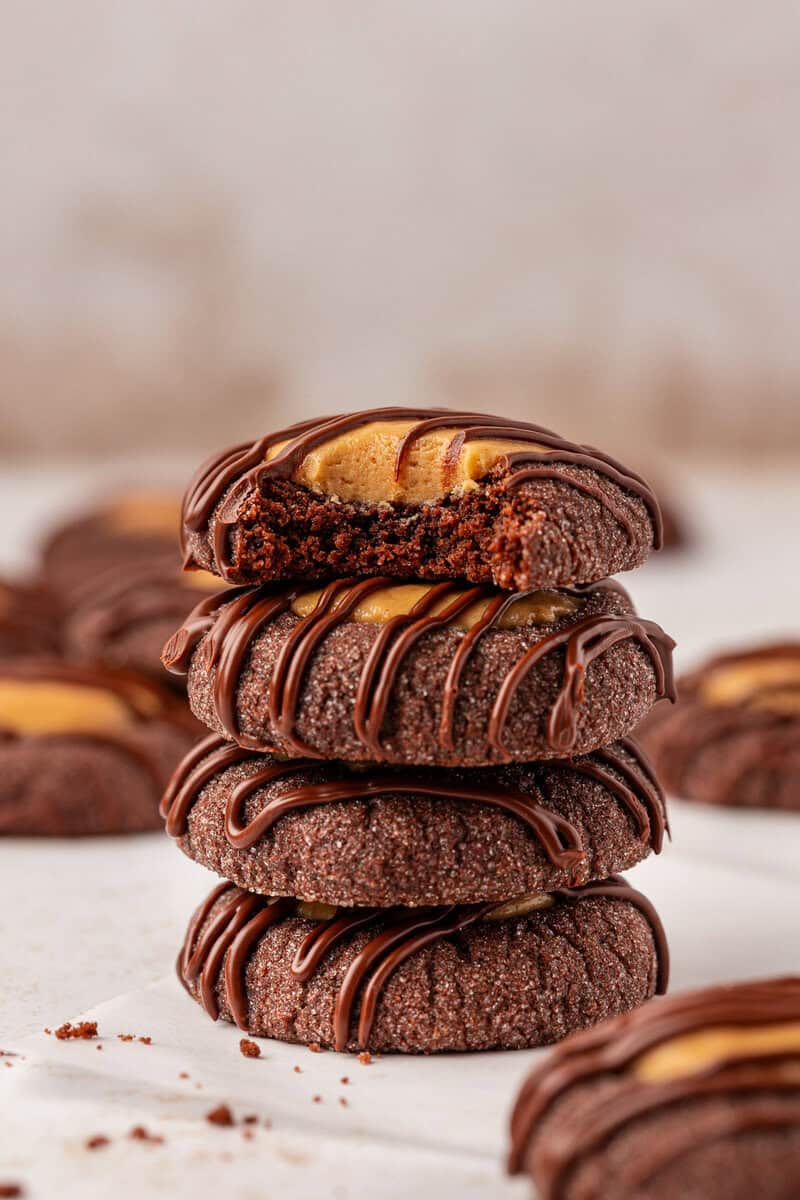
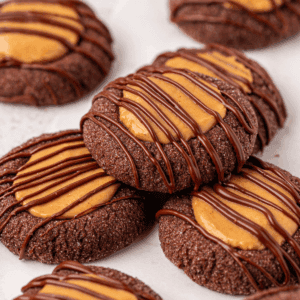
I tested this dough again and again to create chocolate peanut butter thumbprint cookies that stay soft and taste bold. The peanut butter filling is thick like a buckeye center and the chocolate drizzle ties it all together. This is the recipe you make when you want a guaranteed win.
When I first set out to create chocolate peanut butter thumbprint cookies, I started with my tried and true chocolate cookie recipe. It is rich and chewy and has worked beautifully in so many tests, so it felt like the perfect base for this version.
But the moment I baked the first batch, the indent disappeared and the cookies spread into smooth chocolate circles. Freezing the dough made no difference, which told me I needed a brand new formula built specifically to hold a thumbprint.
I rebuilt the dough from the ground up. I added more flour, used baking powder for lift, kept the cornstarch for stability, and switched from a whole egg to two yolks since I removed the corn syrup. The first round cracked when I pressed in the teaspoon. The second was too dry even after increasing the butter and using all brown sugar.
The breakthrough came when I added one more yolk. This single change gave the dough enough moisture and richness to keep its shape and bake soft all the way through.
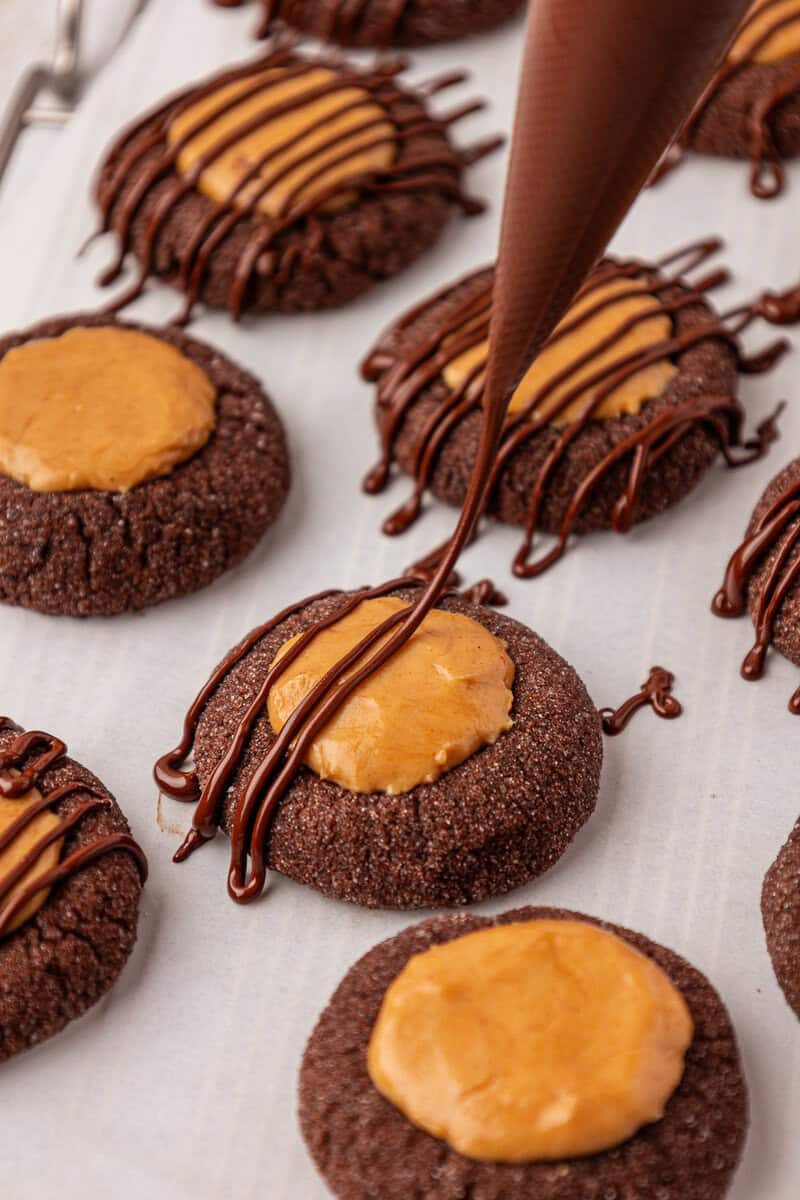
With the chocolate base perfected, I began building the peanut butter filling. My initial idea was a fluffy filling, but my taste testers wanted something with more body. Then I tested a peanut butter ganache, but the sweetness from the chocolate chips overwhelmed the peanut butter. So I turned to the filling from my buckeye balls recipe, adjusting the ratios to make it thumbprint friendly. It is thick, creamy, and tastes exactly like the center of a peanut butter cup. Paired with the chocolate drizzle, every bite is rich, soft, and deeply nostalgic.
Every part of these chocolate peanut butter thumbprint cookies was tested with intention so home bakers can trust that this recipe works exactly as written.
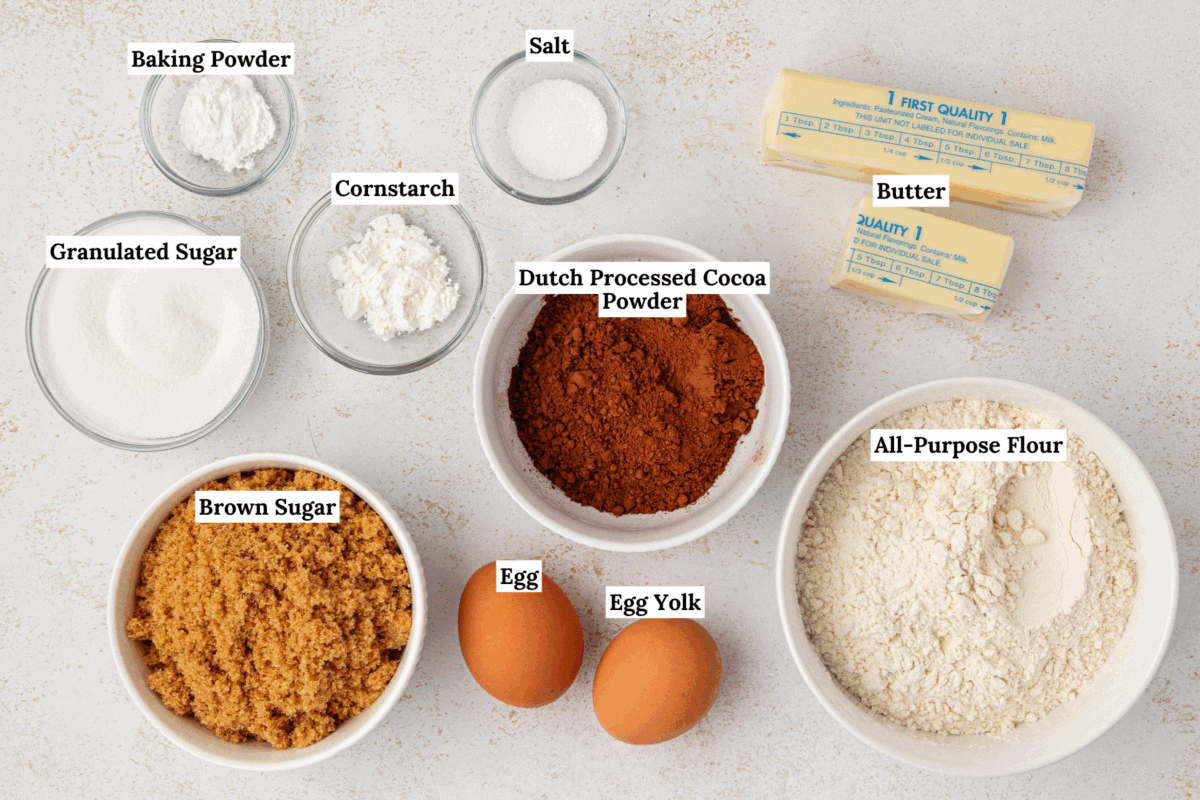
Main Ingredients & Their Role
These ingredients are key to making the absolute best chocolate peanut butter cookies. Let’s break down what role each ingredient plays in this recipe. You can also jump to the recipe card for the full recipe.
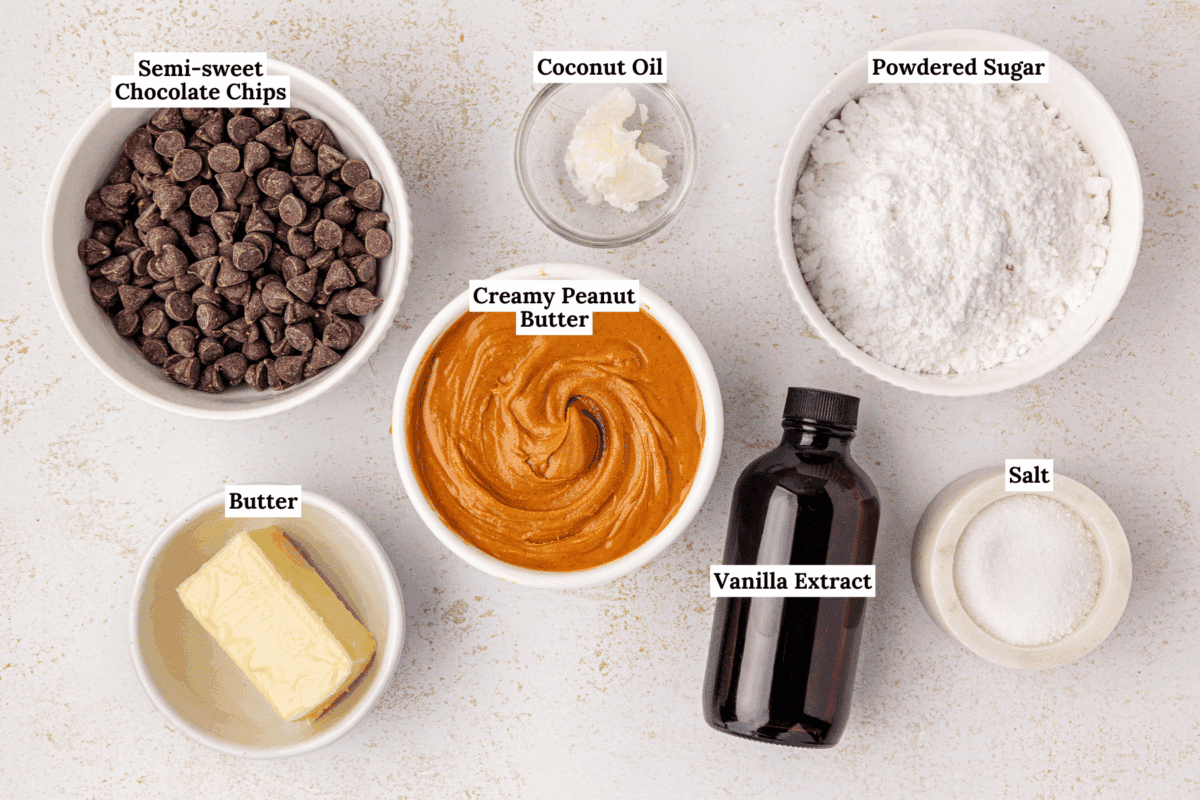
- Dutch processed cocoa powder: Creates a deep chocolate flavor and gives the cookies a rich color and smooth texture.
- Brown sugar: Adds moisture, chew, and a warm caramel note that pairs perfectly with the filling.
- Butter: Provides flavor, tenderness, and helps create a soft crumb that still holds its shape.
- Cornstarch: Gives the dough stability so the thumbprint shape stays defined while baking.
- Egg yolks: Add fat and richness which keeps the cookies soft and prevents cracking.
- Creamy peanut butter: Forms the base of the filling and gives each cookie that peanut butter cup flavor.
- Powdered sugar: Adds sweetness and gives the filling its thick, fudge like texture.
- Semi sweet chocolate chips: Create a smooth drizzle that brings all the flavors together.
How to Make Peanut Butter Chocolate Thumbprint Cookies
This thumbprint peanut butter cookie recipe is always a crowd pleaser. Follow my simple steps below to cookie perfection, or jump to the recipe card for the full recipe.
For the Cookies
Prep baking sheets. Line baking sheets with parchment paper or silicone mats.
Combine dry ingredients. In a medium bowl, whisk together the flour, cocoa powder, salt, baking powder, and cornstarch. Set aside.
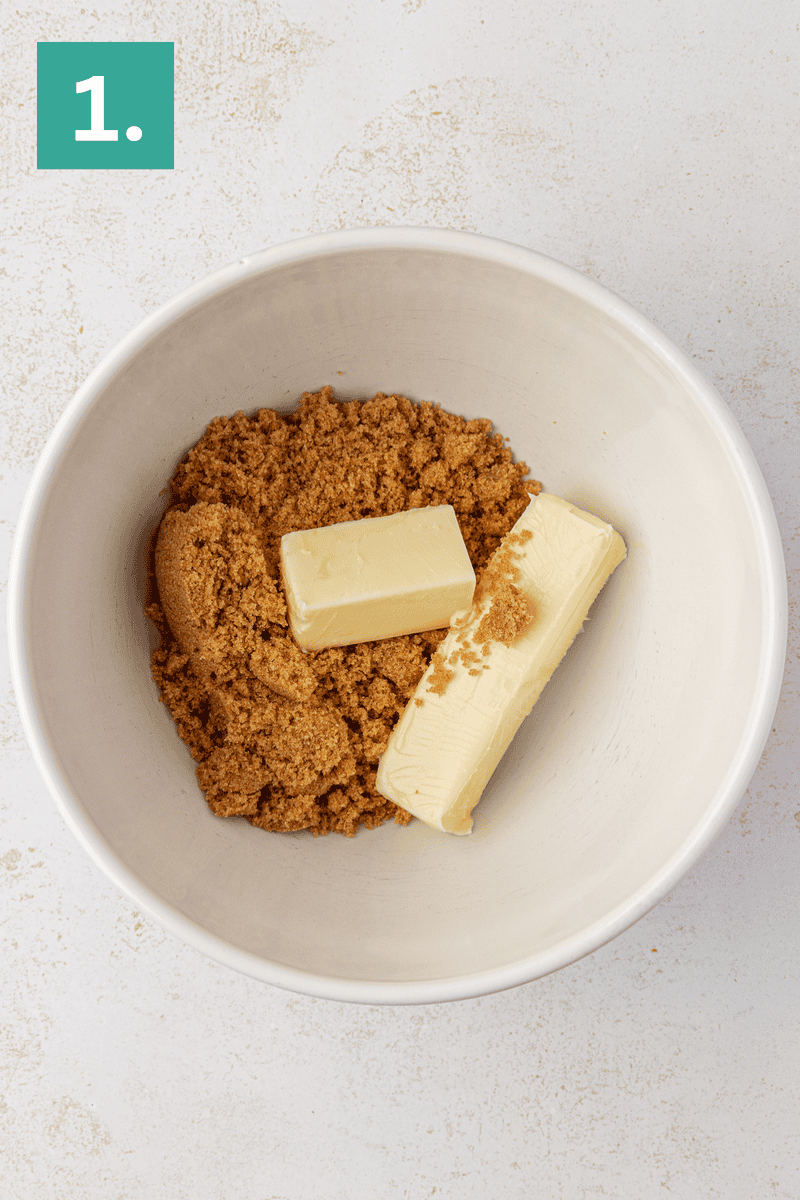
Beat butter and sugar. In a large mixing bowl, beat the butter and brown sugar on medium speed until light and fluffy, about 1–2 minutes.
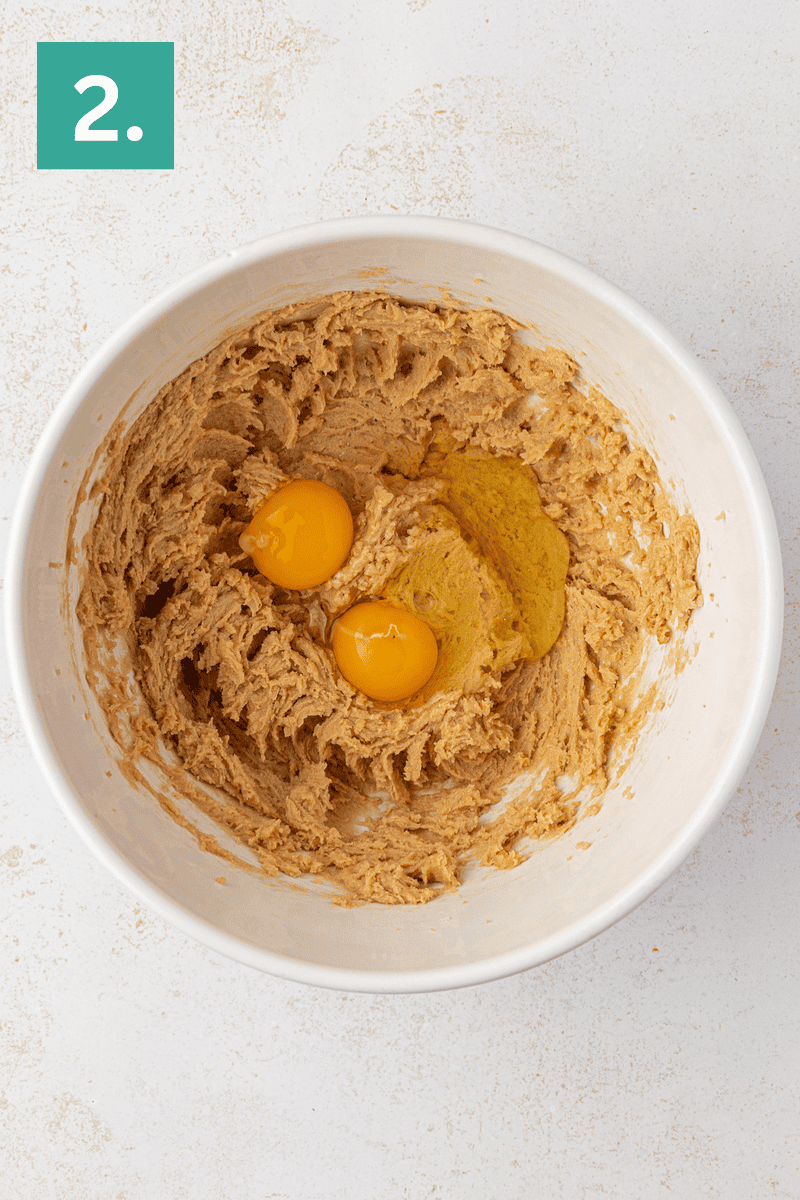
Mix in egg. Beat in the egg and egg yolk for 30 seconds, scraping down the sides as needed.
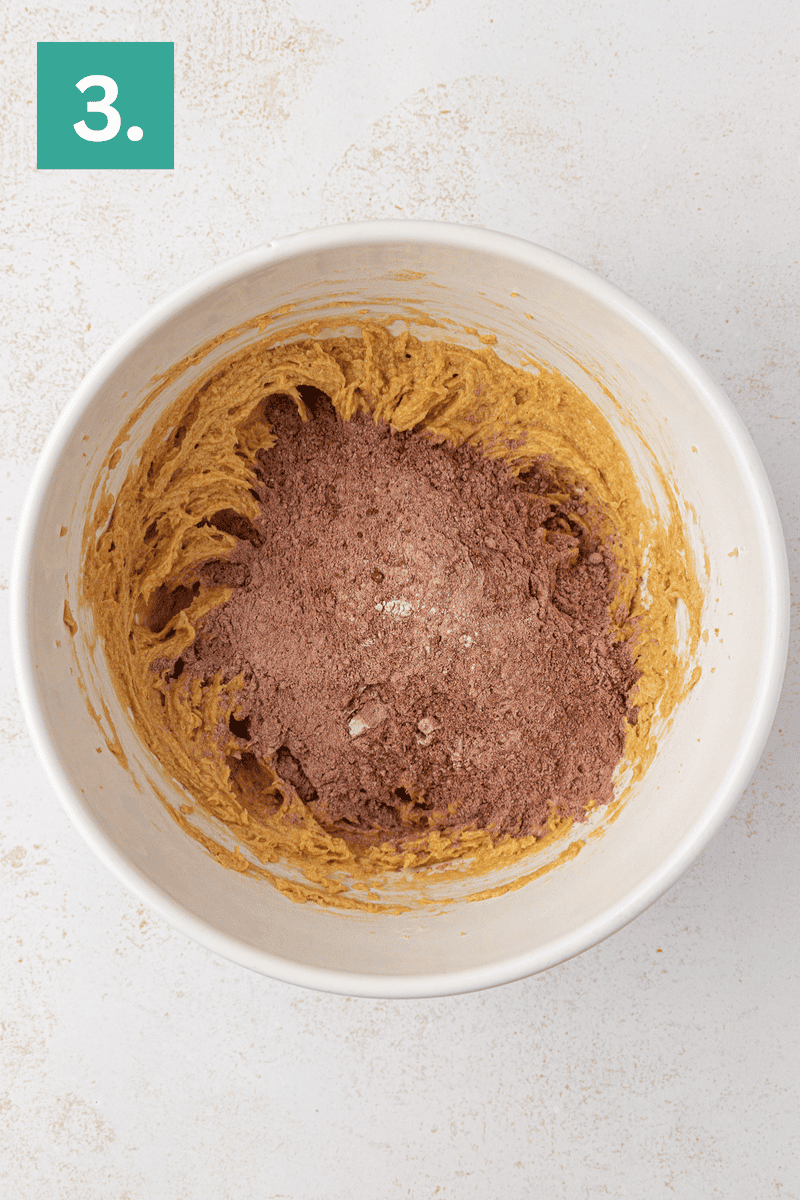
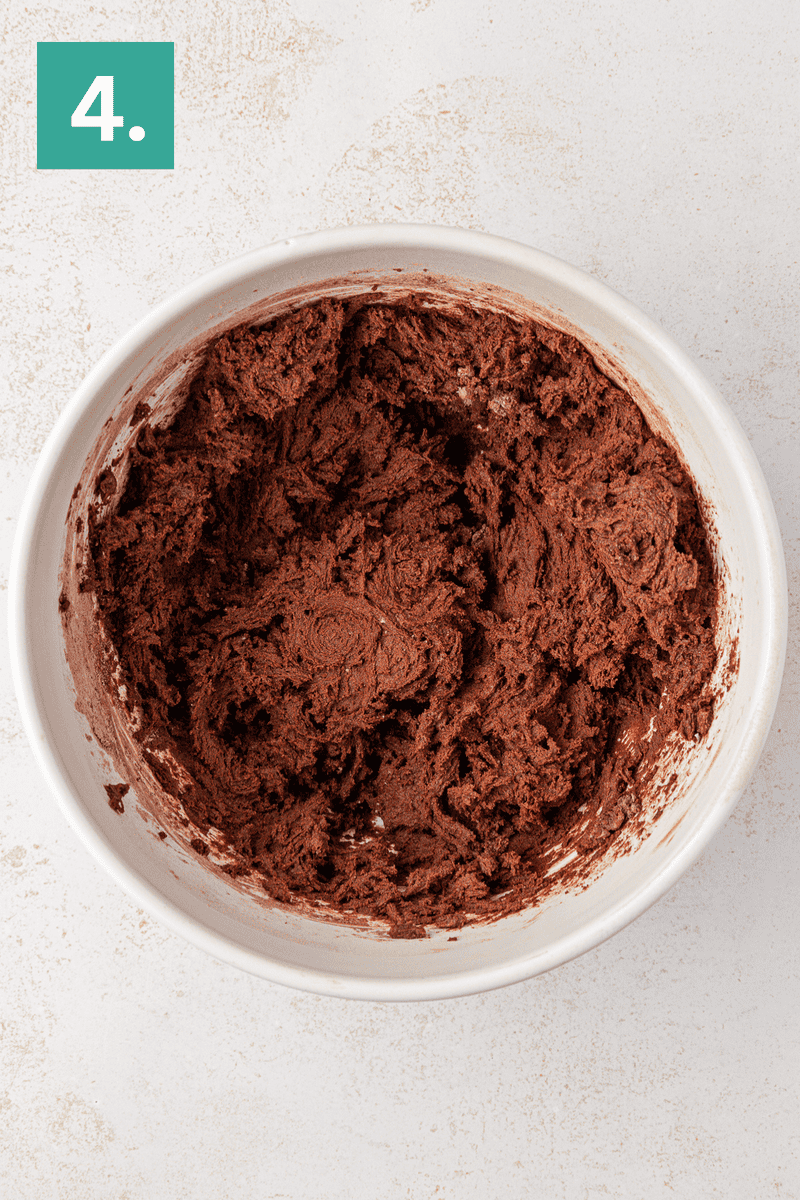
Combine wet and dry ingredients. Gradually add the dry mixture to the wet ingredients, mixing on low speed until just combined. The dough will be very thick.
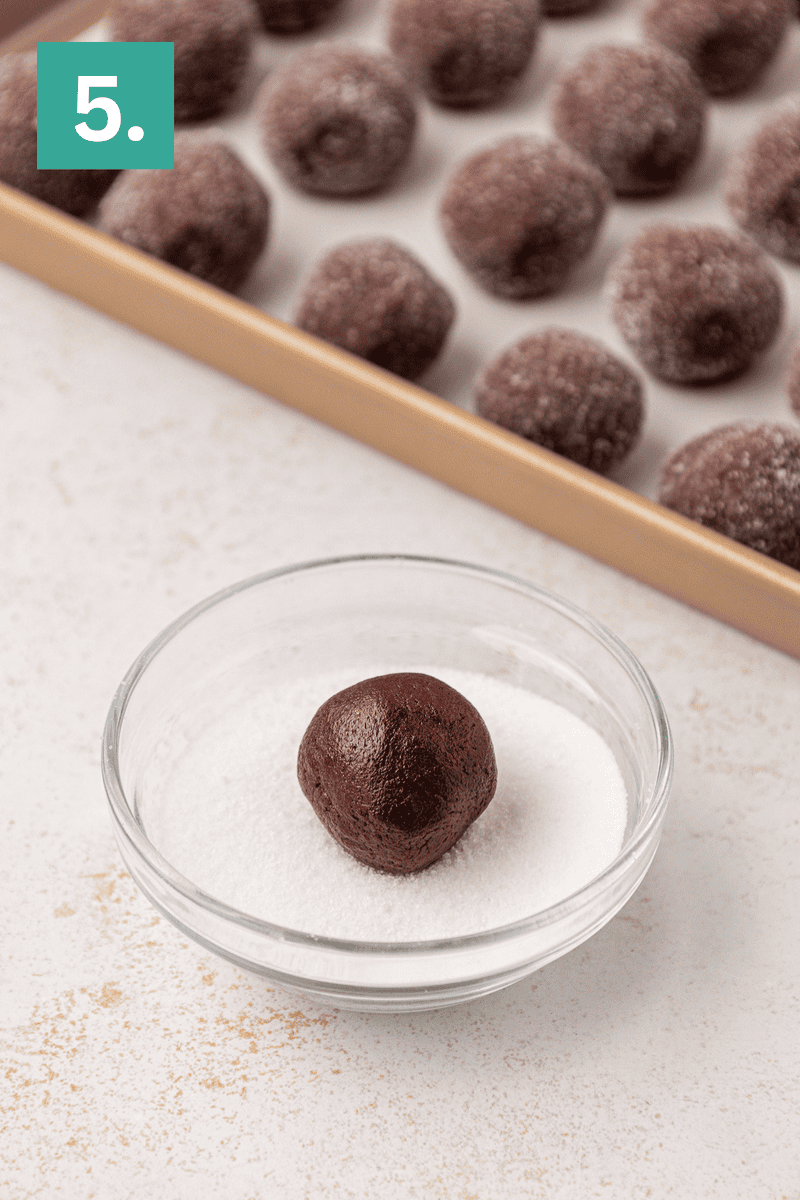
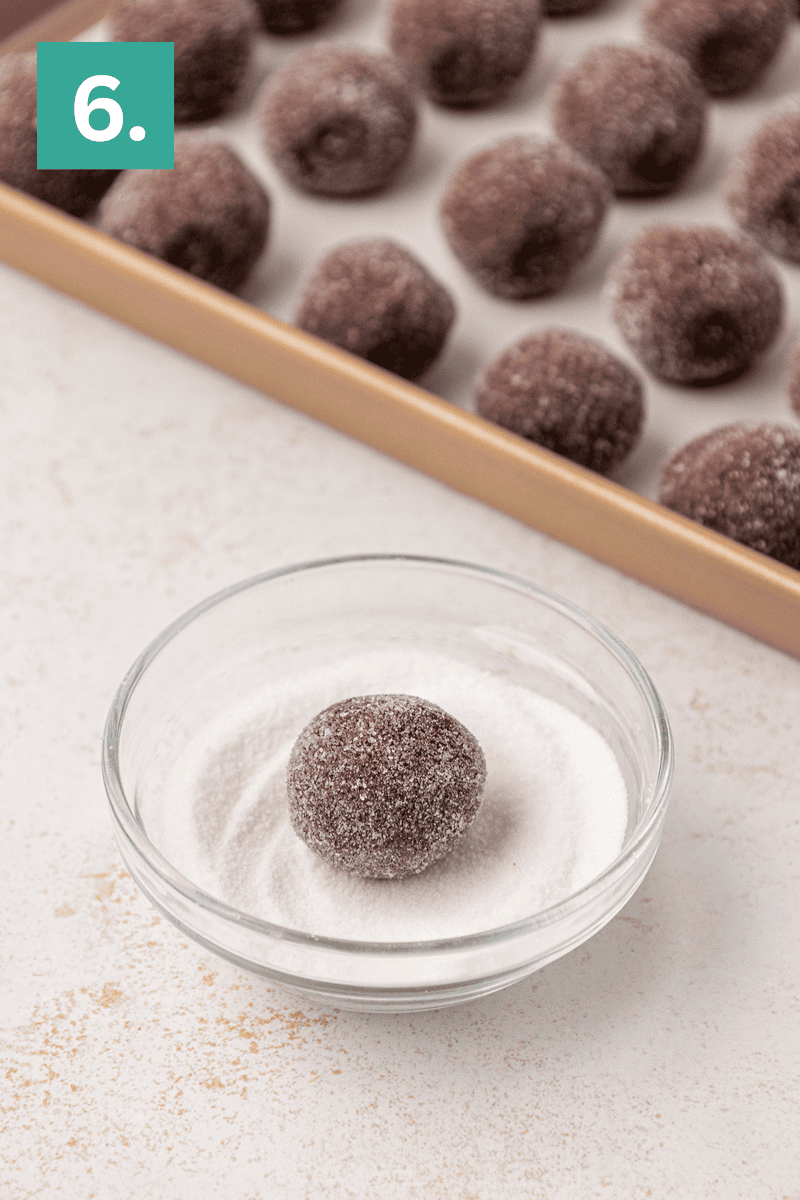
Form cookie dough balls. Scoop 1 tablespoon of dough (use a #60 cookie scoop) and roll into smooth balls. Roll each ball in granulated sugar and place 2 inches apart on prepared baking sheets.
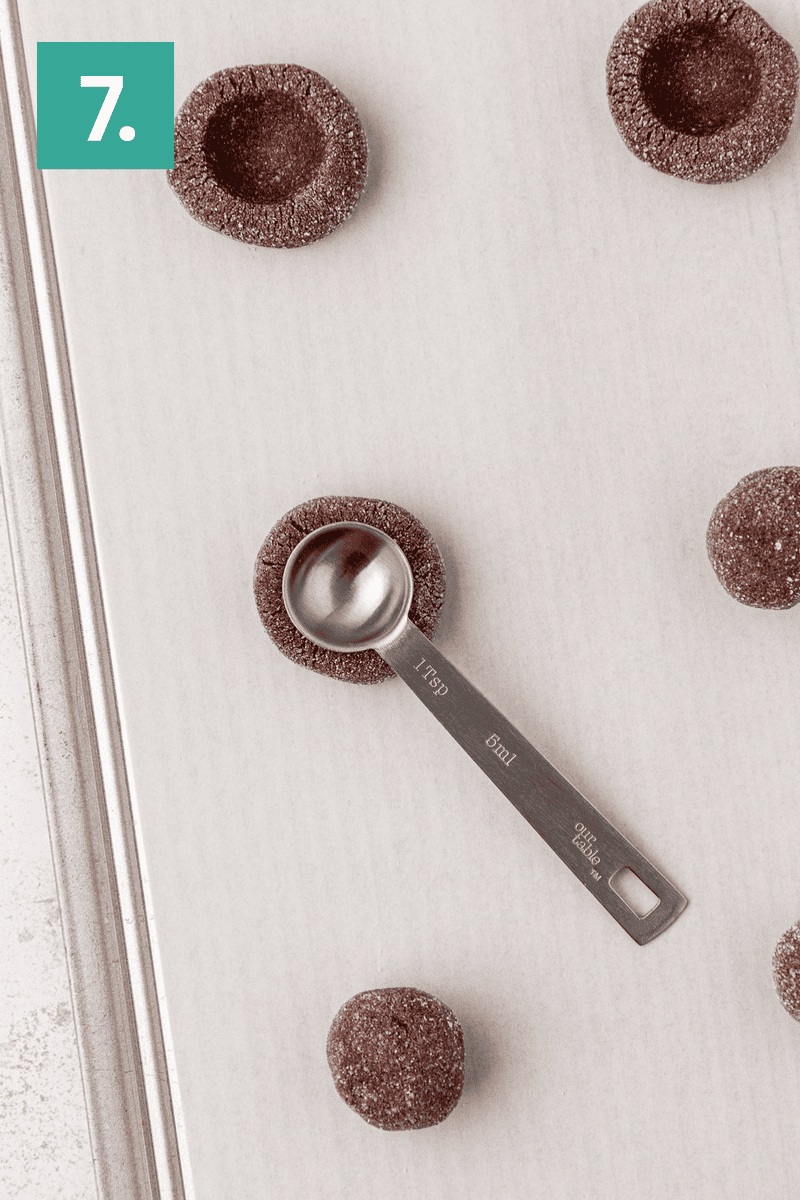

Press and chill cookies. Use the back of a teaspoon to press a divot into the center of each cookie before baking. Place the baking sheet in the freezer for 10 minutes to firm up the dough. You can freeze longer if needed.
Bake and finish cookies. Preheat the oven to 350°F (177°C). Bake for 10-11 minutes or until the edges are set but the centers still look soft. Remove from the oven and immediately use the teaspoon again to gently deepen the center indentation as it disappears while baking.
Cool. Allow cookies to cool completely before filling.
For the Peanut Butter Filling
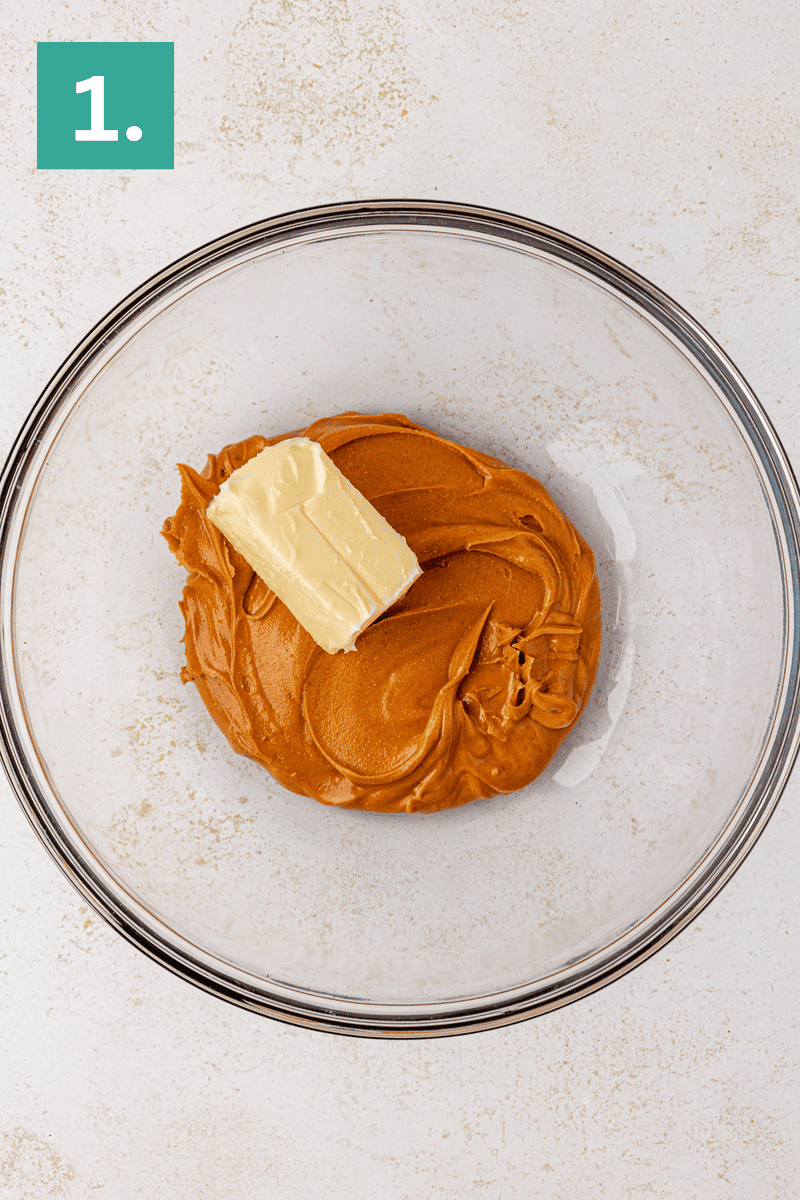
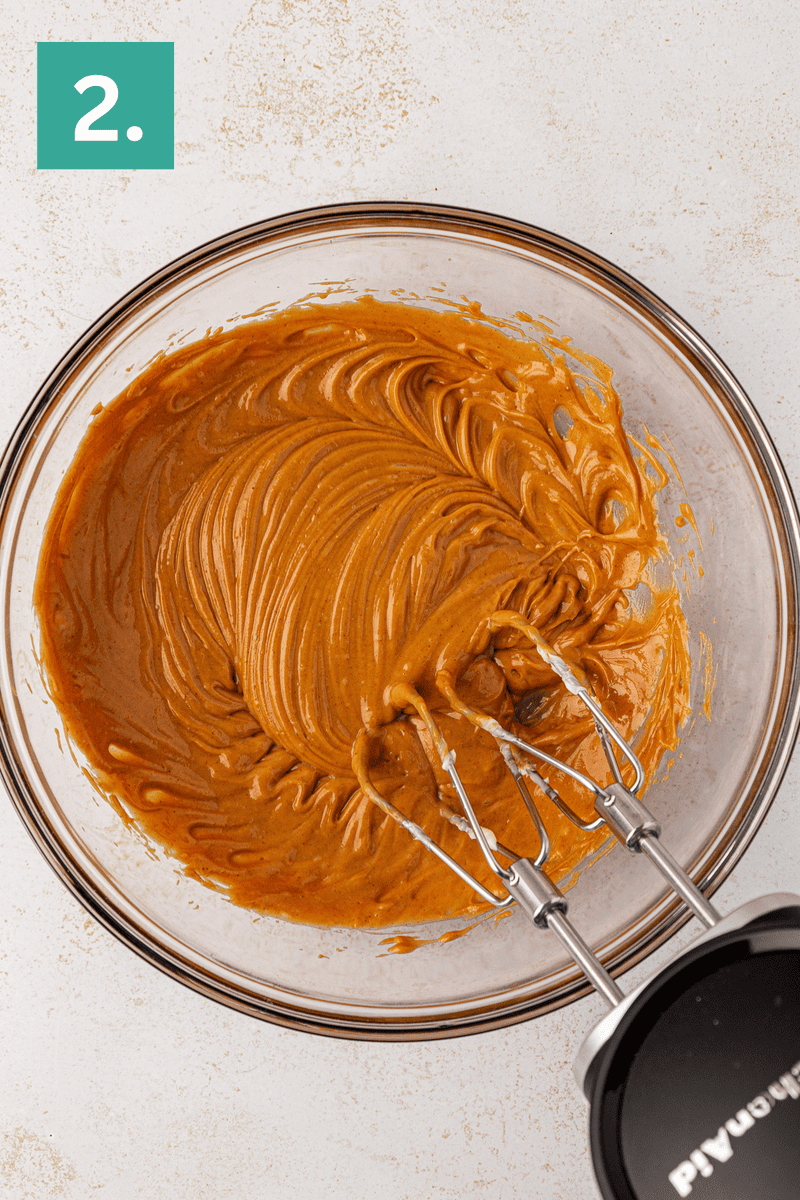
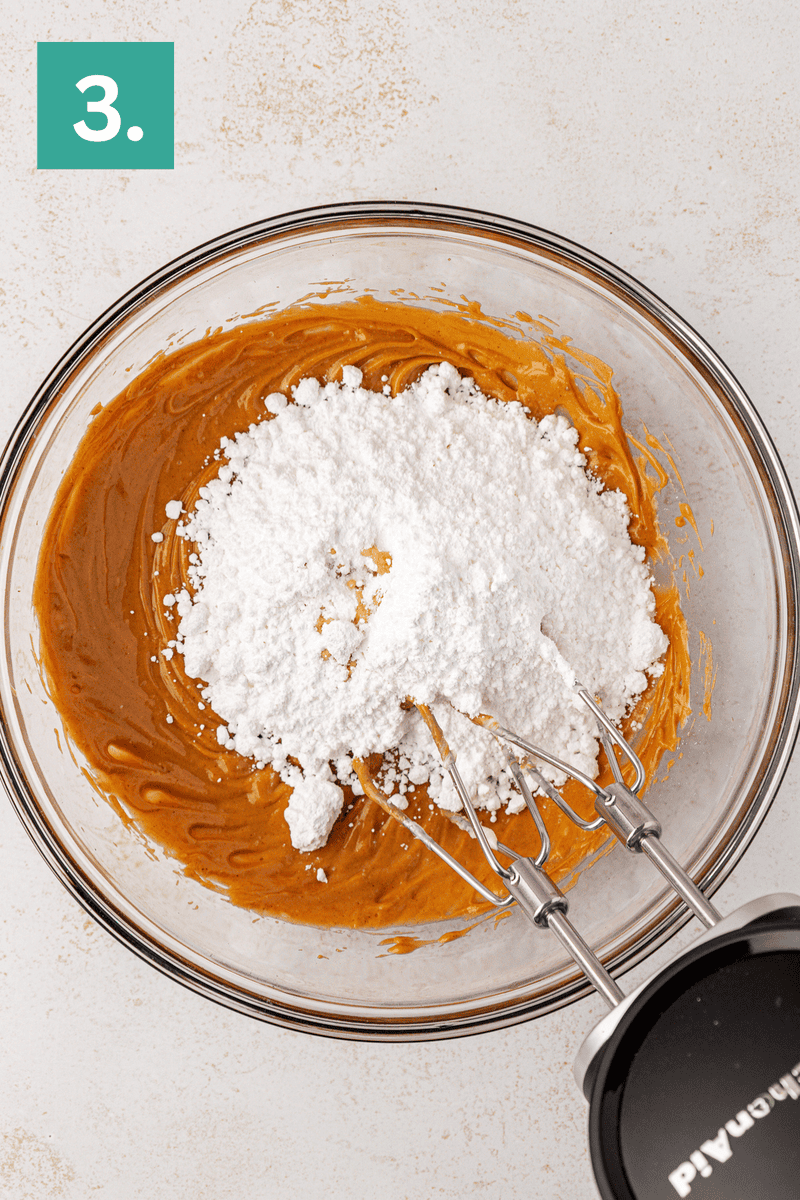
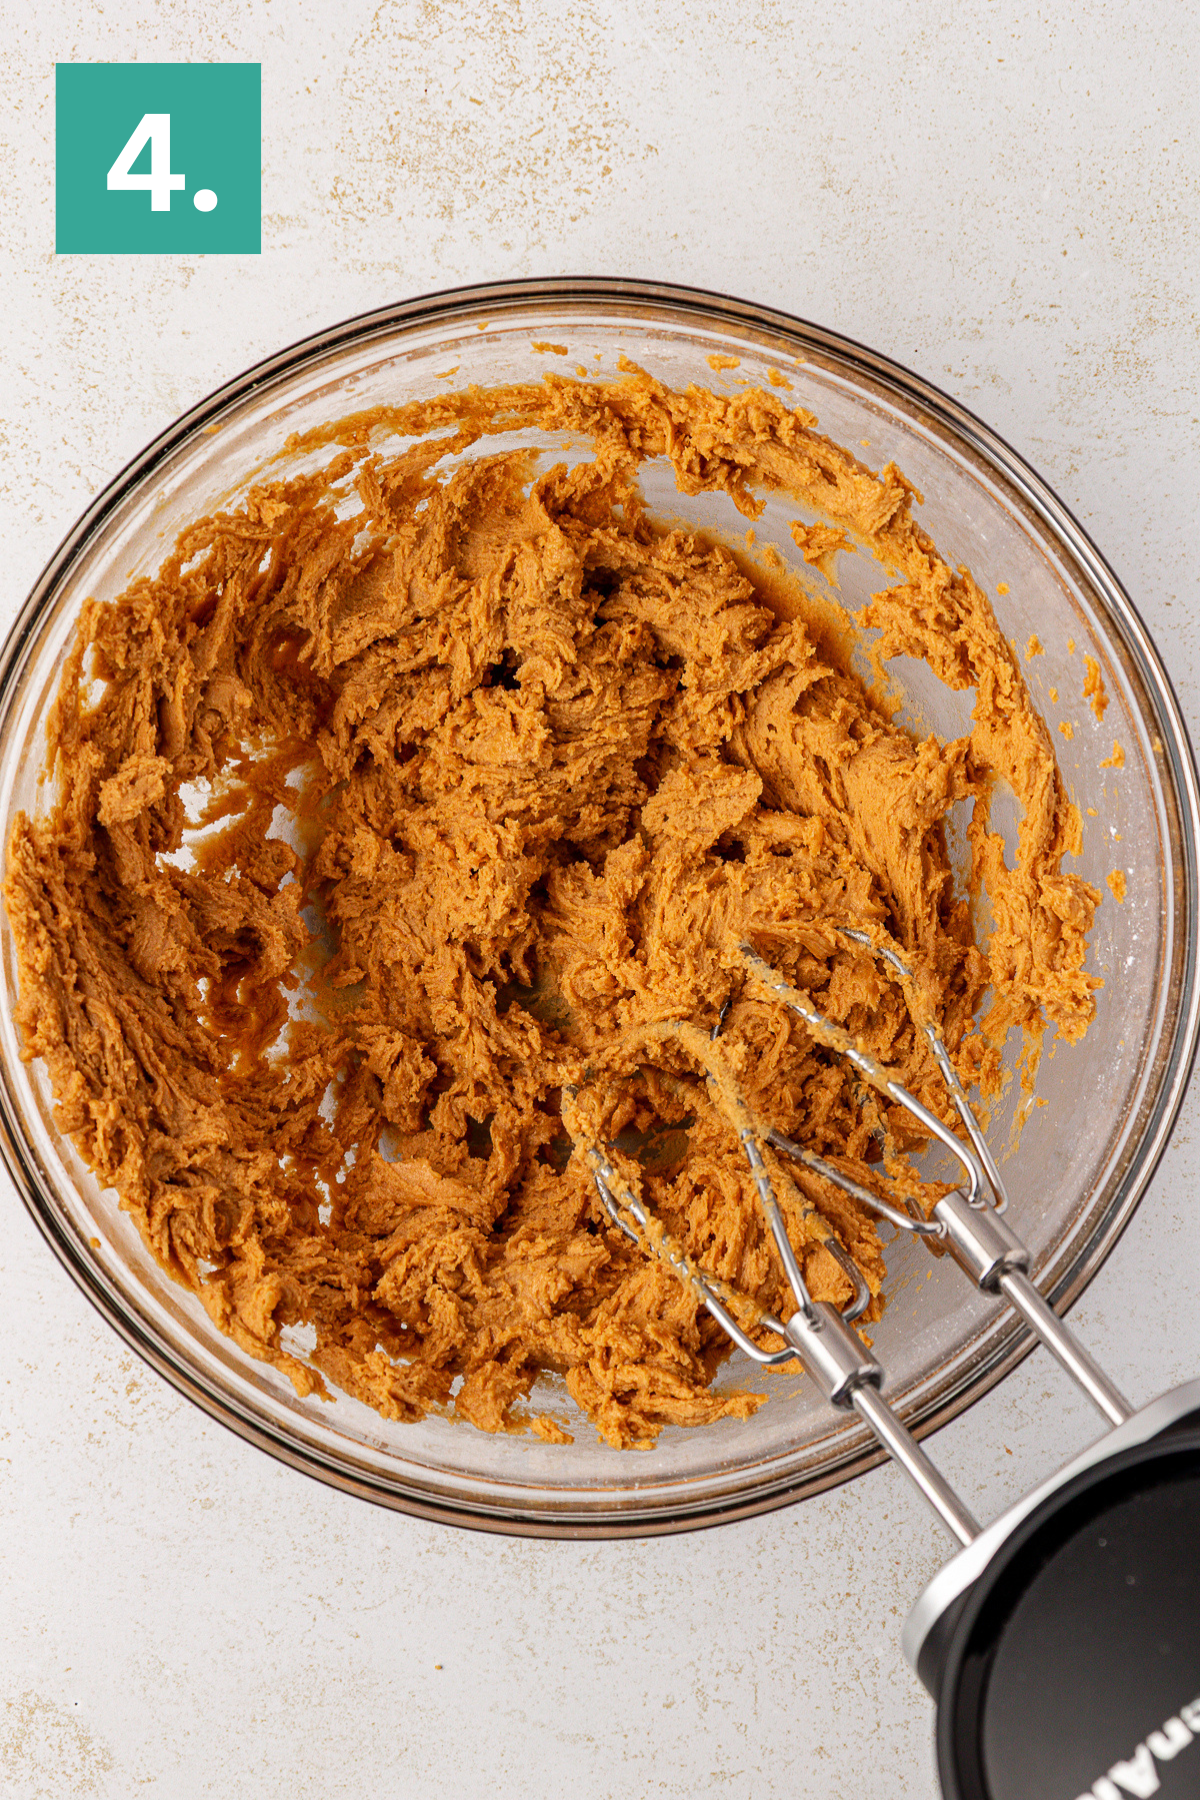
Combine filling ingredients. In a medium bowl, beat the peanut butter and butter with an electric mixer until smooth and creamy, 1 to 2 minutes. Add the powdered sugar, vanilla, and salt, then mix on low until a thick, dough-like filling forms.
Fill cookies. Portion out 2 teaspoons of this mixture and add to the center of each thumbprint. Pro tip: The mixture will be sticky, so wet your fingertips, shake dry, and use your fingertips to press the mixture evenly into the cookies.
In a microwave safe bowl, combine the chocolate chips and coconut oil. Microwave for 1 minute on 50% power, stir, and return to the microwave for another minute on 50% power until melted.
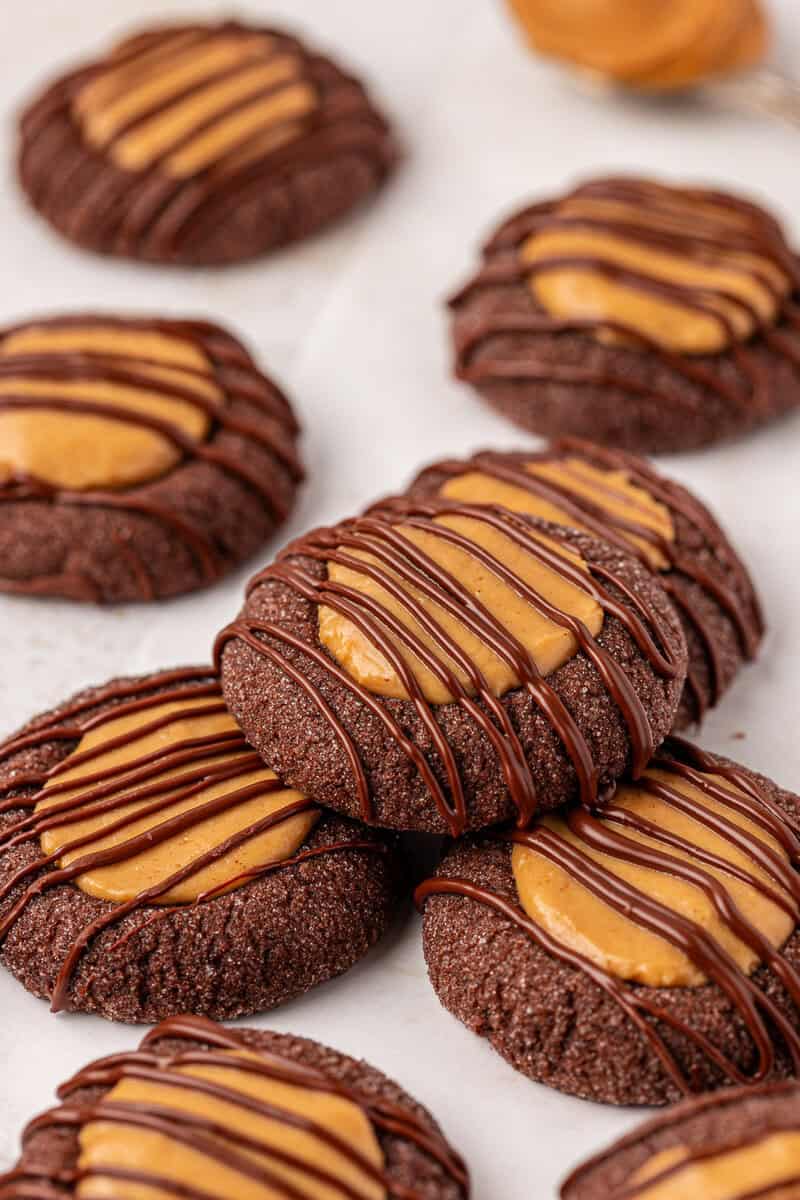
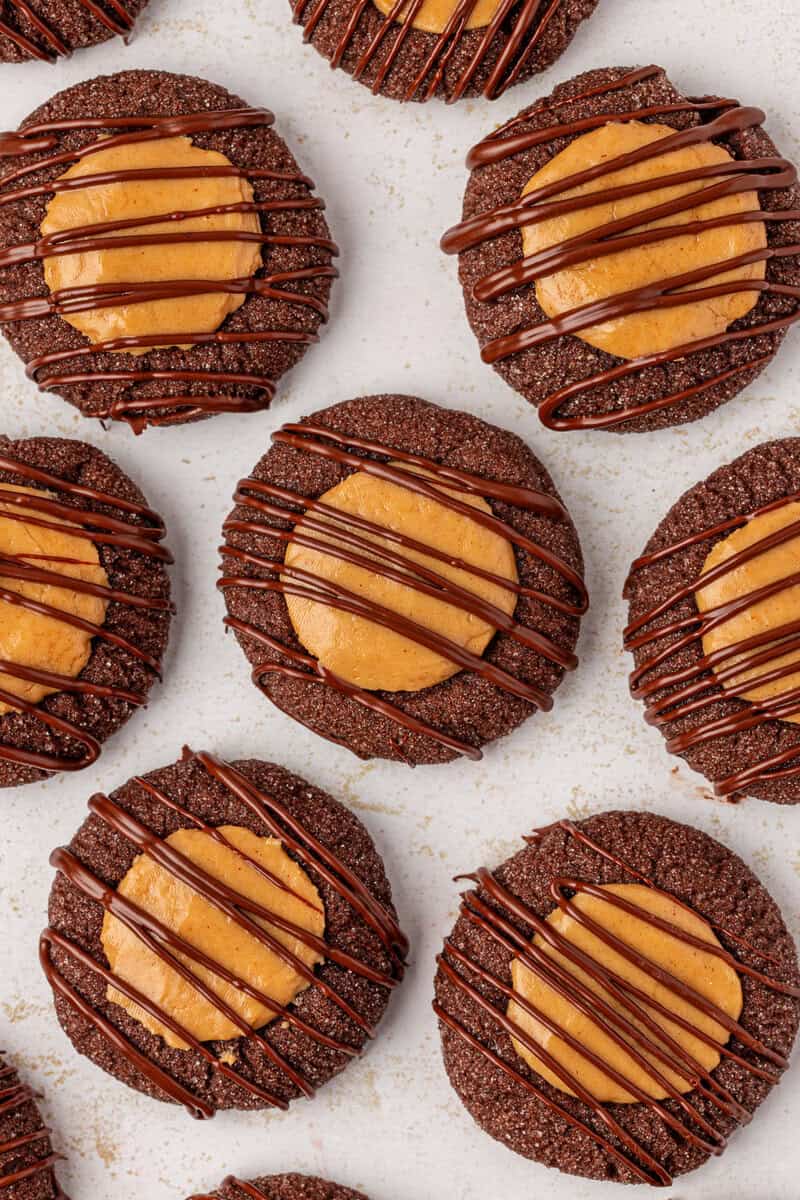
Top with chocolate. Drizzle the chocolate over the peanut butter filling.
Equipment Needed
- Silicone Baking Mat (or parchment paper)
- Baking Sheets
- Electric Mixer
- Cookie Dough Scoop
More Thumbprint Cookie Recipes
- Chocolate Peppermint Thumbprint Cookies
- Chocolate Orange Thumbprint Cookies
- Turtle Thumbprint Cookies
- Eggnog Thumbprint Cookies
Tap stars to rate!
Chocolate Peanut Butter Thumbprint Cookies
Ingredients
Cookies
- 1 ¾ cup (210g) all-purpose flour
- ½ cup (40g) Dutch-processed cocoa powder
- ½ tsp salt
- ½ tsp baking powder
- 1 tsp cornstarch
- ¾ cup (170g) unsalted butter
- 1 cup (213g) brown sugar
- 1 large egg
- 1 large egg yolk
- ¼ cup (50g) granulated sugar, for rolling
Peanut Butter Filling
- ¾ cup (201g) creamy peanut butter
- ¼ cup (57g) unsalted butter, softened
- 1 cup (113g) powdered sugar
- ½ tsp vanilla extract
- Pinch of salt
Chocolate Drizzle
- ¾ cup (129g) semi-sweet chocolate chips
- 1 tsp coconut oil or vegetable shortening
Video
Instructions
Cookies
- Line baking sheets with parchment paper or silicone mats.
- In a medium bowl, whisk together the flour, cocoa powder, salt, baking powder, and cornstarch. Set aside.1 ¾ cup (210g) all-purpose flour, ½ cup (40g) Dutch-processed cocoa powder, ½ tsp salt, ½ tsp baking powder, 1 tsp cornstarch
- In a large mixing bowl, beat the butter and brown sugar on medium speed until light and fluffy, about 1–2 minutes.¾ cup (170g) unsalted butter, 1 cup (213g) brown sugar
- Beat in the egg and egg yolk for 30 seconds, scraping down the sides as needed.1 large egg, 1 large egg yolk
- Gradually add the dry mixture to the wet ingredients, mixing on low speed until just combined. The dough will be very thick.
- Scoop 1 tablespoon of dough (use a #60 cookie scoop) and roll into smooth balls. Roll each ball in granulated sugar and place 2 inches apart on prepared baking sheets.¼ cup (50g) granulated sugar
- Use the back of a teaspoon to press a divot into the center of each cookie before baking. Place the baking sheet in the freezer for 10 minutes to firm up the dough. You can freeze longer if needed.
- Preheat the oven to 350°F (177°C). Bake for 10-11 minutes or until the edges are set but the centers still look soft. Remove from the oven and immediately use the teaspoon again to gently deepen the center indentation as it disappears while baking.
- Allow cookies to cool completely before filling.
Peanut Butter Filling
- In a medium bowl, beat the peanut butter and butter with an electric mixer until smooth and creamy, 1 to 2 minutes. Add the powdered sugar, vanilla, and salt, then mix on low until a thick, dough-like filling forms.¾ cup (201g) creamy peanut butter, ¼ cup (57g) unsalted butter, 1 cup (113g) powdered sugar, ½ tsp vanilla extract, Pinch of salt
- Portion out 2 teaspoons of this mixture and add to the center of each thumbprint. Pro tip: The mixture will be sticky, so wet your fingertips, shake dry, and use your fingertips to press the mixture evenly into the cookies.
- In a microwave safe bowl, combine the chocolate chips and coconut oil. Microwave for 1 minute on 50% power, stir, and return to the microwave for another minute on 50% power until melted.¾ cup (129g) semi-sweet chocolate chips, 1 tsp coconut oil or vegetable shortening
- Drizzle the chocolate over the peanut butter filling.
Notes


Oh Beth, you’ve done it now! After watching your reels about the chocolate thumbprint cookies, I had to try them out. My wife was not as excited, at least not until I gave her a couple cookies. Now she’s been hovering around the kitchen, hoping to sneak a few more when my back is turned. Thank you so much for sharing this recipe, and for all the work you put into the base recipe, making sure it was just right.