
This post may contain affiliate links. Please read our disclosure policy.
I spent 4 weeks in the kitchen perfecting the perfect pie crust recipe, and now I’m sharing it with you! I’ll also share all my best tips and things I did wrong along the way, so you can make the perfect pie crust the first time!
This is the best pie crust recipe I’ve ever made! Flaky and delicious. Will definitely be my go to recipe!
-Molly
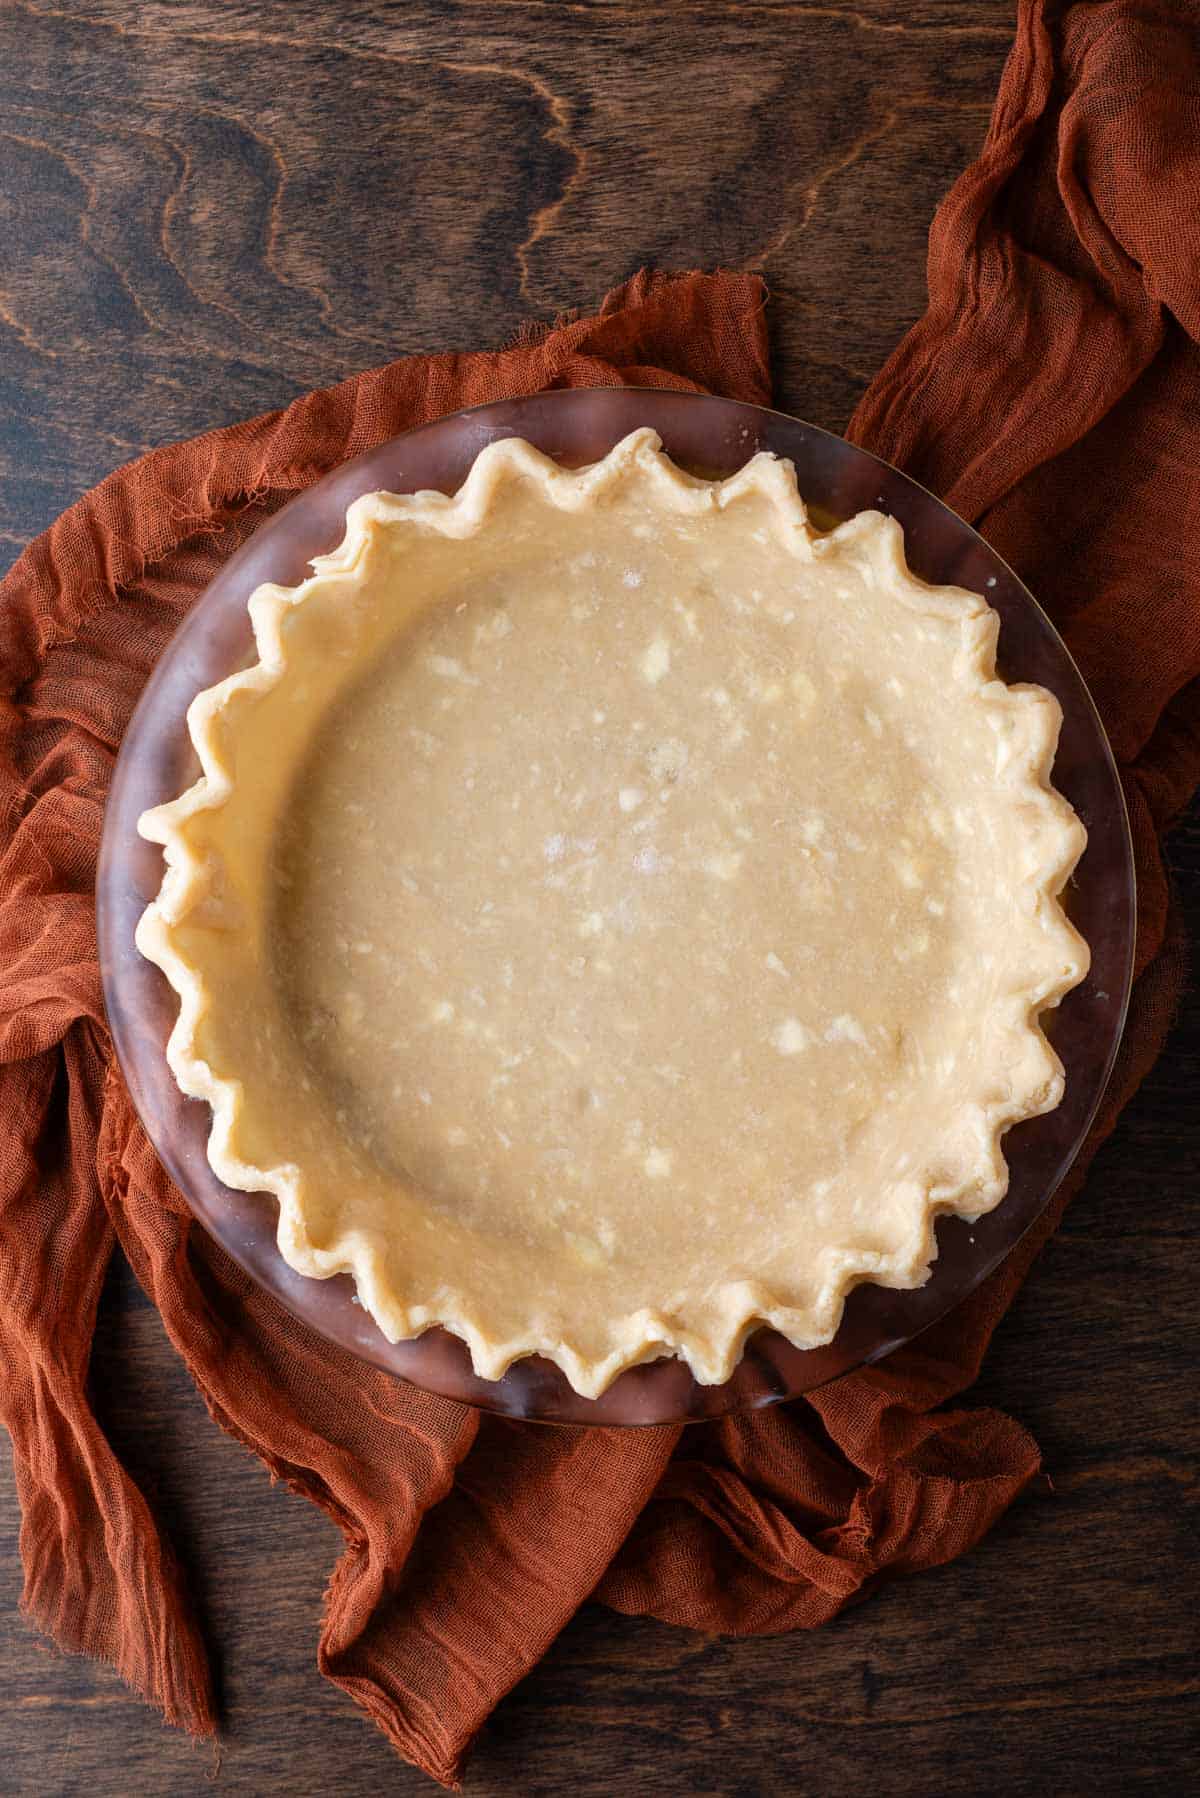
Butter and Shortening Pie Crust is so flaky and delicious!
If this is your first time making pie crust, you’ve landed in the right place. I’ll be your new pie crust coach! Before I started my month-long journey of perfecting my easy pie crust recipe, I had ZERO experience. Even if you have zero baking experience, trust me when I say that it’s entirely possible for anyone to learn how to make flaky pie crust from scratch.
The Flaky Pie Crust Learning Curve
Confession time: I never learned how to make my own homemade pie crust growing up, so I only used store-bought. That is, until this year when I decided to challenge myself and learn how to make the perfect flaky homemade pie crust. If you follow me on Instagram, you may have seen my initial fails at making homemade pie dough. You can still watch my Instagram stories to see all of the things I did wrong the first time (yes, I filmed it for all the world to see and comment on).
While my first attempt was terrible, I learned an important lesson: you 100% should not knead the dough with your hands. After that failed attempt, I reached out to a local friend who grew up making homemade pie crust with her mom and grandma, and thankfully she came over and gave me an in-person lesson.
Thanks to my friend and the generations before her, I learned what the dough should look and feel like when you’ve added just enough water to bring the dough together, the proper way to roll out the dough, and how to flute the edges.
I may have started with zero experience, but those 4 weeks I spent making, re-making, testing, rolling and baking this pie crust allowed me to perfect the perfect pie dough. If you are starting with zero experience, you can feel confident because I am going to walk you through the entire process in easy-to-follow steps.
Flaky Pie Crust Ingredients
If you’re looking for a crust to elevate all your pie recipes, this is the one! The best part, it just takes simple ingredients to make a delicious, flaky pie crust. Get the full recipe with ingredients and instructions in the recipe card below:
- All-purpose flour
- Salt
- Granulated sugar: If you prefer, you can omit the 1 tbsp of granulated sugar, but I promise it doesn’t make the crust sweet.
- Unsalted butter
- Vegetable shortening
- Ice cold water: Believe it or not, you can use vodka in place of the ice water!
How to Make Pie Crust with Butter and Shortening
This butter pie crust is to die for! The month spent perfecting this pie crust dough was so worth it. In that time, I was able to write out this step-by-step guide to make this simple recipe easy to follow and fool proof. Get the full recipe with measurements and ingredients in the recipe card below.
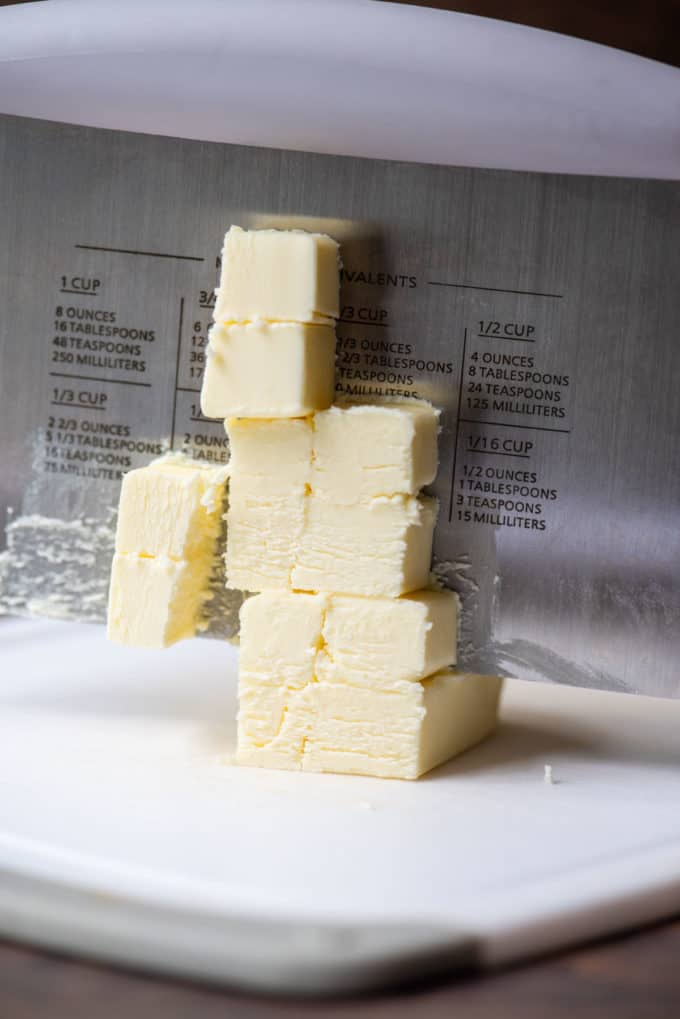
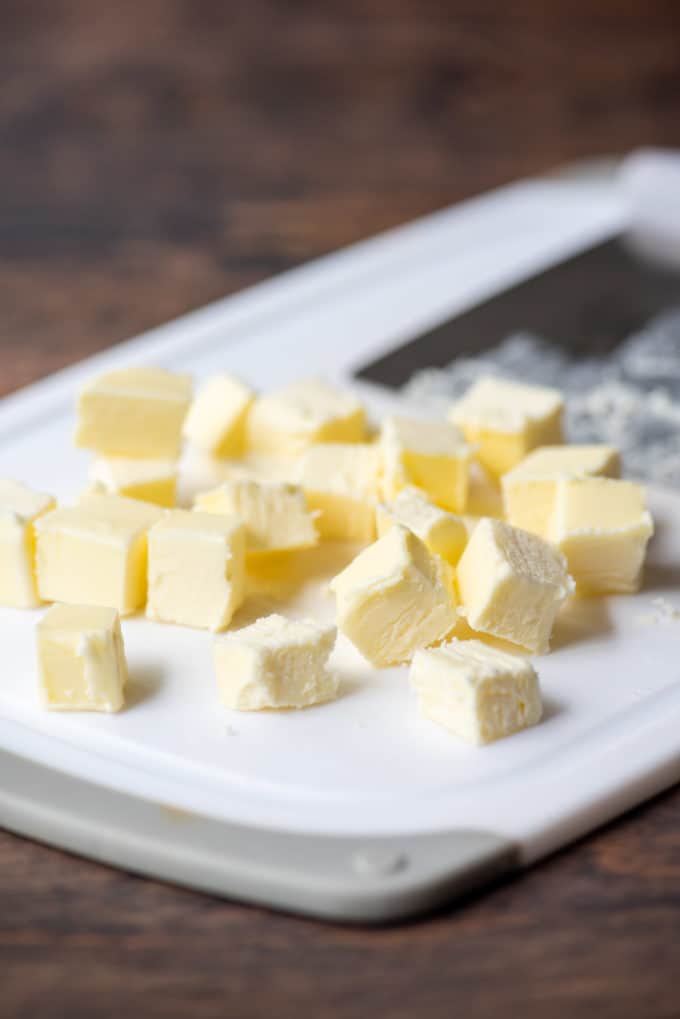
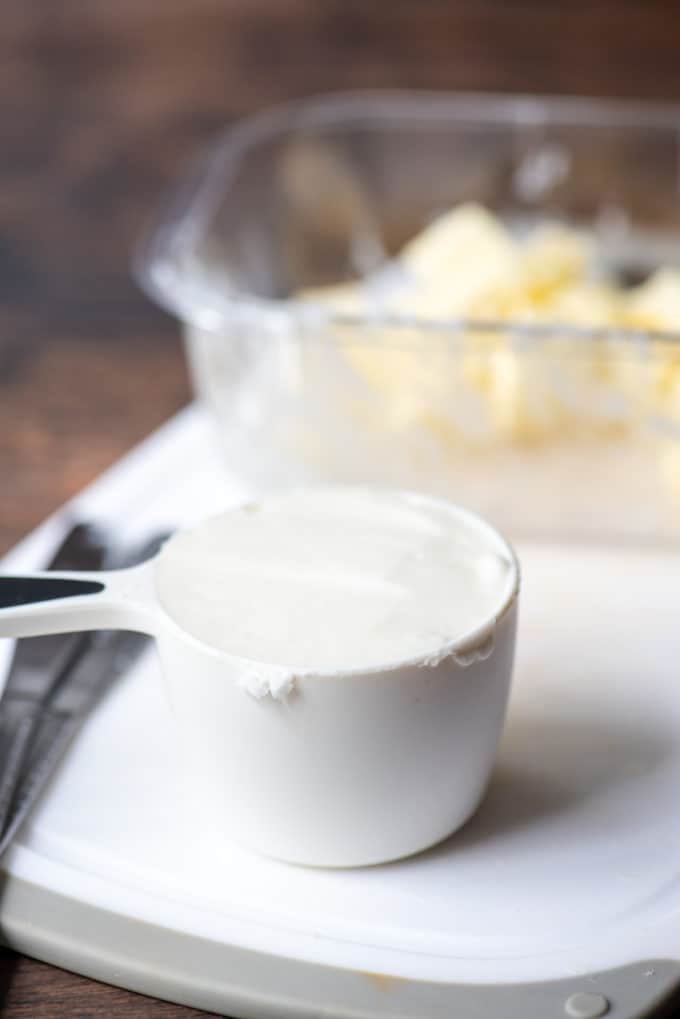
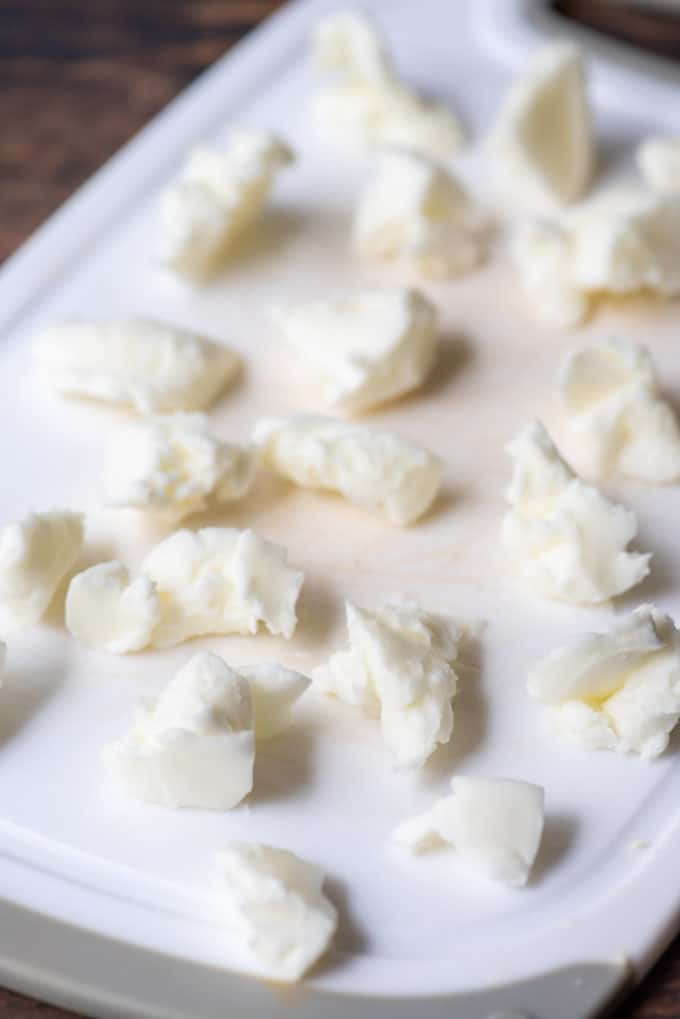
- Chill the Butter and Shortening: Start by cutting the butter and shortening into small cubes. Place in a container or on a plate and put in the fridge to chill for at least 30 minutes. I recommend using shortening sticks so it’s easier to cut into pieces. If using a tub of shortening, you can portion the ⅔ cup into about tablespoon size pieces.
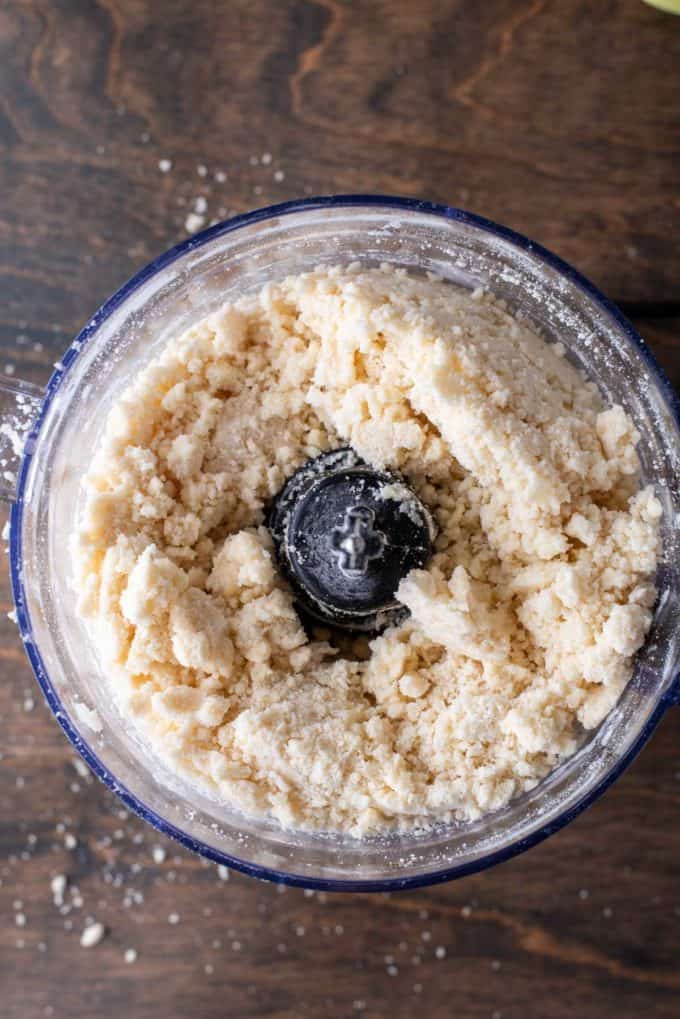
- Combine Dry Ingredients: In the food processor, add the 2 1/2 cups of all-purpose flour, 1 teaspoon of salt, and 1 tablespoon of granulated sugar. Pulse a few times to combine the dry ingredients.
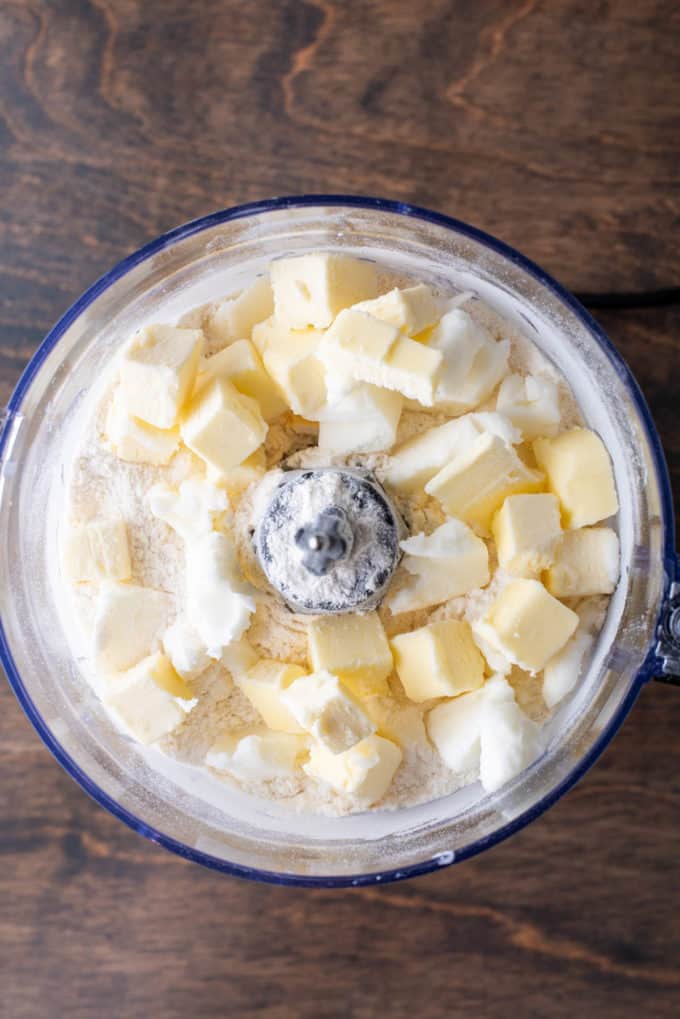
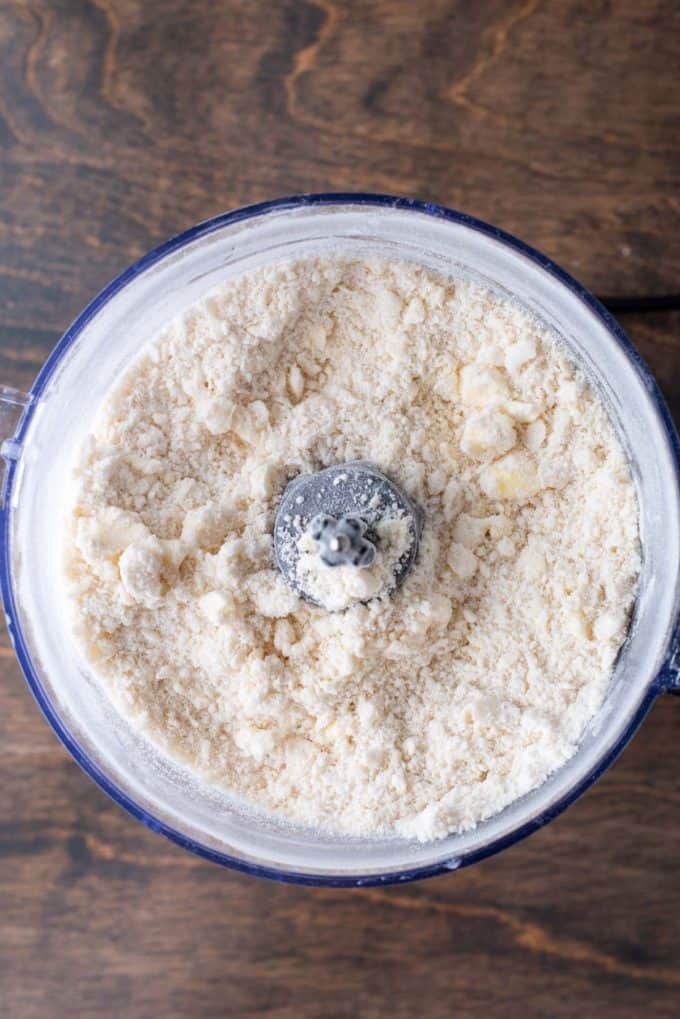
- Add Butter and Shortening: Add the 6 tablespoons of cold unsalted butter cubes and the chilled vegetable shortening chunks into the food processor. Pulse until the mixture resembles coarse crumbs with some pea-sized pieces of butter and shortening remaining. This should take about 10-15 one-second pulses.
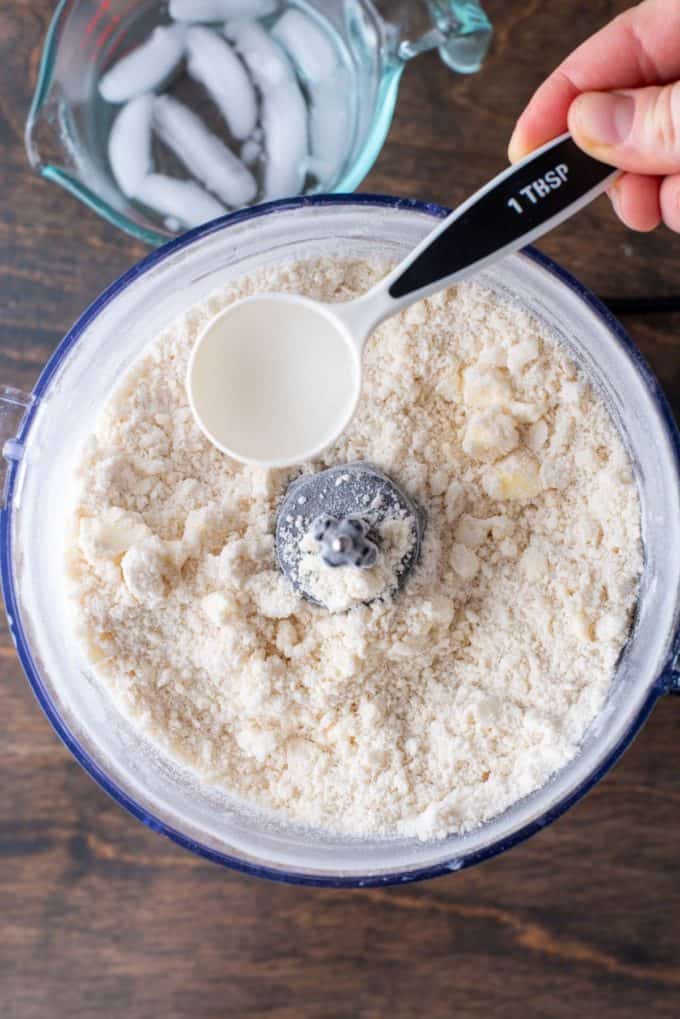
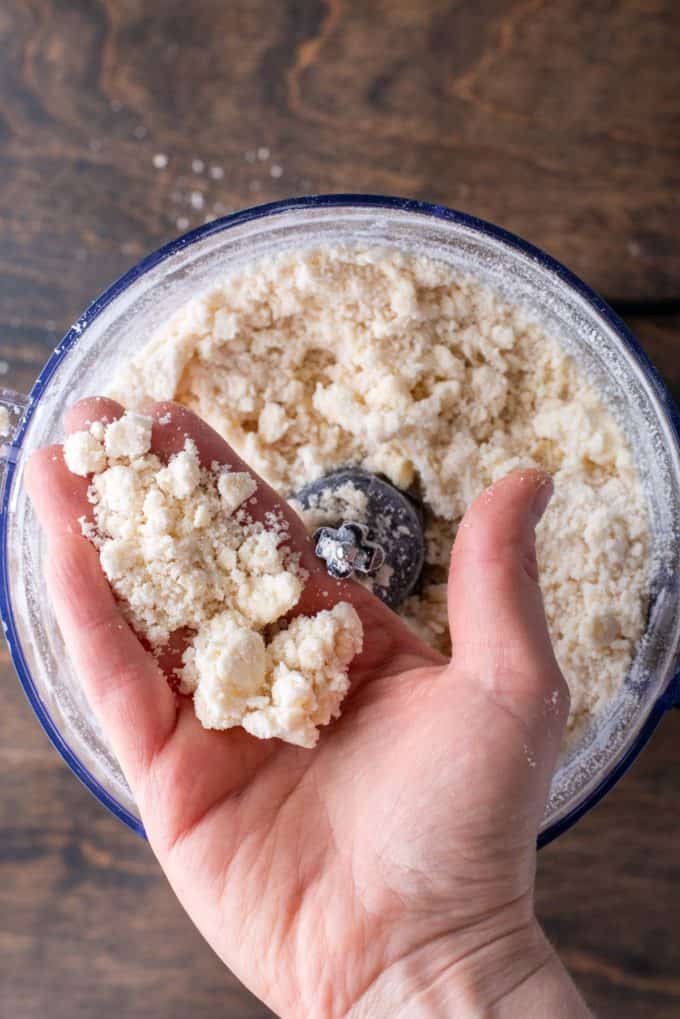
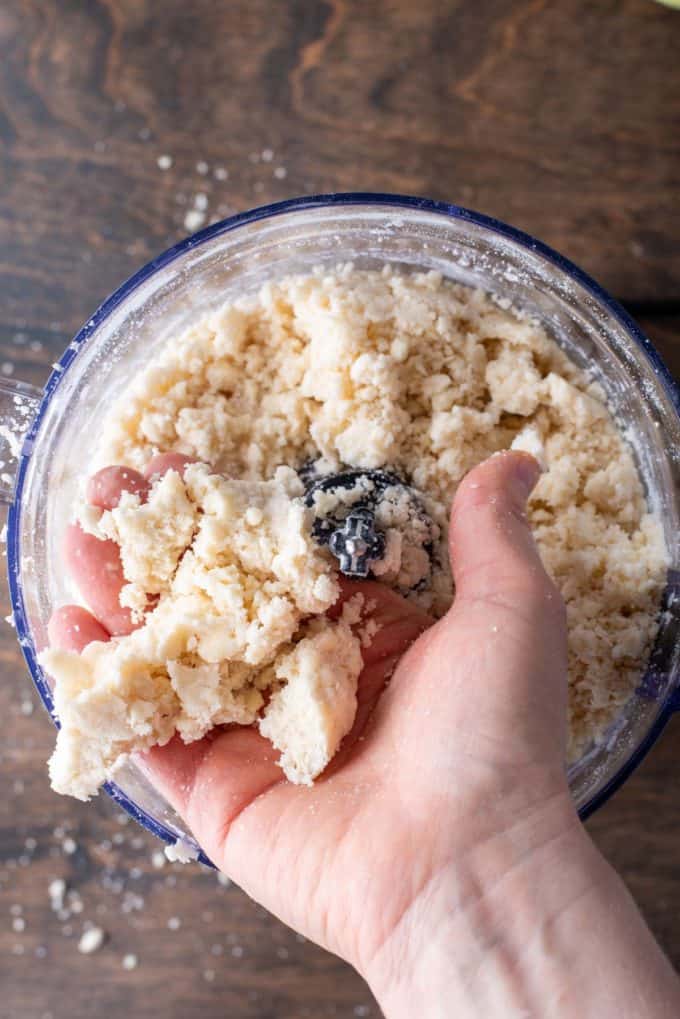
- Add Ice Water: drizzle in the ice-cold water, start with 4 tablespoons, continue processing until the dough begins to clump together. You can test the dough by pinching it; if it holds together, it’s ready. If it’s too dry, add more water, 1 tablespoon at a time, and pulse briefly until the dough reaches the right consistency.
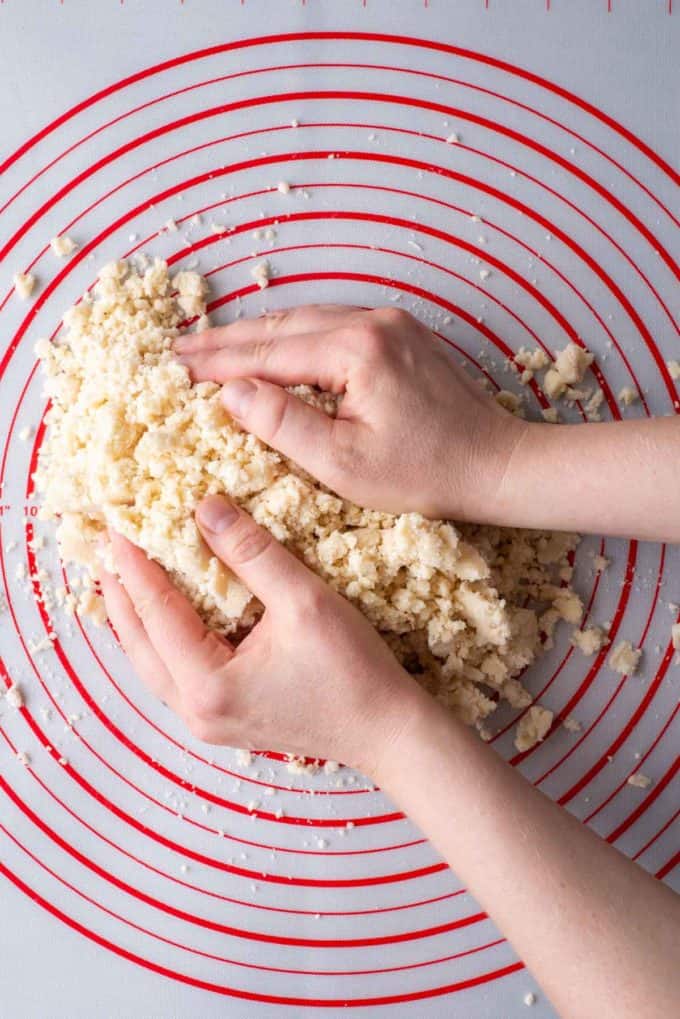
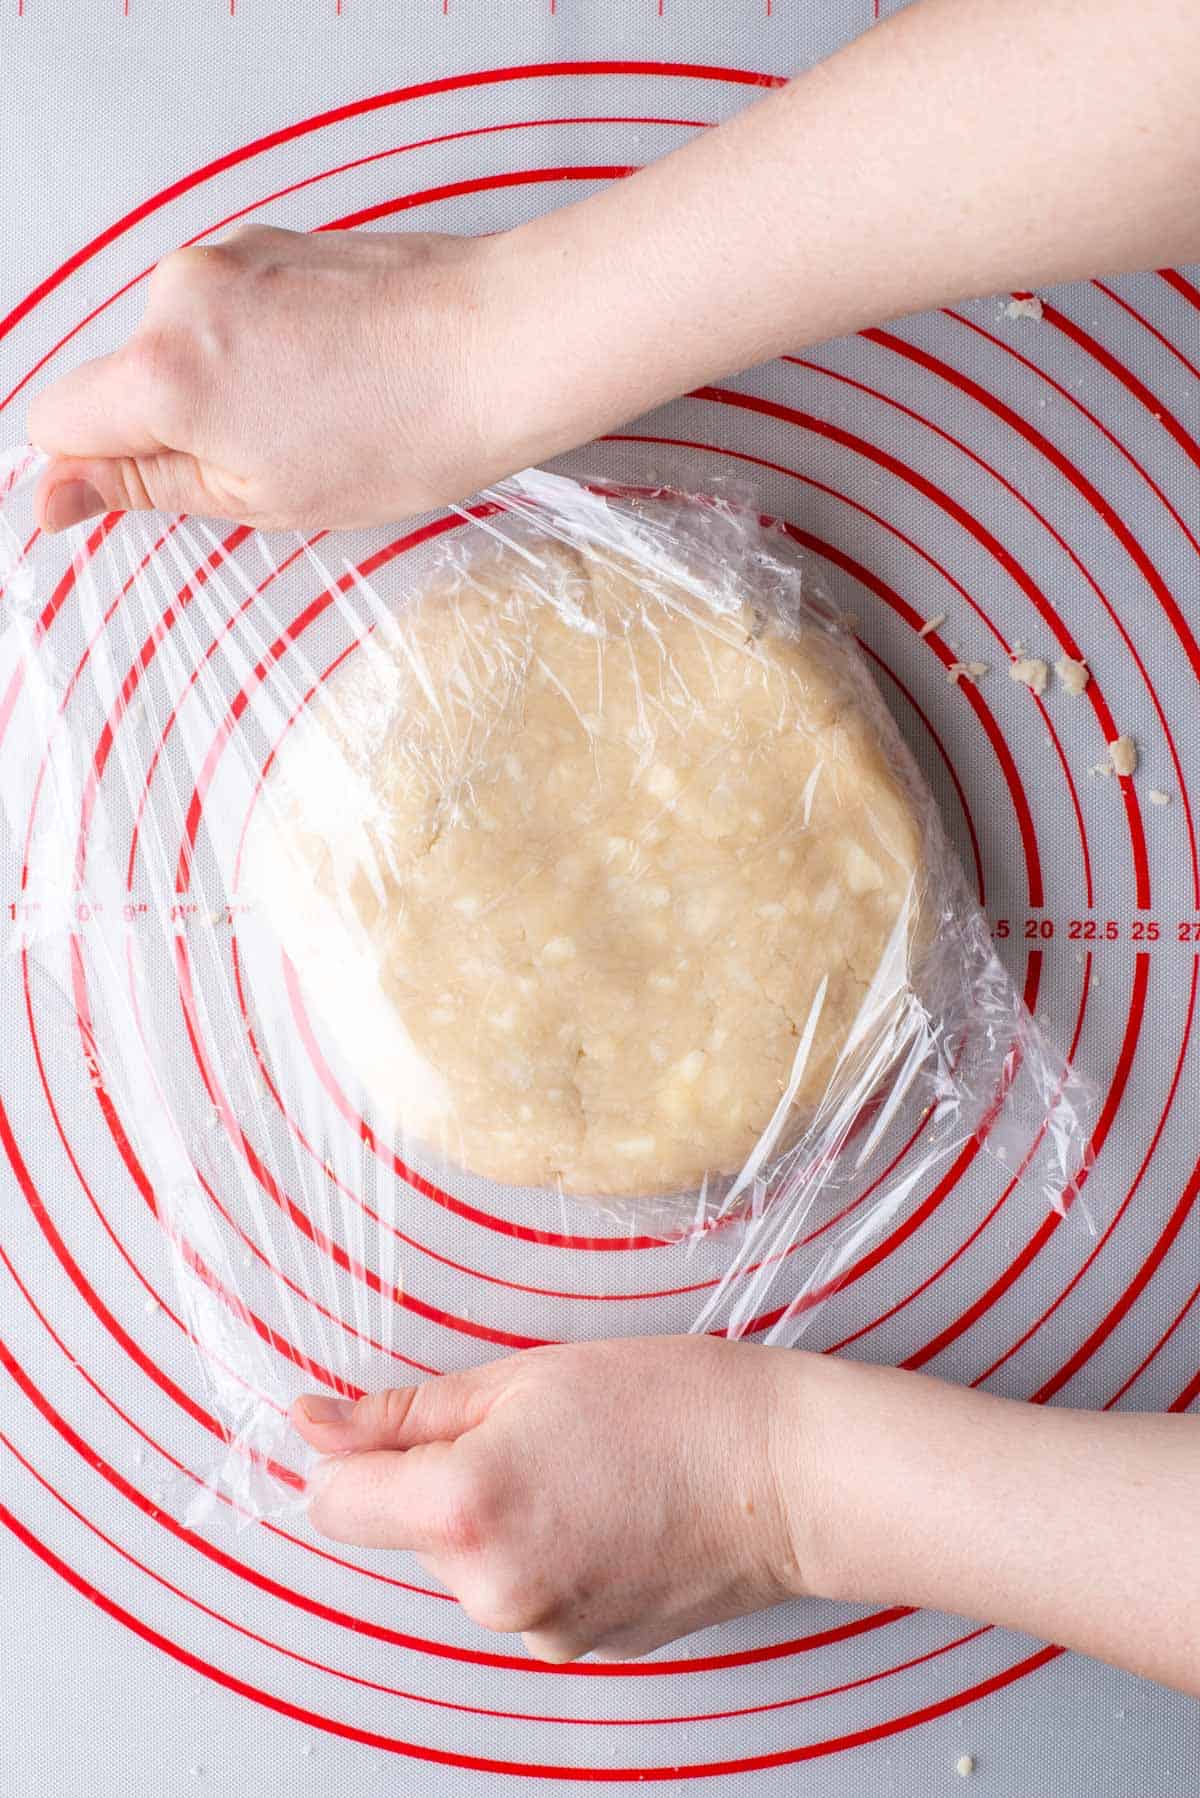
- Form Dough: Turn off the food processor and carefully remove the dough from the bowl. Place it onto a clean surface, such as a large piece of plastic wrap.
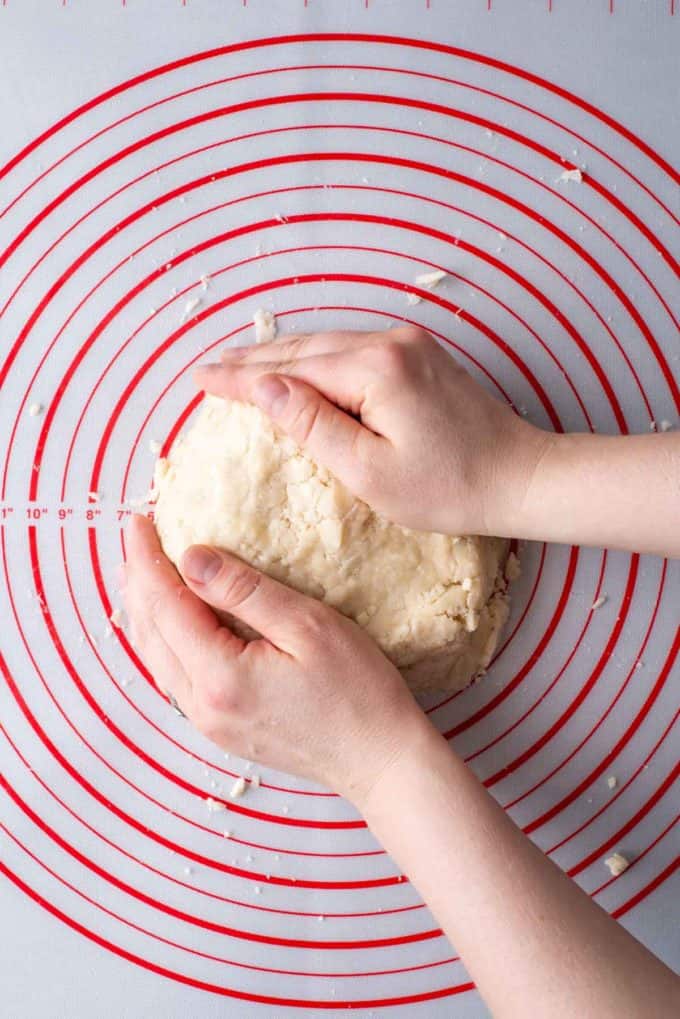
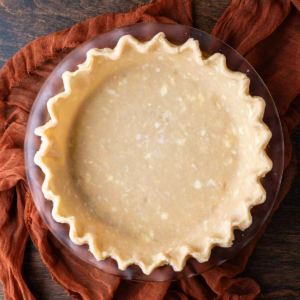
- Shape into Discs: Divide the dough into two equal portions. Shape each portion into a flat disc. This makes it easier to roll out later. Wrap each disc tightly in plastic wrap and refrigerate for at least 60 minutes or until firm. You can refrigerate for up to 4 days. You can also freeze one of the discs for future use if you’re only making a single-crust pie.
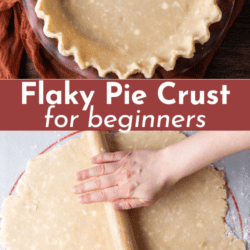
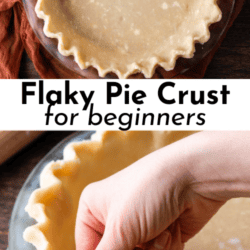
Rolling out the Dough
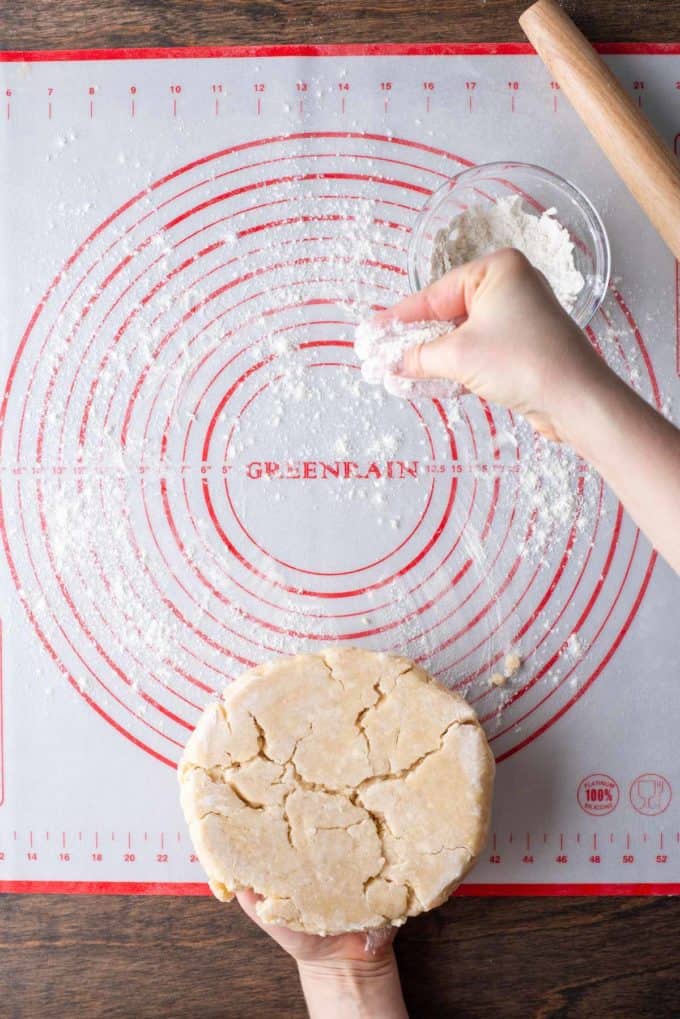
- Prepare Your Work Surface: Ensure your countertop or pie mat is clean and dry. Lightly dust it with all-purpose flour to prevent sticking.
- Take Out Chilled Dough: Remove one of the chilled dough discs from the refrigerator and let it sit at room temperature for a few minutes. This will make it easier to roll.

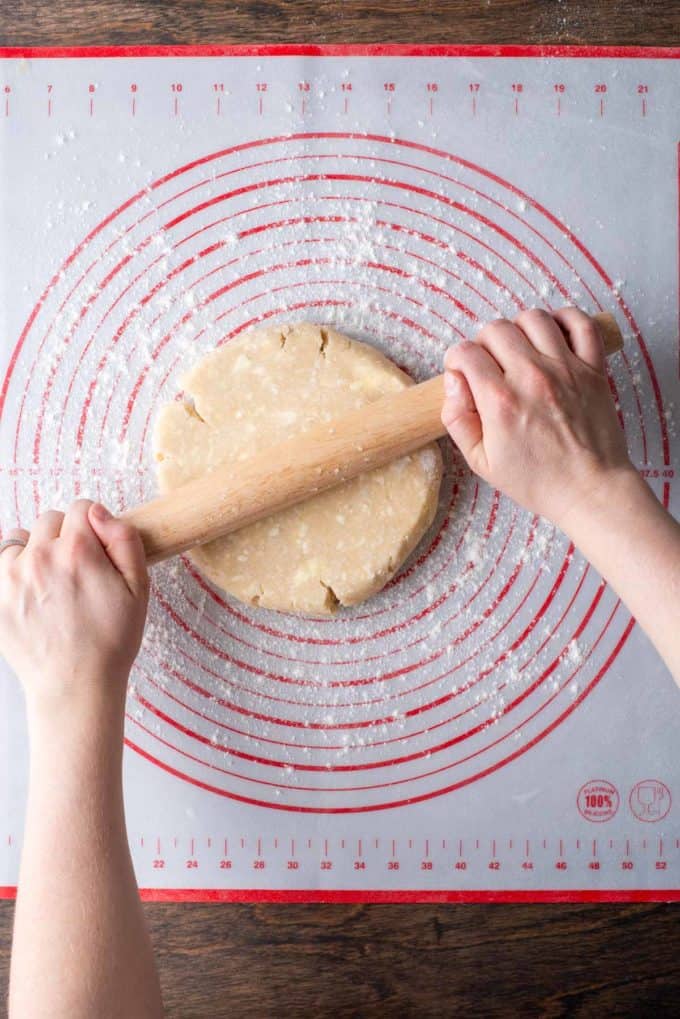
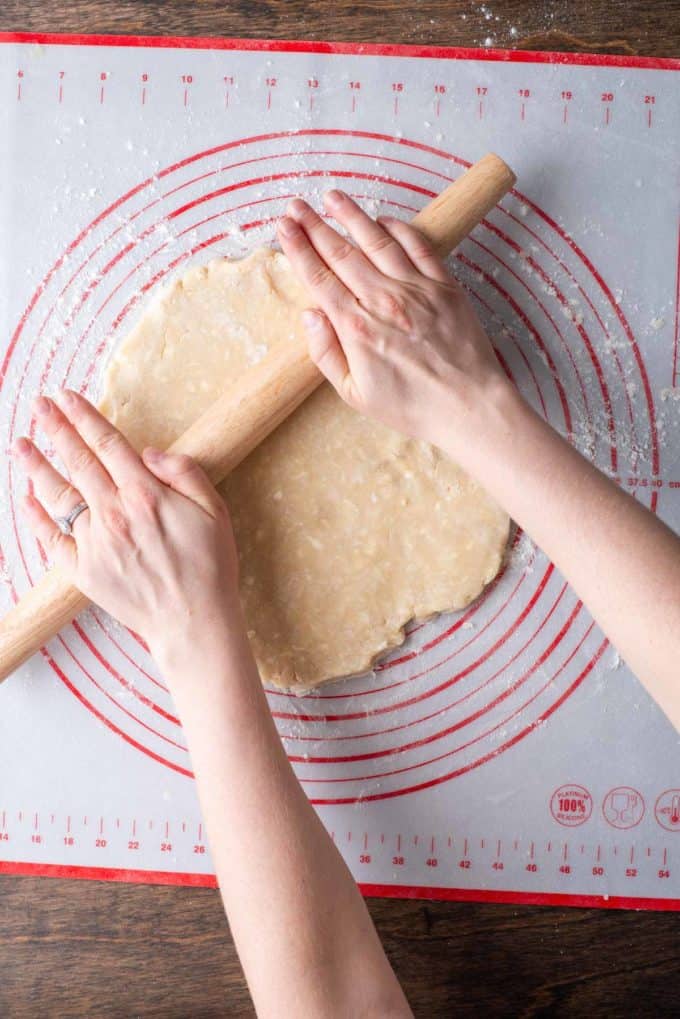
- Begin Rolling: Place the dough disc on the floured surface and use your rolling pin to gently press it down in the center. Start rolling from the center outward. Apply even pressure as you roll, working in all directions to maintain a roughly circular shape. If the dough cracks or splits during the rolling process, use your fingers to gently pinch it back together.
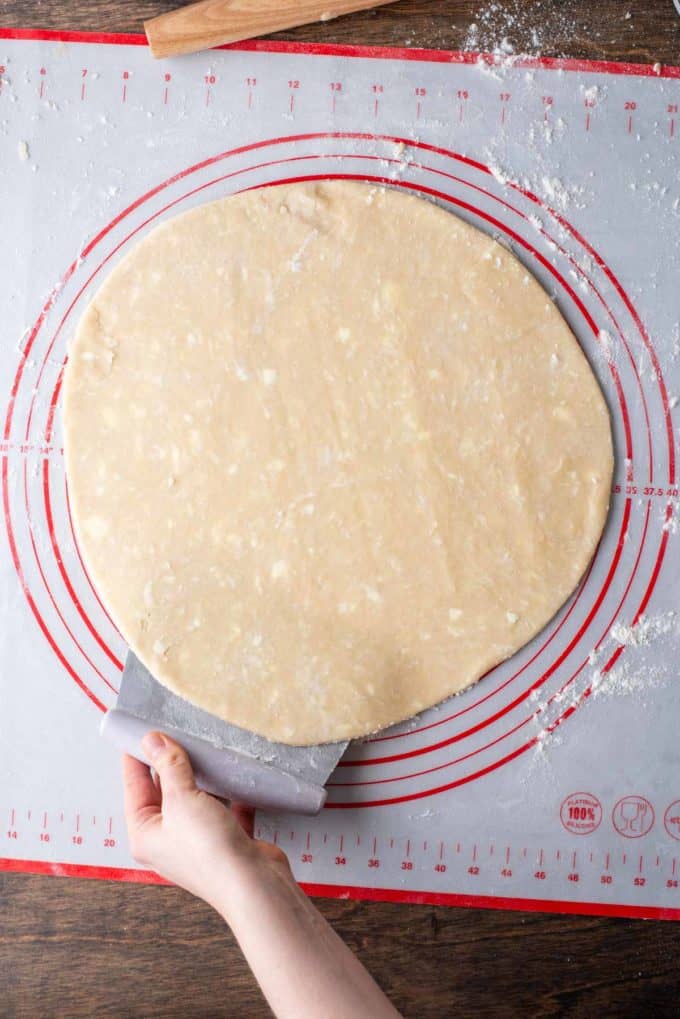
- Rotate the Dough: After each roll, rotate the dough a quarter turn. This helps ensure an even thickness and round shape, and prevents the dough from sticking to the surface. Continue rolling and rotating until the dough is about 6 inches in diameter.
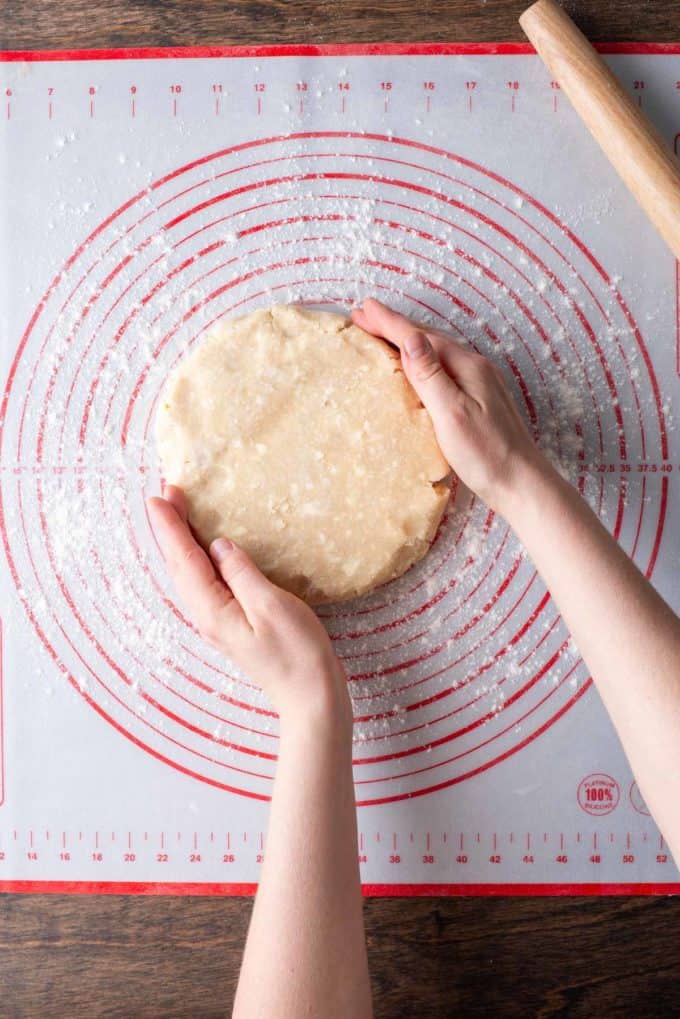
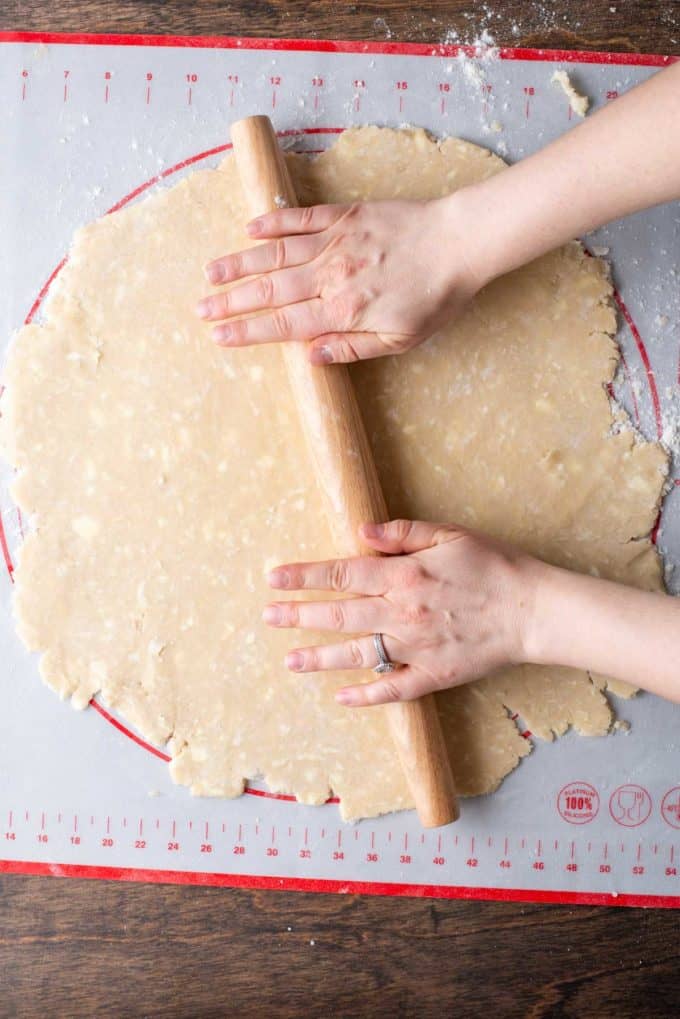
- Flip and Dust with Flour: Gently lift the dough from the surface using your hands, and flip it over. This prevents sticking and ensures even rolling. If the dough feels sticky, lightly dust it with more flour.
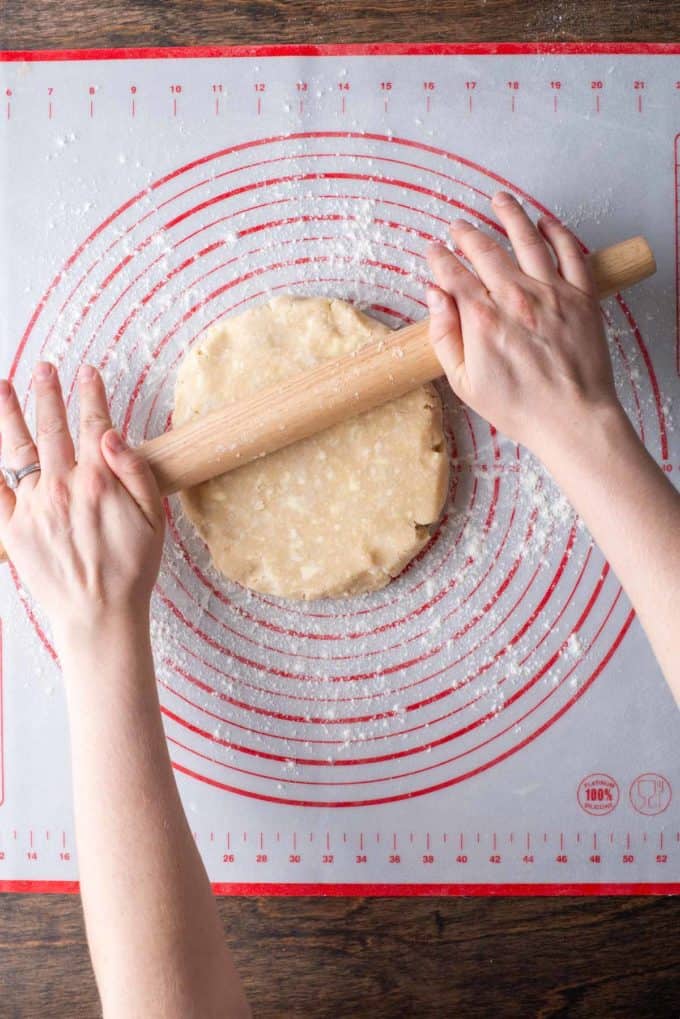
- Continue Rolling: Resume rolling from the center outward, rotating the dough as needed. Aim for an even thickness and gradually work your way to your desired size, typically 11-12 inches in diameter for a standard pie dish.
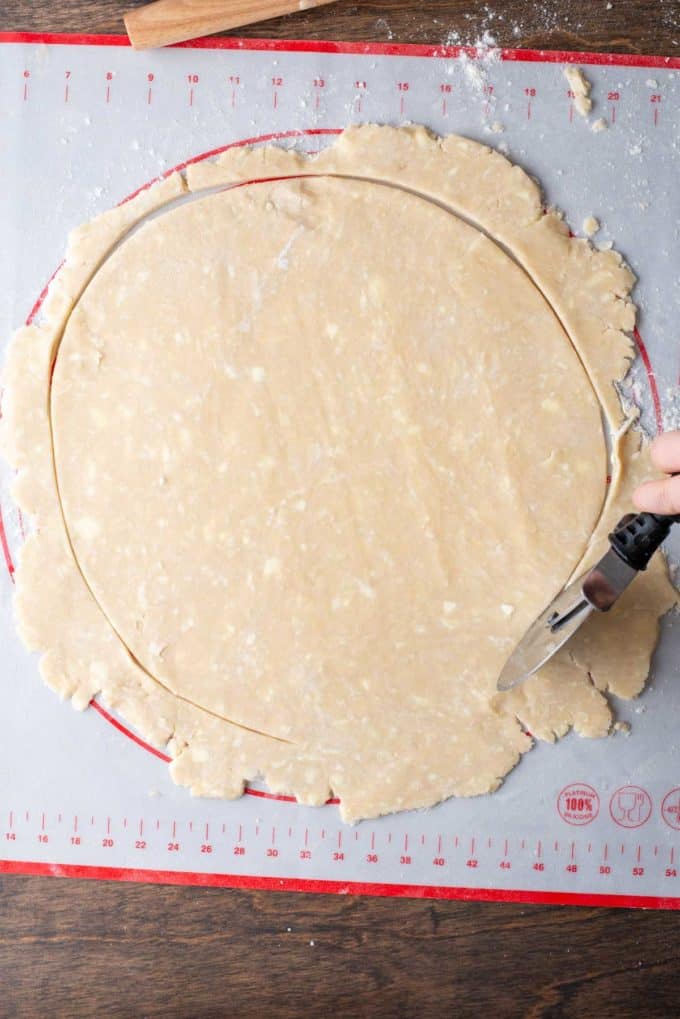
- Use a Pizza Cutter (Optional): For a perfectly round shape, consider using a pizza cutter. Place the cutter’s wheel at the edge of the dough, and cut around the perimeter to trim it into a precise circle. This also helps you visualize the exact size needed for your pie pan.
- Sprinkle with Flour: To prevent the dough from sticking to itself when rolled onto the rolling pin, sprinkle a little more flour over the surface of the dough.
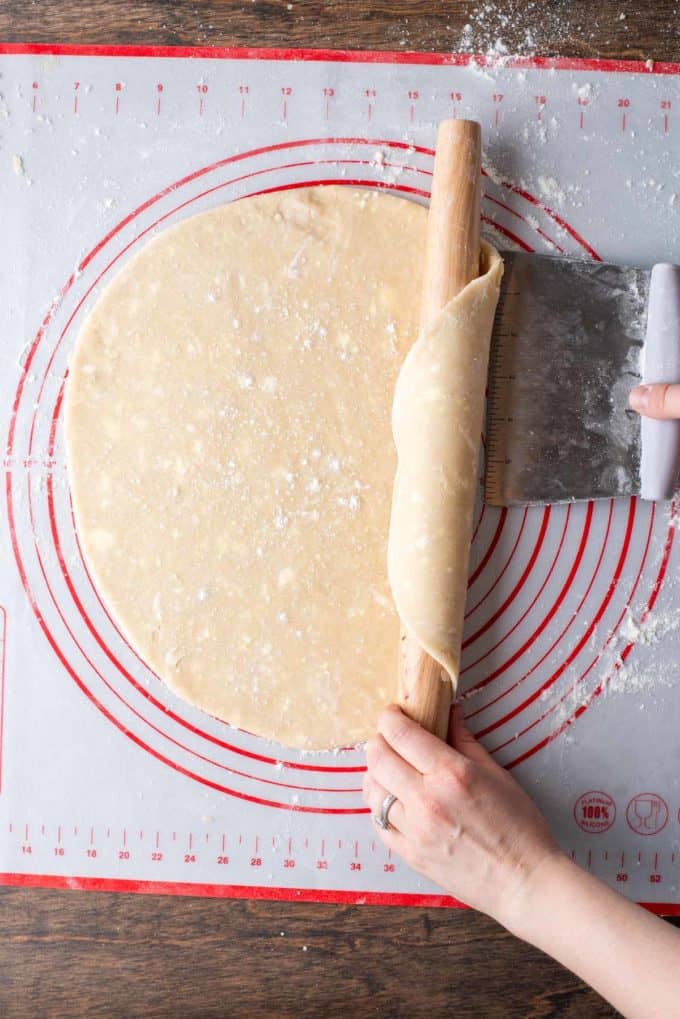
- Roll onto Rolling Pin: Carefully lift one edge of the dough and gently roll it onto your rolling pin. Start from one edge and continue rolling until the entire circle is wrapped around the rolling pin.
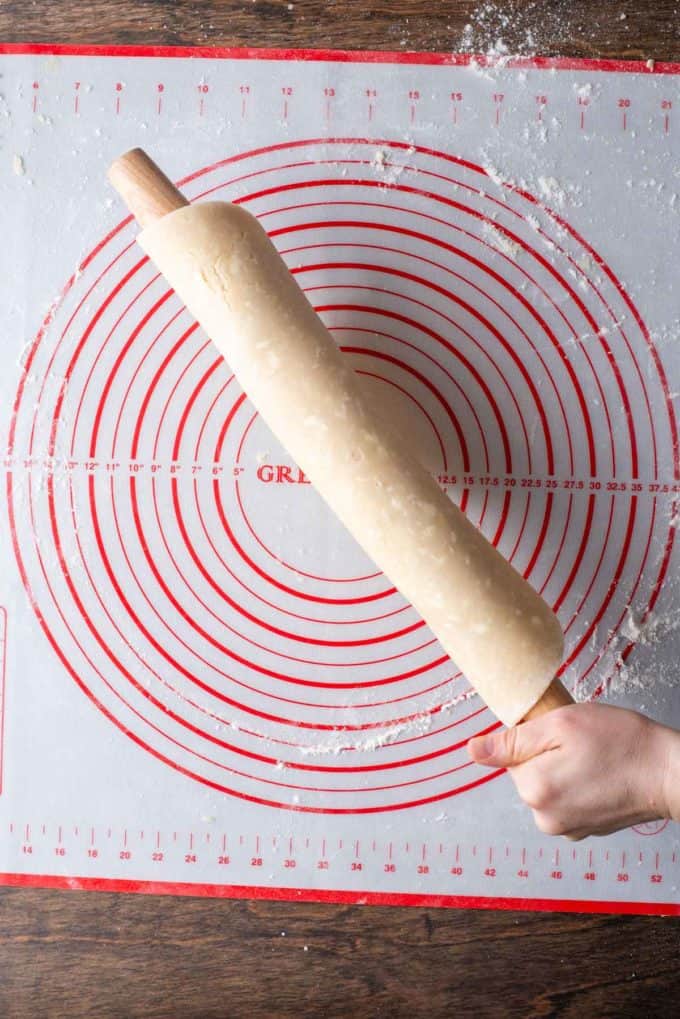

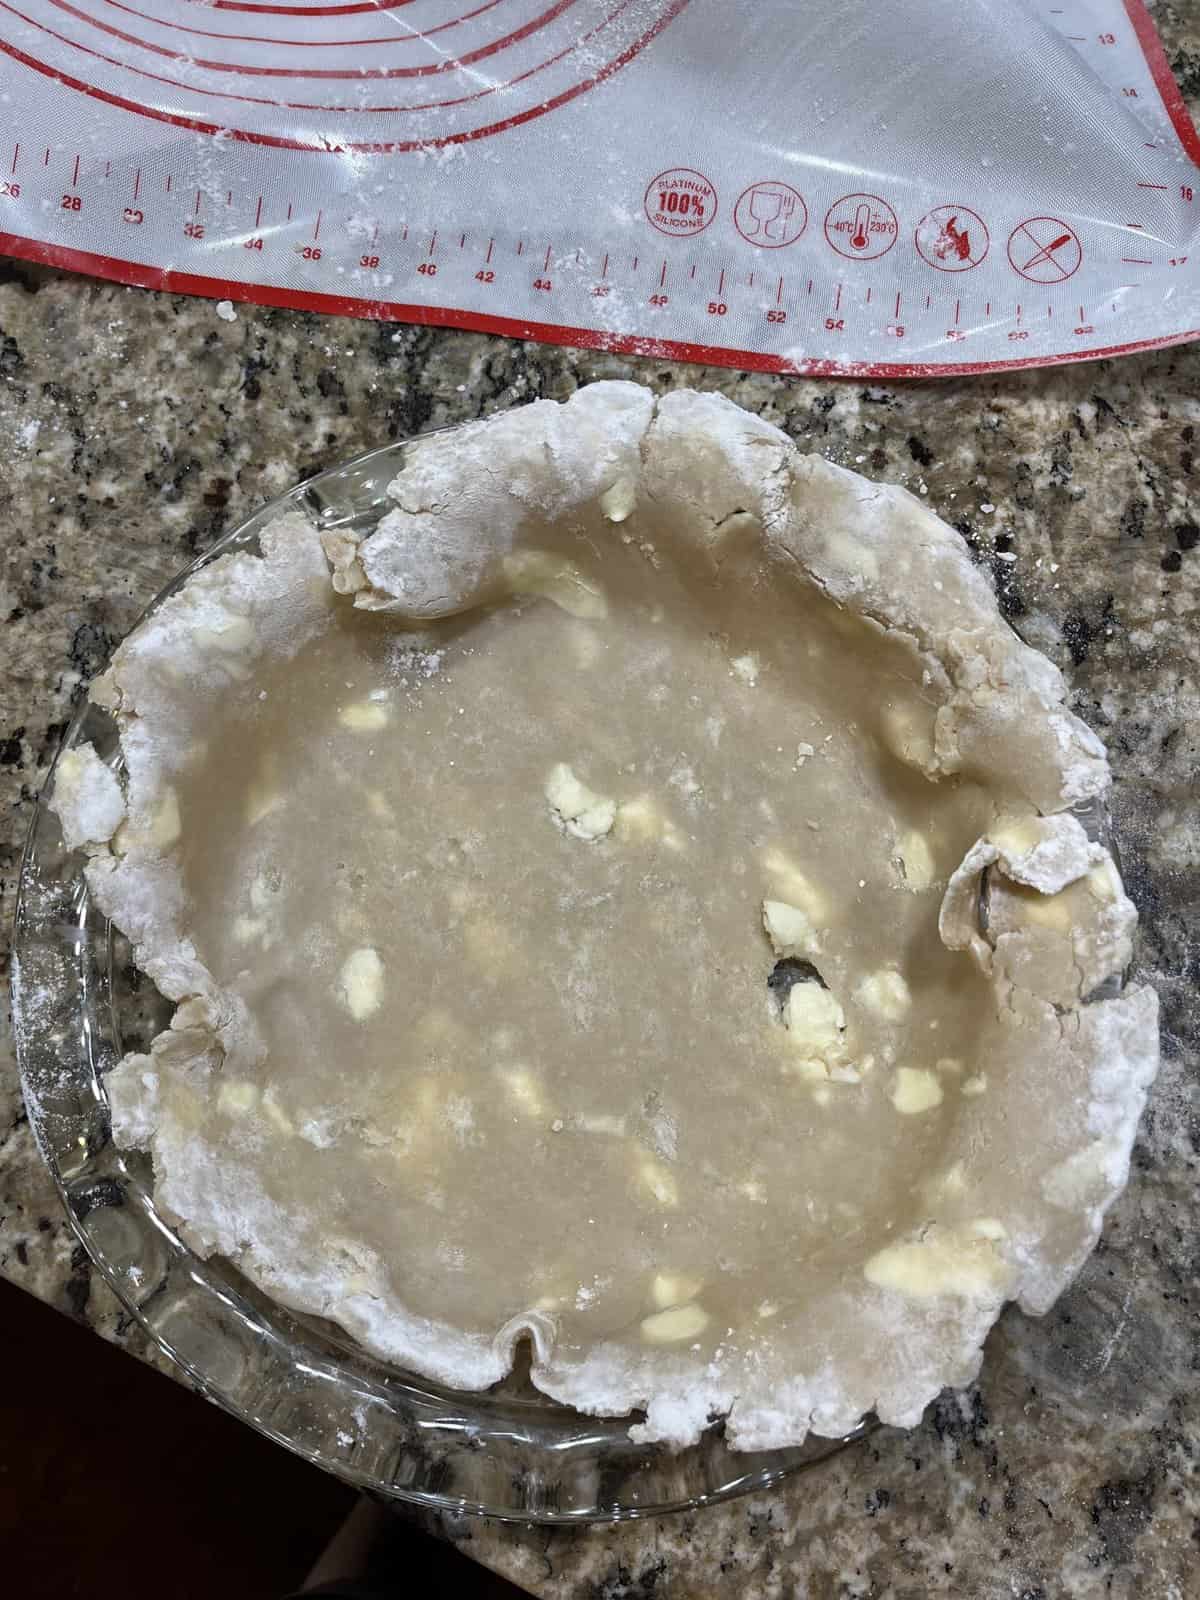
- Transfer to Pie Dish: Position the dough-covered rolling pin over your pie dish with the edge of the dough hanging over the side. Gently unroll the dough from the rolling pin into the pie dish, ensuring it covers the bottom and sides evenly.
- Trim Excess Dough: Trim any excessive overhang from the dough, leaving about 1/2 to 1 inch of overhang all around the pie dish. You can use scissors or a knife to do this.
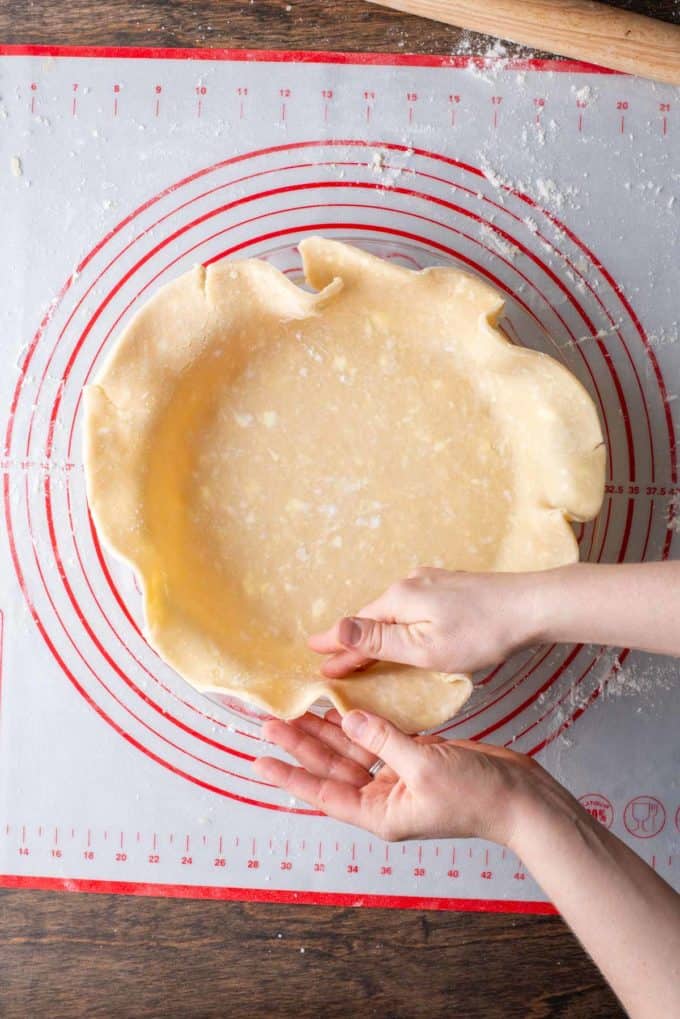
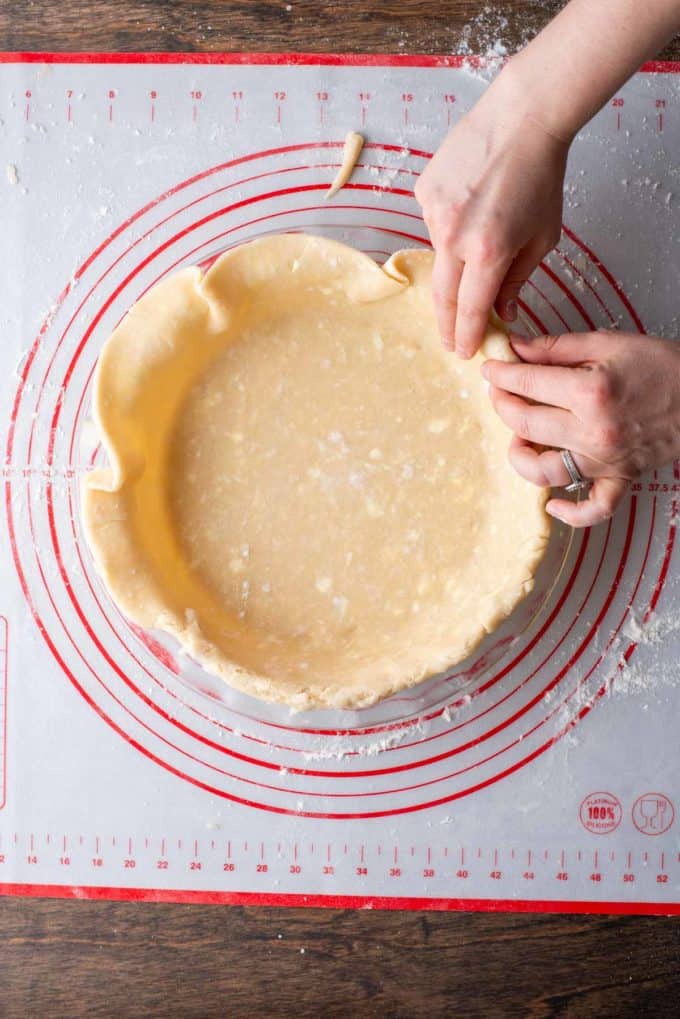
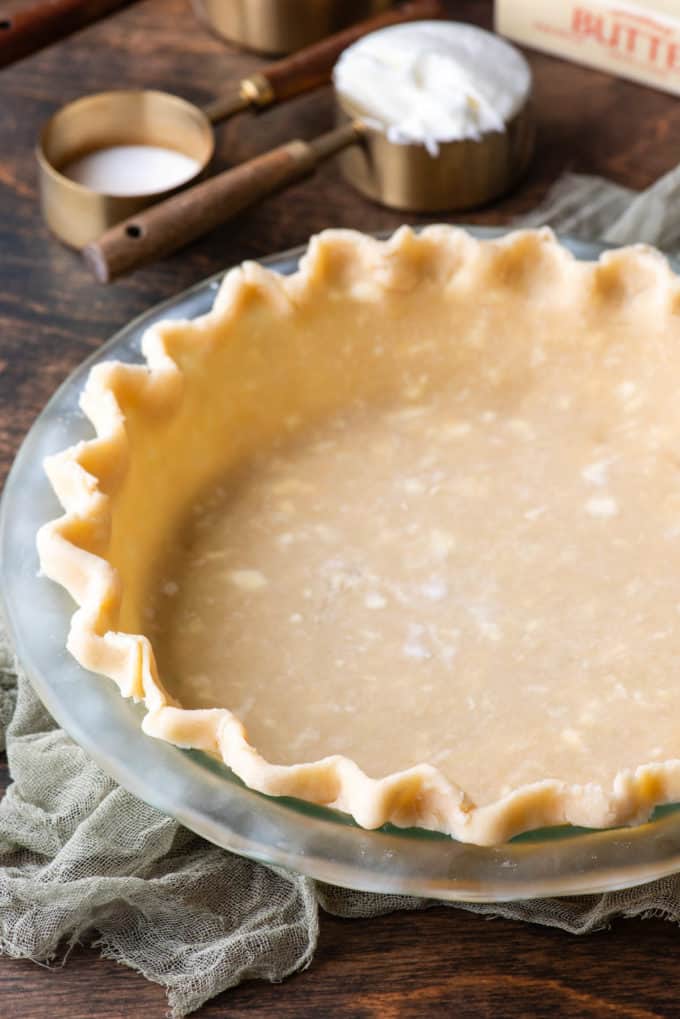
- Fold Under the Overhang: Start by folding the excess dough under itself. This creates a thick, double layer of dough around the edge of the pie dish. It also helps to reinforce the edge and create a more substantial crust.
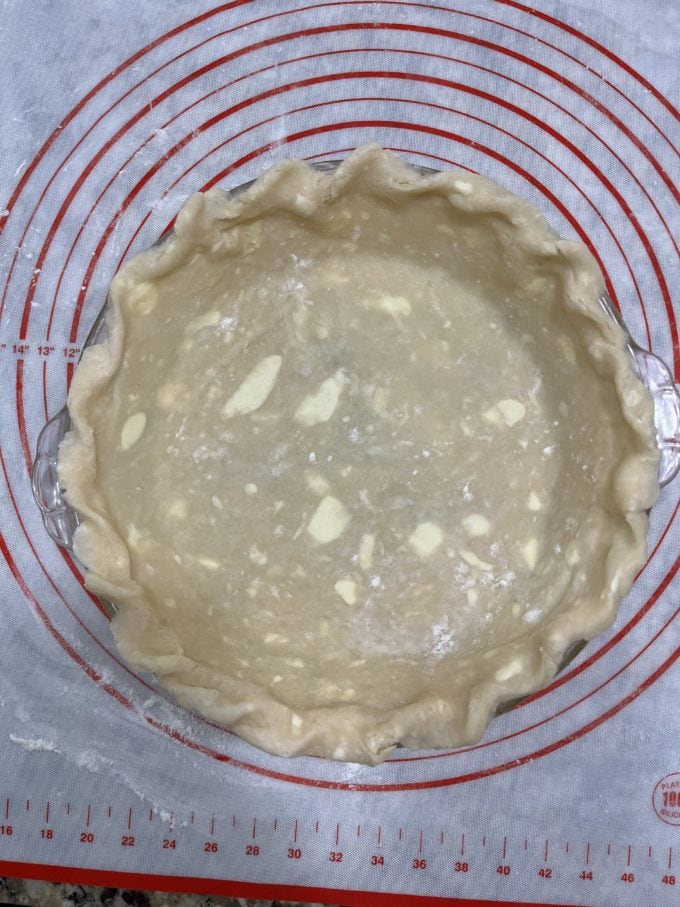
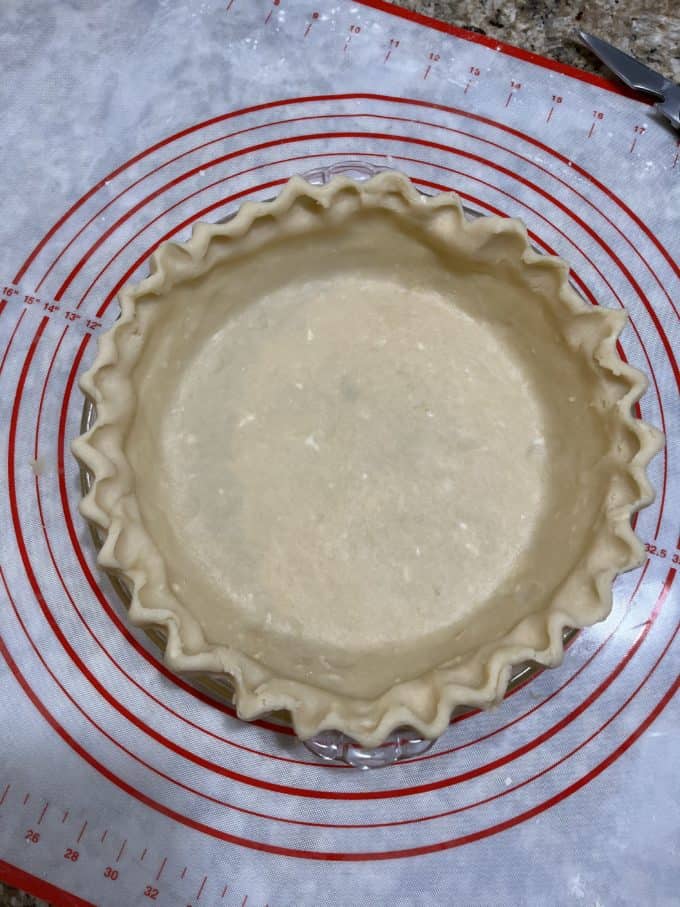
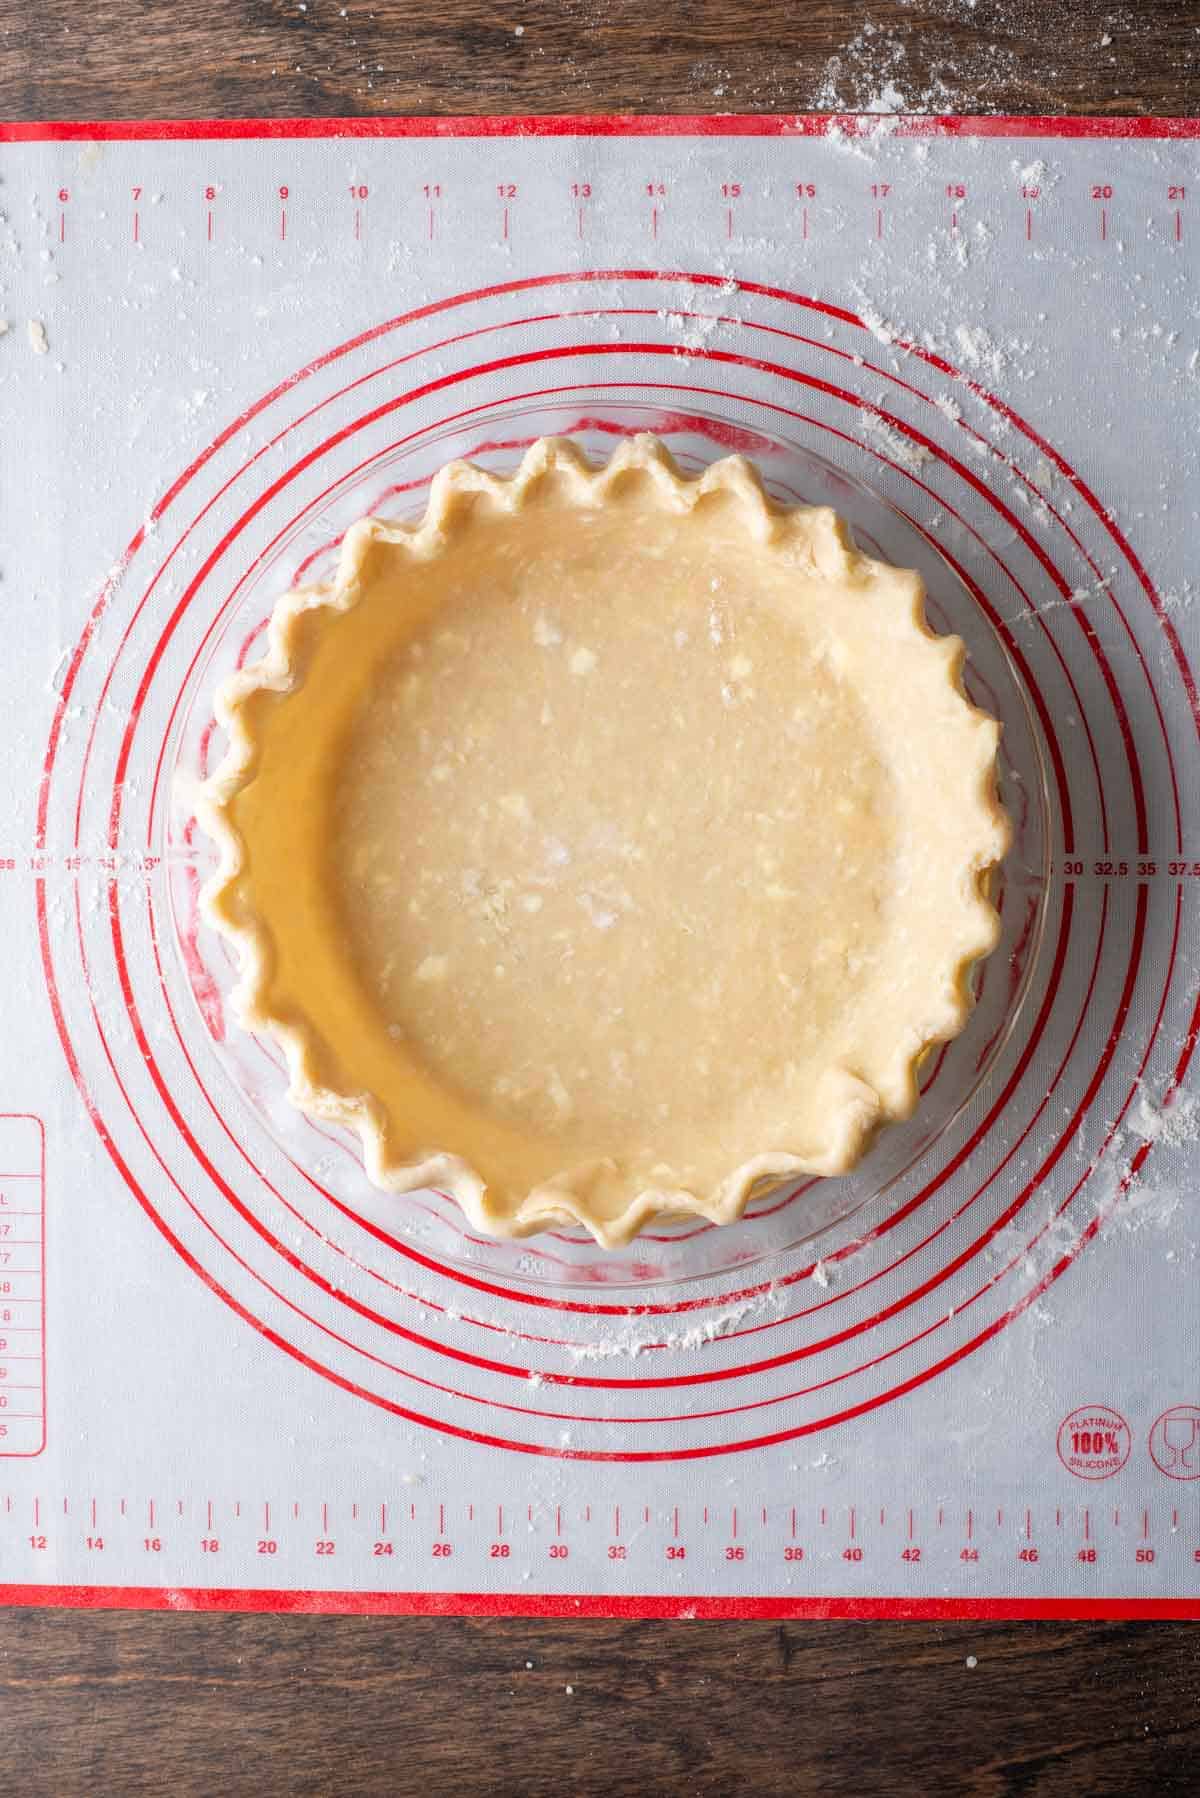
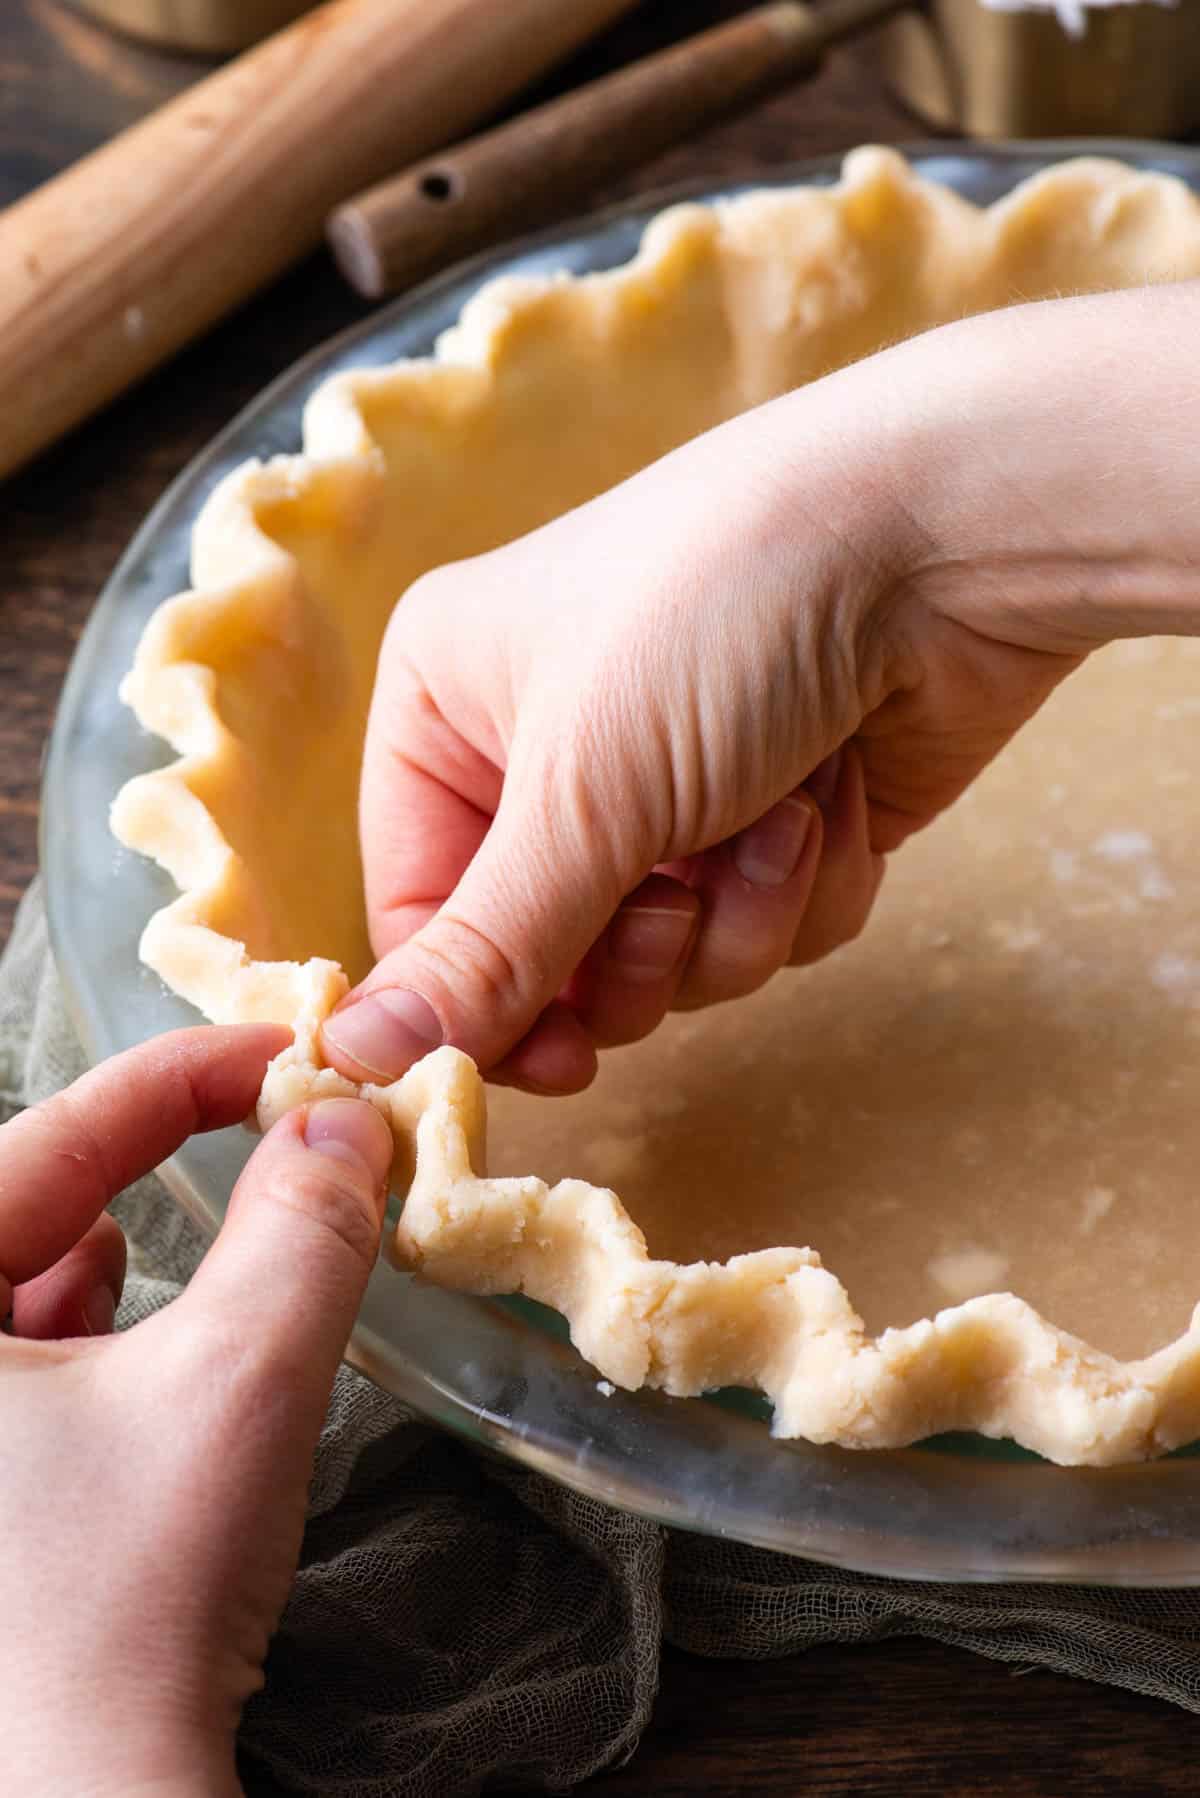
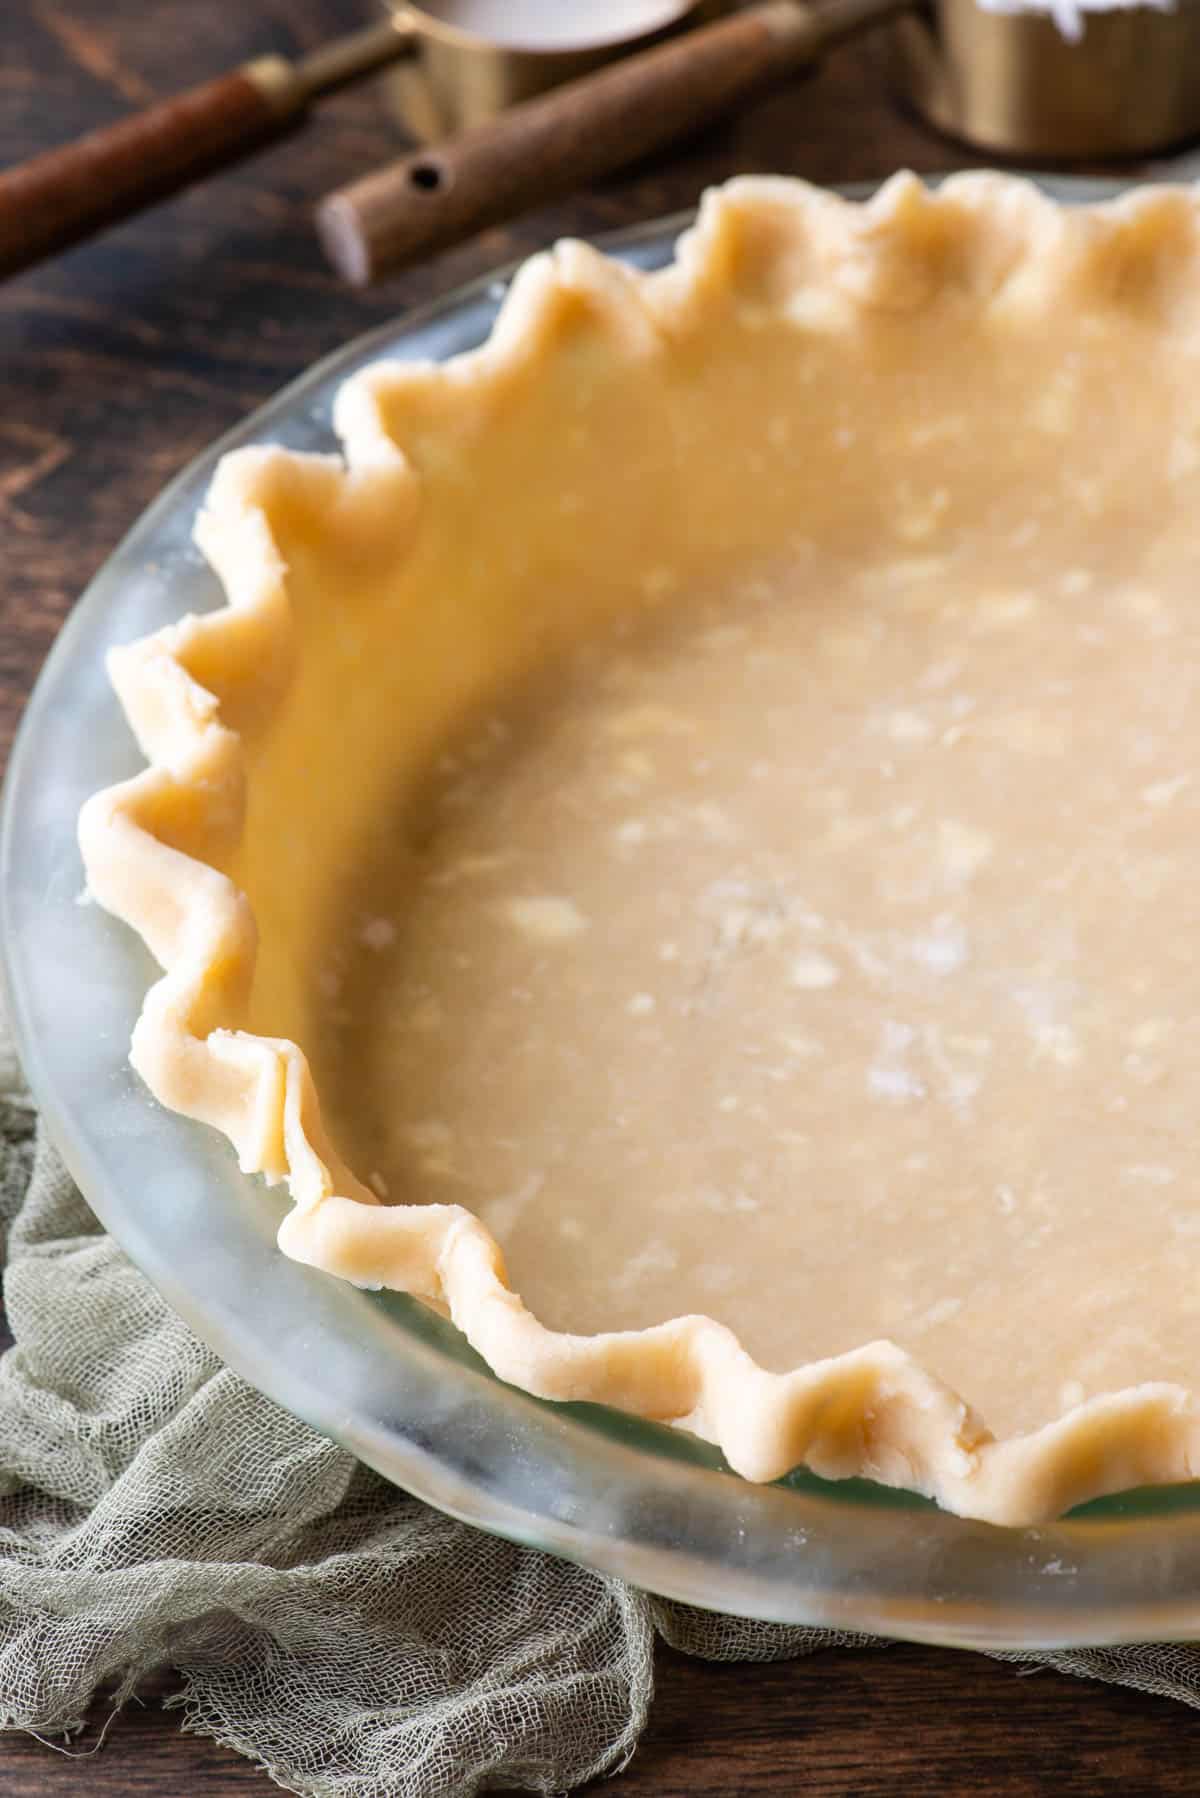
- Flute the Edges: Using your thumb and pointer finger on one hand and your pointer finger on the other hand, pinch the folded edge of the dough together. Hold your fingers perpendicular to the edge of the crust. Continue pinching at regular intervals along the edge. As you pinch, press the dough between your fingers gently. You can create various crimp patterns, such as small points or scallops, depending on your preference.
- Final Touches: After you’ve crimped the entire edge, take a moment to go back and adjust any areas that might need a bit more attention. Make sure the edge is sealed securely.
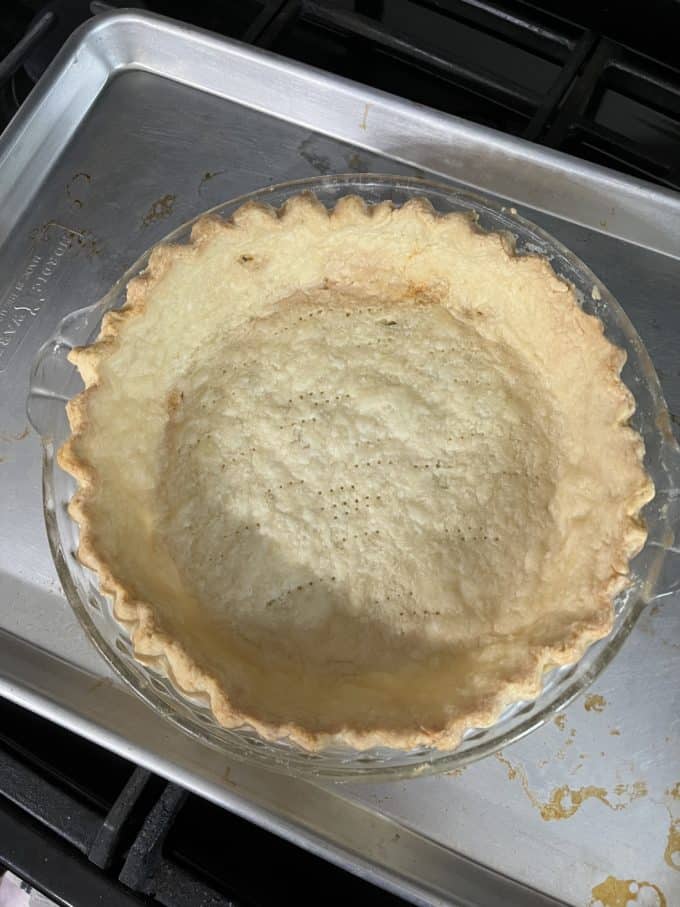
Chill or Bake as Directed: Depending on your pie recipe, you may need to chill the pie crust or proceed directly to baking. Follow the specific instructions for your pie filling and baking time and temperature.
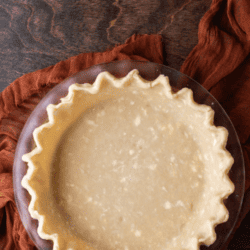
How to Crimp Pie Crust
Crimping or fluting a pie crust refers to the different methods of essentially designing the edges of the pie crust. Before you finish the edges of the crust, follow these steps:
- Prepare Your Pie Dish: Ensure that your rolled-out pie dough is in the pie dish and that it overhangs the edges.
- Trim Excess Dough: Trim any excessive overhang off the sides of the pie plate from the dough, leaving about 1/2 to 1 inch of overhang all around the pie dish. You can use scissors or a knife to do this.
- Fold Under the Overhang: Start by folding the excess dough under itself. This creates a thick, double layer of dough around the edge of the pie dish. It helps reinforce the edge and provides a base with enough dough for the crimping or fluting.
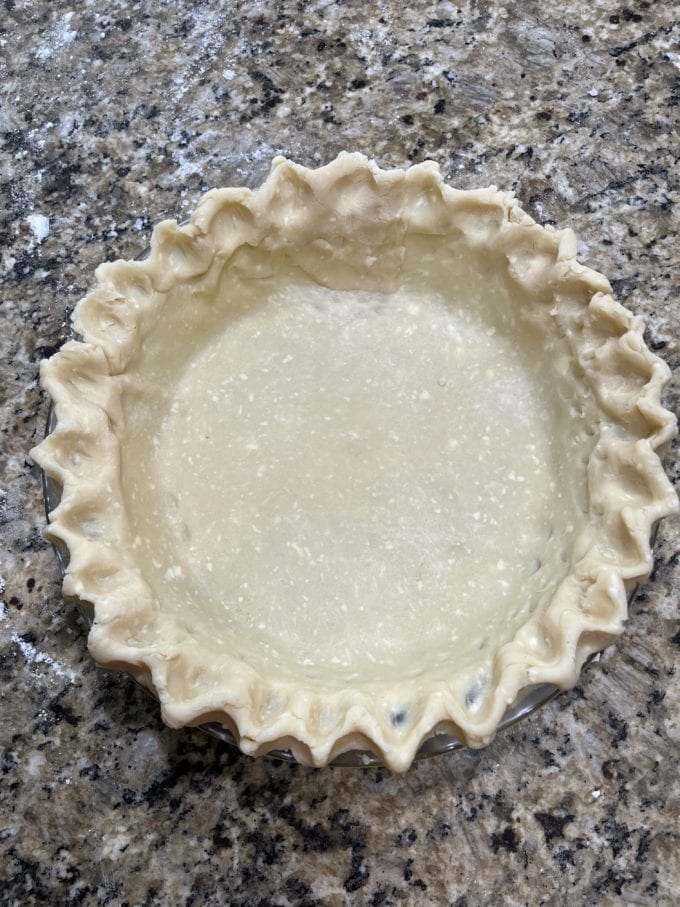
Crimping Method 1: Fluted Edge
There are several different ways to finish pie crust, but the most classic is fluting. To flute the pie crust:
- Use your thumb and pointer finger of one hand to create a V shape.
- With the pointer finger of your other hand, press the V-shaped dough gently to create a flute.
- Continue making these flutes evenly spaced around the entire circumference of the pie crust.

Crimping Method 2: Crimped Edge with a Fork
Crimping is traditionally done with a fork, creating a pattern around the edge of the pie. To crimp the pie crust:
- Use a fork to gently press lines around the edges of the pie crust.
- To avoid tearing through the dough, be sure not to press too hard.
- Continue this pattern around the entire circumference of the pie crust.
Best Flaky Pie Crust Recipe Tips
Once you try this pie dough recipe, you will never go back to store-bought crusts again. I have lots of tips to share with you here for the best pie crust:
- Keep Ingredients Cold: One of the most crucial factors for flakiness is to keep your ingredients as cold as possible. Use cold butter, cold shortening, and ice-cold water. Cold butter creates steam as the pie bakes in the oven and the butter melts, which is what leads to flakiness.
- Use a Food Processor: Through my testing, I found it easiest to use a food processor to assemble the dough. It yields consistent results and it’s quicker than using a pastry cutter. The food processor breaks the butter and shortening into equal uniform-sized pieces while the pastry cutter is more organic and uneven. I also found that butter pieces that were a quarter size or larger made it difficult for me when rolling the dough and transferring. The dough was more likely to break at those spots.
- Don’t Overmix: Mix the dough just until it comes together. Overmixing can result in a tougher crust. You should still see small pea-sized bits of butter in the dough.
- Use Ice Water Sparingly: Only add enough ice-cold water to bring the dough together. Start with the recommended amount in your recipe (I use 4-5 tablespoons of ice water in this recipe) and add more if needed. Too much water can make the dough sticky and less flaky. While testing, I found that I typically used 4-5 tbsp of water when assembling the dough in the food processor and used more when using the pastry cutter or mixing with a spatula. The variation was likely because I wasn’t incorporating the water as evenly when mixing by hand.
- Handle the Dough Gently: When shaping the dough into a disc, be gentle. Don’t knead it like bread dough. Overworking the dough can make it tough and less flaky.
- Rest the Dough: After forming the dough into discs, refrigerate it for at least 60 minutes before rolling. This resting period allows the gluten to relax and the fats to solidify, making the dough easier to work with and resulting in a flakier texture.
- Beginner’s Trick: Even though my dough recipe makes enough for 2 pies, for a beginner learning how to make pie crust, I preferred keeping the dough together as one disk. When you start this way, it gives you more dough to work with, which allows you to have more dough for fluting the edges. Then, as you get better at making homemade pie crust you will feel more confident dividing the dough in half and rolling it out thinner.
- Use a Pie Mat: Using a pie mat was so helpful to me to see exactly what size my pie crust needed to be. I found it really helpful to cut my crust into a perfect circle using a pizza cutter and the lines on the mat. I think this was a game-changer for me. It was easier to roll the dough onto my rolling pin when it was a perfect circle.
- Cracking dough is normal: Your dough will crack and split when you start to roll it. This is normal. Simply use your hands to pinch it back together, You can also use your fingers to gently shape the outside edges into a more uniform shape.
- Use a tapered rolling pin: I originally started with an old-school dowel rolling pin but after a friend recommended it, I tried a tapered rolling pin and much preferred that. With the dowel rolling pin, I seemed to be rolling the edges too thin. Rolling out dough uniformly can be more challenging when using a dowel rolling pin due to the reduced leverage experienced at the edges.
- Position Baking Racks Correctly: Rearranging the baking racks in your oven so that you can place the pie on the lowest baking rack will help the crust fully cook. I learned this through trial and error. I started with my rack in the middle of my oven, but my pies kept coming out with the center of the crust uncooked.
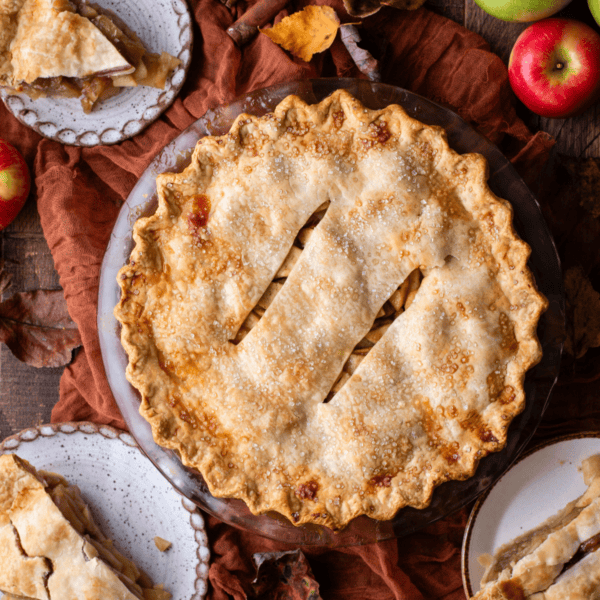
Best Ways to Use this Buttery Flaky Crust
This is the perfect pie crust recipe for any sweet or savory pie you may want to make. Here are some of my favorite ways to use my favorite recipe for pie crust:
- Strawberry Rhubarb Pie
- Shoofly Pie
- Butterscotch Cinnamon Pie
- Apple Crumble Pie
- Coconut Cream Pie
- Easy Pie Crust Cookies
How to Store Flaky Pie Crust
If not using right away, you can refrigerate the discs of pie dough for up to 4 days. You can also freeze the discs of pie dough in an airtight container for up to 6 months.
Can you freeze pie crust?
Yes, you can absolutely freeze pie crust—and it freezes beautifully! Here’s how to do it:
Freeze the dough disc (unrolled):
- After making the dough, shape it into a flat disc, wrap tightly in plastic wrap, then place in a freezer bag.
- Freeze up to 3 months. Thaw overnight in the fridge before rolling.
Freeze a rolled-out crust (unbaked):
- Roll it out, fit it into a pie pan, crimp the edges, and freeze the whole thing.
- Wrap the pan well in plastic wrap and foil.
- Great for getting ahead on holidays! No need to thaw—just bake straight from frozen (add a few extra minutes).
Freeze a double crust (top & bottom):
- Prep the whole pie with filling and top crust (if it’s a fruit pie), then freeze the assembled, unbaked pie.
- Wrap tightly, freeze up to 3 months. Bake straight from frozen—just extend bake time.
Homemade Pie Crust Recipe FAQs
Cold ingredients! The most important rule when making pie crust is to keep your ingredients as cold as possible. This includes using cold butter, shortening, and ice-cold water. This ensures a perfectly flaky crust because the butter remains in solid form in the dough and then evaporates into the layers of dough while baking.
Achieving a golden, crispy, and flaky bottom crust for your pie depends on the efficient and rapid transfer of heat. This is why when it comes to baking flaky pies, it’s recommended to opt for aluminum or aluminum/steel pans rather than glass or stoneware. Metal, particularly aluminum, excels in swiftly and effectively transferring heat from the oven to the pie crust.
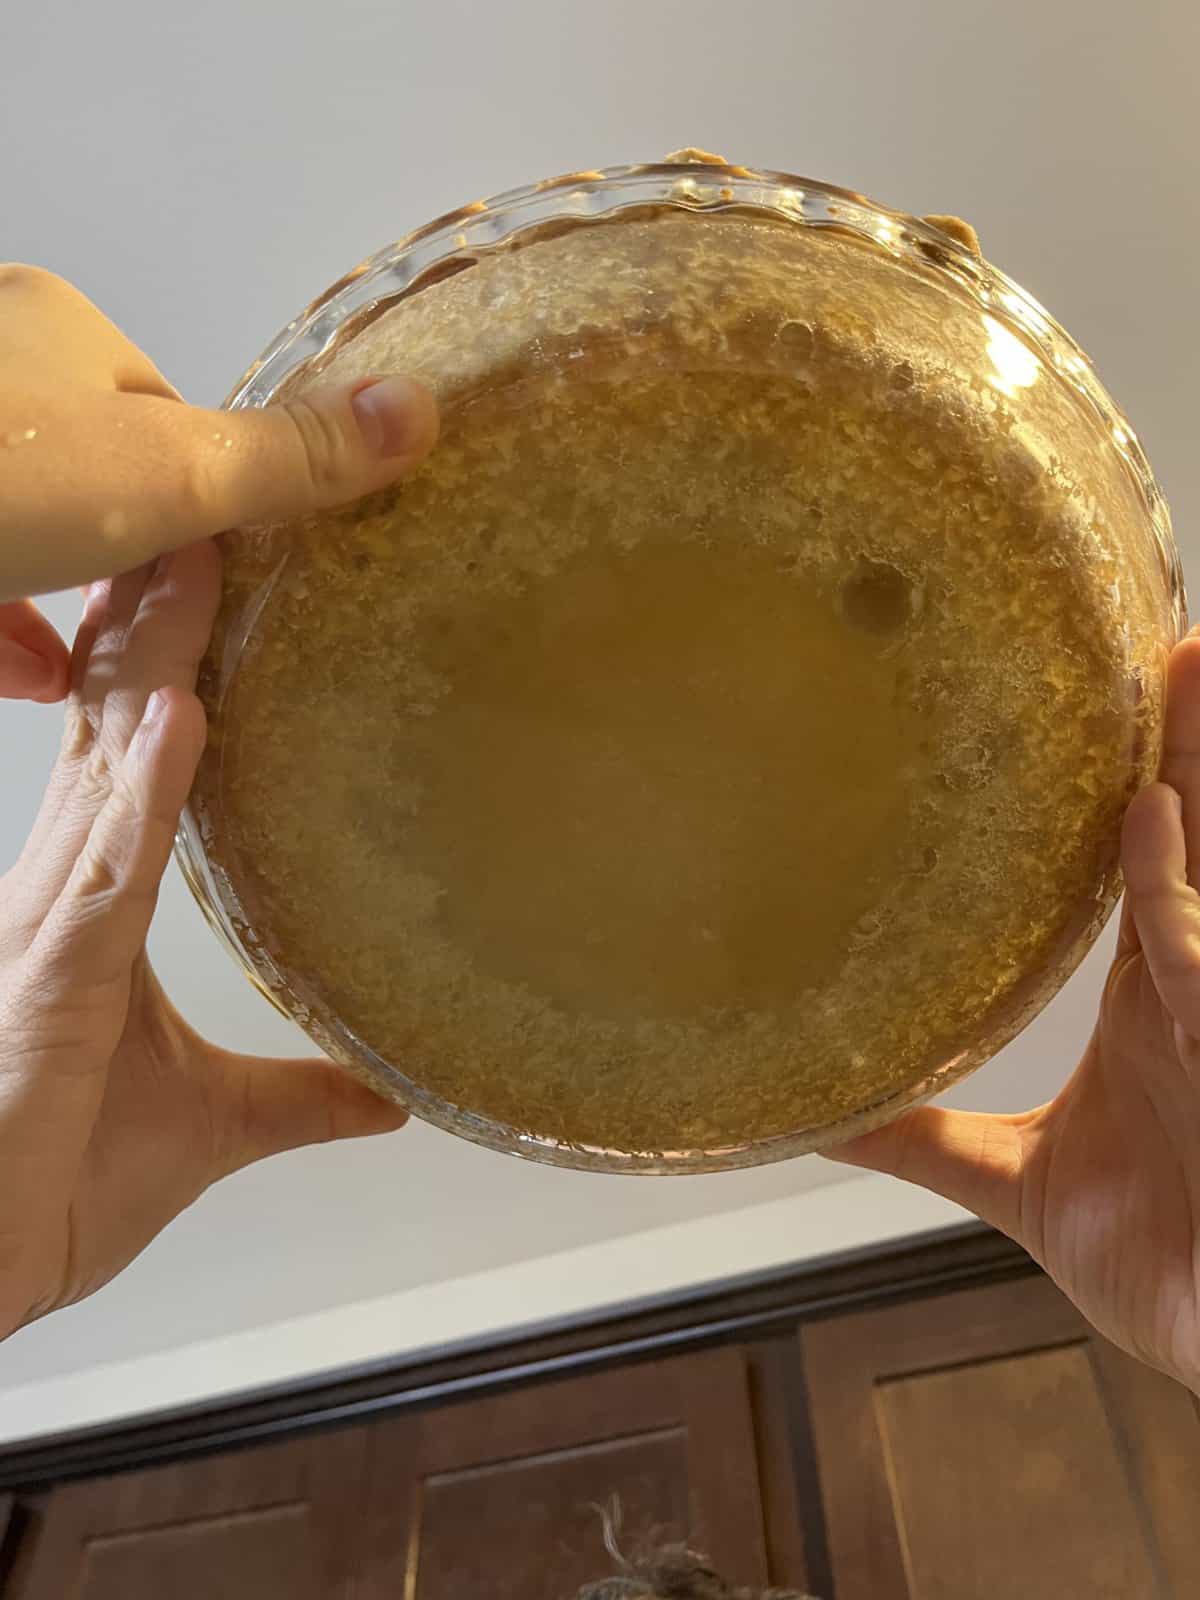
If you have a crumbly dough or a finished pie crust that is crumbly, it’s probably too dry and needs a touch more water. You can test the dough by pinching it; if it holds together, it’s ready. If it’s too dry, add more water, 1 tablespoon at a time, until the dough reaches the right consistency.
Using shortening creates a flaky crust. Butter adds flavor and structure to the dough while shortening is used to create ultra flaky layers.
No, you don’t need to egg wash the bottom pie crust. If you’re making a pie that has a top crust or a lattice crust, then I do recommend adding an egg wash. The purpose of egg wash is to give the final product a golden brown color that is slightly shiny.
Sometimes you will need to poke holes in the bottom of the pie crust, and sometimes you won’t. If you are par-baking or blind-baking the crust, then you will typically poke holes in the crust after you remove the pie weights and before you add the pie filling.
More Pie Recipes
Tap stars to rate!
Best Flaky Pie Crust Recipe
Equipment
Ingredients
- 2 ½ cups (300g) all-purpose flour
- 1 tsp salt
- 1 Tbsp granulated sugar
- 6 Tbsp (86g) cold unsalted butter
- ⅔ cup (123g) vegetable shortening, chilled
- ½ cup (118ml) ice cold water, I typically only use 4-5 tablespoons
Instructions
- Chill the Butter and Shortening: Start by cutting the butter and shortening into small cubes. Place in a container or on a plate and put in the fridge to chill for at least 30 minutes. I recommend using shortening sticks so it’s easier to cut into pieces. If using a tub of shortening, you can portion the ⅔ cup into about tablespoon size pieces.
- Combine Dry Ingredients: In the food processor, add the 2 1/2 cups of all-purpose flour, 1 teaspoon of salt, and 1 tablespoon of granulated sugar. Pulse a few times to combine the dry ingredients.2 ½ cups (300g) all-purpose flour, 1 tsp salt, 1 Tbsp granulated sugar
- Add Butter and Shortening: Add the 6 tablespoons of cold unsalted butter cubes and the chilled vegetable shortening chunks into the food processor. Pulse until the mixture resembles coarse crumbs with some pea-sized pieces of butter and shortening remaining. This should take about 10-15 one-second pulses.6 Tbsp (86g) cold unsalted butter, 2/3 cup (123g) vegetable shortening
- Add Ice Water: drizzle in the ice-cold water, start with 4 tablespoons, continue processing until the dough begins to clump together. You can test the dough by pinching it; if it holds together, it’s ready. If it’s too dry, add more water, 1 tablespoon at a time, and pulse briefly until the dough reaches the right consistency.1/2 cup (118ml) ice cold water
- Form Dough: Turn off the food processor and carefully remove the dough from the bowl. Place it onto a clean surface, such as a large piece of plastic wrap.
- Shape into Discs: Divide the dough into two equal portions. Shape each portion into a flat disc. This makes it easier to roll out later. Wrap each disc tightly in plastic wrap and refrigerate for at least 60 minutes or until firm. You can refrigerate for up to 4 days. You can also freeze one of the discs for future use if you’re only making a single-crust pie.
- Prepare Your Work Surface: Ensure your countertop or pie mat is clean and dry. Lightly dust it with all-purpose flour to prevent sticking.
- Take Out Chilled Dough: Remove one of the chilled dough discs from the refrigerator and let it sit at room temperature for a few minutes. This will make it easier to roll.
- Begin Rolling: Place the dough disc on the floured surface and use your rolling pin to gently press it down in the center. Start rolling from the center outward. Apply even pressure as you roll, working in all directions to maintain a roughly circular shape. If the dough cracks or splits during the rolling process, use your fingers to gently pinch it back together.
- Rotate the Dough: After each roll, rotate the dough a quarter turn. This helps ensure an even thickness and round shape, and prevents the dough from sticking to the surface. Continue rolling and rotating until the dough is about 6 inches in diameter.
- Flip and Dust with Flour: Gently lift the dough from the surface using your hands, and flip it over. This prevents sticking and ensures even rolling. If the dough feels sticky, lightly dust it with more flour.
- Continue Rolling: Resume rolling from the center outward, rotating the dough as needed. Aim for an even thickness and gradually work your way to your desired size, typically 11-12 inches in diameter for a standard pie dish.
- Use a Pizza Cutter (Optional): For a perfectly round shape, consider using a pizza cutter. Place the cutter’s wheel at the edge of the dough, and cut around the perimeter to trim it into a precise circle. This also helps you visualize the exact size needed for your pie pan.
- Sprinkle with Flour: To prevent the dough from sticking to itself when rolled onto the rolling pin, sprinkle a little more flour over the surface of the dough.
- Roll onto Rolling Pin: Carefully lift one edge of the dough and gently roll it onto your rolling pin. Start from one edge and continue rolling until the entire circle is wrapped around the rolling pin.
- Transfer to Pie Dish: Position the dough-covered rolling pin over your pie dish with the edge of the dough hanging over the side. Gently unroll the dough from the rolling pin into the pie dish, ensuring it covers the bottom and sides evenly.
- Trim Excess Dough: Trim any excessive overhang from the dough, leaving about 1/2 to 1 inch of overhang all around the pie dish. You can use scissors or a knife to do this.
- Fold Under the Overhang: Start by folding the excess dough under itself. This creates a thick, double layer of dough around the edge of the pie dish. It also helps to reinforce the edge and create a more substantial crust.
- Flute the Edges: Using your thumb and pointer finger on one hand and your pointer finger on the other hand, pinch the folded edge of the dough together. Hold your fingers perpendicular to the edge of the crust. Continue pinching at regular intervals along the edge. As you pinch, press the dough between your fingers gently. You can create various crimp patterns, such as small points or scallops, depending on your preference.
- Final Touches: After you’ve crimped the entire edge, take a moment to go back and adjust any areas that might need a bit more attention. Make sure the edge is sealed securely.
- Chill or Bake as Directed: Depending on your pie recipe, you may need to chill the pie crust or proceed directly to baking. Follow the specific instructions for your pie filling and baking time and temperature.


This is very close to the pie crust my Mom made. Excellent recipe and method.
I have a much easier pie crust recipe from my Great Grandma, that is guaranteed flaky even for a blackberry cobbler. The secret ingredient is a tsp of white vinegar.
Can this be made without a food processor? I do not have one.
Hi Louise! I found it easiest to use a food processor, but you can use a pastry cutter.
This is the best pie crust recipe I’ve ever made. Everyone knew it was homemade. Flaky and delicious. Will definitely be my go to recipe!
Excellent recipe .
Hi Beth,
I ususally use lard for my pies. could I substitute lard for the vegetable shortening? I am excited to use your recipe. I love to watch your videos and the enthusiasm you have for baking.
Thank you!
Hi Susan! I don’t have any experience with lard so I’m not sure if it will preform the same. Let me know if you try it!
I would like to know if you can use butter flavor shortening sticks with the unsalted butter in this recipe? Have you ever tried it? Thank you 😊
I haven’t tried it, but I am going to guess that it will work!
The amount of shortening is listed in “ml”, but that is a liquid measure, not a weight. Grams would be the appropriate choice. Can you please correct so I can make this recipe? Thank you!
I updated it to grams!