
This post may contain affiliate links. Please read our disclosure policy.
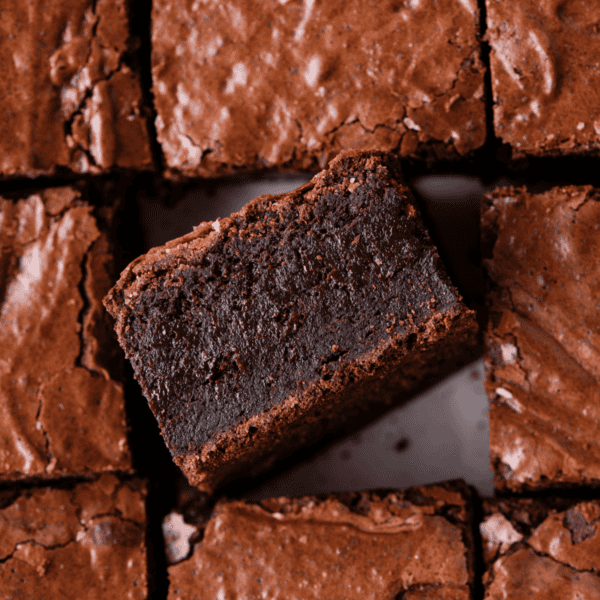
I went back and retested my cream cheese brownies and realized something important. They needed more cheesecake. So I doubled it and fixed the swirl method to make sure every bite has that creamy layer. If you love fudgy brownies with real cheesecake presence, you’re going to love this version.
The BEST brownies I’ve ever made!! I seriously had to stop myself from eating the whole pan in one sitting!
-Brooklyn
Why This Cream Cheese Brownie Recipe Is Different
I originally published this cream cheese brownie recipe in 2019, and recently I retested it with fresh eyes. My fudgy brownie base recipe was good, but the cheesecake layer was too thin. It disappeared into the chocolate instead of standing out.
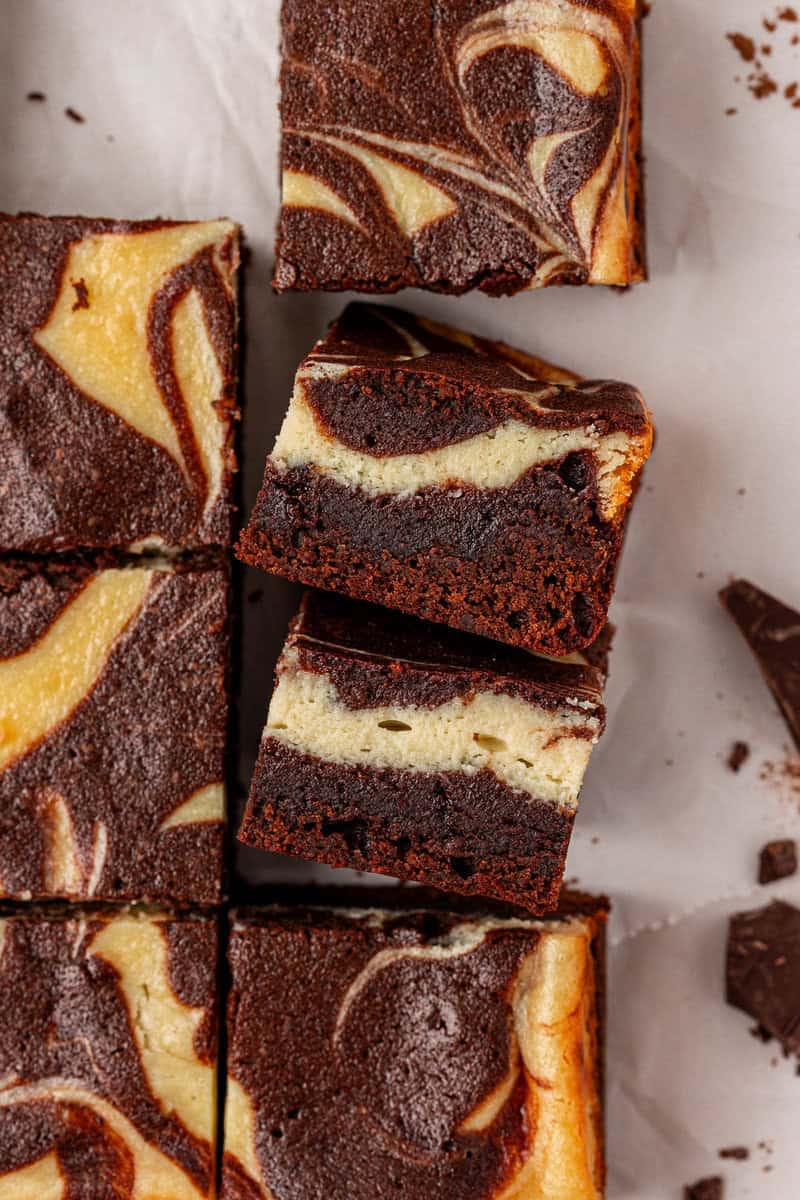
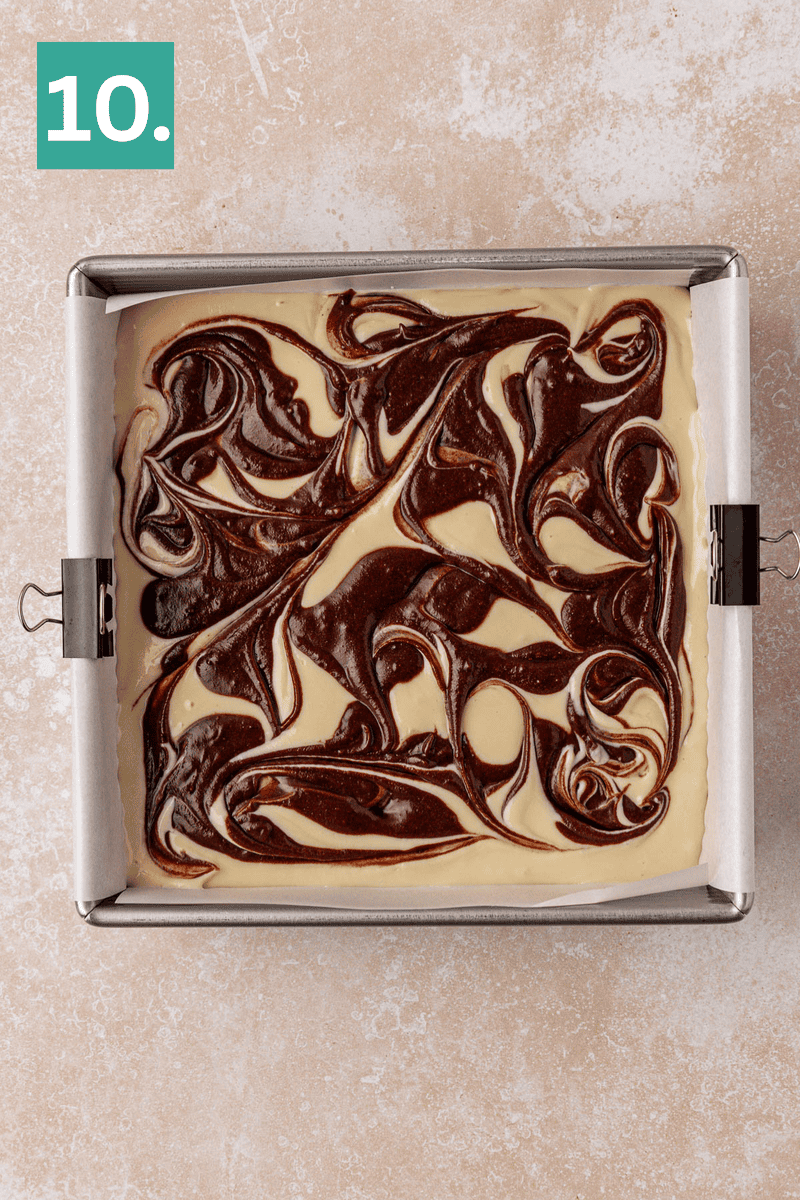
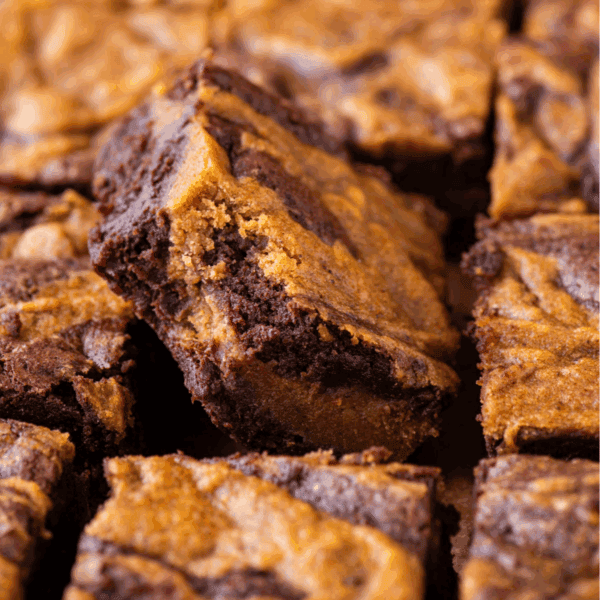
So I doubled the cheesecake layer and completely reworked the swirl method. I discovered that reserving 1/3 cup of brownie batter and thinning it with hot water creates the same consistency as the cheesecake mixture. That one small adjustment makes swirling easier and gives you bold, dramatic swirls that stay distinct after baking.
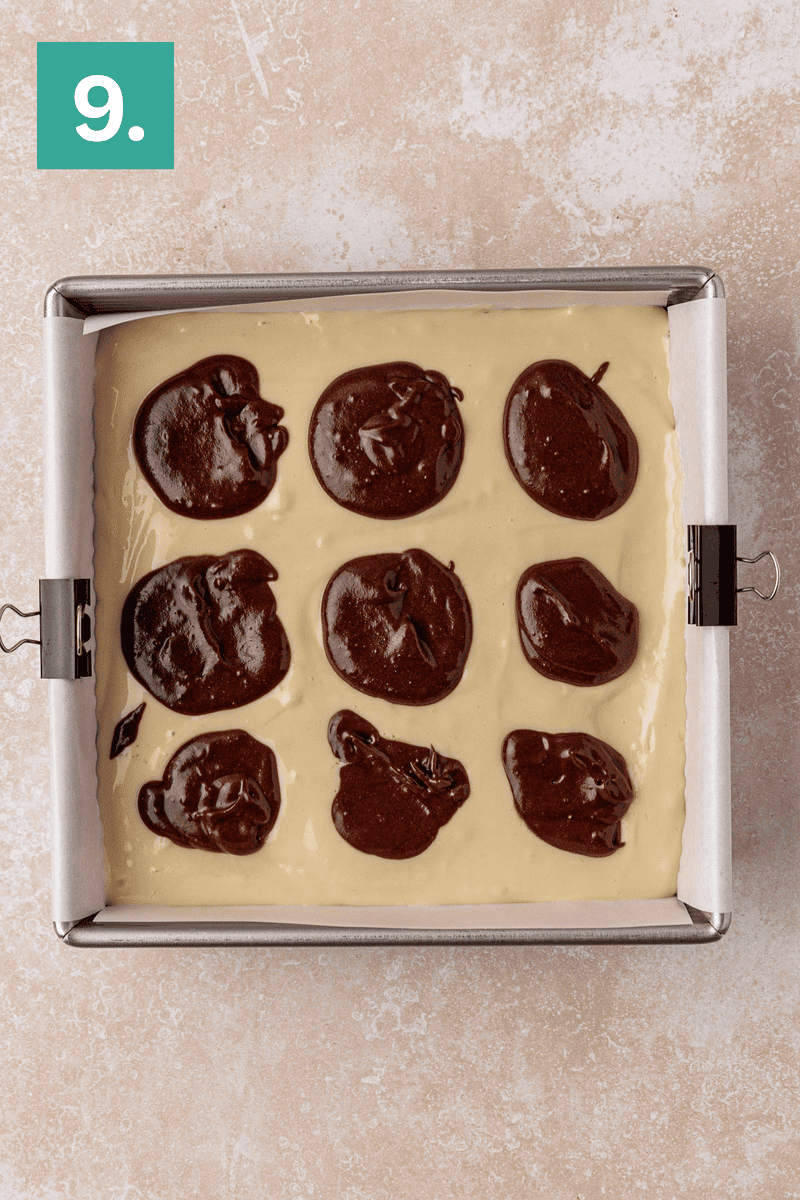
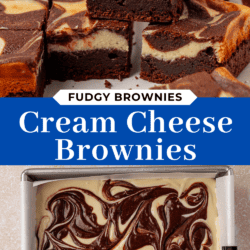
Instead of random spoonfuls, I tested dropping 9 dollops in a 3 by 3 grid. This guarantees balanced swirls across the entire pan. Every square gets both fudgy brownie and creamy cheesecake in the right ratio.
These are not thin, barely there cheesecake brownies. They are thick, fudgy, and unapologetically swirled. Tested, adjusted, and improved.
Key Ingredients You Need
Here’s an overview of the key ingredients for this cheesecake brownies recipe. You can also jump to the full recipe.
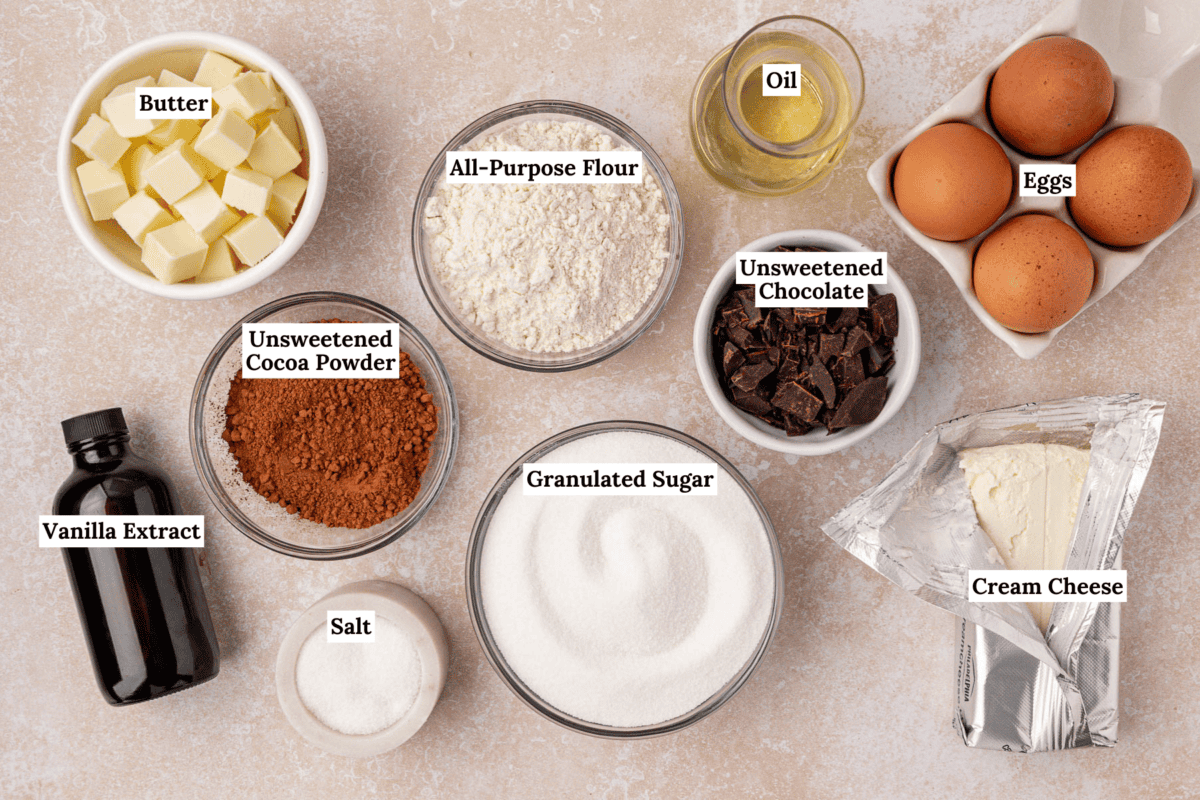
- Cream Cheese: Use full fat, room temperature cream cheese for a smooth cheesecake layer that bakes up creamy and stable.
- Unsweetened Chocolate: Melted with butter for a deeper chocolate flavor than cocoa alone.
- Cocoa Powder: Adds structure and intensifies the chocolate base.
- Extra Egg Yolk: Boosts richness and helps create a fudgy texture.
- Vegetable Oil: Keeps the brownies moist and soft even after chilling.
- Hot Water in Reserved Batter: The secret to matching consistencies for clean, defined swirls.
How to Make Cream Cheese Brownies
Homemade brownies with cream cheese have never been easier. Just follow my simple step-by-step instructions below, or jump to the full recipe in the recipe card below:
Prep oven and pan: Preheat the oven to 350°F (180ºC). Line an 8×8 or 9×9 inch metal pan with parchment paper.
Cheesecake Layer: In a mixing bowl, beat the cream cheese and granulated sugar with an electric mixer until smooth. Add in the egg and vanilla extract, beat again. Set aside.
Brownies: In a small bowl, whisk together the flour, salt, and cocoa powder. Set aside.
Melt chocolate and butter: In a small saucepan over low heat, melt the chopped unsweetened chocolate and cubed butter, stirring occasionally, about 5 minutes. This step can also be done in the microwave on 50 percent power.

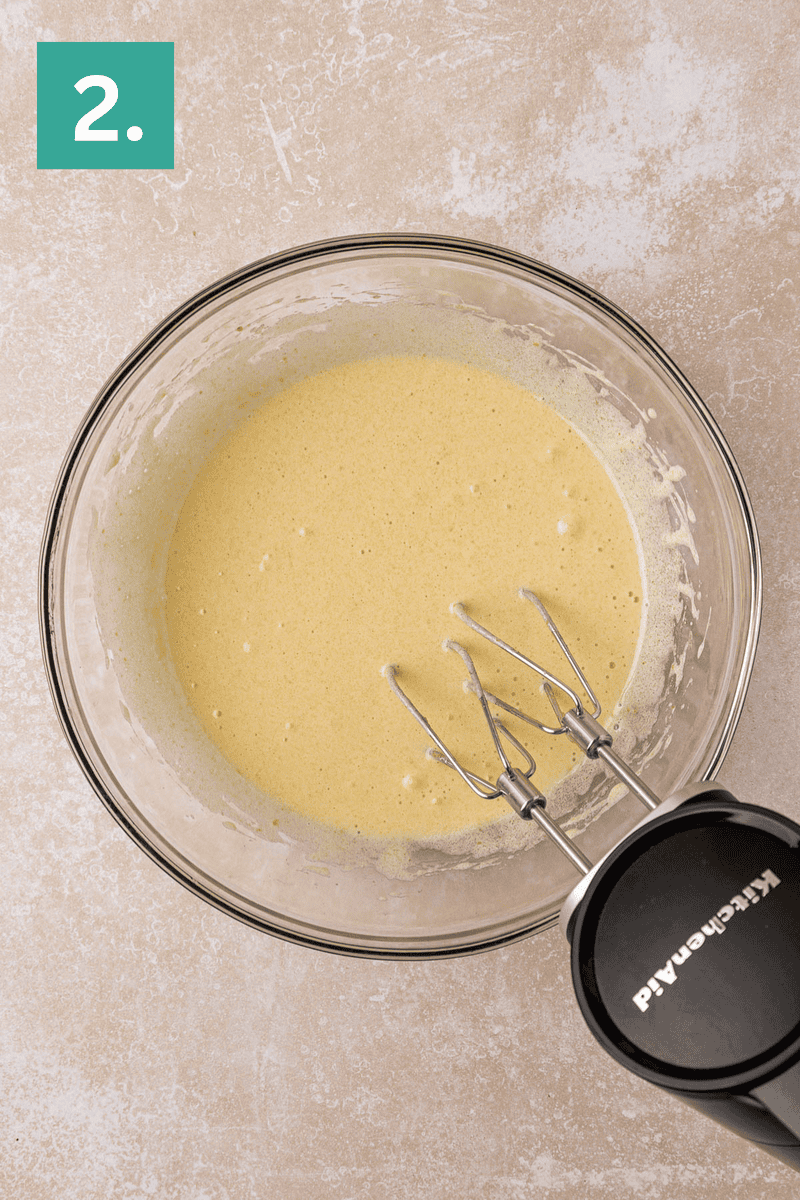
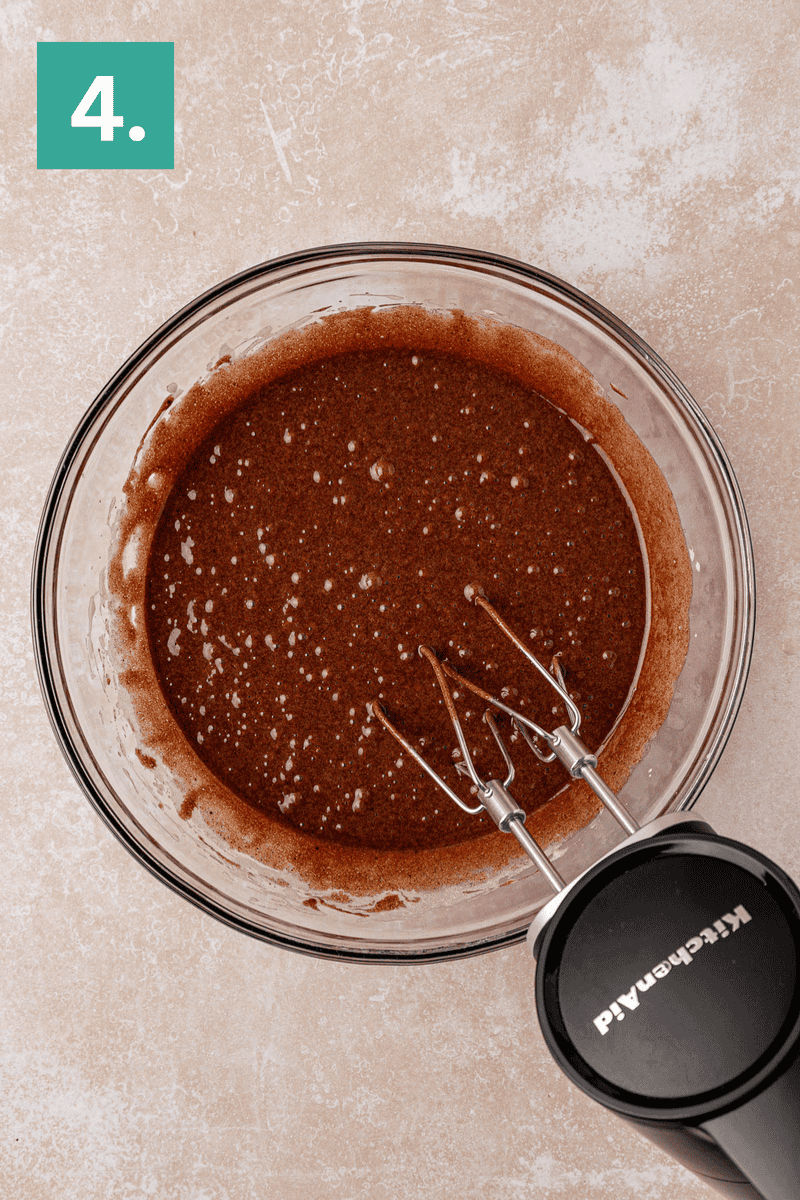
Combine wet ingredients: In a large mixing bowl, beat the granulated sugar, eggs, and egg yolk with an electric mixer for 1 minute, until pale yellow and doubled in volume.
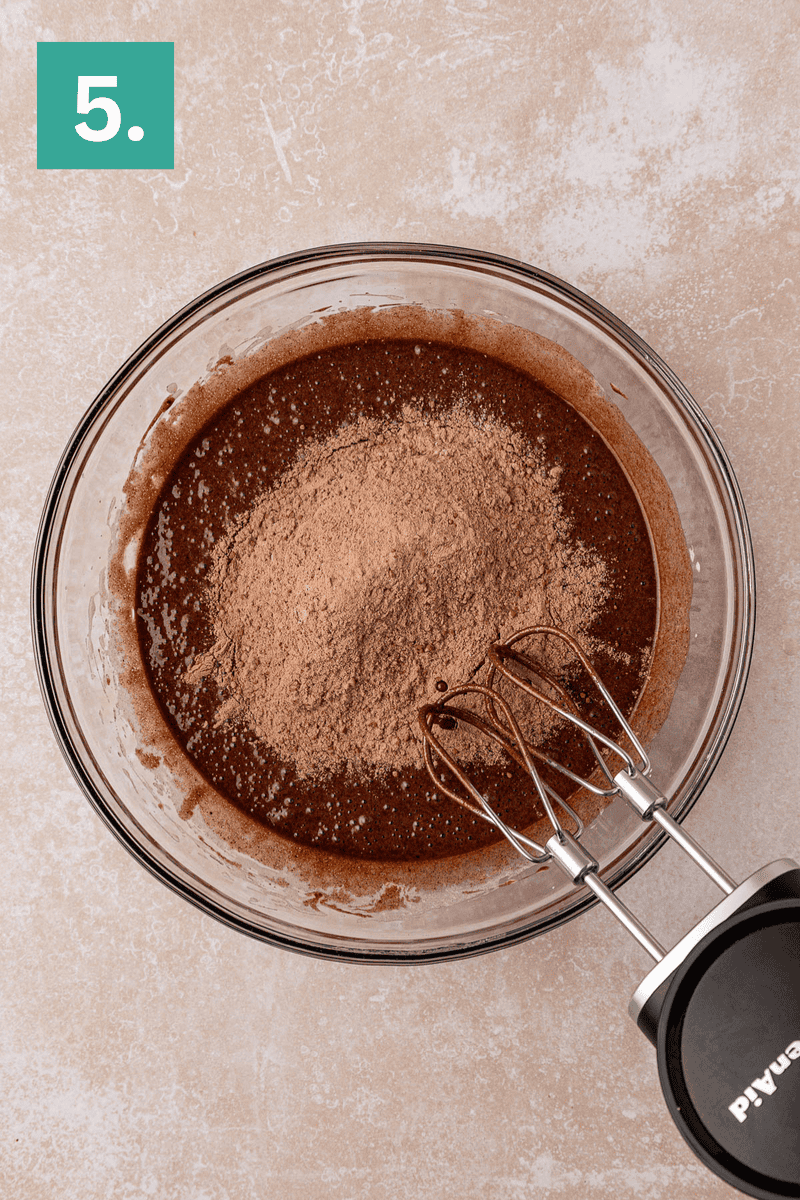
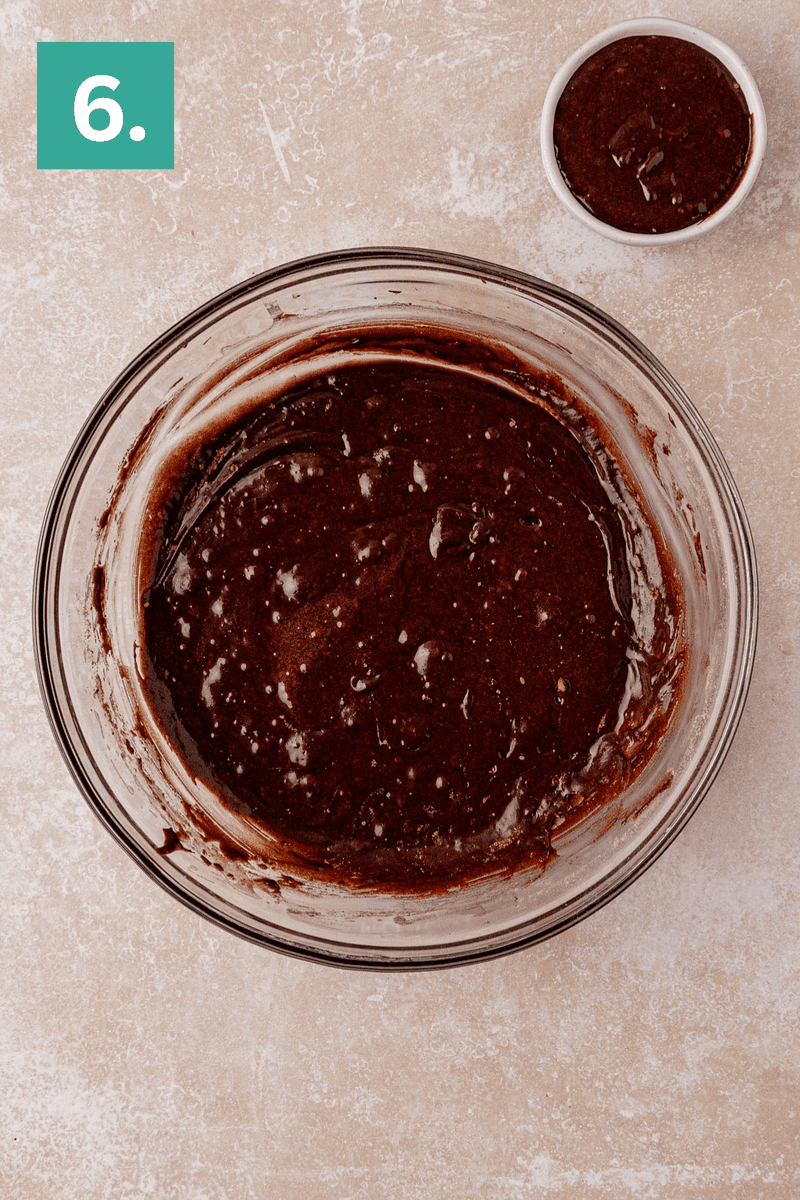
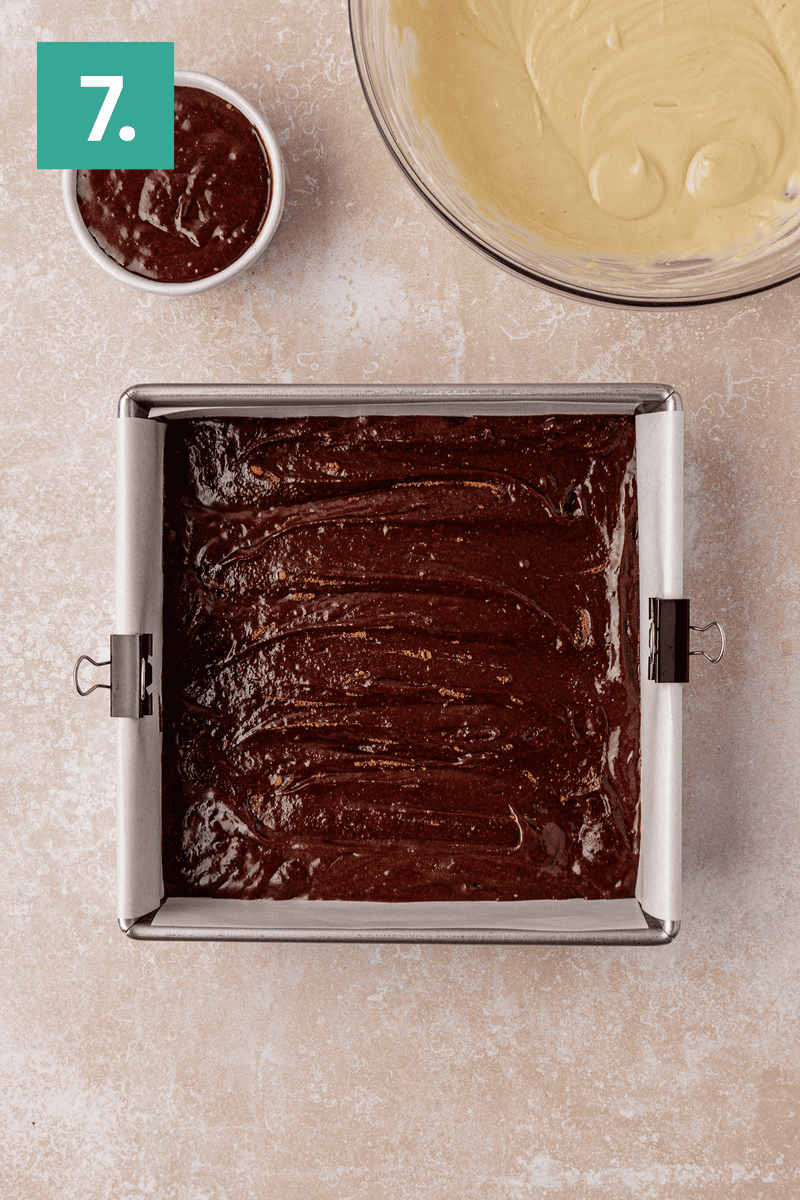
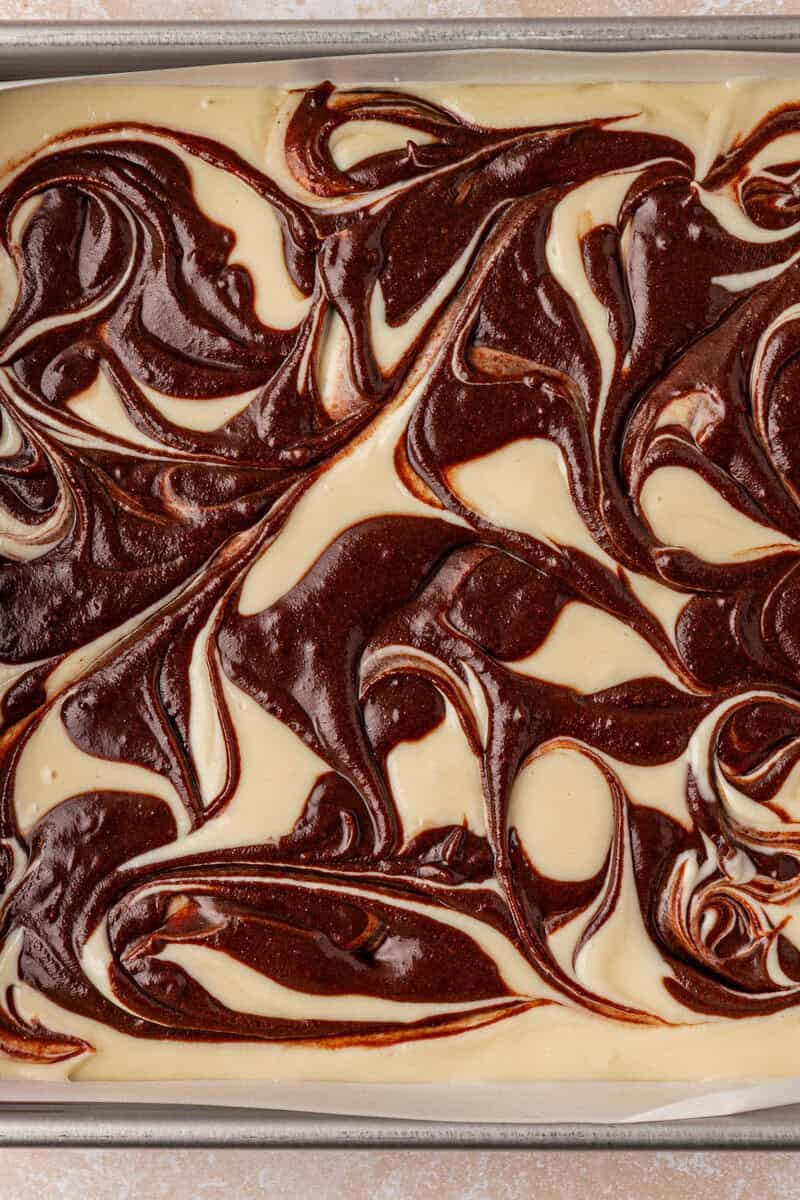
Combine all ingredients: Add the flour mixture to the wet ingredients and mix just until incorporated. Reserve ⅓ cup of the brownie batter. Spread the remaining batter evenly into the prepared pan.
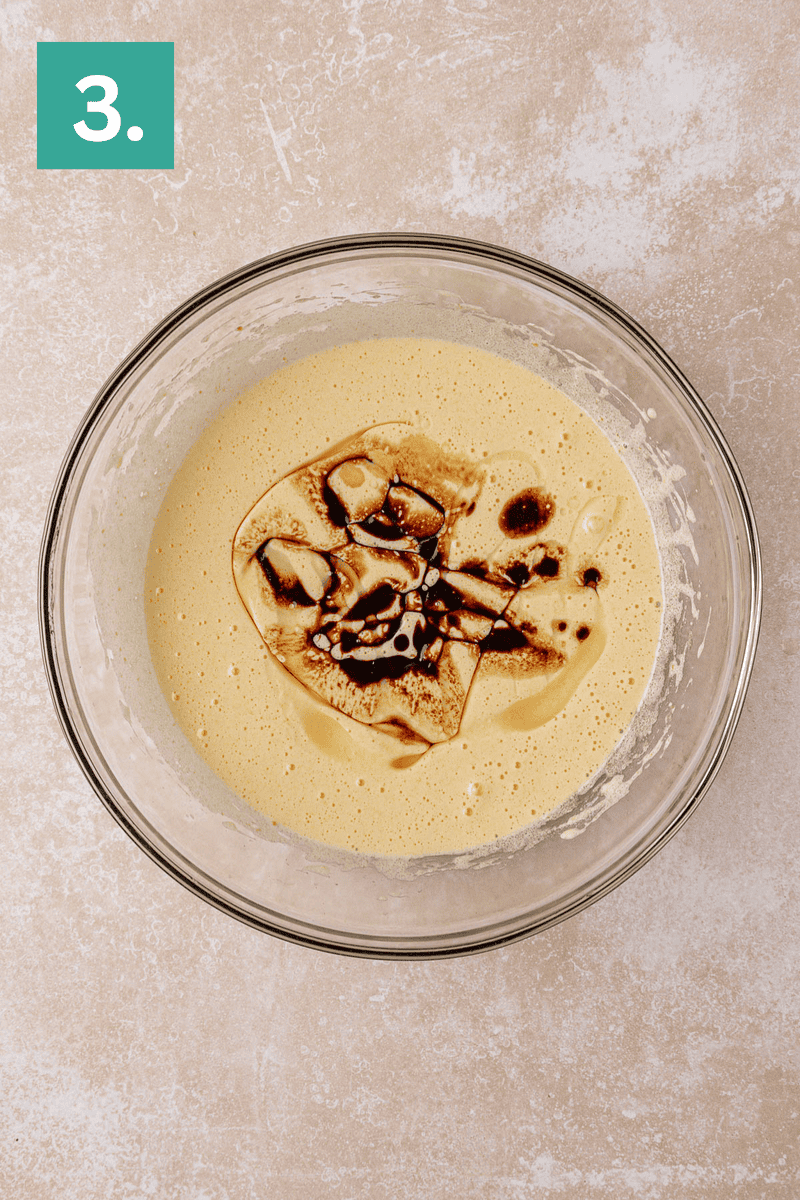
Mix in chocolate: Pour the melted chocolate mixture into the egg mixture, then add the vegetable oil and vanilla extract. Beat until combined.
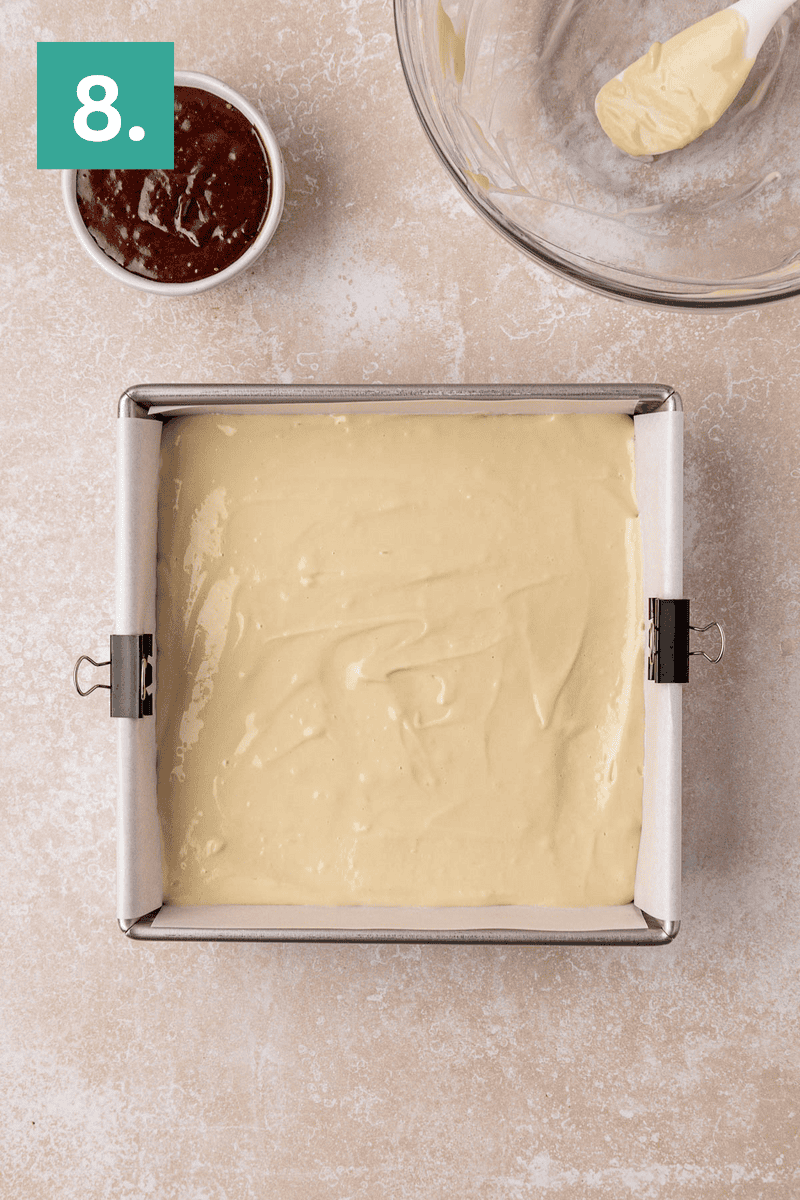
Layer: Spread the cheesecake batter evenly over the brownie layer.
To thin the reserved brownie batter, whisk in 1 tablespoon of hot water. The goal is to match the consistency of the cheesecake batter. Add an additional tablespoon of hot water if needed.
Add layer: Drop 9 dollops of the brownie batter over the cheesecake layer in a 3×3 grid. Use a knife to gently swirl the layers together, stopping while the swirls are still distinct. We want big beautiful swirls.
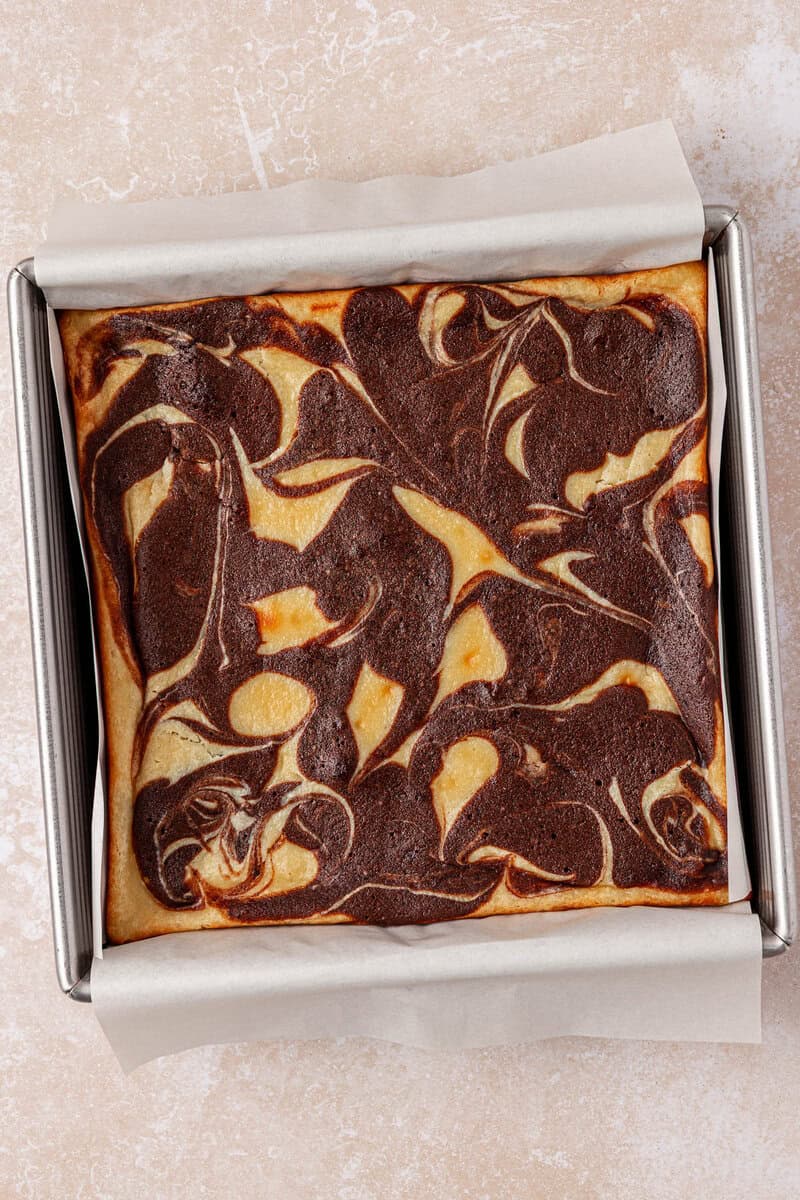
Bake: Bake for 35 to 45 minutes, or until the cheesecake is set and puffy or a toothpick inserted in the center comes out clean. For a chewier, less fudgy texture, bake an additional 3 to 4 minutes.
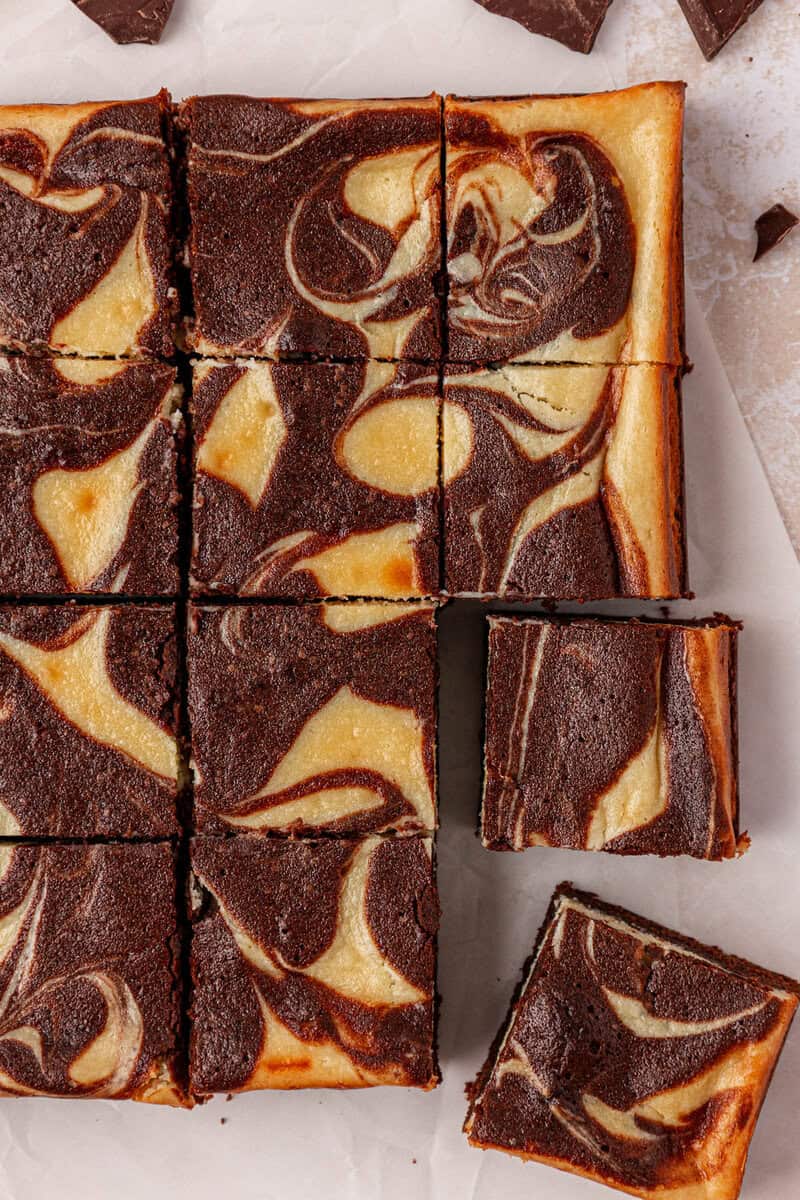
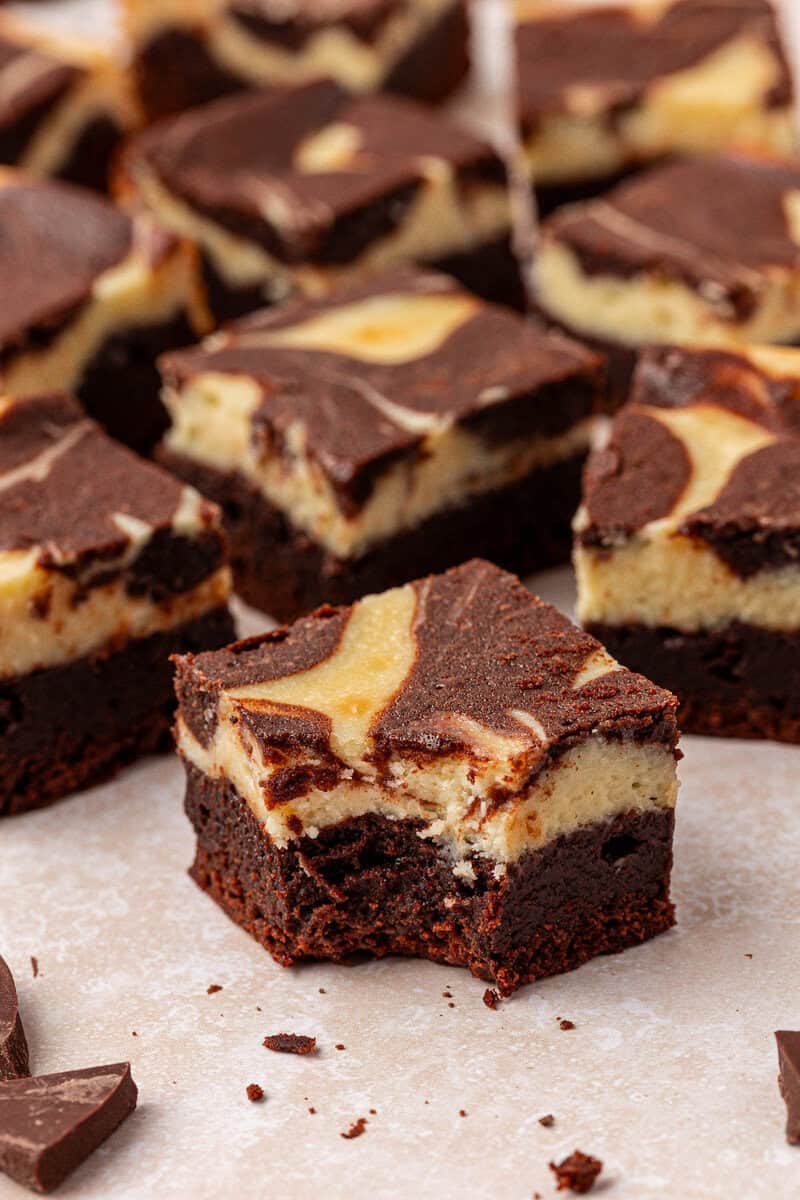
Cool and Cut: Allow the brownies to cool completely, then refrigerate for 1 hour before slicing. Use a sharp knife dipped in hot water and wiped clean between cuts, or use a plastic knife to prevent sticking.
How to Get Perfect Cheesecake Swirls
The secret to bold, defined swirls is controlling the consistency of both batters. Before spreading the brownie batter in the pan, reserve 1/3 cup. Spread the rest evenly into the pan first.
After layering the cheesecake mixture on top, thin the reserved brownie batter with 1 tablespoon of hot water. The goal is to match the thickness of the cheesecake layer so one batter does not overpower the other. If needed, add a little more hot water until it loosens slightly but is still rich and chocolatey.
Drop 9 dollops in a 3 by 3 grid across the surface. This ensures every square gets both layers. Use a knife to make large sweeping motions and stop while the swirls are still distinct. Do not overmix or you will lose that beautiful contrast.
8×8 vs 9×9 Pan Guide
You can bake these cream cheese brownies in either an 8×8 or 9×9 metal pan, but the texture and bake time will shift slightly.
If you use an 8×8 pan, the brownies will be thicker and slightly more fudgy. Because the batter sits deeper in the pan, they will need a few extra minutes in the oven. Start checking around 40 minutes, but expect closer to 45 to 55 minutes for the cheesecake layer to fully set.
In a 9×9 pan, the larger surface area helps them bake more evenly and a touch faster. Start checking around 35 minutes and look for a set cheesecake layer with a toothpick that comes out clean or with a few moist crumbs. I used a 9×9 metal pan and baked for 40-45 minutes.

How to Tell When Cheesecake Brownies Are Done
Cheesecake brownies are done when the cheesecake layer looks set and slightly puffed. It should not jiggle in the center when you gently shake the pan.
Insert a toothpick into the center. It should come out clean or with a few moist crumbs, not wet batter. If you prefer a chewier texture, bake for an additional 3 to 4 minutes.
Remember that the brownies will continue to firm up as they cool. Chilling them for at least 1 hour gives the cleanest structure and best texture.
How to Cut Cream Cheese Brownies Cleanly
For ultra clean slices, chill the brownies first. Cold brownies cut far more neatly than warm ones.
My favorite trick is using a plastic knife. It glides through the cheesecake layer without dragging or sticking. I was honestly shocked how well this worked.
You can also dip a sharp knife in hot water, wipe it dry, then slice. Wipe the blade clean between each cut for sharp, bakery worthy edges.

Storage and Make Ahead Tips
Because of the cream cheese layer, store these brownies in the refrigerator. Place them in an airtight container for up to 5 days.
To make ahead, bake and cool completely, then chill before slicing. The flavor actually improves after resting overnight.
To freeze, wrap individual squares tightly in plastic wrap, then place in a freezer safe container. Freeze for up to 2 months. Thaw overnight in the refrigerator before serving.
More Brownie & Bar Recipes
Tap stars to rate!
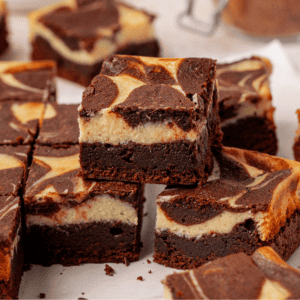
Fudgy Cream Cheese Swirl Brownies
Ingredients
Cheesecake Swirl
- 8 oz (226g) cream cheese, room temperature
- ½ cup (99g) granulated sugar
- 1 large egg, room temperature
- 1 tsp vanilla extract
Brownies
- ¾ cup (90g) all-purpose flour
- ½ tsp salt
- ⅓ cup (28g) unsweetened cocoa powder
- 2 oz unsweetened chocolate, chopped
- ½ cup (113g) unsalted butter, cubed
- 1 ¼ cups (248g) granulated sugar
- 2 large eggs
- 1 large egg yolk
- ¼ cup (50g) vegetable oil
- 1 tsp vanilla extract
Video
Instructions
- Preheat the oven to 350°F (180ºC). Line an 8×8 or 9×9 inch metal pan with parchment paper.
- Cheesecake Swirl: In a mixing bowl, beat the cream cheese and granulated sugar with an electric mixer until smooth. Add in the egg and vanilla extract, beat again. Set aside.8 oz (226g) cream cheese, 1/2 cup (99g) granulated sugar, 1 large egg, 1 tsp vanilla extract
- Brownies: In a small bowl, whisk together the flour, salt, and cocoa powder. Set aside.3/4 cup (90g) all-purpose flour, 1/2 tsp salt, 1/3 cup (28g) unsweetened cocoa powder
- In a small saucepan over low heat, melt the chopped unsweetened chocolate and cubed butter, stirring occasionally, about 5 minutes. This step can also be done in the microwave on 50 percent power.2 oz unsweetened chocolate, 1/2 cup (113g) unsalted butter
- In a large mixing bowl, beat the granulated sugar, eggs, and egg yolk with an electric mixer for 1 minute, until pale yellow and doubled in volume.1 1/4 cups (248g) granulated sugar, 2 large eggs, 1 large egg yolk
- Pour the melted chocolate mixture into the egg mixture, then add the vegetable oil and vanilla extract. Beat until combined.1/4 cup (50g) vegetable oil, 1 tsp vanilla extract
- Add the flour mixture to the wet ingredients and mix just until incorporated. Reserve ⅓ cup of the brownie batter. Spread the remaining batter evenly into the prepared pan.
- Spread the cheesecake batter evenly over the brownie layer.
- To thin the reserved brownie batter, whisk in 1 tablespoon of hot water. The goal is to match the consistency of the cheesecake batter. Add an additional tablespoon of hot water if needed.
- Drop 9 dollops of the brownie batter over the cheesecake layer in a 3×3 grid. Use a knife to gently swirl the layers together, stopping while the swirls are still distinct. We want big beautiful swirls.
- Bake for 35 to 45 minutes, or until the cheesecake is set and puffy or a toothpick inserted in the center comes out clean. For a chewier, less fudgy texture, bake an additional 3 to 4 minutes.
- Allow the brownies to cool completely, then refrigerate for 1 hour before slicing. Use a sharp knife dipped in hot water and wiped clean between cuts, or use a plastic knife to prevent sticking.
Notes


Thank You so much. Love watching you,can’t remember when I have seen someone so gifted and happy with what they are doing. Pure love of what your doing and it shiw in your results.
Not afraid to tell us all how many times you have baked them for your perfection. Keep up the
smile youbare very refreshing to watch.
LOVE TO MAKE THESE, BUT I DON’T HAVE CHOCOLATE, JUST THE CHOCOLATE POWDER. WILL IT WORK WITHOUT THE CHOPPED CHOCOLATE?
Hi Diane, no, this recipe isn’t made for just cocoa powder.