This post may contain affiliate links. Please read our disclosure policy.
A few weeks ago Ryan and I celebrated a big accomplishment! We finished paying off all of our student loans!!
It just so happened that the humane society was having a 50% off sale that same weekend. The real truth is that we were motivated to make the final payment on our loans because of the sale since we had been talking about getting a kitten once we paid them off.
So we made the final payment, went kitten shopping and came home with a little black fur ball. We were so excited. I mean he was so cute and little, weighing in at 2 pounds!
We were blissfully ignorant thinking this cat was just going to look cute, sleep, and play nice.
Uh no. Kittens are like newborn babies. Except they can walk and bite and terrorize your whole house.
For the first week we let the kitten sleep with us. Worst idea ever because play time starts at 2am every morning and second, how does such a little creature take up so much space?!
I also can’t get any work done because he LOVES to sit on my keyboard. And when he’s not doing that, he’s biting every cord in the house or attacking my hair.
However, as I write this post, he’s sleeping like an angel in my lap, purring so loudly, and I am reminded why I love him. But next time maybe a hawaiian vacation would be more of a celebratory gift :)
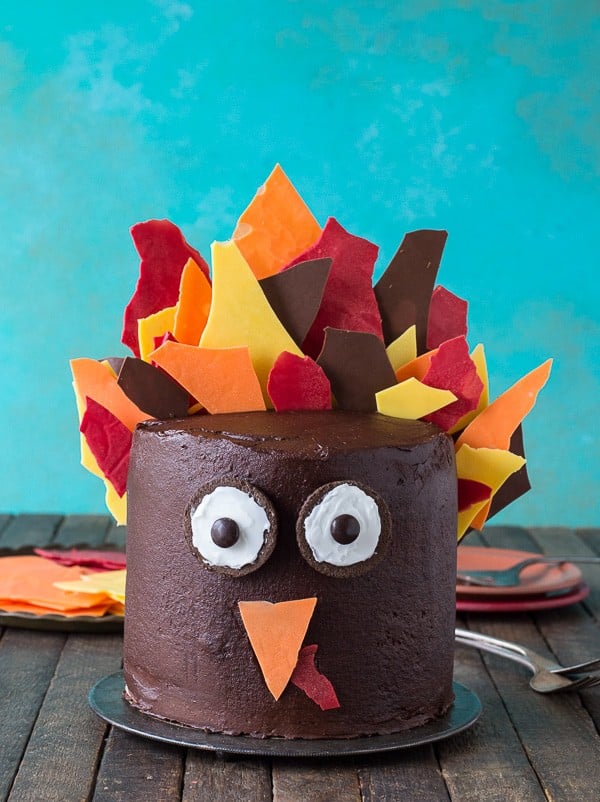
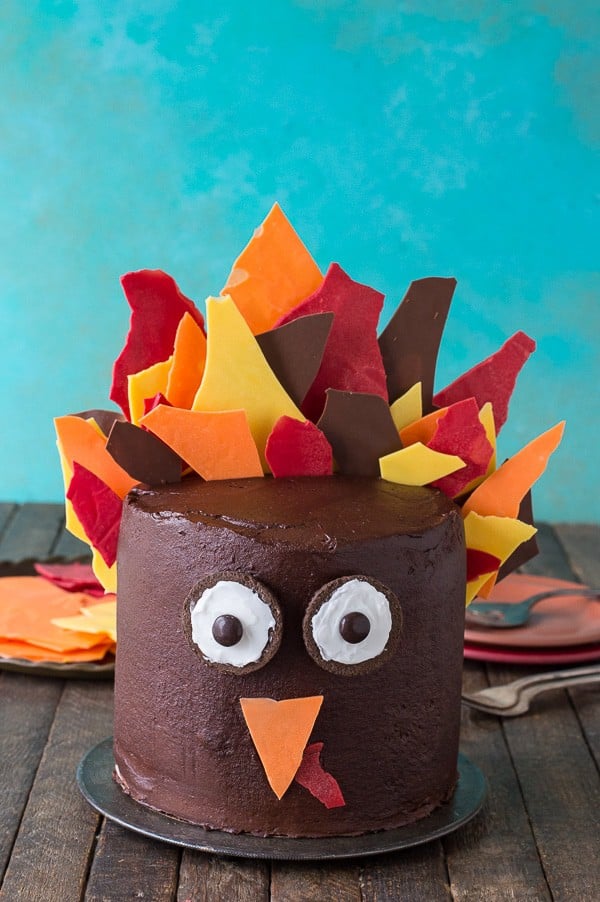
We’re moving from kittens to turkeys. Oh gosh, this cake! I am so glad it happened!
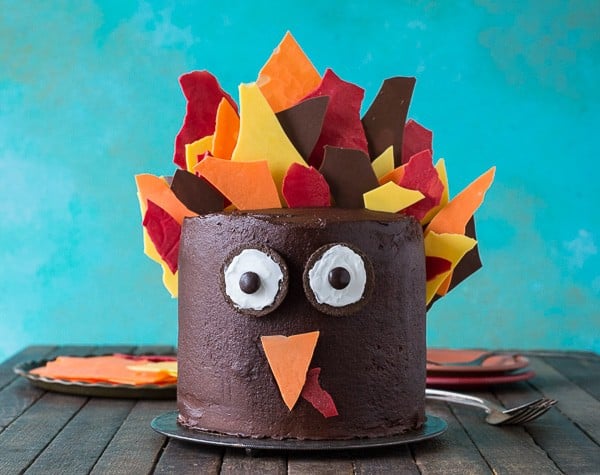
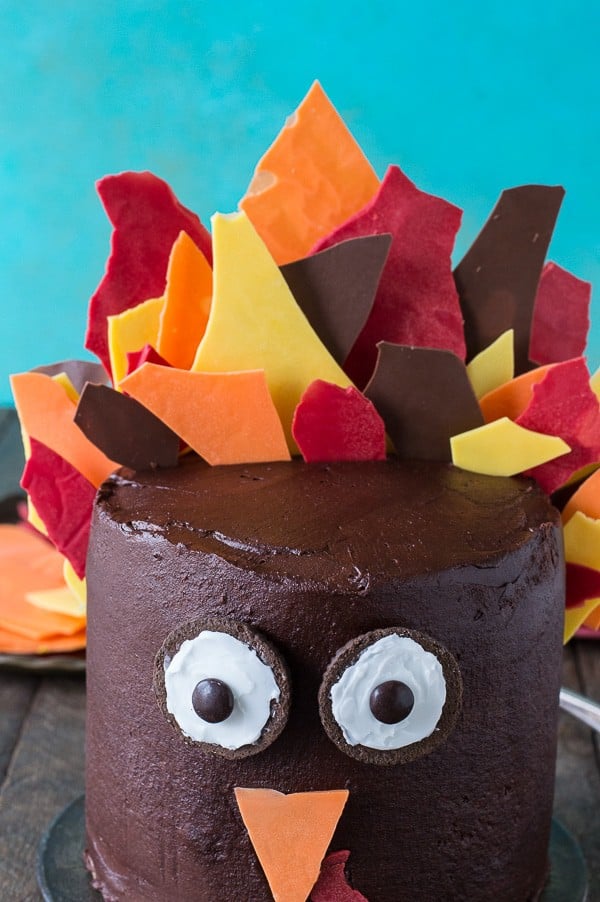
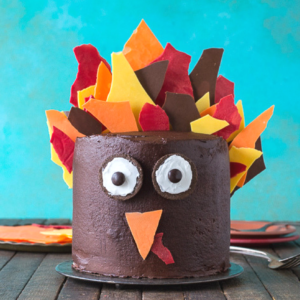
Every season I feel like I have that one ridiculous recipe idea that won’t leave my head until I make it. I knew I wanted to make a turkey cake, but obviously I didn’t want to put feathers on the cake because feathers and buttercream don’t seem like they would work together well, and the more important fact, feathers aren’t edible. I used chocolate shards for the first time on another cake I made, and then one day it clicked that I could use different color chocolate shards as the turkey’s feathers!
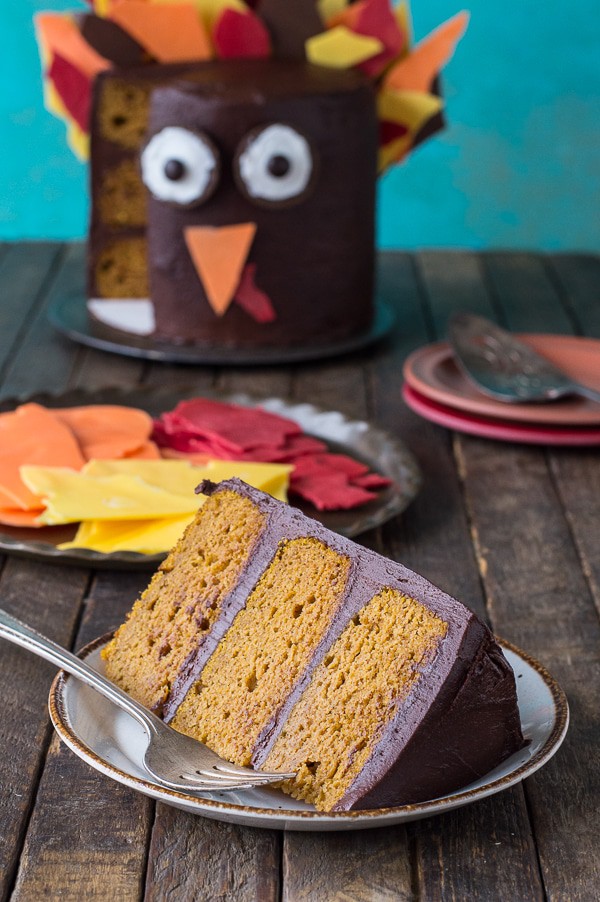
I kept the flavors of this cake on point for thanksgiving – i.e. pumpkin & chocolate!!! It’s a 3 layer pumpkin cake with chocolate buttercream. If you know me you know that my favorite way to enjoy pumpkin is with chocolate!
You only need a few things to make this regular pumpkin chocolate cake ready for thanksgiving!
-red, orange, yellow and brown candy melts, plus vegetable shortening for melting
-1 oreo
-a little bit of white icing
-2 brown m&ms
To make chocolate shards (the feathers) you will..
1. melt some red candy melts with a little bit (1 tbsp) of vegetable shortening in a small saucepan over low heat. Stir with a spatula melt smooth and melted.
2. Place a plastic cutting board or metal baking sheet on the counter. Place a large piece of wax paper on top of the flat surface.
3. Pour the melted chocolate on top of the wax paper. Use a spatula to smooth the chocolate into an even layer all around the wax paper.
4. Place another piece of wax paper on top of the melted chocolate and gently smooth out any air bubbles.
5. Place the cutting board or baking sheet with the wax paper on it in the freezer for 15 minutes.
6. After 15 minutes, remove it from the freezer and allow it to warm up for 3-5 minutes.
7. Remove the top layer of wax paper, break the chocolate into shards and store them in the freezer on a plate, in a container or in a bag until you’re ready to use them.
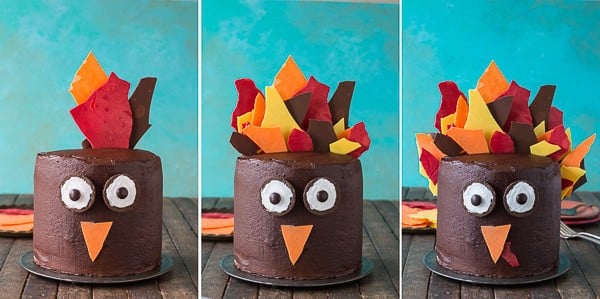
Below is a side shot of the cake so you can see how many shards I shoved in there!
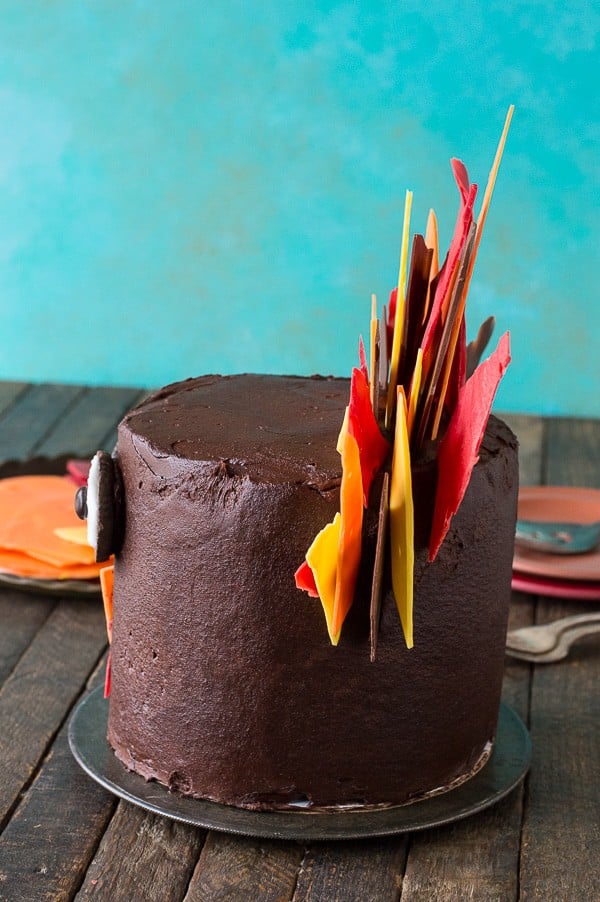
My little piece of advice, if some of the shards fall off, maybe they are too heavy so try breaking them into smaller pieces or carefully push them further into the cake. I would recommend adding the “feathers” no more than 30 minutes before serving the cake.
Tap stars to rate!
Turkey Cake
Ingredients
Pumpkin Cake
- ½ cups + 2 tbsp all purpose flour
- ½ tsp baking powder
- ¼ tsp baking soda
- pinch of salt
- ¼ tsp cinnamon
- ½ tsp pumpkin pie spice
- ¼ cup + 2 tbsp brown sugar
- ½ stick butter, 1/4 cup, room temperature
- 1 large egg
- ½ cup pumpkin puree
Chocolate Buttercream
- 3 sticks butter, room temperature (1 1/2 cups)
- 1 ½ cup vegetable shortening
- 1 ½ cups cocoa powder
- 3-4 cups powdered sugar
Turkey Decorations
- red, orange, yellow, and brown candy melts
- vegetable shortening
- 1 oreo cookie
- very small amount of white frosting
- 2 brown m&ms
Instructions
Pumpkin Cake
- Preheat the oven to 350º F.
- Using butter, grease the bottom and sides of an 6 inch round cake pan or springform pan and line the bottom with a round piece of parchment paper. To ensure even baking, place a bake even strip around the pan. You can make your own homemade bake even strip by cutting a towel or shirt to fit the size of your pan. Get the fabric really wet, then squeeze out the dripping water but do not squeeze it too dry. Secure the fabric around the pan with a safety pin.
- In a bowl combine the flour, baking powder, baking soda, salt, cinnamon, and pumpkin pie spice. Mix well to combine.
- In a separate bowl, combine the brown sugar and butter, beat together using an electric mixer until creamy, 1-2 minutes.
- Add in the egg and mix.
- Add in the pumpkin puree, mixing by hand with a spatula.
- Add half of the flour mixture to the wet ingredients, do not dump it in, rather take spoonfuls of the flour mixture and gently shake it over the wet ingredients, as if you were sifting in the flour. Fold in the mixture until no flour remains. Repeat with the other half of the flour, folding it in and scraping the sides and bottom of the bowl to incorporate everything.
- Scrape the batter into the prepared cake pan, using a spatula to evenly spread it.
- Bake for 25-28 minutes, or until a toothpick inserted in the center comes out clean.
- Once the cake is done, allow it to cool in the pan on a cooling rack for 10 minutes. After 10 minutes, carefully remove the cake from the pan. If using a springform pan, remove the sides and bottom. Allow the cake to cool completely on a cooling rack. Once cool, remove the parchment paper round from the bottom of the cake. If you need to level the top of your cake, do so now using either a cake lever or knife. Make sure the cake is completely cooled, then wrap the cake in plastic wrap and place it in the refrigerator. This cake is good for up to one week like this.
Repeat these steps, baking as many layers as you need.
Chocolate Buttercream
- In a mixing bowl, combine the butter and vegetable shortening, beat using an electric mixer until fluffy. Add in the cocoa powder, and gently mix by hand with a spatula.
- Begin to add the powdered sugar, about 1-2 cups at a time, mixing by hand first, then with the electric mixer. Continue adding powdered sugar until the frosting tastes good to you and is well mixed.
Chocolate Shards
- Melt some red candy melts with a little bit (1 tbsp) of vegetable shortening in a small saucepan over low heat. Stir with a spatula melt smooth and melted.
- Place a plastic cutting board or metal baking sheet on the counter. Place a large piece of wax paper on top of the flat surface.
- Pour the melted chocolate on top of the wax paper. Use a spatula to smooth the chocolate into an even layer all around the wax paper.
- Place another piece of wax paper on top of the melted chocolate and gently smooth out any air bubbles.
- Place the cutting board or baking sheet with the wax paper on it in the freezer for 15 minutes.
- After 15 minutes, remove it from the freezer and allow it to warm up for 3-5 minutes.
- Remove the top layer of wax paper, break the chocolate into shards and store them in the freezer on a plate, in a container or in a bag until you’re ready to use them.
- Repeat these steps, melting each color and making shards.
To assemble the cake
- Spread a small amount of buttercream on a 6 inch round cardboard cake circle. Place your first layer of cake on top of the cardboard. Put buttercream on top of the first layer and spread it as even as possible with an offset spatula. Decide how much or how little frosting you want in-between each layer, you can measure the frosting, I use 1/3 to 1/2 cup in between each layer.
- Repeat this process for each layer of cake. Once all of the layers are stacked and frosted, spread some frosting (the same amount as you did between the layers) on the top of the cake.
- Next, t’s time to do a crumb coat. The crumb coat will help seal the crumbs in. Using your offset spatula, spread a thin layer of buttercream around the sides and the top of the cake. It’s easiest to start off with more frosting on the cake and remove some as needed.
- Place the entire cake in the freezer or fridge for 20 minutes to harden the crumb coat.
- Begin to add the second layer of frosting. Spread an even layer of frosting on the top of the cake. Next either pipe on the frosting or spread on the frosting around the sides of the cake. Use a spatula or icing smoother to smooth out the frosting, scraping off excess as you go. Once the frosting is uniform around the cake, use the smooth side of Viva brand paper towels and a fondant smoother to smooth out any imperfections. Place the paper towel on the cake and gently rub the fondant smoother around. Repeat this process, moving the paper towel all around the cake.
- Transfer the cake to your desired serving plate.
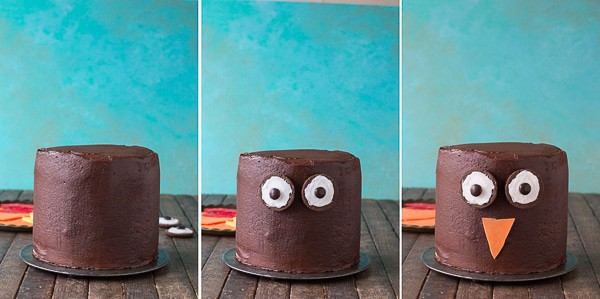
- To make the eyes, add white frosting to 2 oreo cookies. Use some frosting to “glue” one brown m&m to each cookie.
- Add a little bit of buttercream to the back of each oreo and gently press them into the cake.
- Cut or break a longer shape from some of the red chocolate shards for the turkey’s wattle. Gently press that onto the cake.
- Cut or break a triangle shape from some of the orange chocolate shards for the turkey’s beak. Gently press that onto the cake, overlapping the wattle slightly.
- Add chocolate shards to the back half of the cake, making the turkey’s feathers. Add as many as you’d like, big and small ones. Stick them firmly into the buttercream and cake.
- Display, cut and serve the cake!



Cutest thing EVER! How creative. This would be so much fun for a Holiday tradition!
Awwww!!!
First of all, huge congrats on your student loans, what an accomplishment! Yay about your kitten, AND this cake is gorgeous! It would be a showstopping dessert on any Thanksgiving dessert buffet table!
Thanks for your sweet comments Faith!
Your kitty sounds so cute! They are lots of work, but you are giving him such a good home :) This cake is so cute! It looks just delicious.
That is very true!
This cake is so cute! It would be a total showstopper of a Thanksgiving dessert. Also hooray for paying off your loans. I still have years of that left…haha. Also hooray for little fluff ball kittens! Don’t worry he will calm down soon and then he’ll just sleep all day. I also love that you adopted a black kitty. They are my favorite :)
I sure hope he calms down!! Today he knocked my crushed candy canes all over the kitchen :(
Oh my goodness, Beth! This couldn’t be any cuter! Shared and pinned. :)
Thank you friend!!
Congratulations on paying off the student debt and on the new kitten! Plus, this cake is beyond adorable!
Thank you Tonia!
kitties and puppies, and babies all seem like such a sweet fun idea – the more the merrier, until they get home :) but once you get over the sleep deprivation and the messy house, they are fun again – and this cake is a must for my Thanksgiving table
Hahaa, you nailed it on the head!
Congrats on the kitty! (and being student loan debt free – wooho!) This cake is seriously the cutest and absolute perfection on the inside!
Thank you Gina!
This cake is epic! Love that pumpkin flavor- very seasonally fitting and festive :)
This post made me laugh! We just moved into a small apartment and my cat doesn’t have anywhere to sleep. So we let him sleep in our room the last two nights and I’ve been woken up at 3am with a cat who is wide awake, ready to play – just like you said! Soooo annoying! Meanwhile loving this gorgeous and super creative cake – your amazing!
Close your bedroom door at night.. you will sleep like an angel until the cat starts meowing!!