This post may contain affiliate links. Please read our disclosure policy.
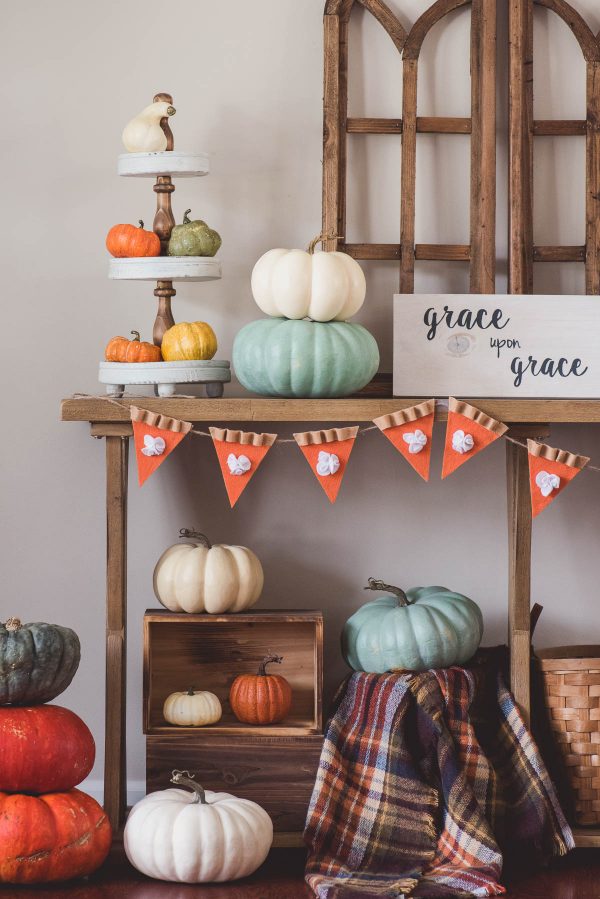
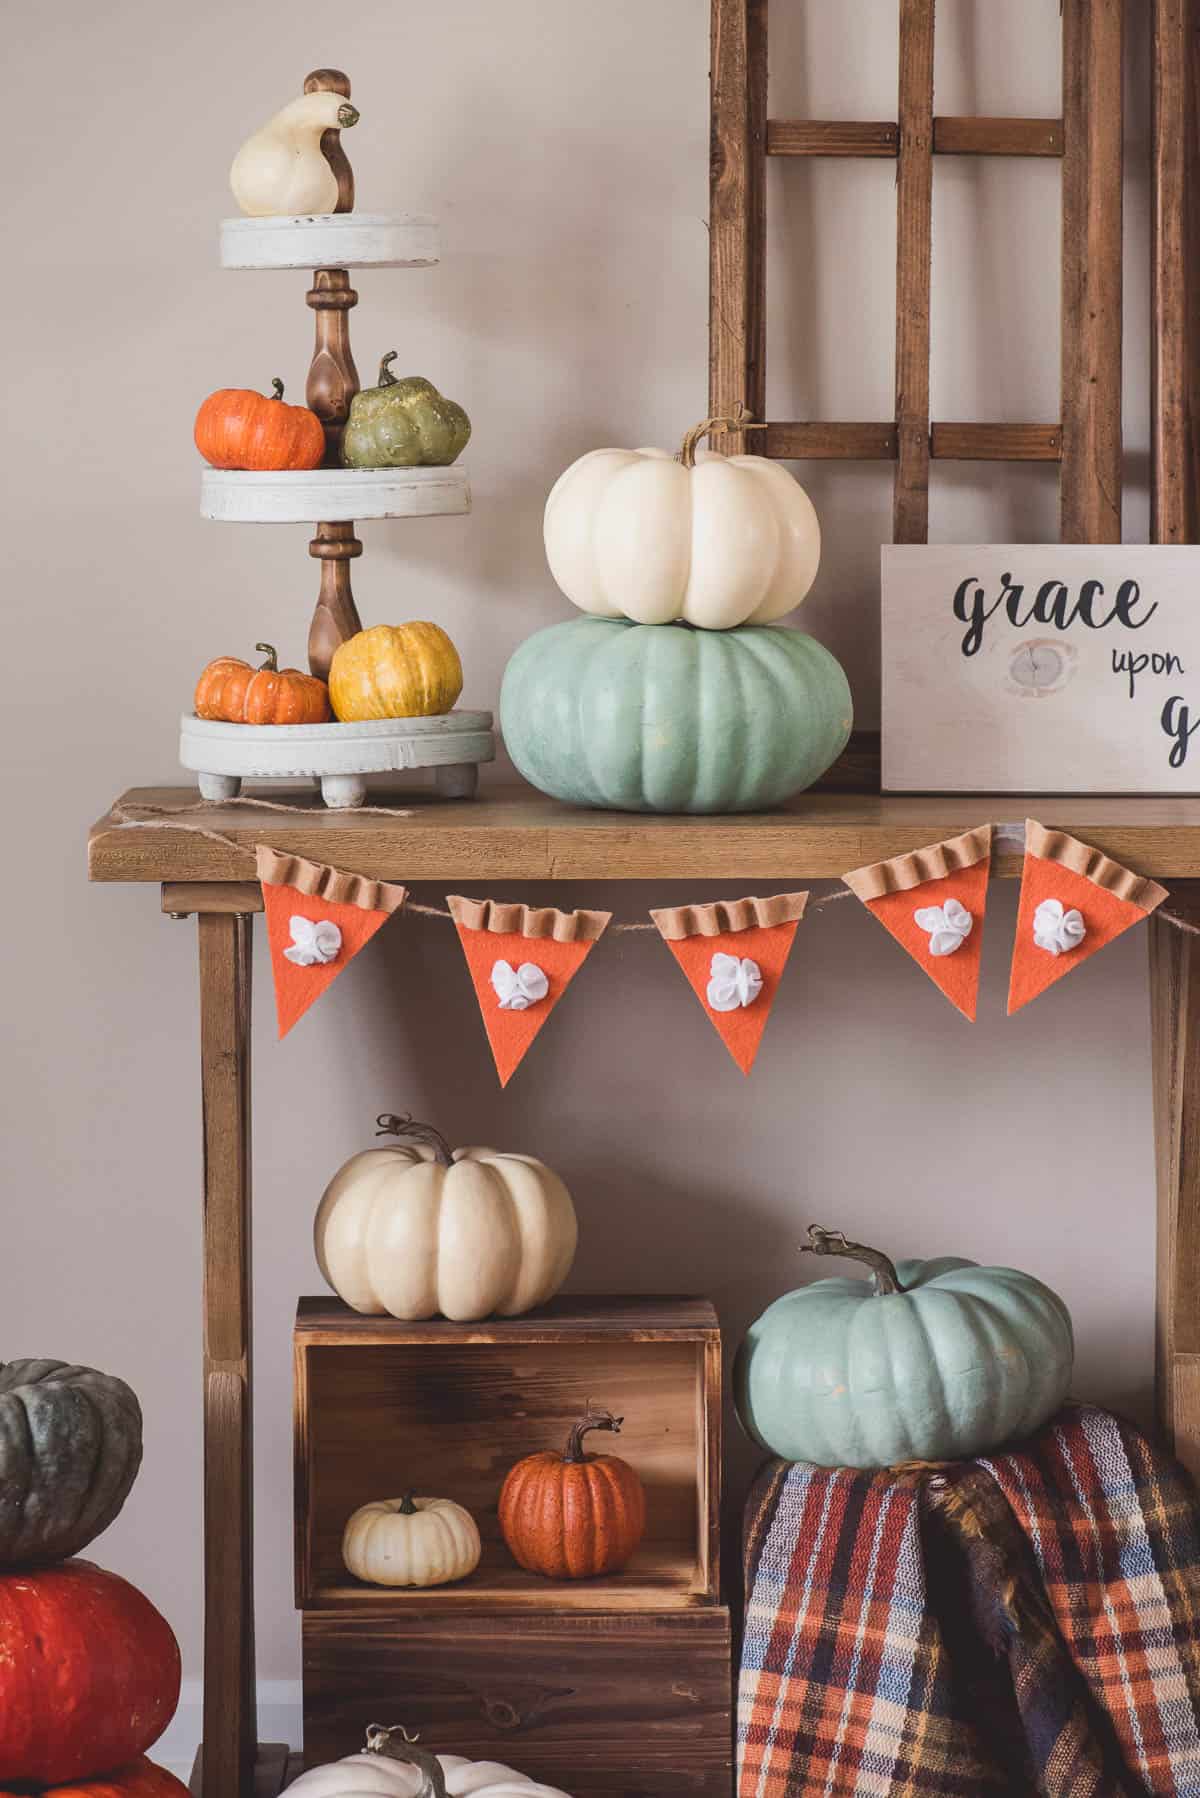
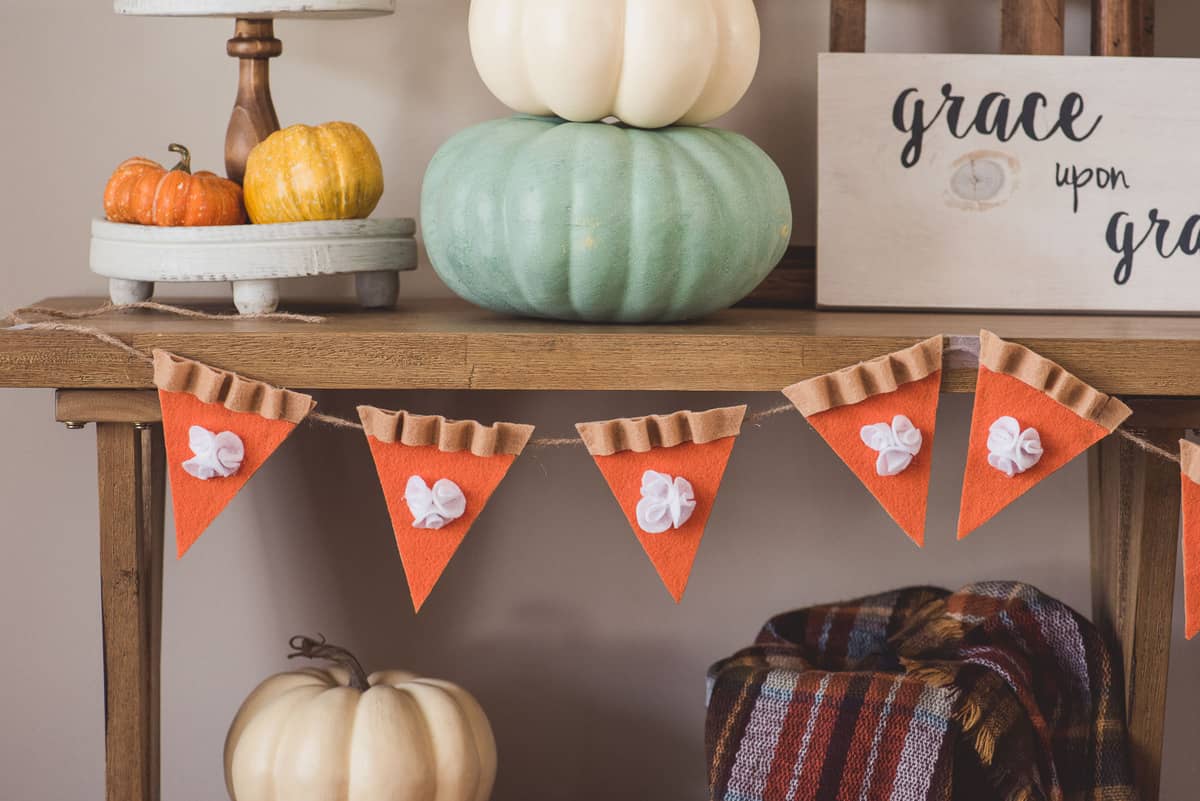
It’s no secret I love my instagram community! I was showing them on my stories this pumpkin pie garland I made and you guys flooded my inbox asking how I made it!! The overwhelming response was that you wanted a tutorial, so I got busy!
Let me say.. photographing the step by step process of a craft is different than photographing food. It was almost more stressful ???? although, nothing is as stressful as photographing ice cream during the summer where all is does it lose shape and melt.
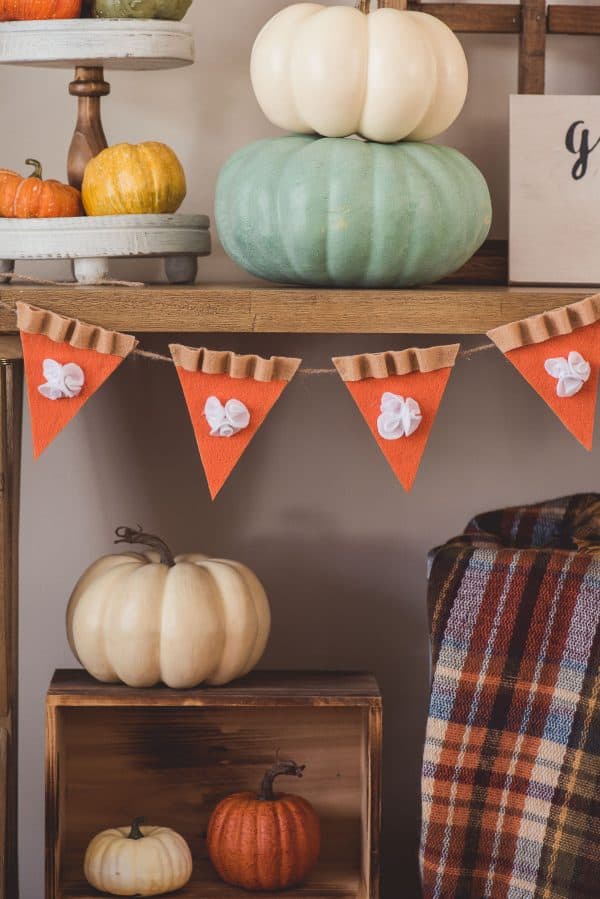
Here is our thorough tutorial for how to make this pumpkin pie garland!
Supplies needed:
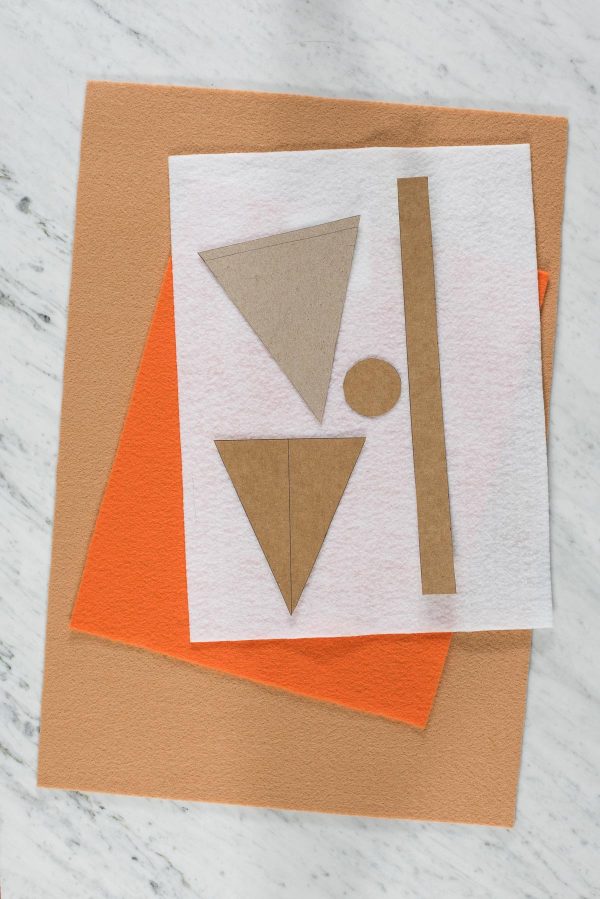
–templates (PDF templates that you can print, woohoo!!)
-1 large tan felt sheet
-1 large orange felt sheet
-1 small white felt sheet
-craft scissors
-pen for tracing
-glue gun and glue sticks
-twine (I measured mine to be 79 inches so it would fit over my fireplace)
I bought my felt at Michaels. I discovered that I like the larger pieces of felt from Michaels better. It feels like it’s a higher quality, thicker felt. Each large sheet of felt costs about $2. You will only need 1 large tan felt sheet and 1 large orange felt sheet.
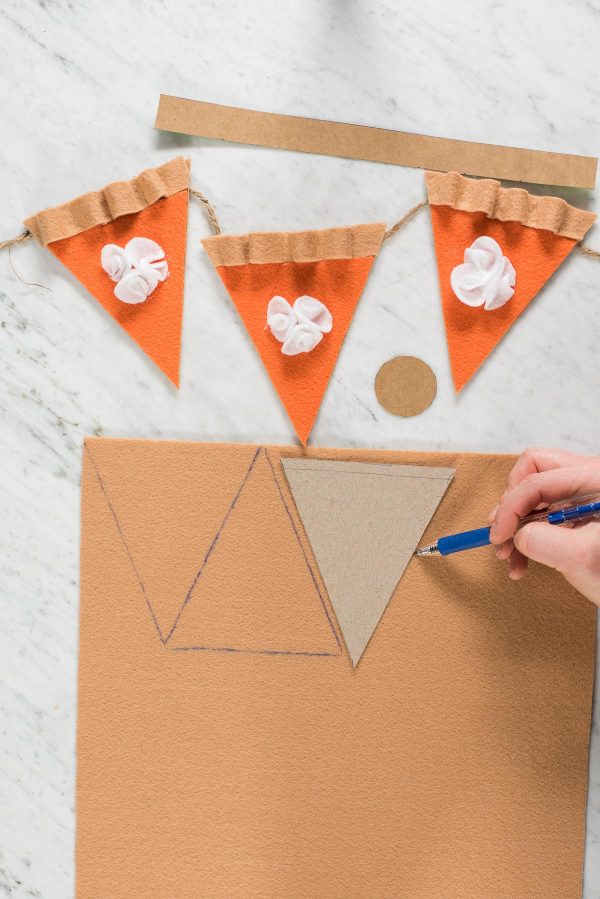
I recommend printing off the template, cutting them out and then tracing them onto thicker cardboard, like a cereal box or similar. Then use the cardboard template as your template going forward.
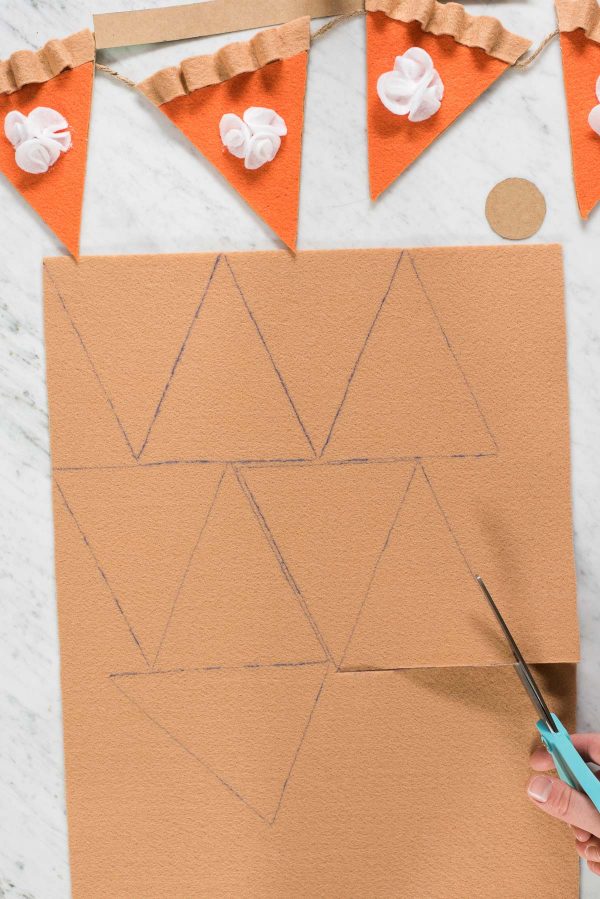
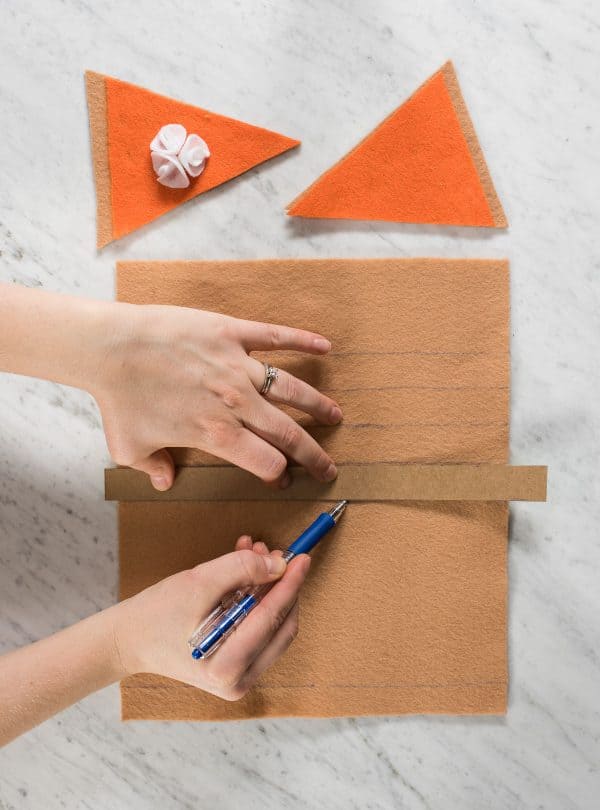
Trace the “crust” template onto the tan felt. Make as many crusts as you’d like. My garland has 10 pumpkin pies. Then cut them out.
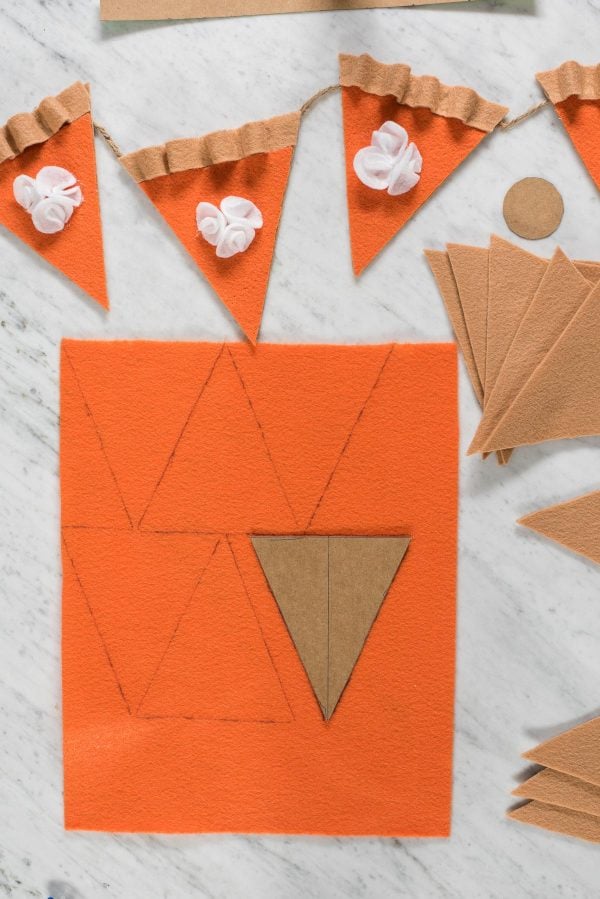
Next, next the “pumpkin pie” template onto the orange felt. Then cut them out.
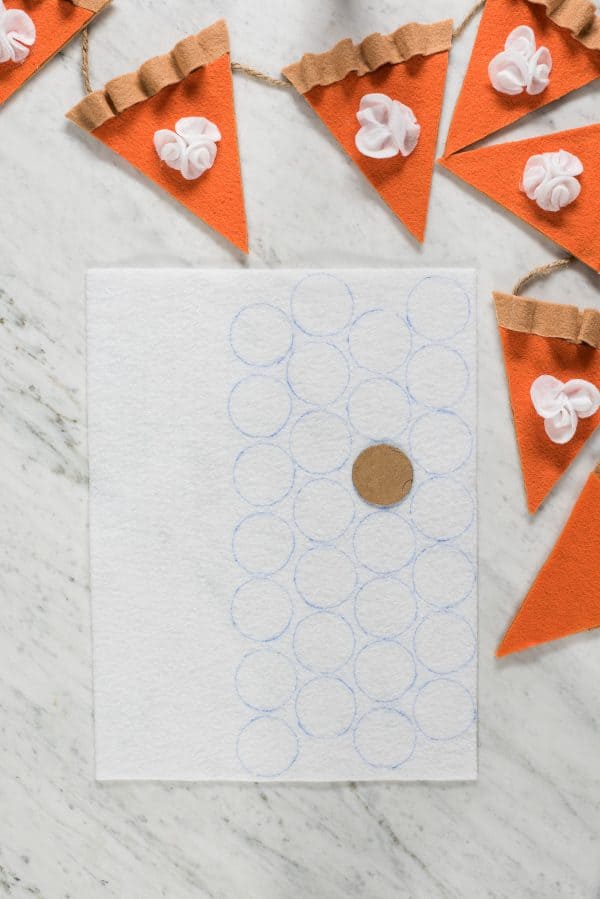
Trace the “whipped cream” circle template onto the white felt. Remember, that you will need 3 circles per pumpkin pie. Then cut them out.
Last, trace the “top crust” template onto the remaining tan felt. Then cut them out. Now all of the pieces should be cut out. Give your hand and fingers a break from those scissors ✂️
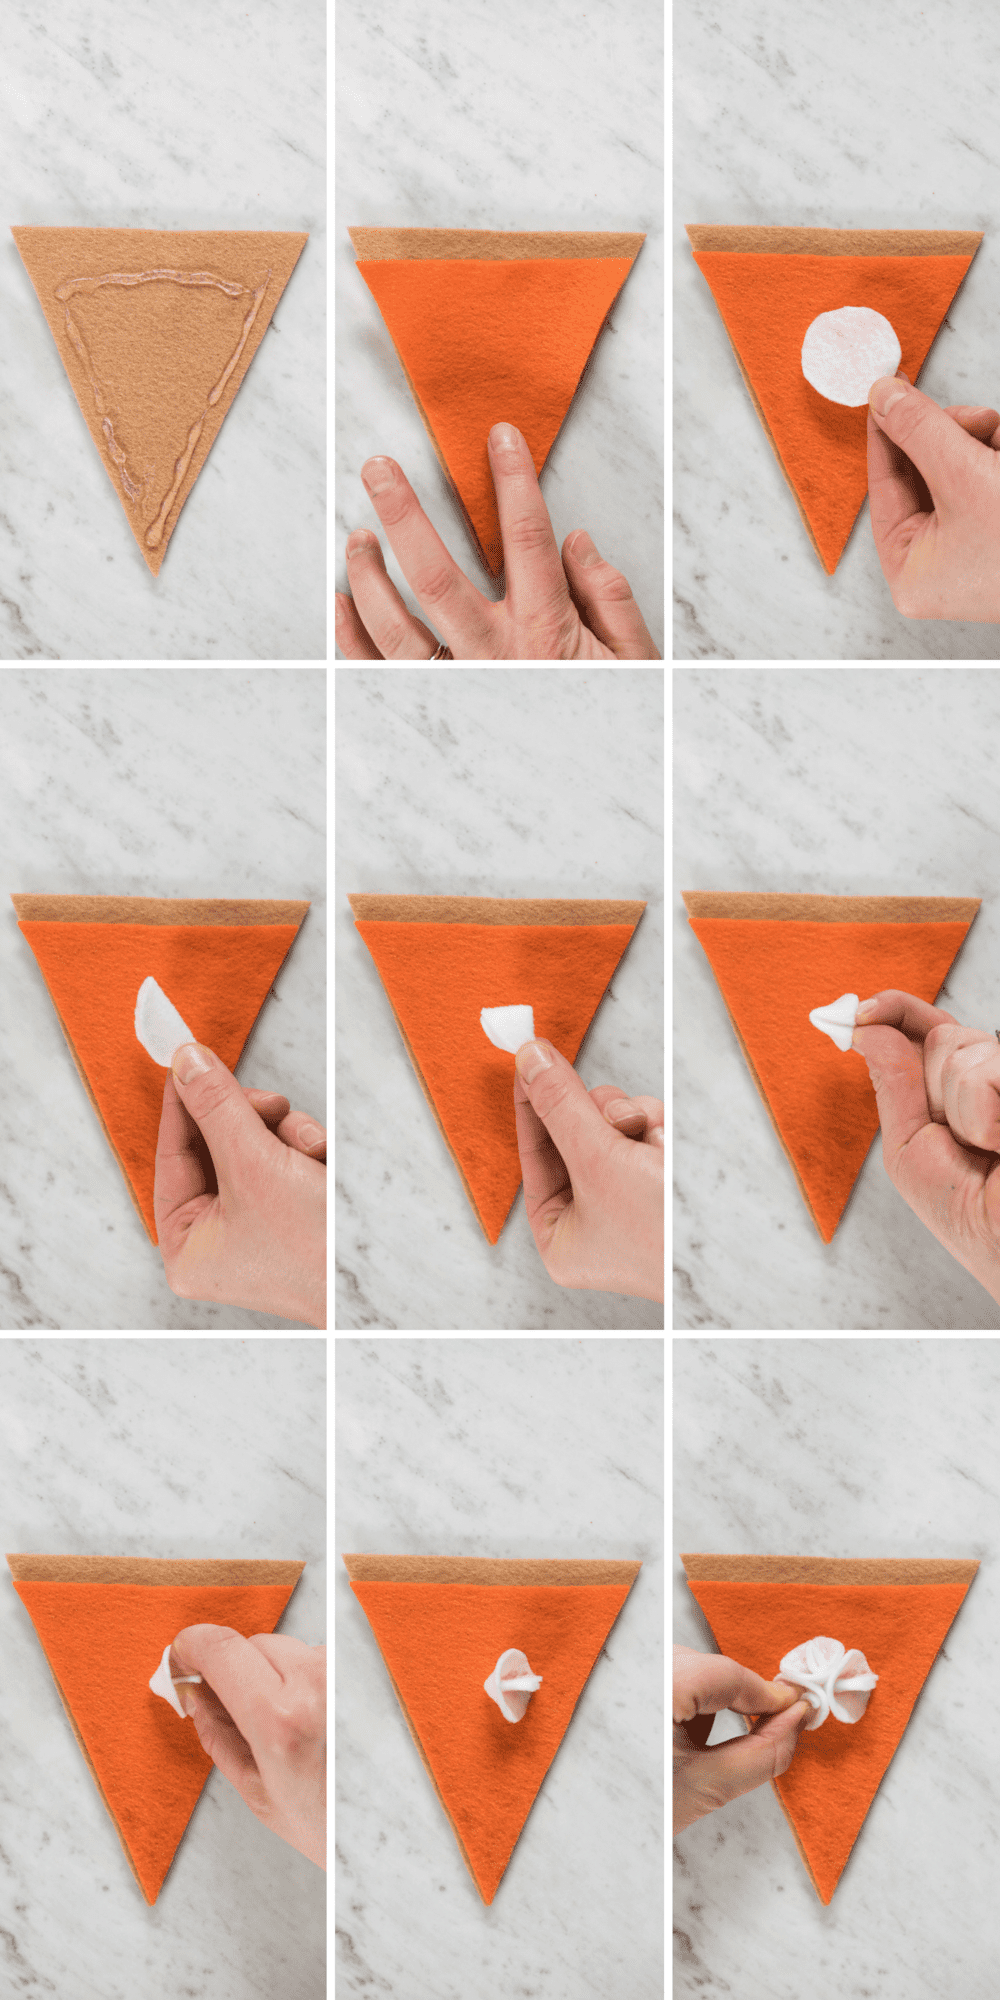
Begin to assemble each pumpkin pie. Glue the orange pumpkin filling onto the crust. There will be tan crust at sticks out at the top – that’s where you’ll attach the top crust!
Next take a white circle, hold it in half, then fold it in half again. Pinch the inside of the holder circle and glue the fold side down. Repeat by adding 2 more white circles.
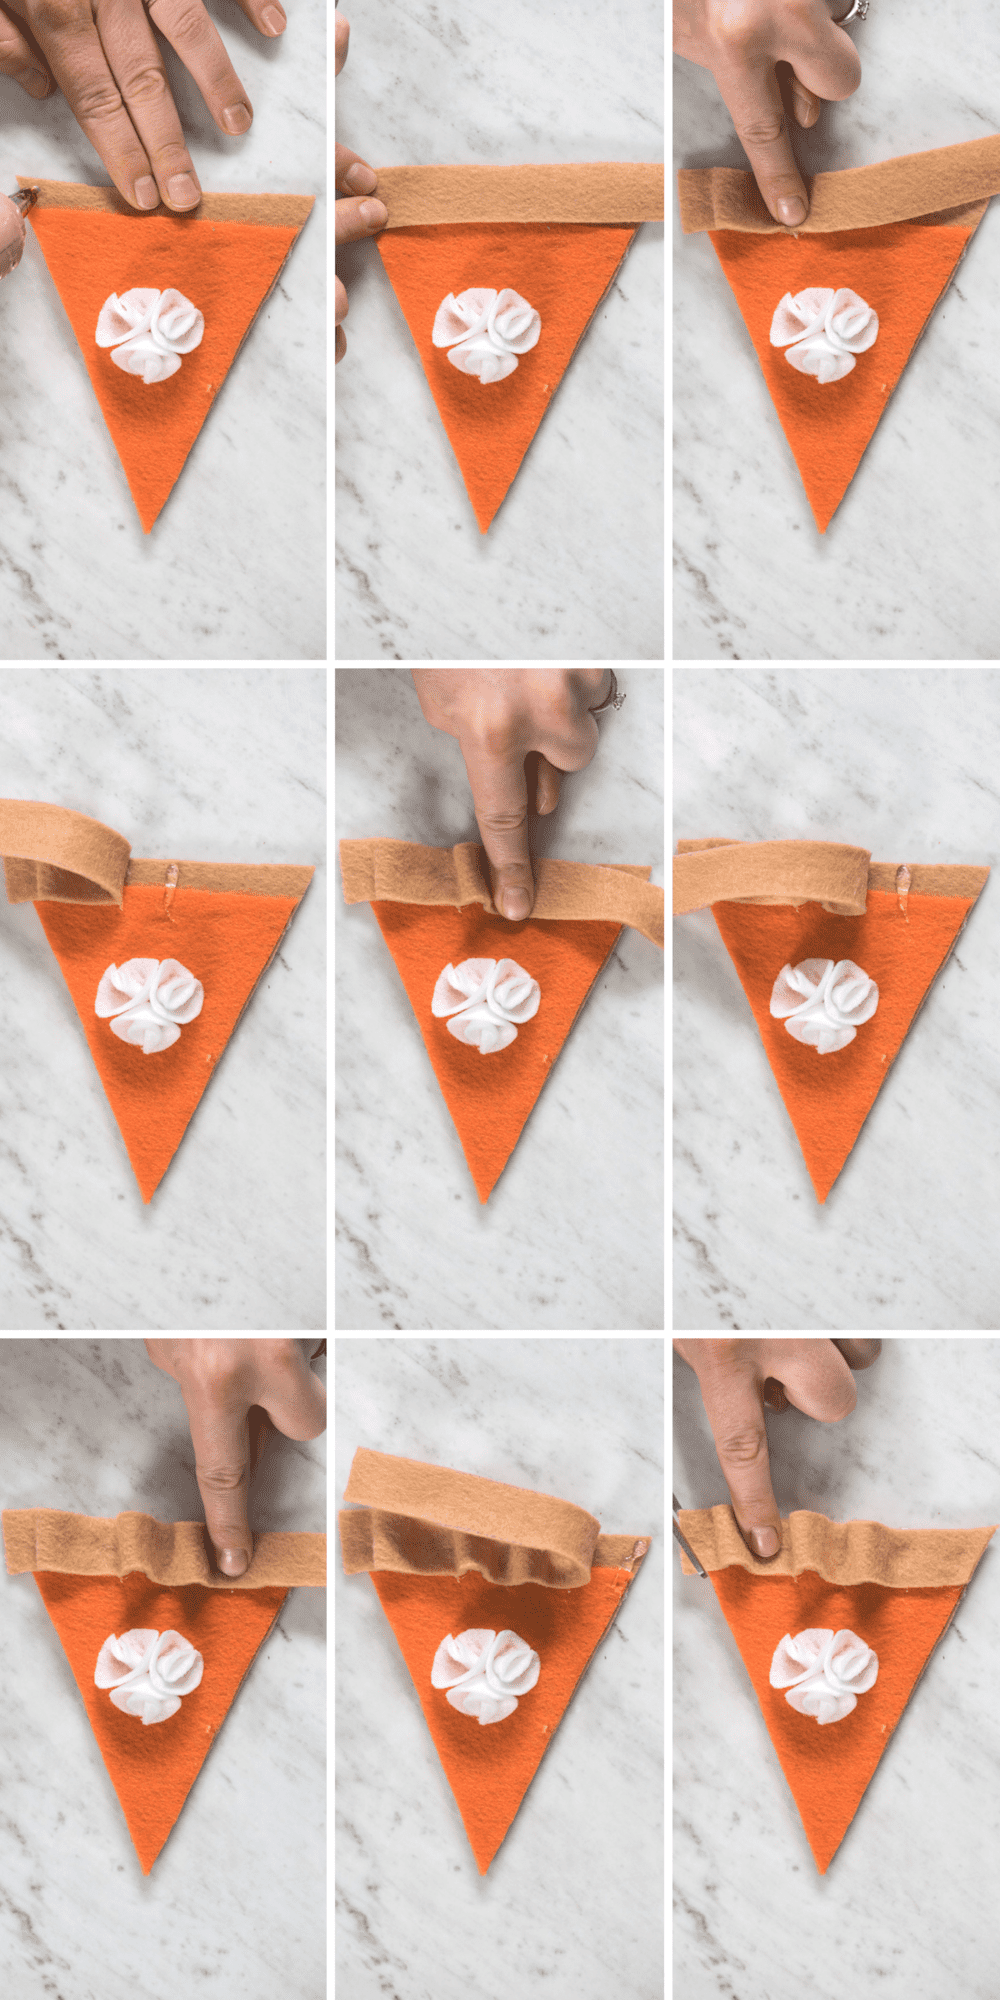
Next add the top crust. Allow a little excess to hang over so you can cut the crust at an angle once it’s dry. Glue down one edge. Then make a little bump, add more glue, etc. You are creating a wavy pattern. I like each of my pies to have 4 wavy bumps. Once the crust is glued down, cut the excess of each end.
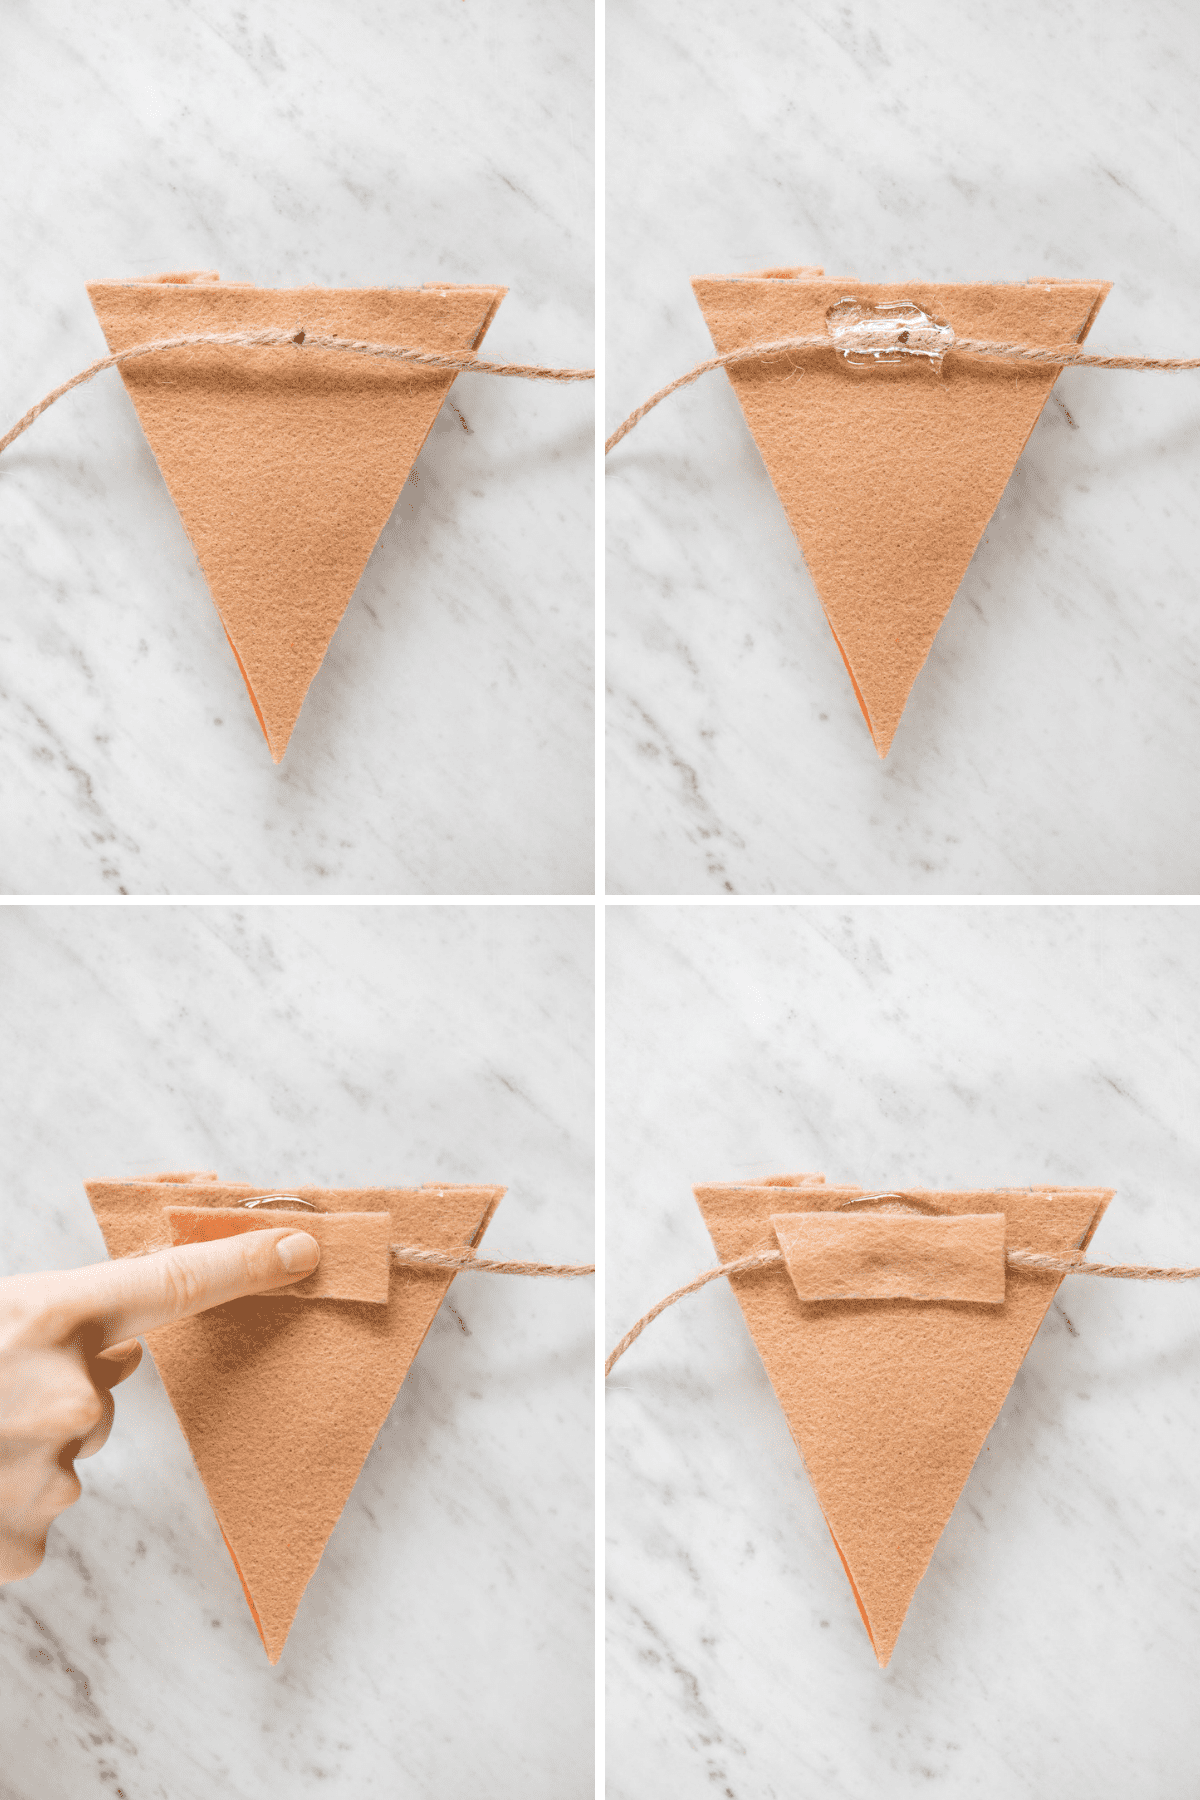
Determine how long you want your twine to be. I measured mine across my fireplace so my garland would be long enough to hang there and that was 79 inches. Determine where the center of your twine is and glue the first pie on there. Flip the pie over, add a squeeze of glue, then cover with a scarp of tan felt. Repeat this process, placing your pumpkin pies as close or as far apart as you’d like.
Once your garland is dry, it’s ready to hang!





I love this so much!! I’m in the middle of making it right now 🥰 question though. How do I make the pen marks not show on my felt?? I’m going to have blue tinged whipped cream 🫠🫠🫠
How long would you say this takes to make?
I guess it depends on how diligent and focused you are, but I would say 1-2 hours.
Hello –
When you say “large sheet”, what is the size of the sheet? Also, what is the size for a “small sheet”? I work for a public library and would like to do this craft, but need the correct dimensions to order, thank you!
Hi Ali! I bought my felt as Michaels and whatever their large and small sizes were is what I used. Basically you’ll need a lot of orange felt and a smaller amount of tan and white pieces.