
This post may contain affiliate links. Please read our disclosure policy.
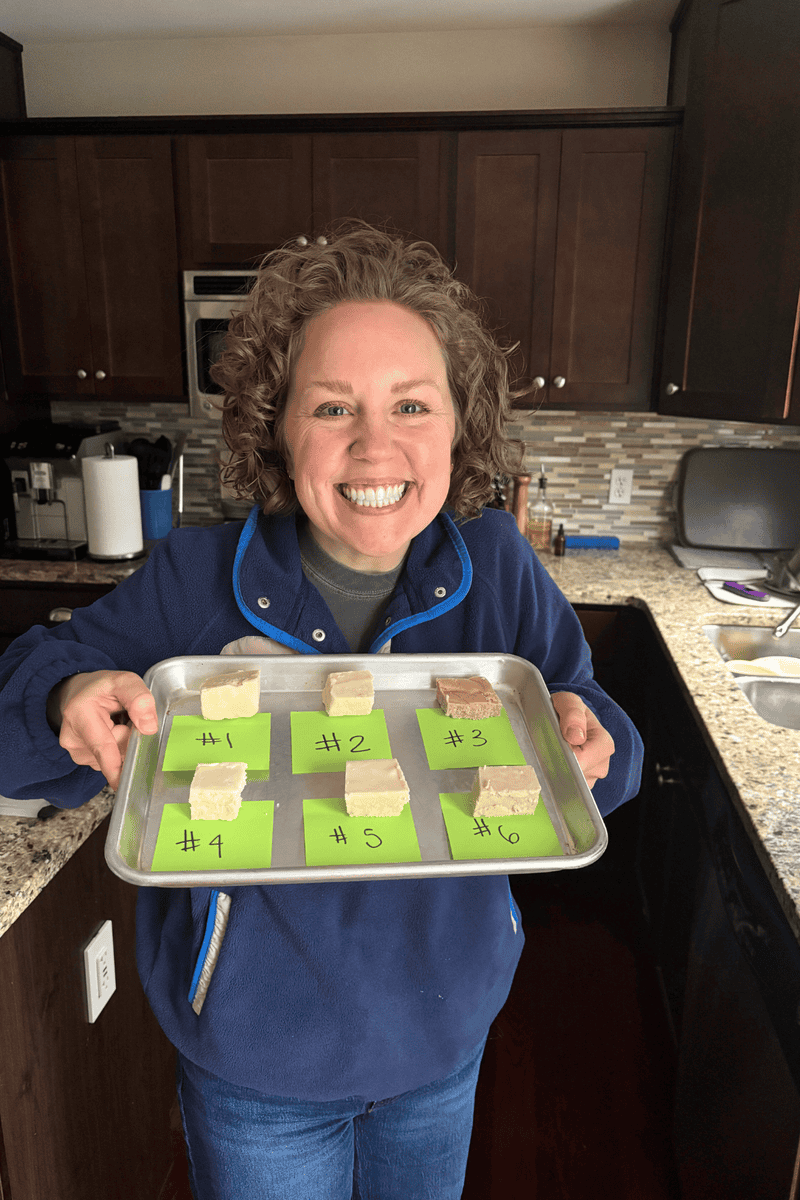
After seven test batches, multiple sugar ratios, and one very burnt pot of maple syrup, this maple fudge finally landed in the sweet spot between creamy, sliceable, and packed with real maple flavor. Real maple syrup gives incredible depth, but it also makes fudge more prone to crystallizing than standard fudge, but I didn’t give up.
I tested different cook temperatures, sugar combinations, and butter levels until the crystals stayed tiny and creamy instead of gritty. This is also not a quick condensed milk fudge. It is a true cooked maple fudge built around real maple syrup.
What I Learned After 7 Batches of Maple Fudge
This maple fudge recipe ended up taking seven test batches to get right. Maple syrup behaves differently than regular sugar, which is why developing a smooth, creamy maple fudge took some careful testing.
Most classic fudge recipes, like my easy chocolate fudge, rely on ingredients that are easier to control. Maple syrup contains natural minerals that can encourage sugar crystals to form as the fudge cools, which makes maple fudge a little trickier to perfect.
The first thing I learned is that real maple syrup is worth the extra effort. I tested a version with maple extract and while the smell was amazing, the flavor felt flat compared to the batches made with real maple syrup.
I also tested different final cooking temperatures between 236 and 238 degrees. That small range might not sound like much, but it changes how much moisture cooks out of the fudge and how firm the final texture becomes.
Another adjustment was reducing the butter slightly. Too much butter made the fudge softer and a little sticky when cutting. Cutting the butter back helped the fudge set more cleanly.
I also experimented with all granulated sugar versus a mix of granulated and brown sugar. The brown sugar version won easily. It added deeper caramel flavor and gave the fudge a richer maple candy color.
To help control crystallization, I added a small amount of corn syrup. Maple syrup naturally contains minerals that encourage sugar crystals to form, which is why maple fudge can sometimes turn grainy. A little corn syrup helps keep those crystals extremely fine so the fudge stays creamy.
One of the most important steps ended up being reducing the maple syrup first. This concentrates the maple flavor so it still shines through once the other ingredients are added.
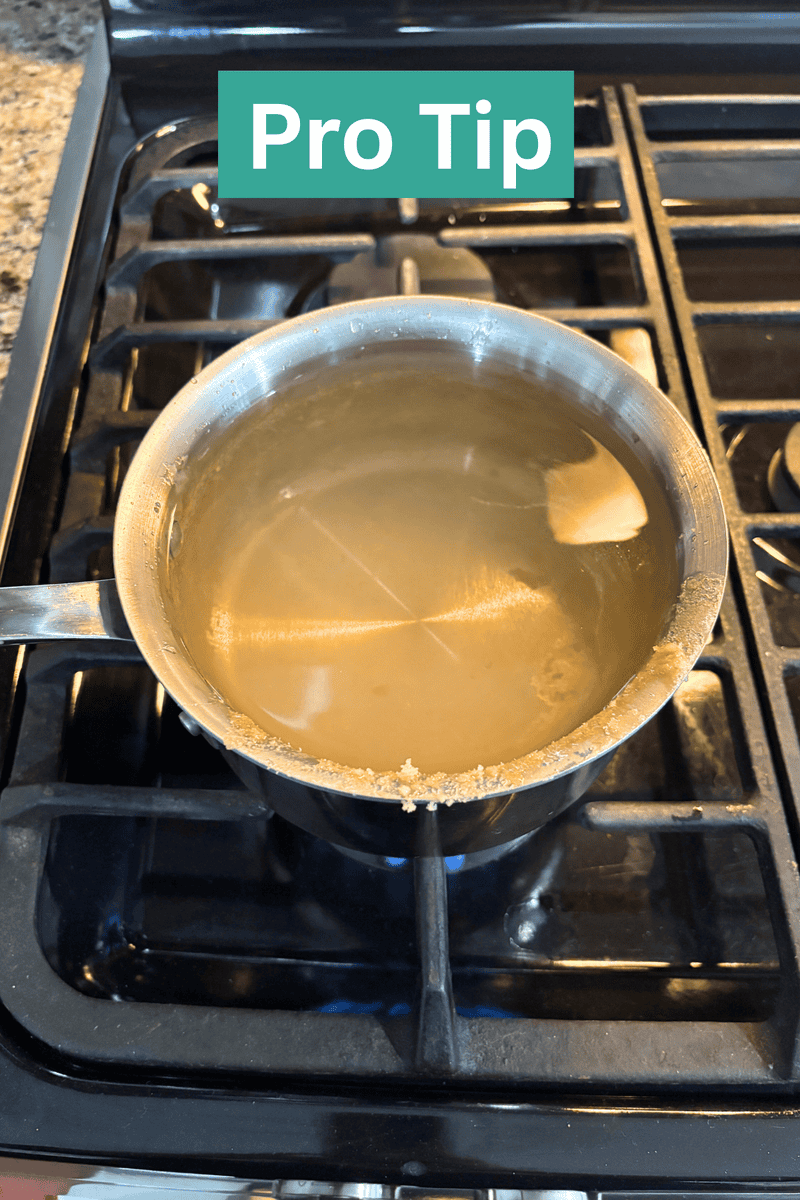
I also learned that maple syrup reductions need supervision. One test batch turned into a pot completely coated in burnt maple crystals because I walked away from the stove for too long. The good news is that boiling water in the pot dissolves the sugar and cleans it up easily.
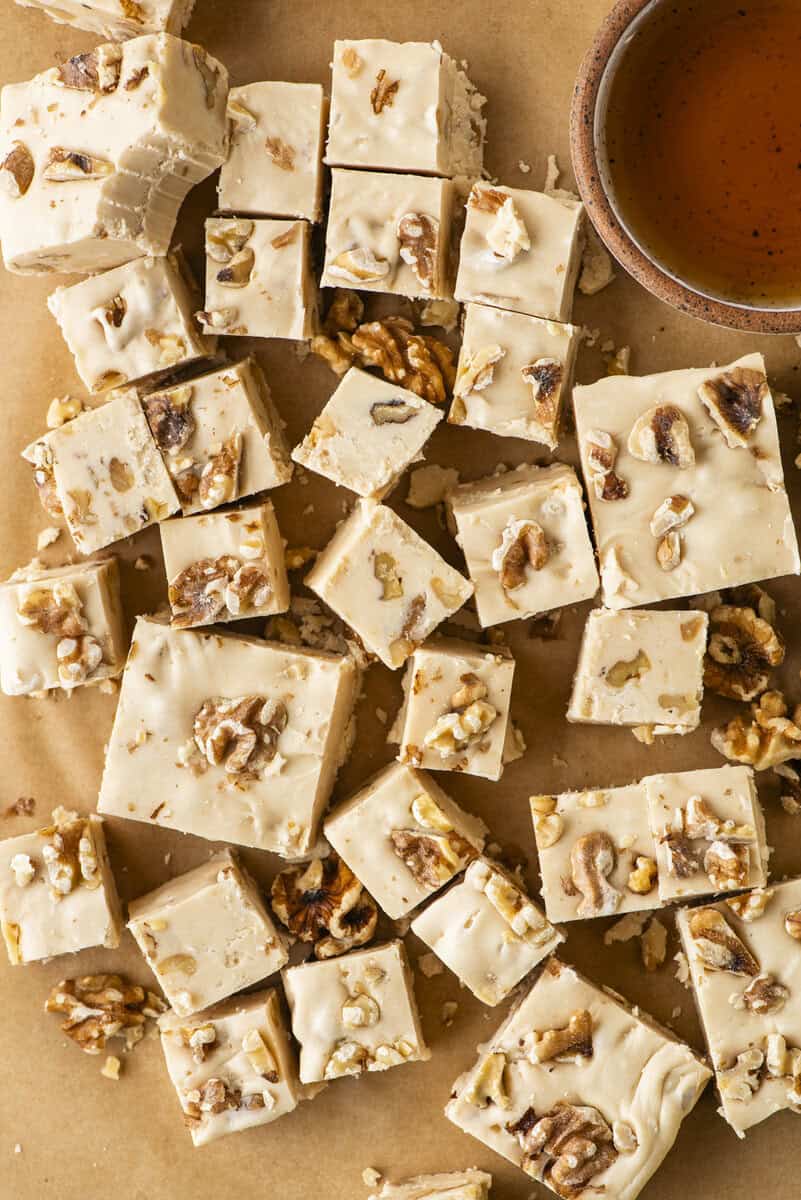
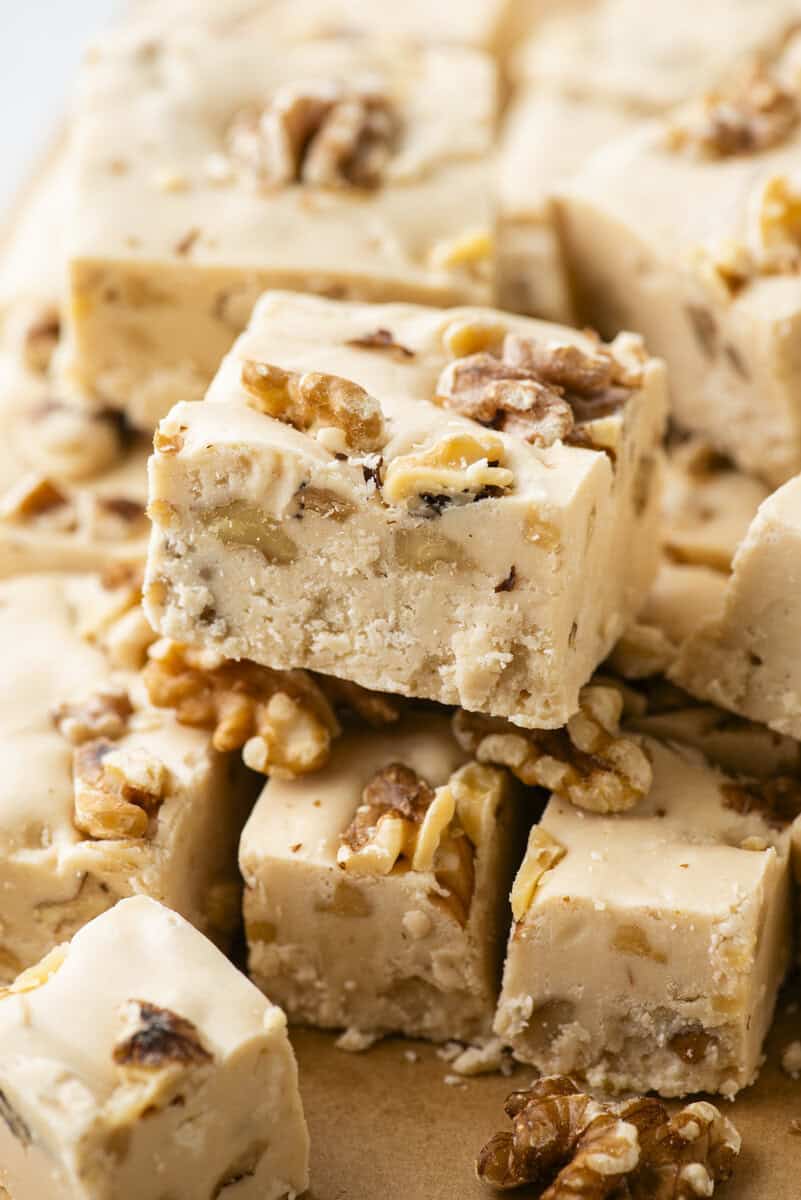
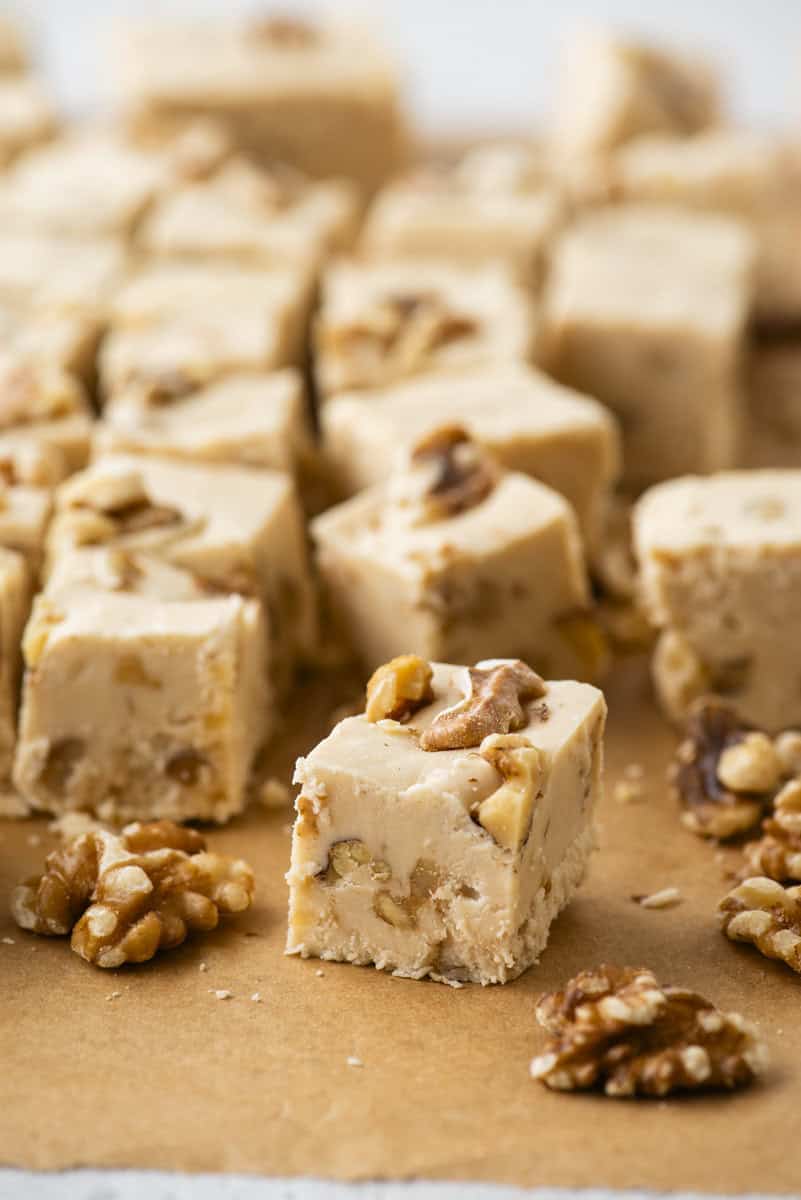
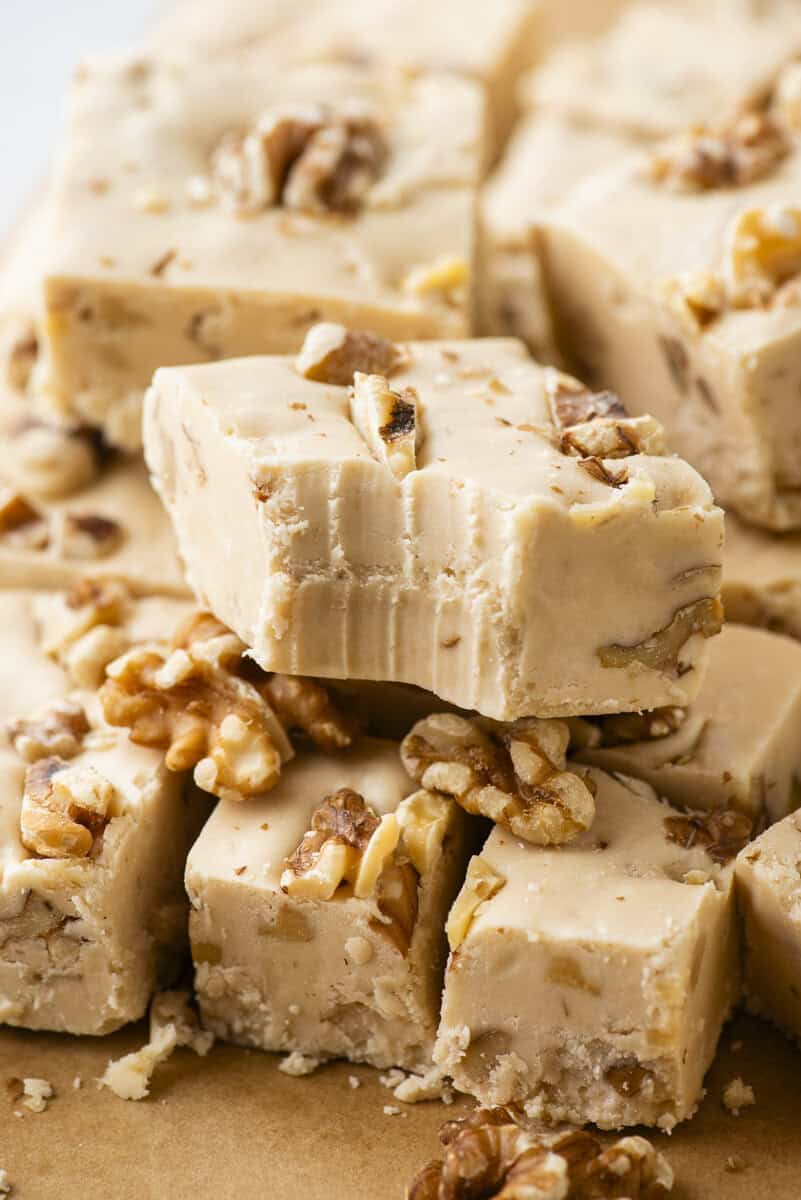
After seven rounds of testing, this final version gives you real maple flavor, a creamy melt in your mouth texture, and fudge that slices cleanly instead of turning sticky or gritty.
Why Maple Fudge Sometimes Turns Grainy
Maple fudge can be trickier than other fudge because maple syrup contains natural minerals that encourage sugar crystals to form as it cools. When those crystals grow too large, the texture can feel grainy. The goal is not to eliminate crystals completely, but to keep them extremely small so the fudge stays smooth and creamy. Cooking the mixture to the right temperature and adding a little corn syrup helps control crystal size. After seven test batches, this version keeps the crystals tiny so the fudge melts in your mouth while still delivering deep maple flavor.
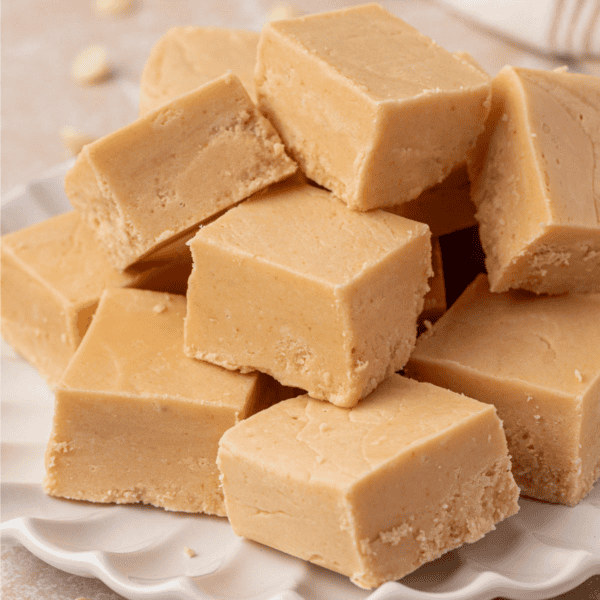
For another classic candy recipe, try my creamy peanut butter fudge that melts in your mouth.
Ingredients That Make This Maple Fudge Work
Here’s an overview of the ingredients in this recipe and what they do. You can also jump to the recipe card below for the full recipe.
- Maple Syrup: Reducing the maple syrup first concentrates the flavor so the finished fudge tastes like real maple.
- Brown Sugar: Adds warm caramel notes and gives the fudge a deeper maple color. It also helps round out the sweetness of the maple syrup.
- Corn Syrup: A small amount helps control sugar crystallization. This keeps the crystals tiny so the fudge stays creamy instead of grainy.
- White Chocolate Chips: These melt into the fudge base and help create the creamy structure.
- Marshmallow Creme: Helps stabilize the fudge and gives it that soft melt in your mouth texture.
- Toasted Walnuts: Maple and walnuts are a classic pairing. Toasting them brings out a deeper nutty flavor and adds texture.
How to Make Maple Fudge
Making irresistible homemade maple fudge is easy when you follow my simple steps below, or jump to the recipe card for the full recipe.
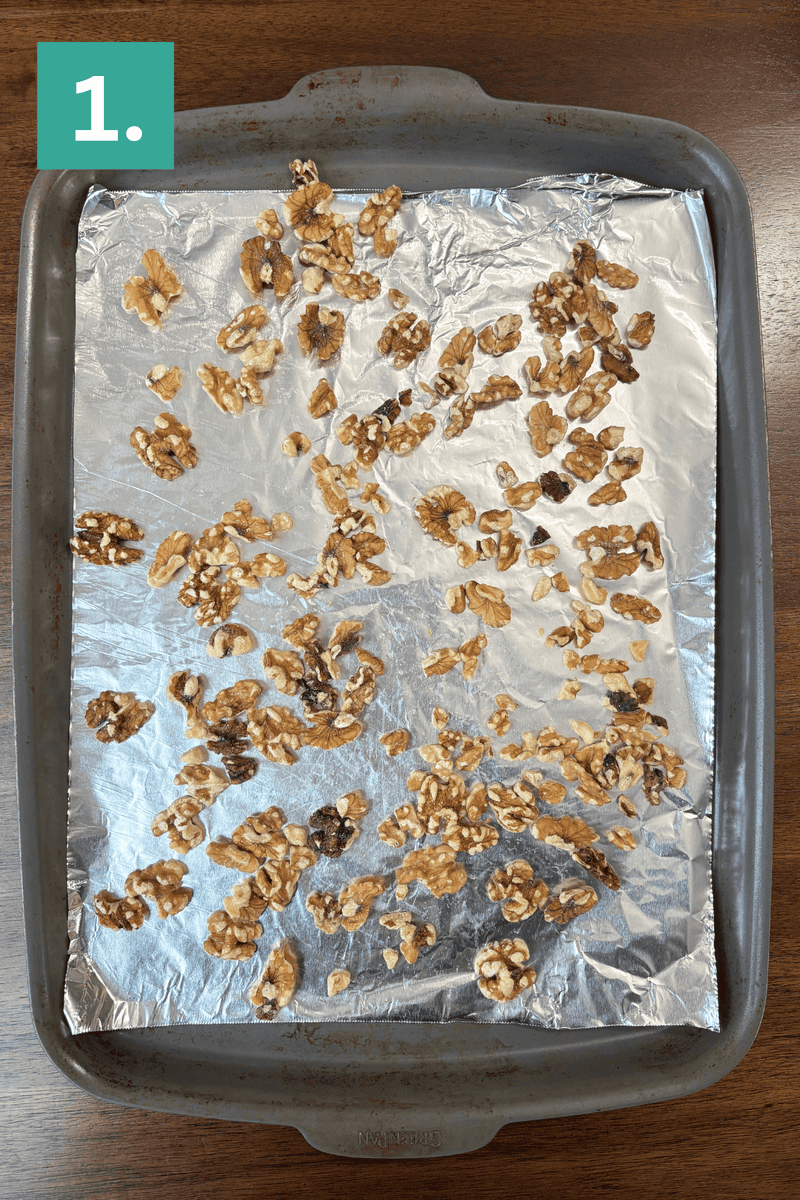
Toast the walnuts: Preheat the oven to 350ºF. Arrange the walnuts in a single layer on a rimmed baking sheet lined with parchment paper or foil. Toast for 7 to 10 minutes, stirring a few times during baking, until the nuts are lightly browned and fragrant. Because the walnuts around the edges toast faster than those in the center, give them a quick stir to help them brown evenly.
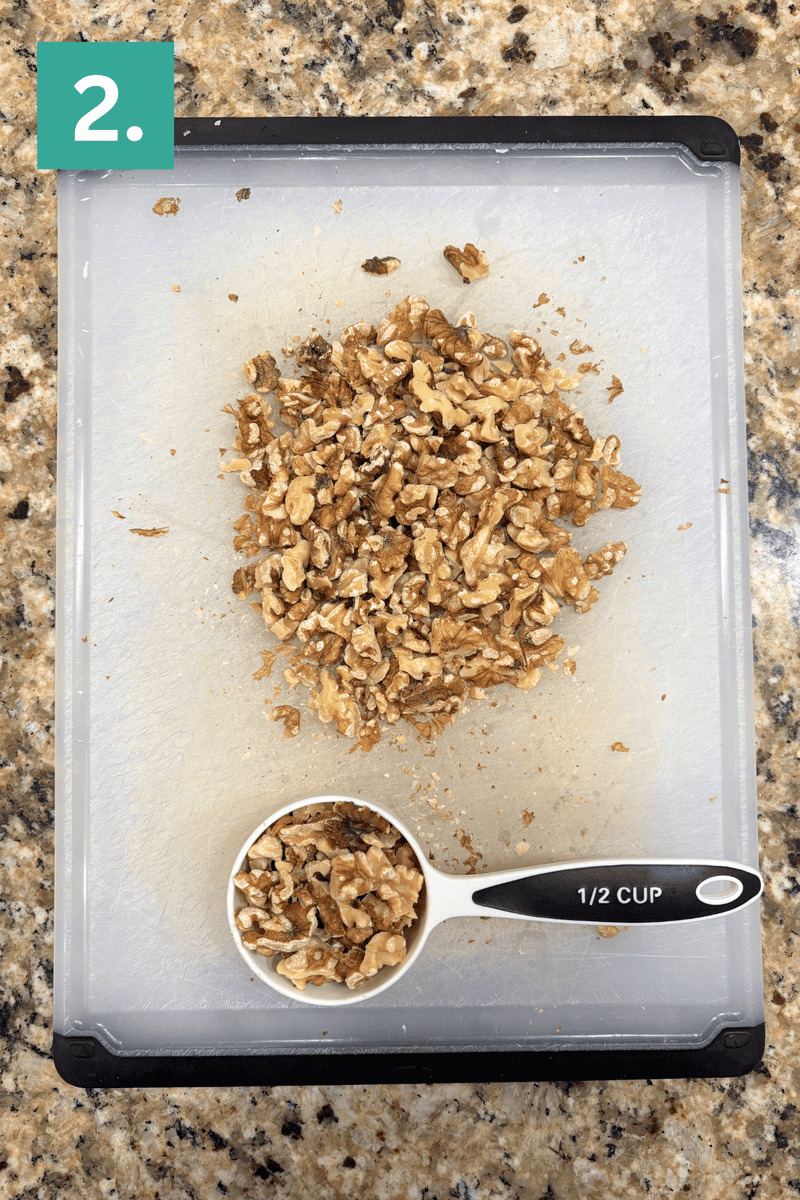
Cool walnuts: Once they’re done, transfer the walnuts to a plate right away so they can cool and don’t continue to toast on the hot pan. Once the walnuts cool, rough chop them, dividing them into 1 cup and ½ cup portions. You can also skip toasting and use raw walnuts.
Prep pan: Line an 8×8 or 9×9 inch square pan with aluminum foil, allowing some overhang so you can easily lift the fudge out later. Set aside.
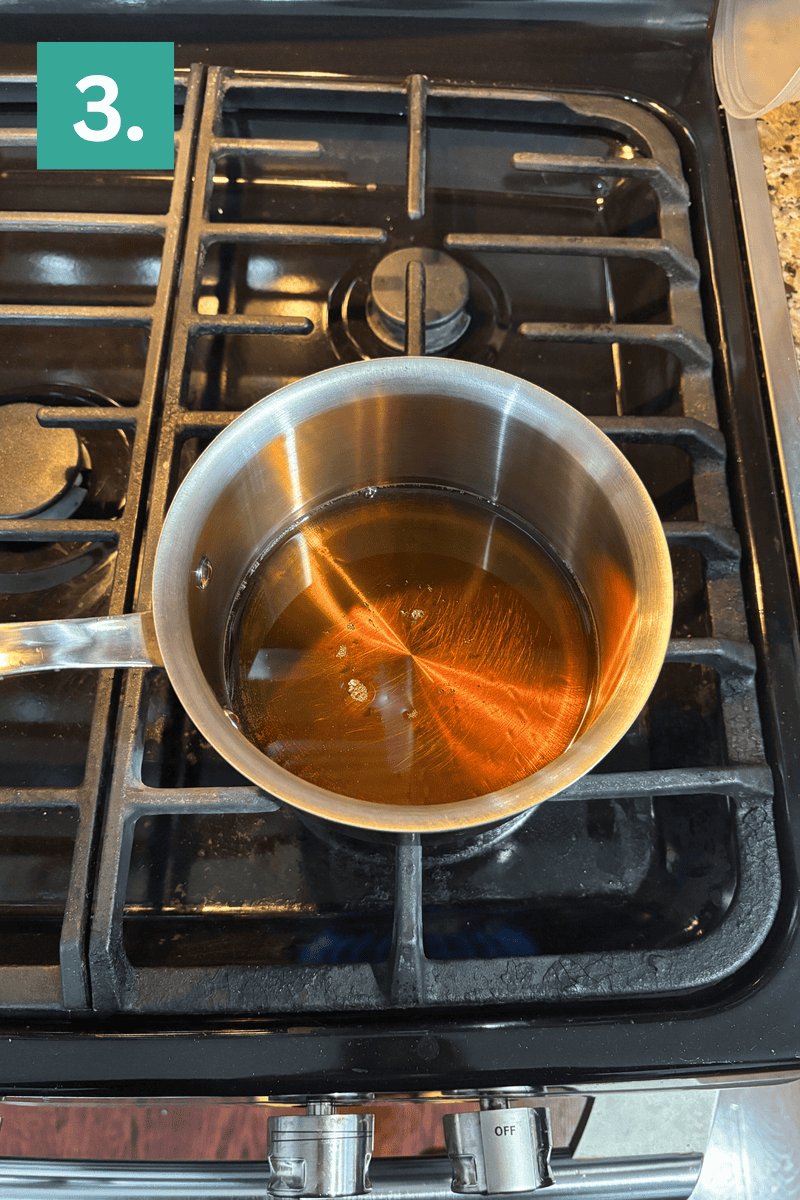
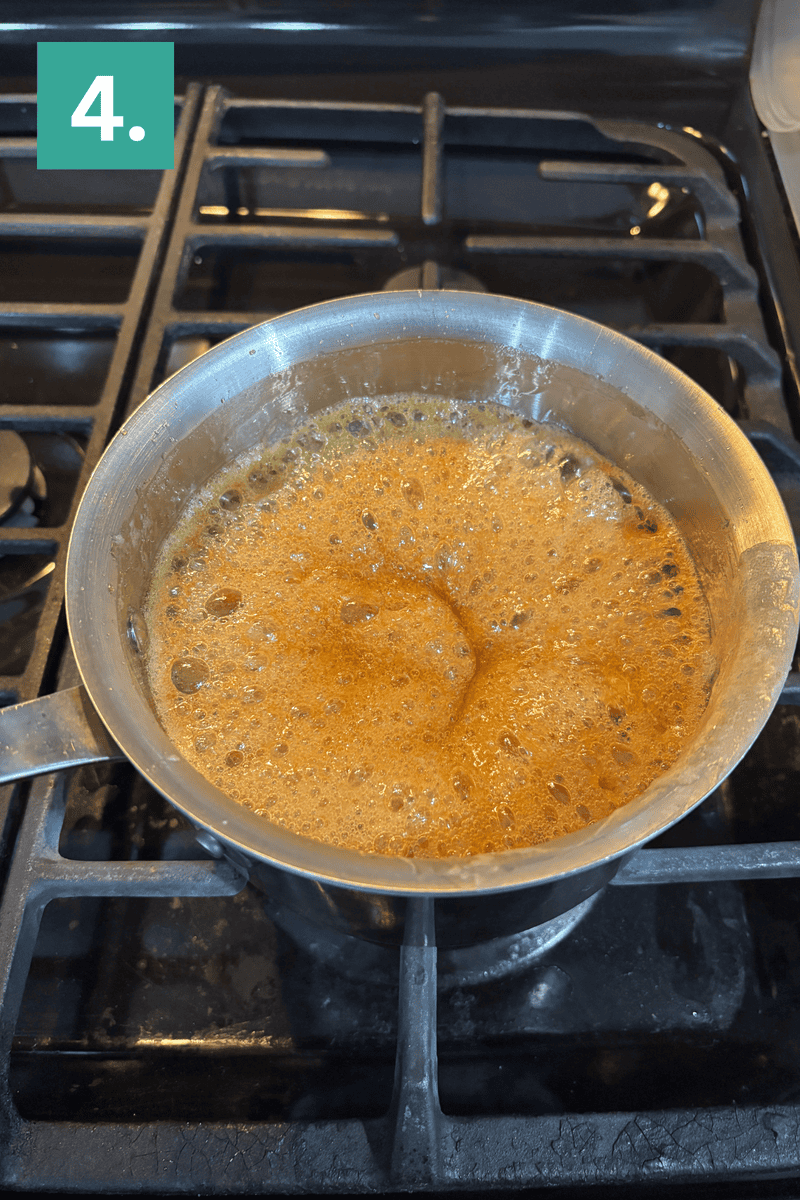
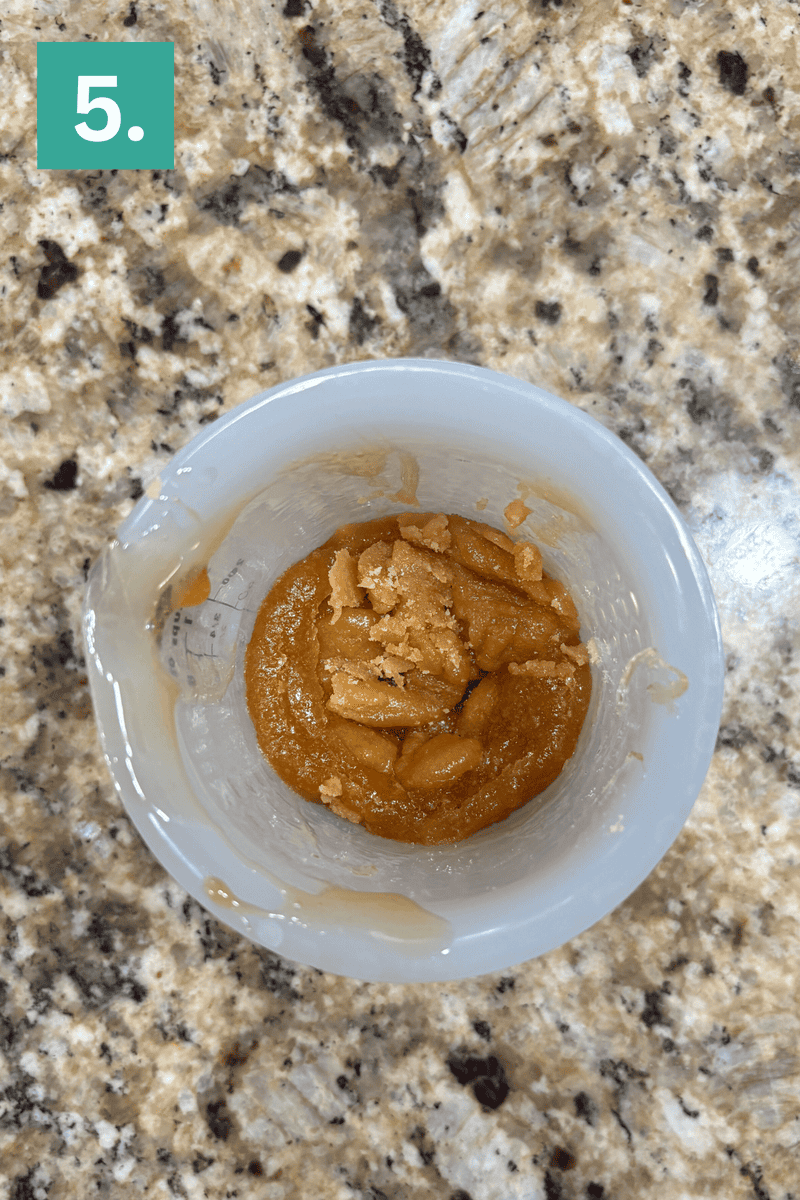
Reduce maple syrup: Add the maple syrup to a small saucepan over medium heat. Once it comes to a boil, reduce the heat to medium low or low and let it gently boil for about 15 to 20 minutes, keeping an eye on it as it reduces to make sure it doesn’t overflow. If the bubbles are getting close to the edge of the pan, turn the heat down. After about 15 minutes, carefully pour the syrup into a measuring cup to check the volume. If it has not reduced to about ½ cup yet, return it to the pan and continue simmering. Once reduced, set the syrup aside to cool while you prepare the other ingredients. As it cools, the syrup will crystallize and no longer be liquid. This is normal.
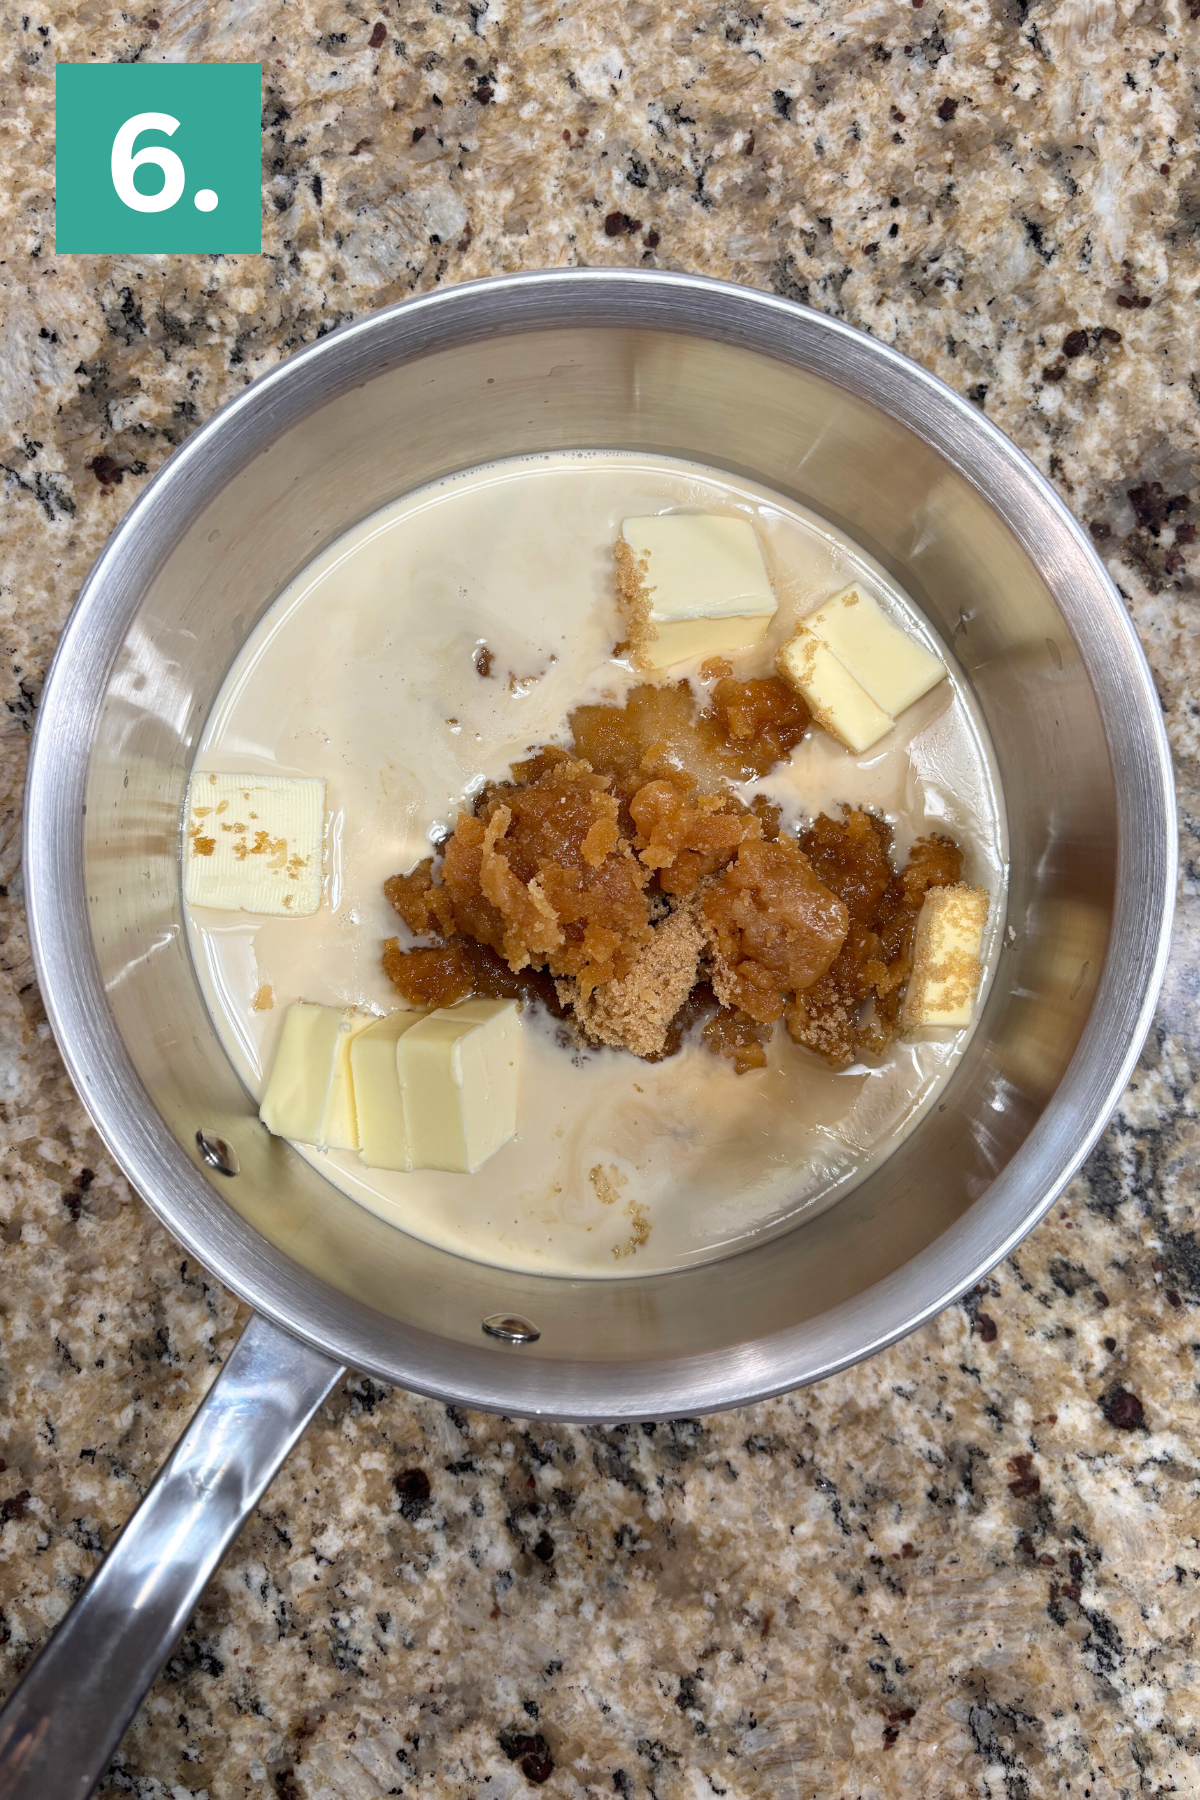
Begin combining ingredients: In a medium saucepan over medium heat, combine the granulated sugar, brown sugar, butter, evaporated milk, corn syrup, and the reduced maple syrup. Stir constantly until the sugar is melted. Then stir occasionally until the mixture comes to a full boil.
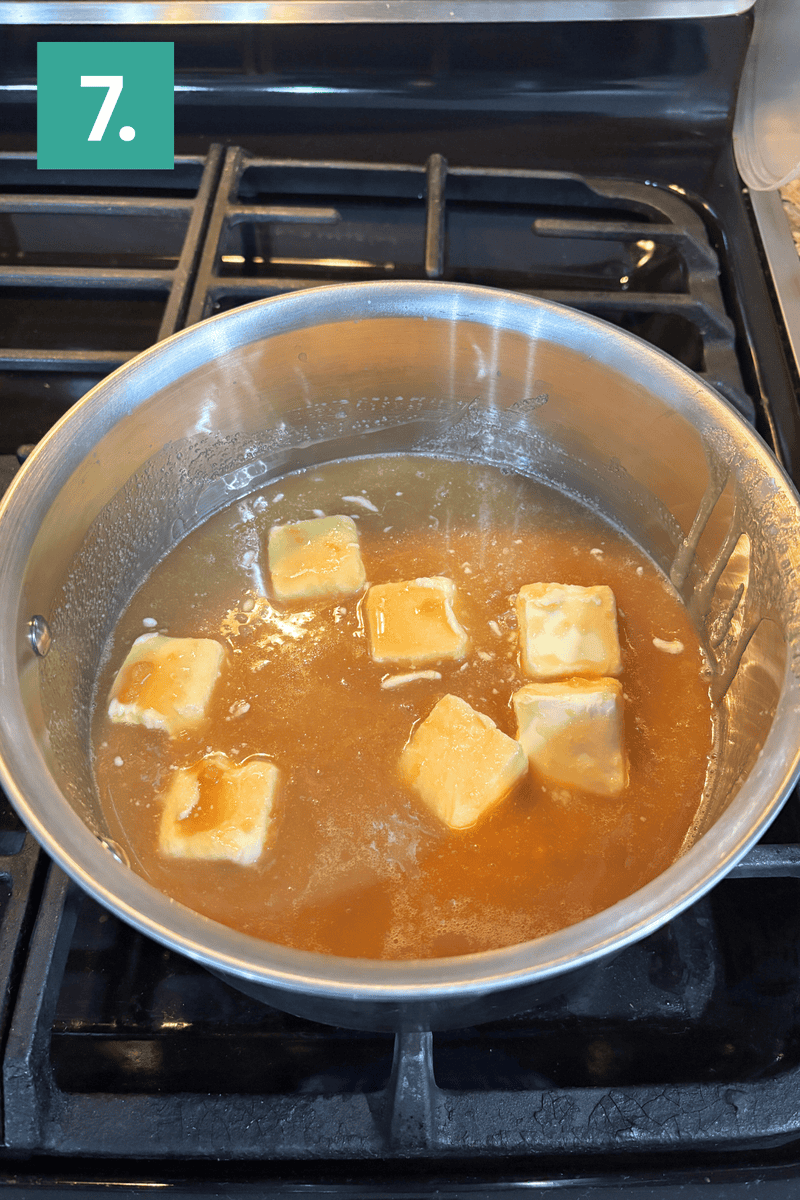
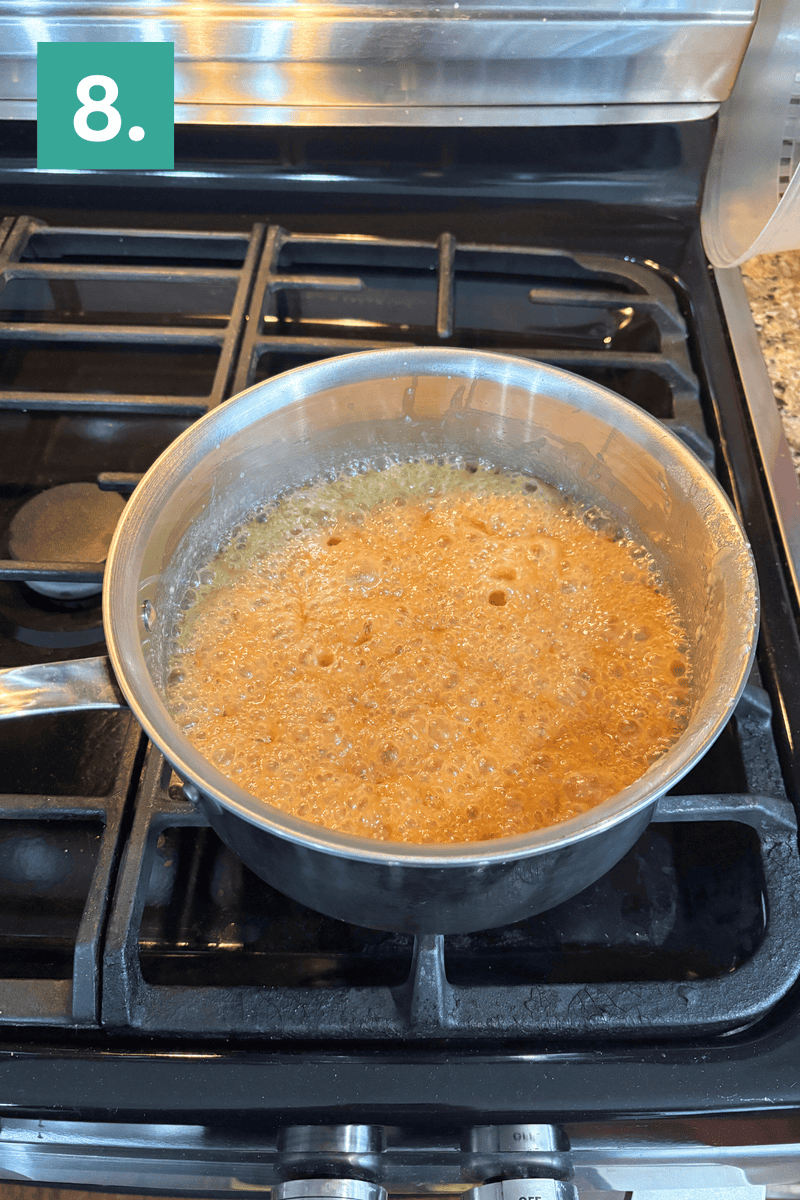
Continue boiling: Do not stir. Let the mixture continue boiling for 4 to 8 minutes, or until an instant-read thermometer reaches 236 to 238ºF. Be sure the thermometer tip is suspended in the liquid and not touching the bottom of the pan, which can give a false reading.
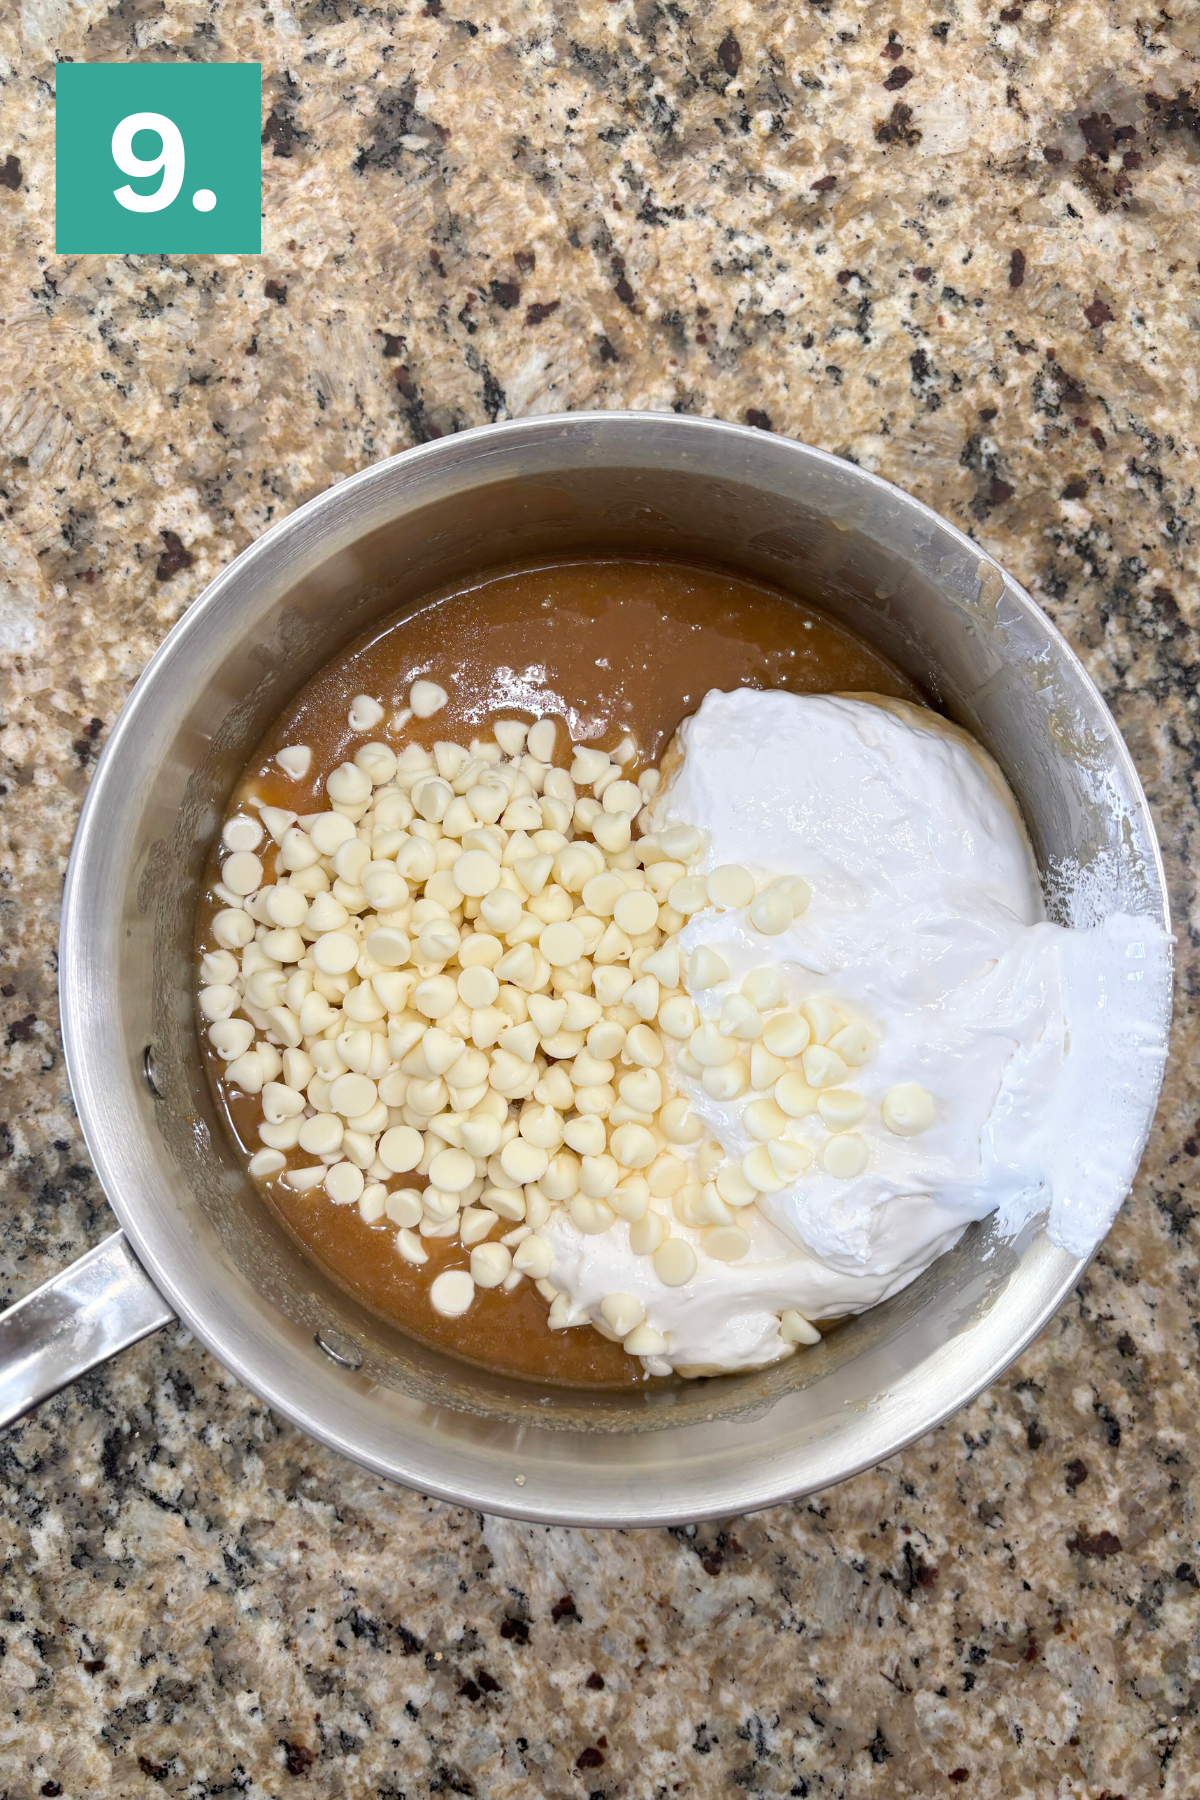
Mix in more ingredients: Remove the saucepan from the heat and immediately stir in the white chocolate chips, marshmallow creme, and salt. Stir until the mixture is smooth and completely melted.

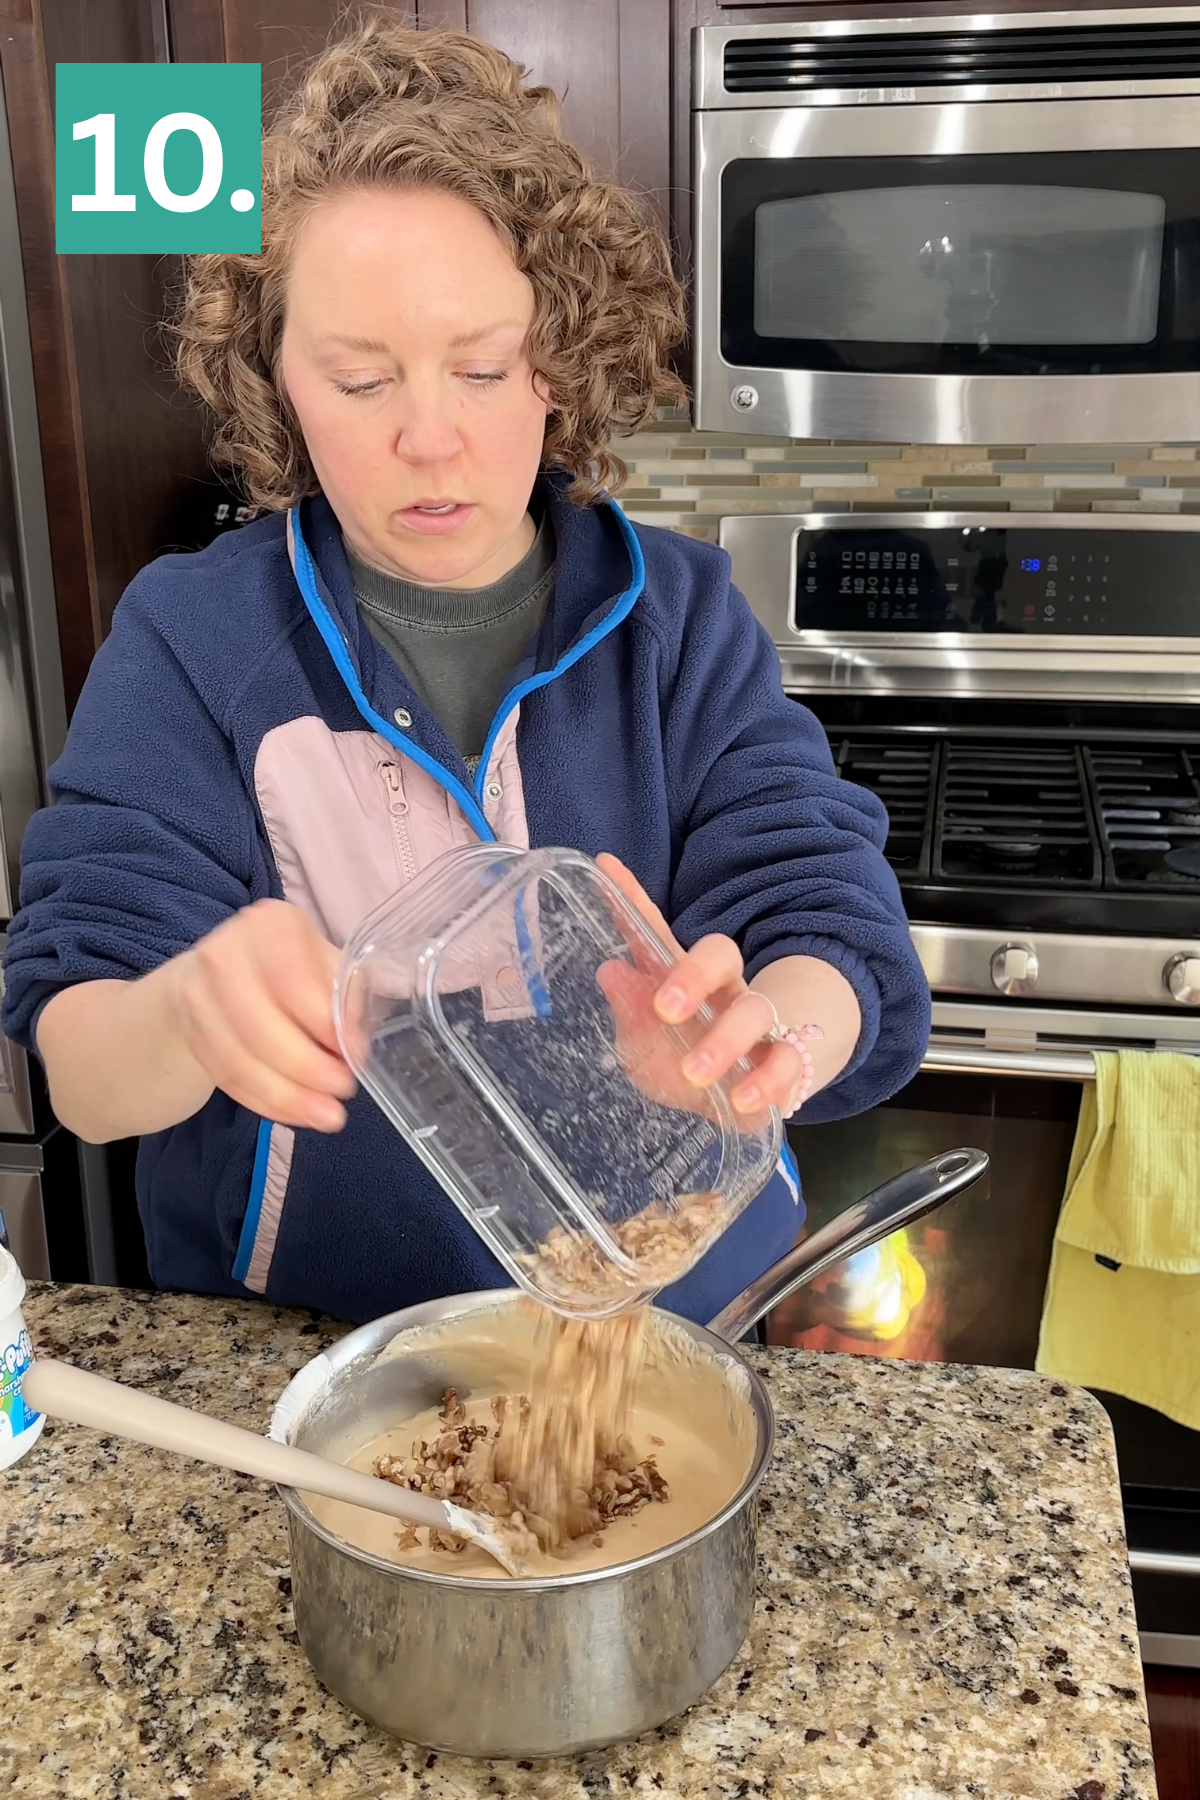
Mix in walnuts: Stir in 1 cup of toasted walnuts, mixing until evenly distributed throughout the fudge.
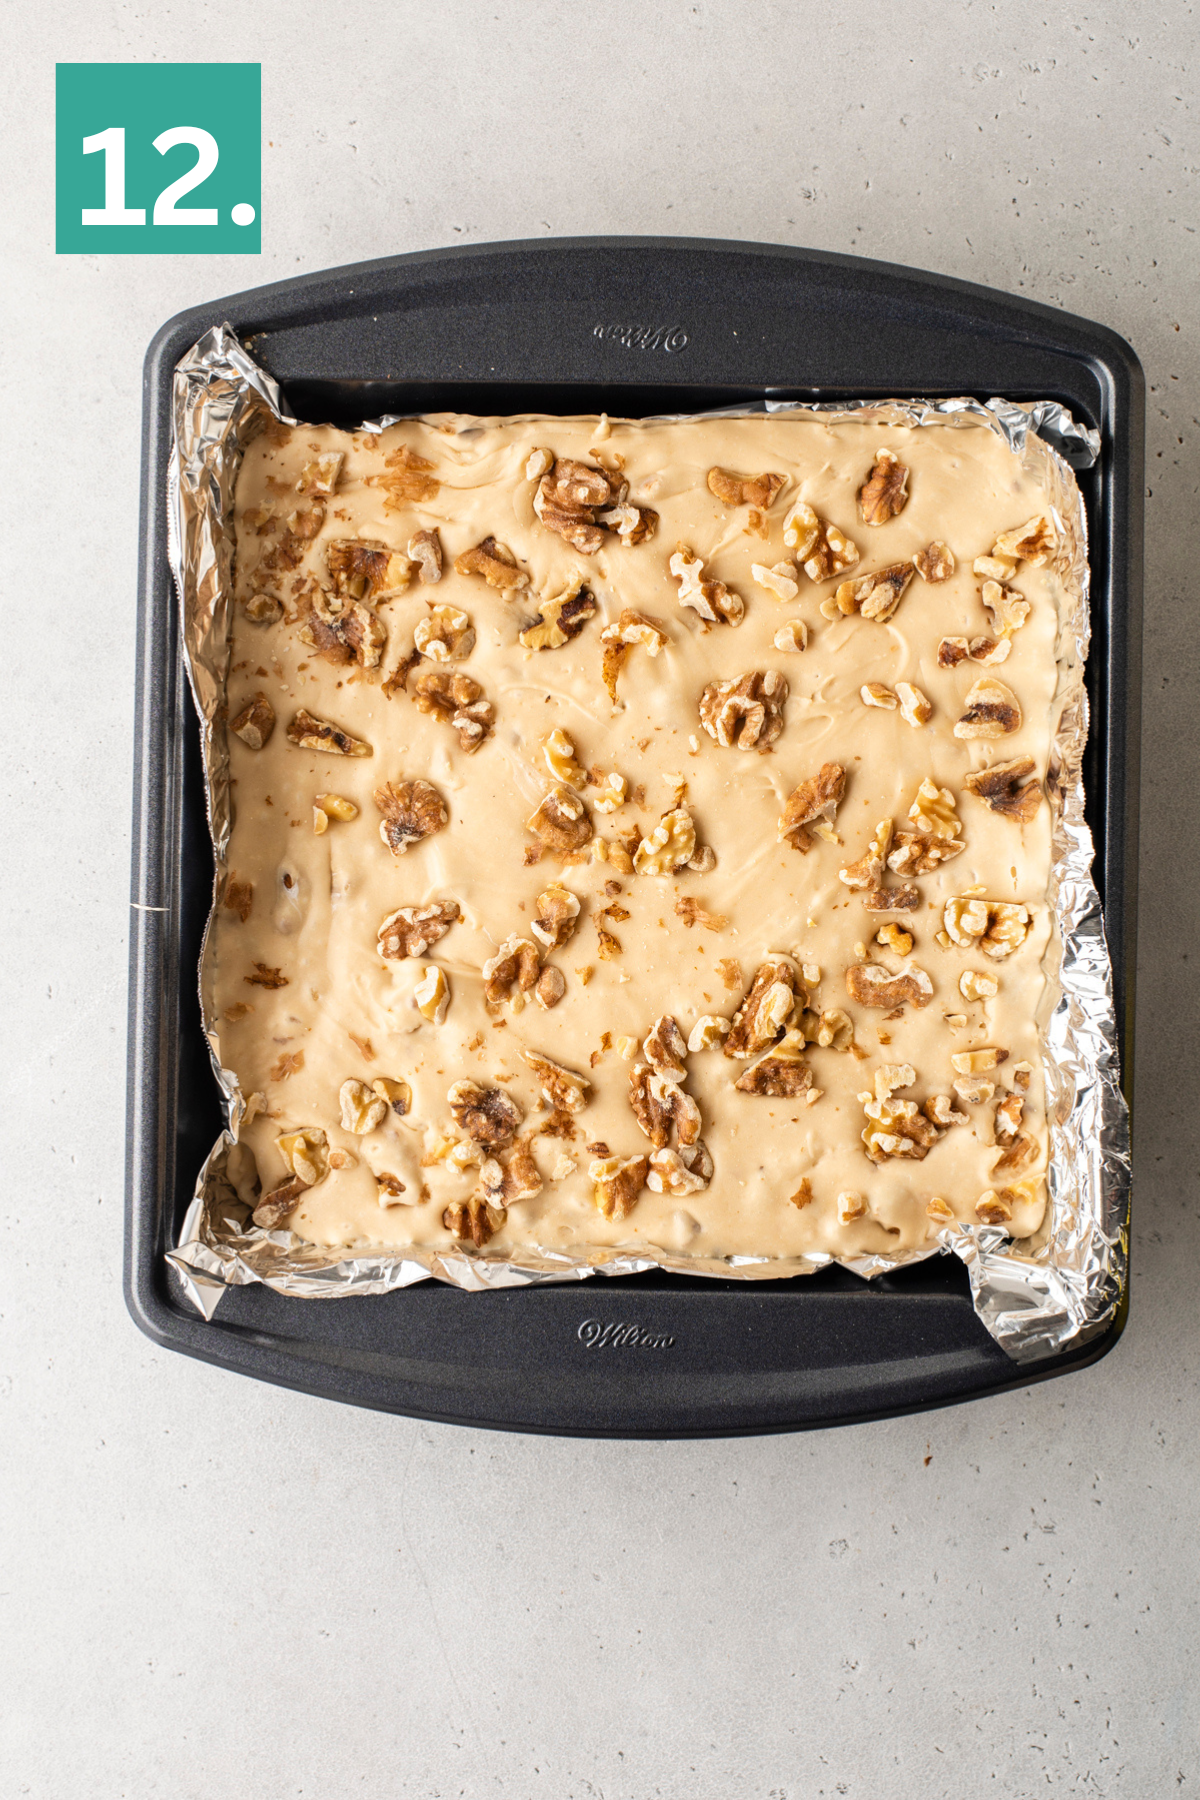
Transfer: Pour the fudge into the prepared pan. Sprinkle the remaining ½ cup of walnuts on top.
Cool and set: Allow the fudge to cool and fully set before cutting, about 6 to 8 hours, though overnight is even better for clean slices.
How to Clean Burnt Sugar from Pan
Crystalized maple syrup and cooked fudge can look impossible to clean, but there’s an easy fix. Fill the pan with water and place it on the stove over high heat. Bring the water to a boil and let it boil for a few minutes—the heat will dissolve the hardened sugar. Once it loosens, carefully pour out the water and wipe the pan clean.
How to Tell When Maple Fudge Is Set
Maple fudge needs time to fully firm up before cutting. The surface should look matte instead of shiny and feel firm when gently pressed. If you lift the foil or parchment, the entire slab should hold its shape without bending.
Most batches set in about 6 to 8 hours at room temperature, but I prefer to let mine sit overnight because the texture becomes even cleaner and easier to slice.
If the fudge still feels soft when pressed, it simply needs more time to cool and set.
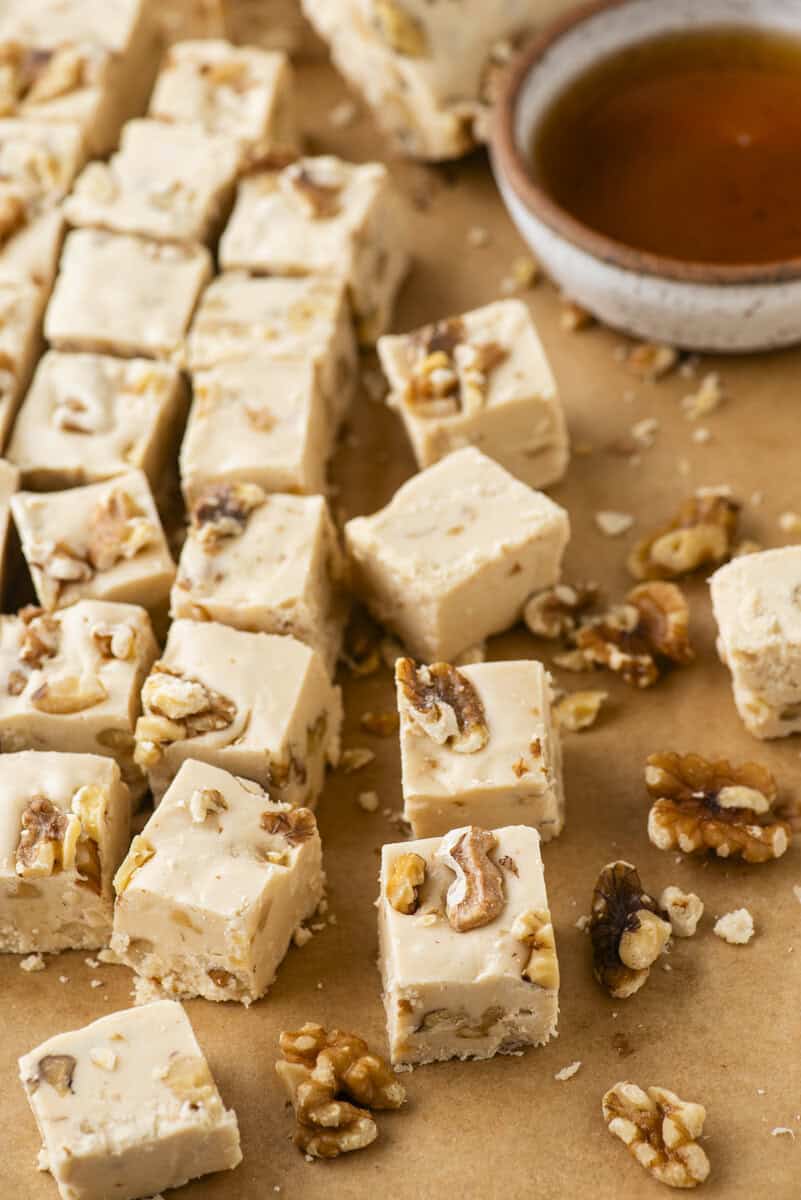
Tips for Cutting Clean Fudge Squares
Once the fudge is fully set, lift it out of the pan using the foil or parchment lining. This makes it much easier to cut neat squares.
For the cleanest cuts, run a knife under hot water and dry it before slicing. The warm blade glides through the fudge without dragging.
Wipe the knife clean between cuts. This keeps the edges sharp and prevents smearing.
Storage and Make Ahead Tips
Store maple fudge in an airtight container at room temperature for up to one week. Separate layers with parchment paper to prevent sticking. If your kitchen runs warm, you can refrigerate it, but let it come back to room temperature before serving for the best texture.
Fudge also freezes well. I have a whole post about how to freeze fudge. Wrap it tightly in plastic wrap and place it in a freezer safe container for up to three months. Thaw at room temperature before slicing or serving.
This maple fudge is one of my favorite additions to Christmas cookie tins and homemade candy trays.
Maple Fudge Flavor Variations
- Maple Pecan Fudge: Swap the walnuts for toasted pecans. Pecans add a slightly sweeter and softer nut flavor that pairs beautifully with maple.
- Maple Bourbon Fudge: Add one to two teaspoons of bourbon when stirring in the chocolate chips and marshmallow creme. The bourbon adds warmth and deepens the maple flavor.
- Maple Bacon Fudge: Stir in 1 cup crispy chopped bacon (patted dry) in place of the nuts for a sweet, salty, and smoky maple fudge variation.
More Fudge Posts

Tap stars to rate!
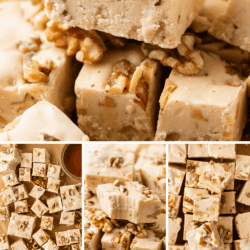
Maple Walnut Fudge
Ingredients
- ¾ cup (247g) maple syrup, reduced to 1/2 cup or a little less (about 140-150g)
- 1 ½ cups (297g) granulated sugar
- ¾ cup (161g) brown sugar
- ½ cup (113g) unsalted butter
- ⅔ cup (160g) evaporated milk
- 2 Tbsp (40g) corn syrup
- 12 oz (340g) white chocolate chips
- 7 oz marshmallow creme
- ½ tsp salt
- 1 ½ cups (about 155g) whole walnuts, toasted
Video
Instructions
- Toast the walnuts: Preheat the oven to 350ºF. Arrange the walnuts in a single layer on a rimmed baking sheet lined with parchment paper or foil. Toast for 7 to 10 minutes, stirring a few times during baking, until the nuts are lightly browned and fragrant. Because the walnuts around the edges toast faster than those in the center, give them a quick stir to help them brown evenly. Once they’re done, transfer the walnuts to a plate right away so they can cool and don’t continue to toast on the hot pan. Once the walnuts cool, rough chop them, dividing them into 1 cup and ½ cup portions. You can also skip toasting and use raw walnuts.1 ½ cups (about 155g) whole walnuts
- Line an 8×8 or 9×9 inch square pan with aluminum foil, allowing some overhang so you can easily lift the fudge out later. Set aside.
- Add the maple syrup to a small saucepan over medium heat. Once it comes to a boil, reduce the heat to medium low or low and let it gently boil for about 15 to 20 minutes, keeping an eye on it as it reduces to make sure it doesn’t overflow. If the bubbles are getting close to the edge of the pan, turn the heat down. After about 15 minutes, carefully pour the syrup into a measuring cup to check the volume. If it has not reduced to about ½ cup yet, return it to the pan and continue simmering. Once reduced, set the syrup aside to cool while you prepare the other ingredients. As it cools, the syrup will crystallize and no longer be liquid. This is normal.¾ cup (247g) maple syrup
- In a medium saucepan over medium heat, combine the granulated sugar, brown sugar, butter, evaporated milk, corn syrup, and the reduced maple syrup. Stir constantly until the sugar is melted. Then stir occasionally until the mixture comes to a full boil.1 ½ cups (297g) granulated sugar, ¾ cup (161g) brown sugar, ½ cup (113g) unsalted butter, ⅔ cup (160g) evaporated milk, 2 Tbsp (40g) corn syrup, ¾ cup (247g) maple syrup
- Do not stir. Let the mixture continue boiling for 4 to 8 minutes, or until an instant-read thermometer reaches 236 to 238ºF. Be sure the thermometer tip is suspended in the liquid and not touching the bottom of the pan, which can give a false reading.
- Remove the saucepan from the heat and immediately stir in the white chocolate chips, marshmallow creme, and salt. Stir until the mixture is smooth and completely melted.12 oz (340g) white chocolate chips, 7 oz marshmallow creme, ½ tsp salt
- Stir in 1 cup of toasted walnuts, mixing until evenly distributed throughout the fudge.1 ½ cups (about 155g) whole walnuts
- Pour the fudge into the prepared pan. Sprinkle the remaining ½ cup of walnuts on top.
- Allow the fudge to cool and fully set before cutting, about 6 to 8 hours, though overnight is even better for clean slices.
Notes


So easy to make and tastes delicious!