
This post may contain affiliate links. Please read our disclosure policy.
I didn’t stop at one version of this recipe—I tested multiple batches, adjusting ingredients (melted butter vs creamed butter), different chill times, and leavening adjustments to see what actually worked. The result? Thick, chewy bakery-style cookies that bake up perfectly without the extra step of chilling.
If I could give this recipe more than 5 stars I would!
This is by far THE BEST cookie recipe you will EVER try! Everyone I decided I wanted to share them with really enjoyed them and said they’re the best they’ve ever had! So, hats off you to Beth!!!
-Colleen
Bakery-style chocolate chip cookies aren’t just about making them bigger—they’re about getting the texture, structure, and balance just right. I started with my original chocolate chip cookie recipe and tested multiple variations to create a version that was thicker, chewier, and truly bakery-style. If you’re craving something closer to the classic, the original Nestle Toll House recipe is always a good place to start too.
I experimented with melted butter versus room temperature butter, adjusted the flour and leavening, and tested different chill times side-by-side. What surprised me most was that the commonly recommended step—chilling the dough—didn’t actually give me the best result here.
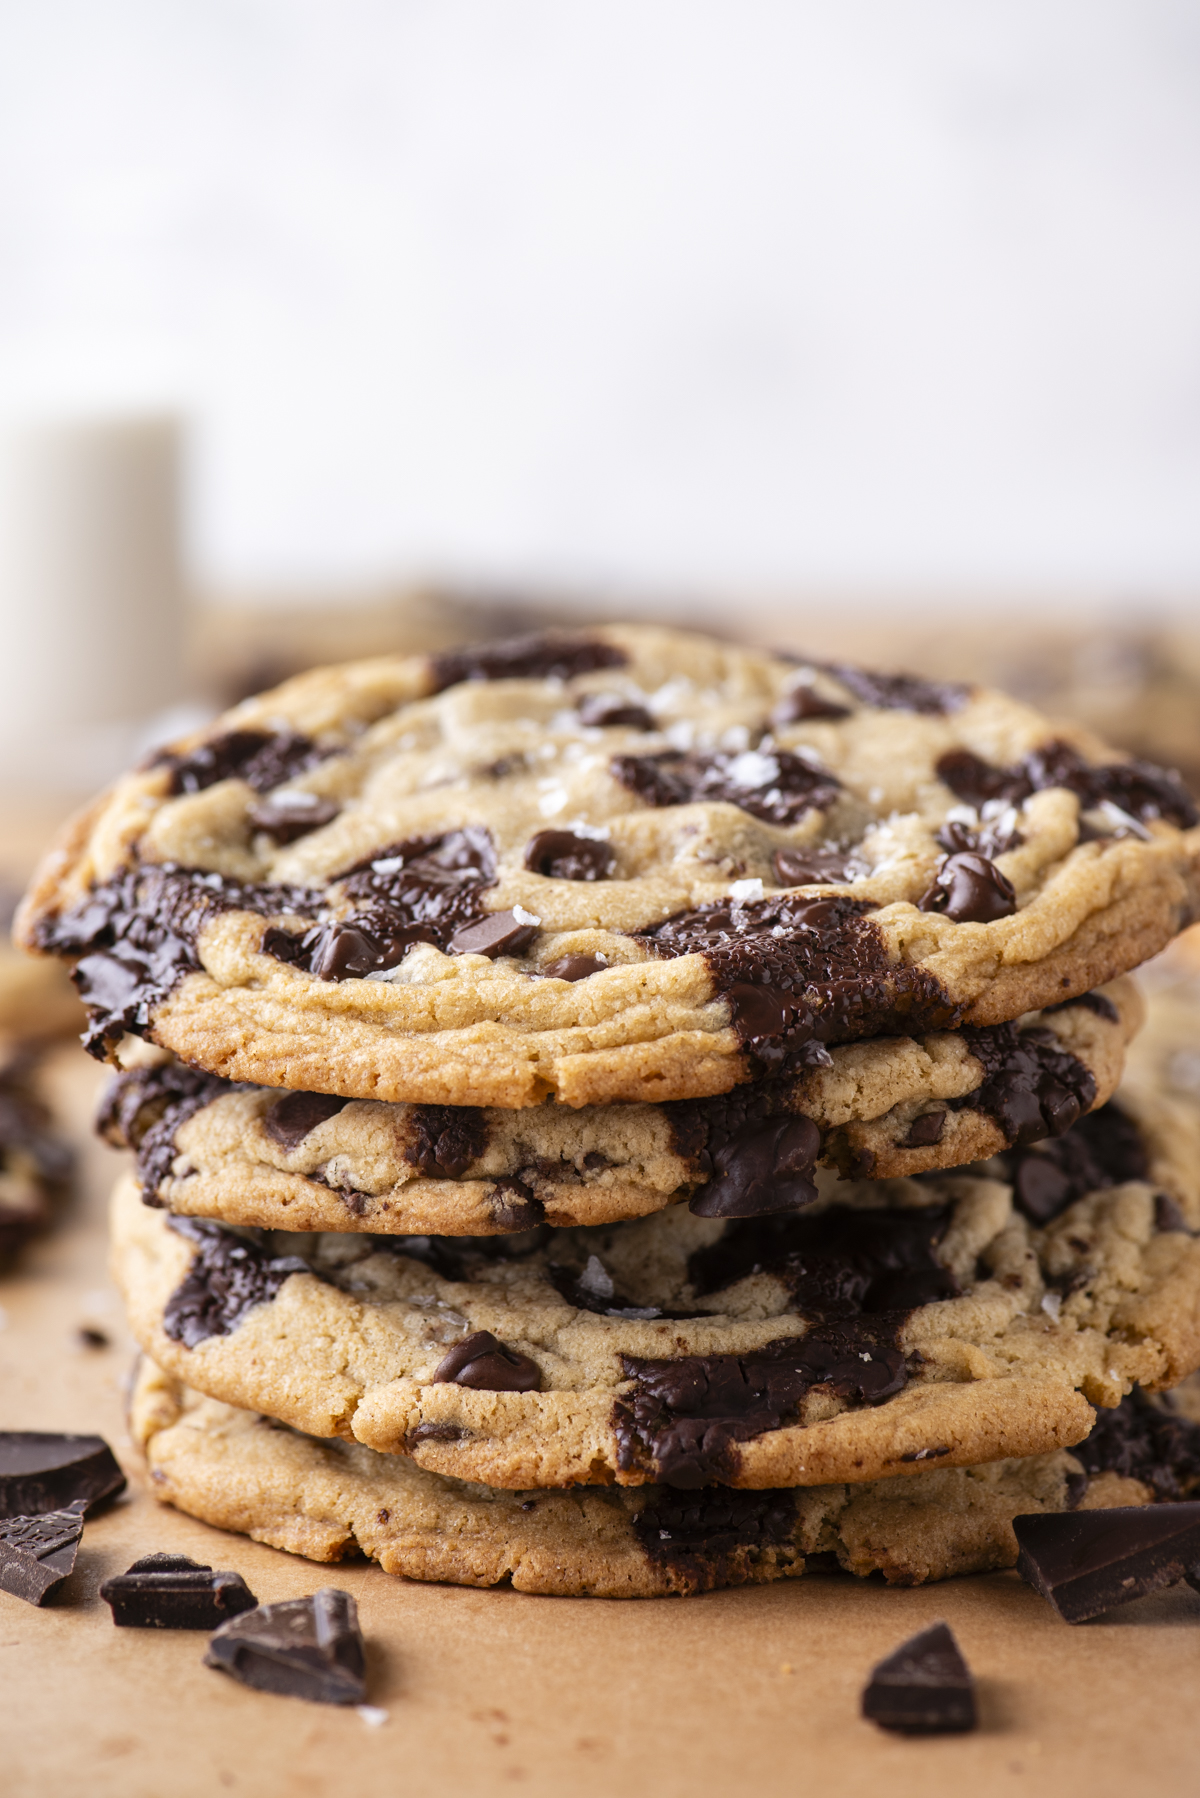
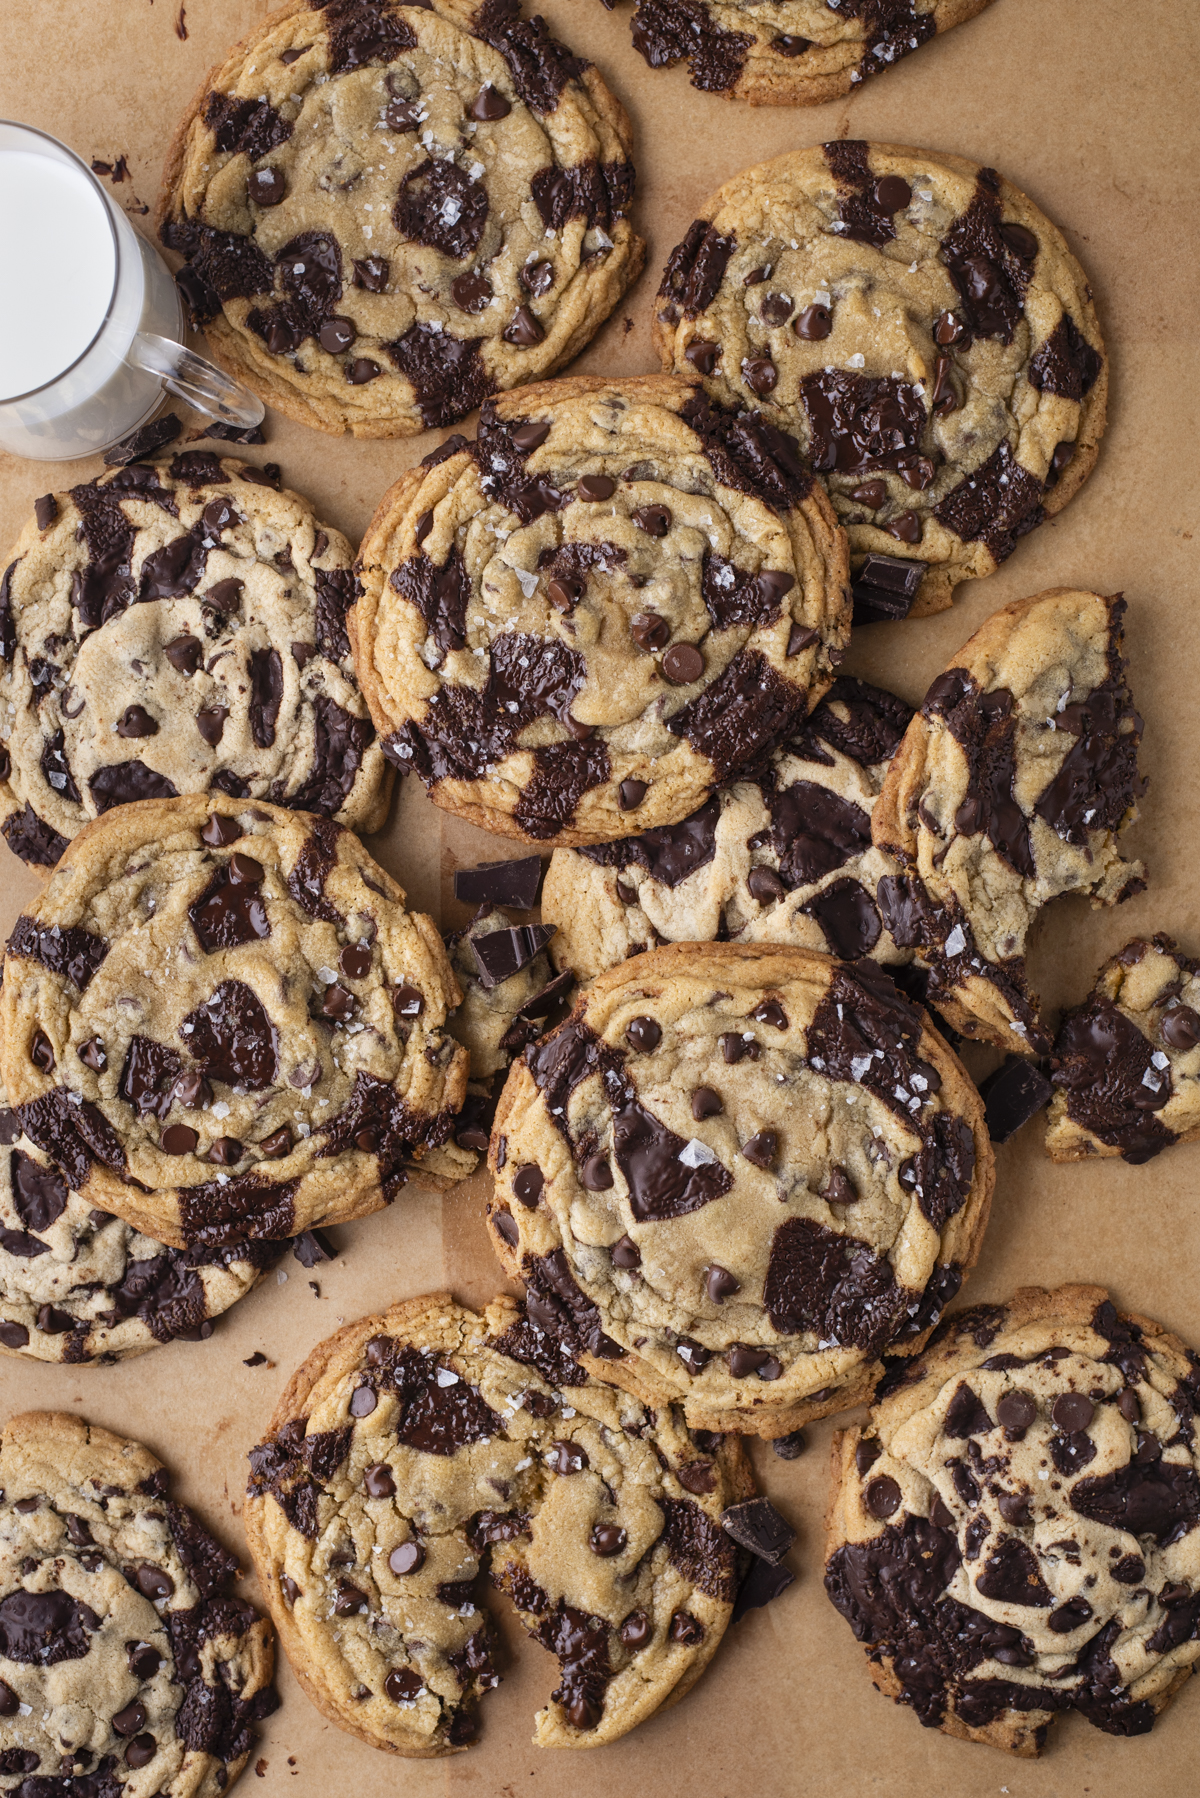
After multiple rounds of testing, this is the version that made the cut: thick cookies with soft centers, lightly crisp edges, and that signature bakery-style look—without any unnecessary steps.
What Makes These Chunky Chocolate Chip Cookies Bakery Style
Bakery-style cookies stand out because of their size, texture, and overall balance—and this recipe was built with all three in mind.
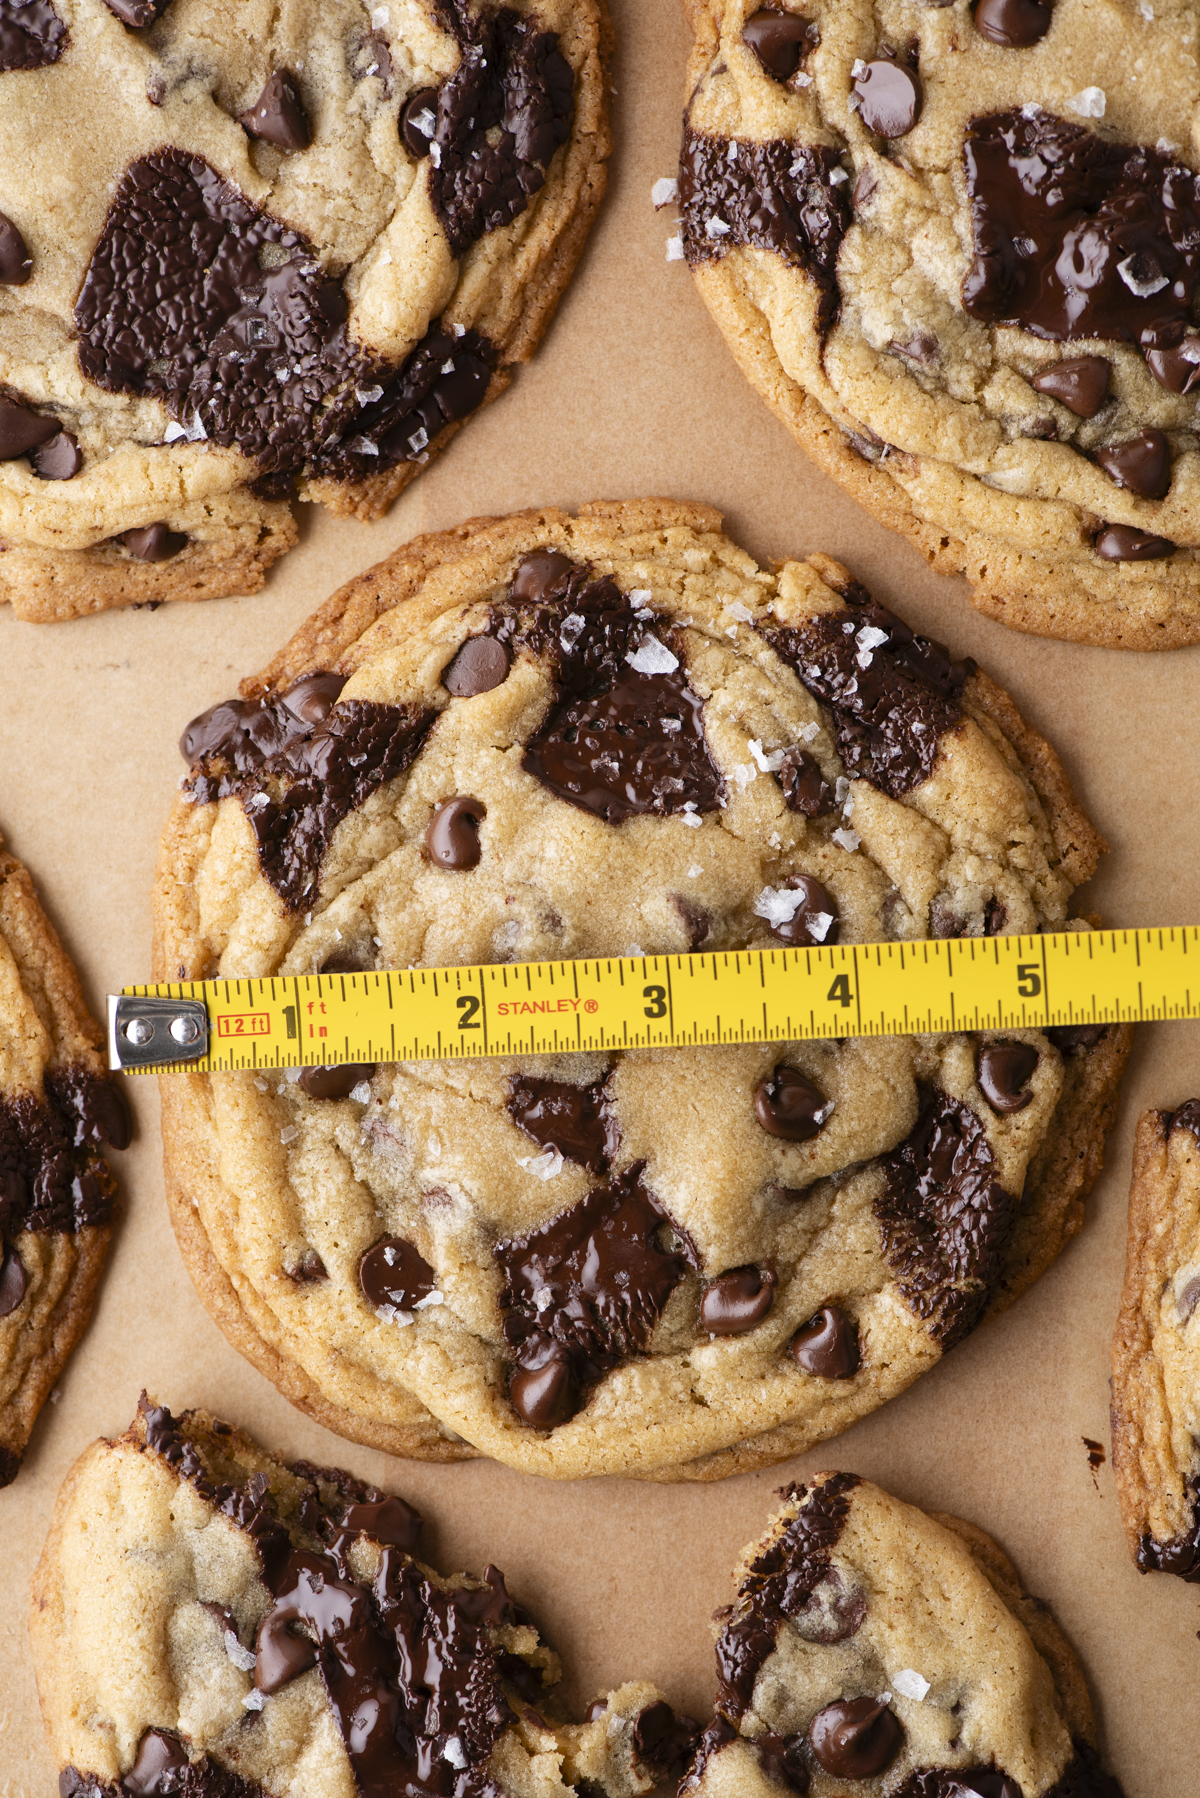
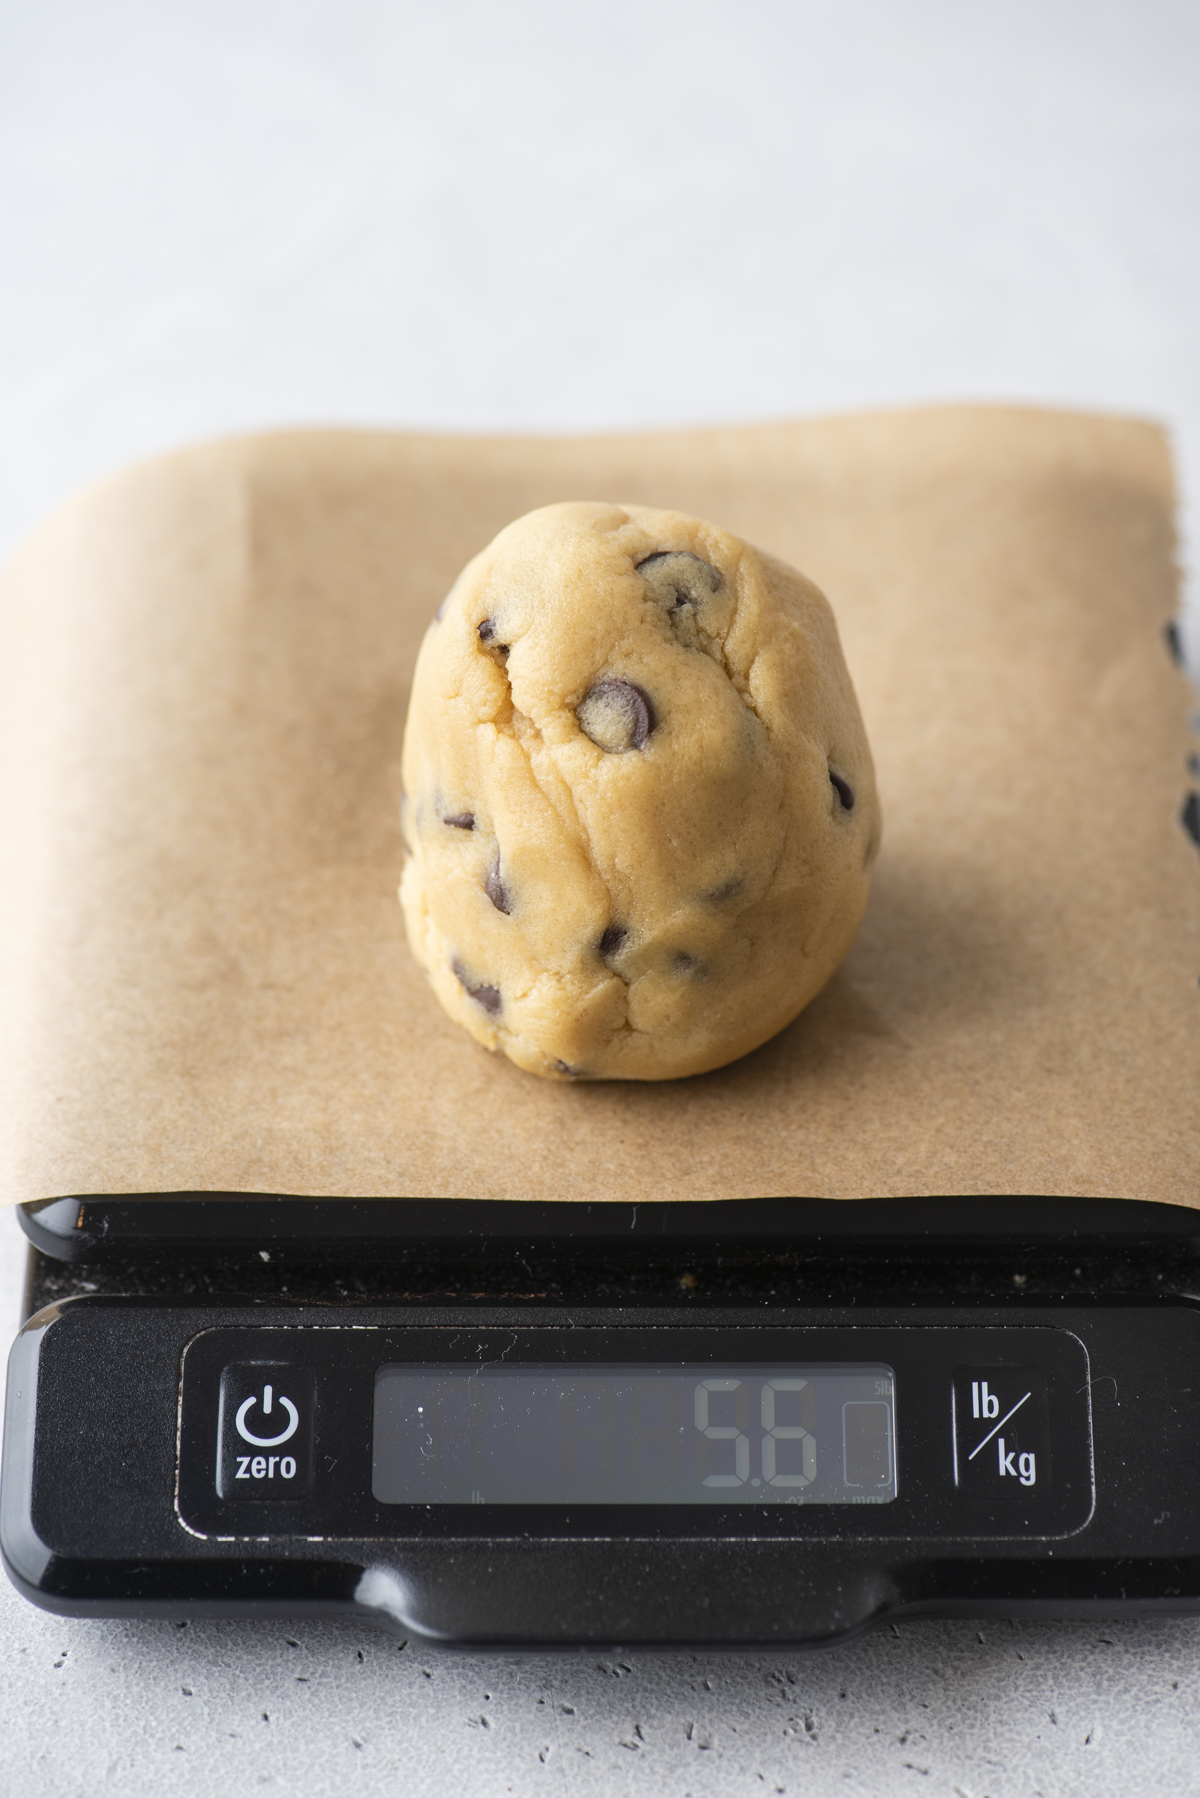
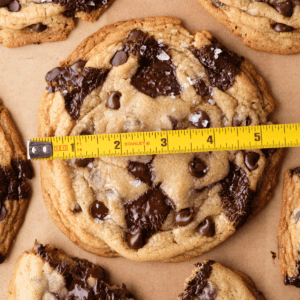
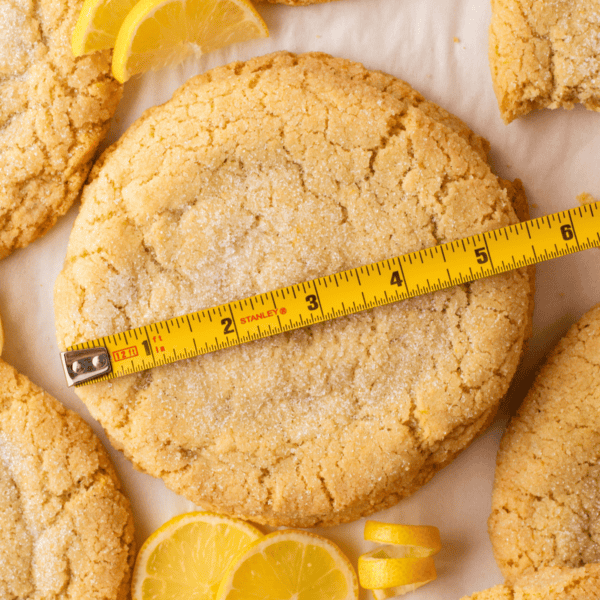
The most obvious difference is size. These cookies use 5.5 to 6 oz of dough each, which creates a thicker cookie with a soft center and enough structure to hold its shape. Instead of spreading thin, the dough bakes up tall and substantial.
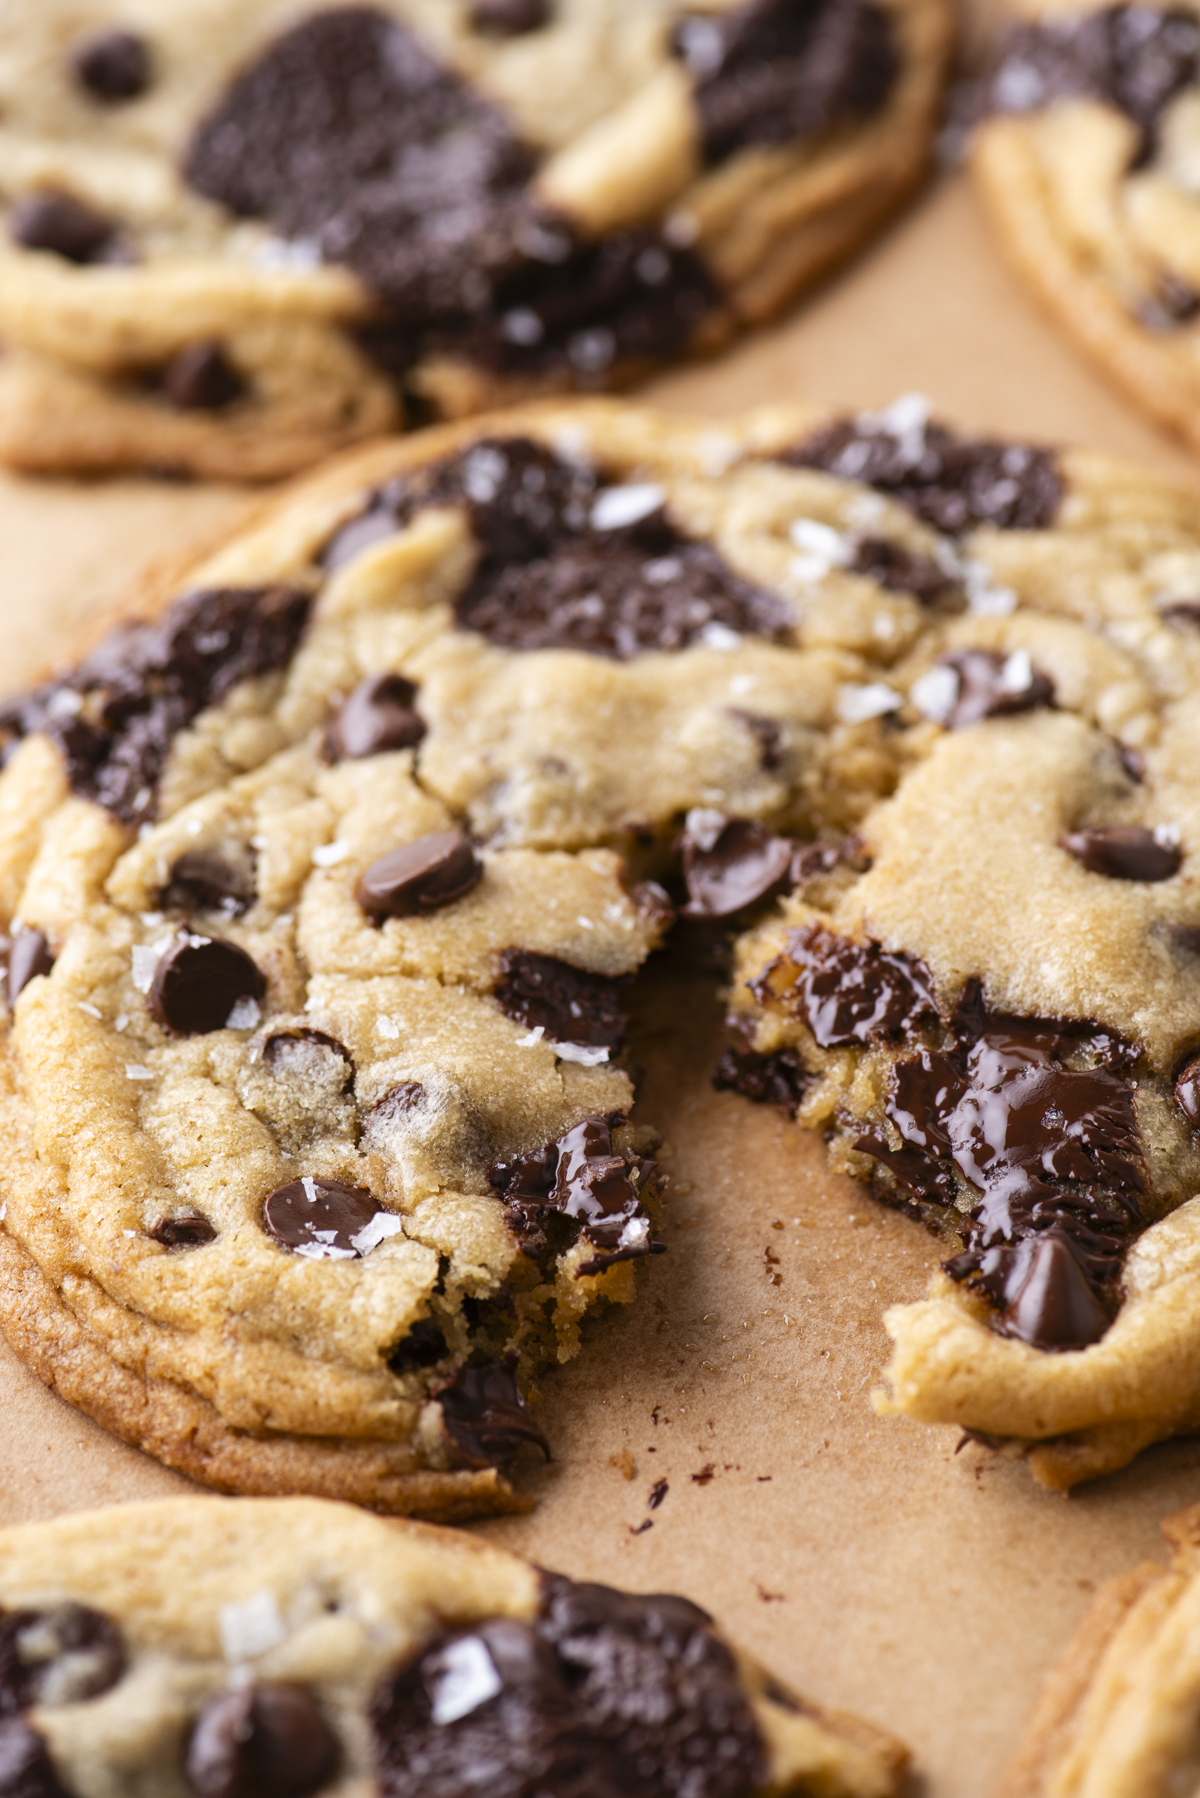
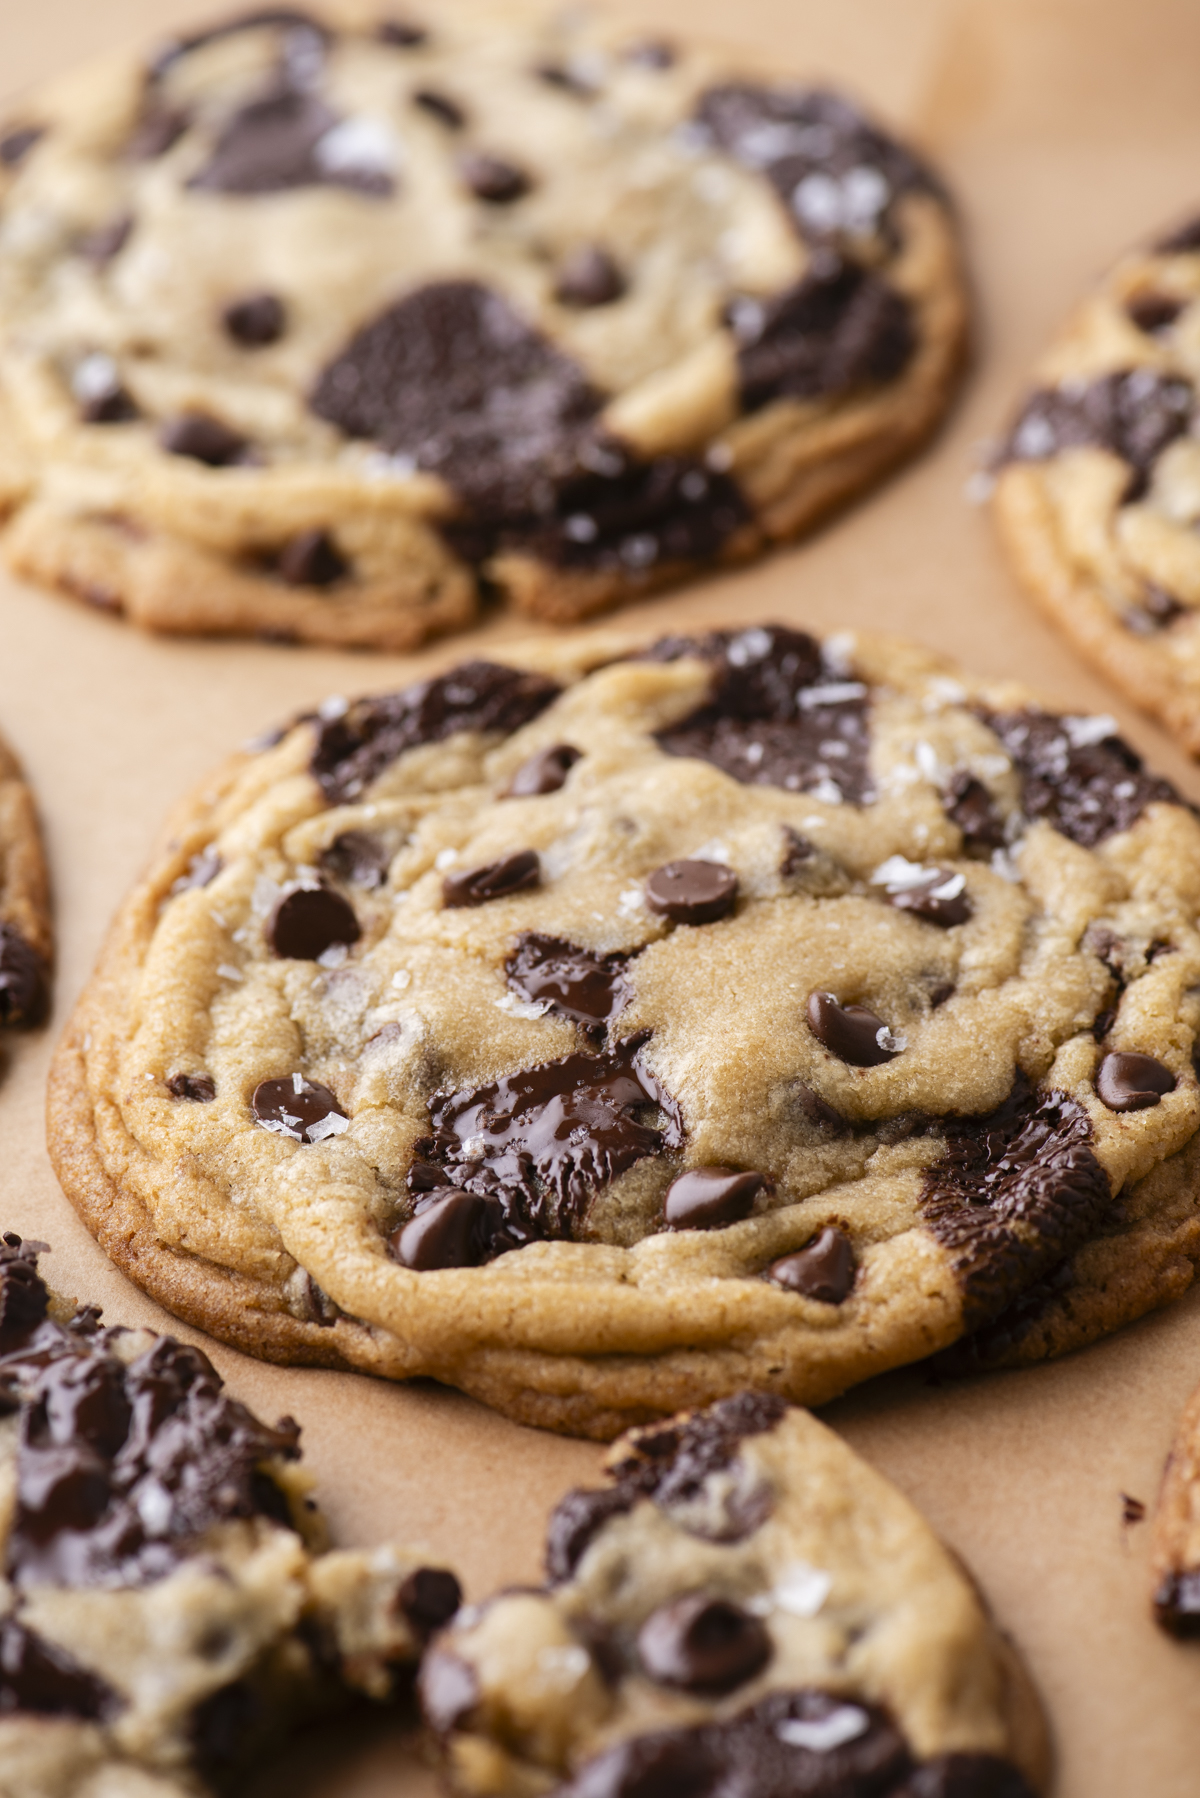
Texture is just as important. A true bakery-style cookie has contrast—a soft, gooey center with lightly crisp edges. Not crunchy all the way through, and definitely not cakey. Getting that balance took a few ingredient adjustments, including adding an extra egg yolk for richness and carefully controlling the flour so the centers stay soft.
Finally, it comes down to ingredient balance. Brown sugar adds moisture and chew, granulated sugar helps with structure and spread, and small adjustments to baking soda and cornstarch keep the cookies thick without making them puffy.
What I Tested (This Is What Makes This Recipe Different)
This recipe wasn’t developed in one batch—it came from testing multiple variables side-by-side to see what actually changed the final cookie.
I tested both melted butter and creamed (room temperature) butter. Melted butter gave a chewier, denser texture, while creamed butter created more structure and helped the cookies hold their shape.
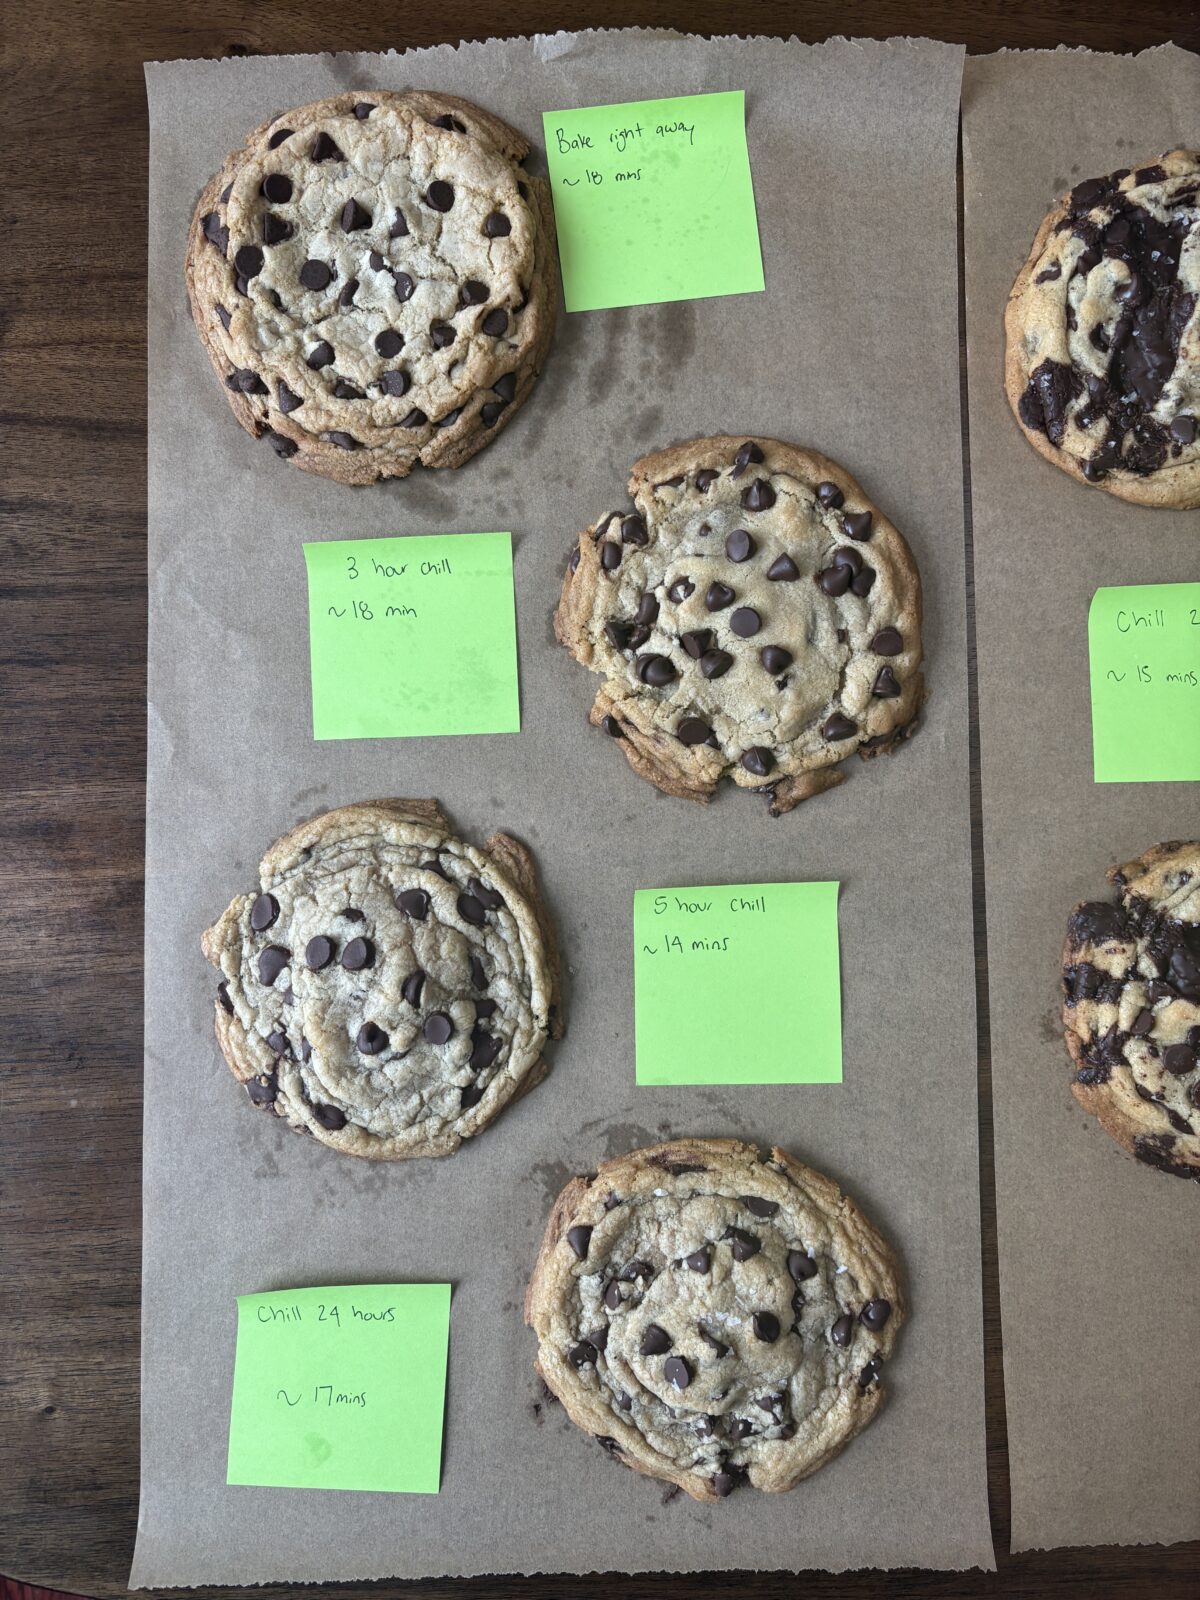
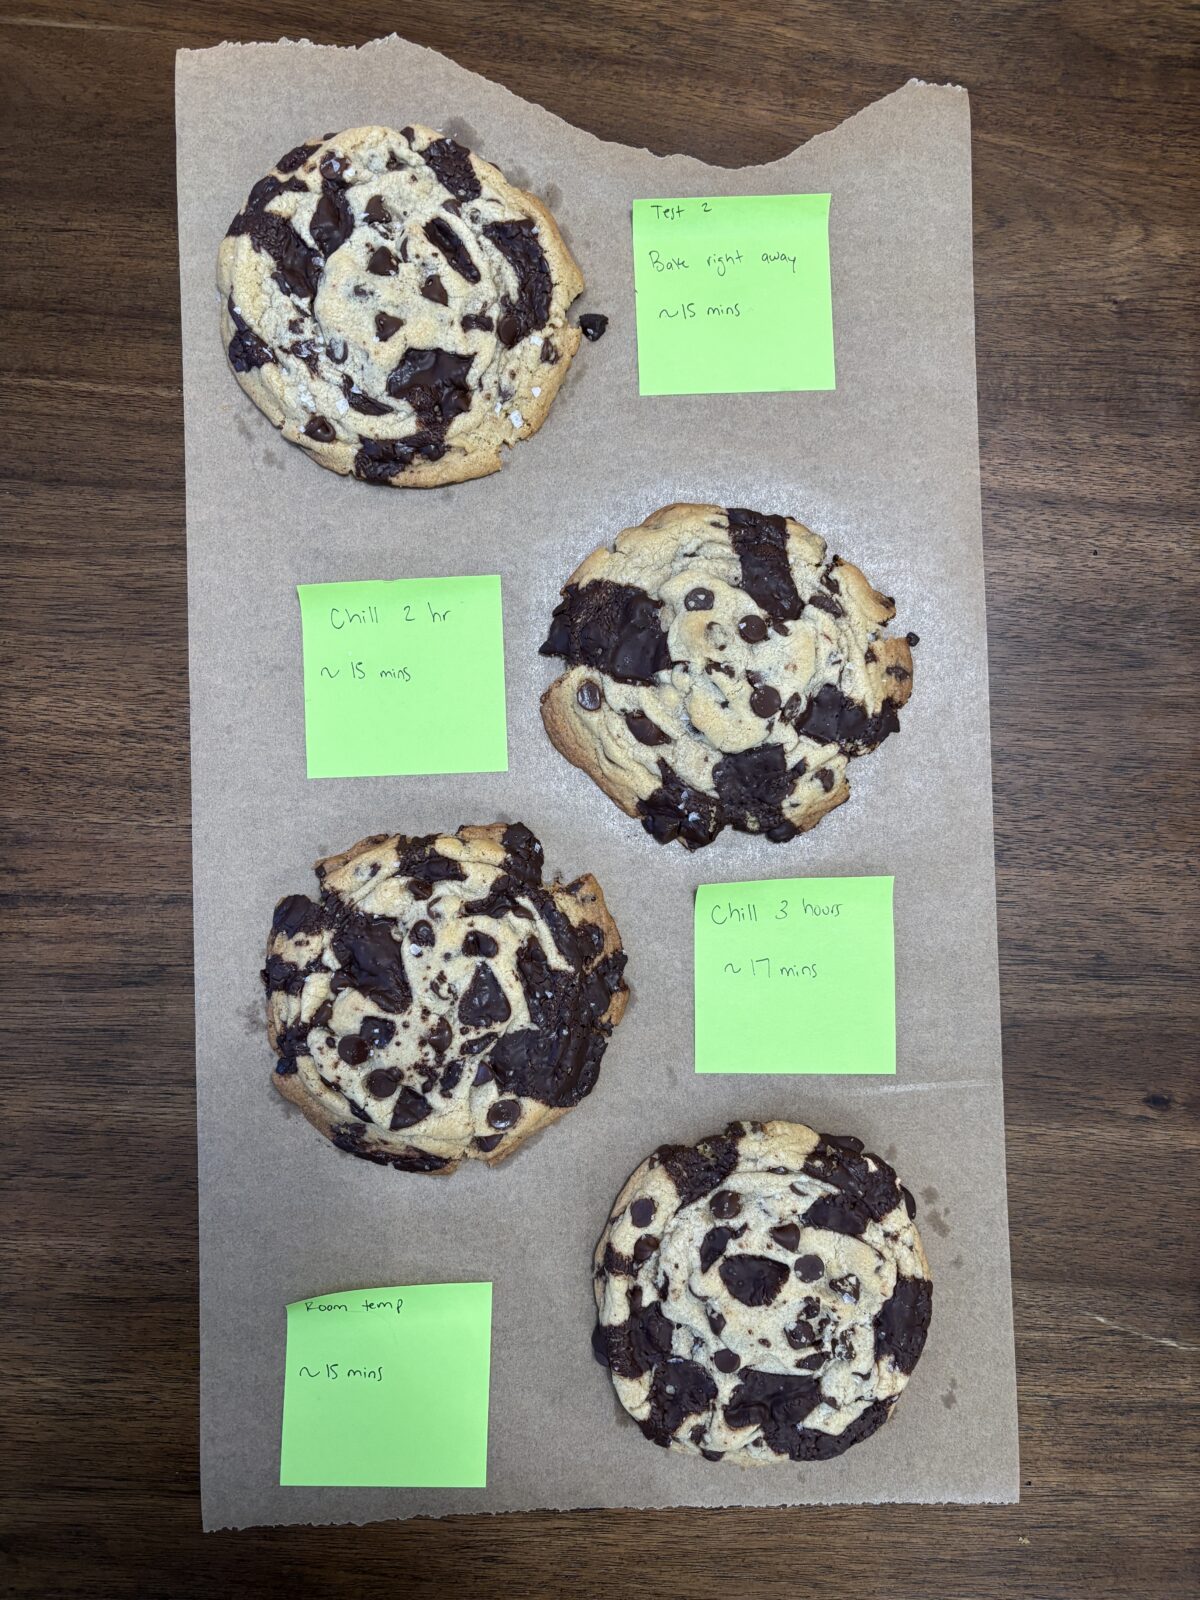
Chill time was another major variable. I baked the same dough right away, after 2 hours in the fridge, after 5 hours in the fridge and after chilling overnight. Each version baked differently, especially when it came to spread, bake time, and edge texture.
I also adjusted the baking soda slightly to control how much the cookies spread. Too much leavening caused flatter cookies, while reducing it helped keep them thicker.
I also tried different chocolate chips and adding chopped chocolate bars.
What Actually Worked
After testing all of these variations, the results were clear.
Skipping the chill time gave me the best texture. Chilled dough required a longer bake time, which caused the edges to become too crisp and crunchy. Baking the dough right away resulted in softer edges and a better overall balance.
Using room temperature butter also made a noticeable difference. It helped the cookies hold their shape while still staying soft in the center, giving that thick, bakery-style structure.
Shaping the dough tall before baking was another key step. Rolling the dough into an elongated shape instead of a flat ball helped the cookies bake up thicker and more structured.
Why No Chill Works Here
One of the biggest surprises in testing this recipe was how much chill time affected the final result.
When the dough was chilled, the cookies took longer to bake. That extra bake time caused the edges to brown more, crack, and become noticeably crispier. While chilling can improve flavor in some recipes, it didn’t produce the best texture here.
Baking the dough right away allowed the cookies to spread just enough while keeping the edges soft and the centers thick and chewy.

Chunky Chocolate Chip Cookies Ingredients
Here’s an overview of the key ingredients in this recipe. Keep reading or jump to the recipe card for the full recipe.
- Butter (room temperature): Using room temperature butter (instead of melted) helps the cookies hold their shape and bake up thicker. It creates structure while still allowing for a soft center.
- Egg + Extra Egg Yolk: The extra yolk adds richness and chewiness. More fat = softer, denser centers without making the cookies cakey.
- Brown Sugar: Adds moisture and depth of flavor. This is what gives the cookies that soft, chewy texture and classic bakery-style taste.
- Cornstarch: Adds tenderness to the cookies without making them overly soft or cakey. A small amount goes a long way.
- Baking Soda: Controls how much the cookies spread. Reducing it slightly helps keep the cookies thicker.
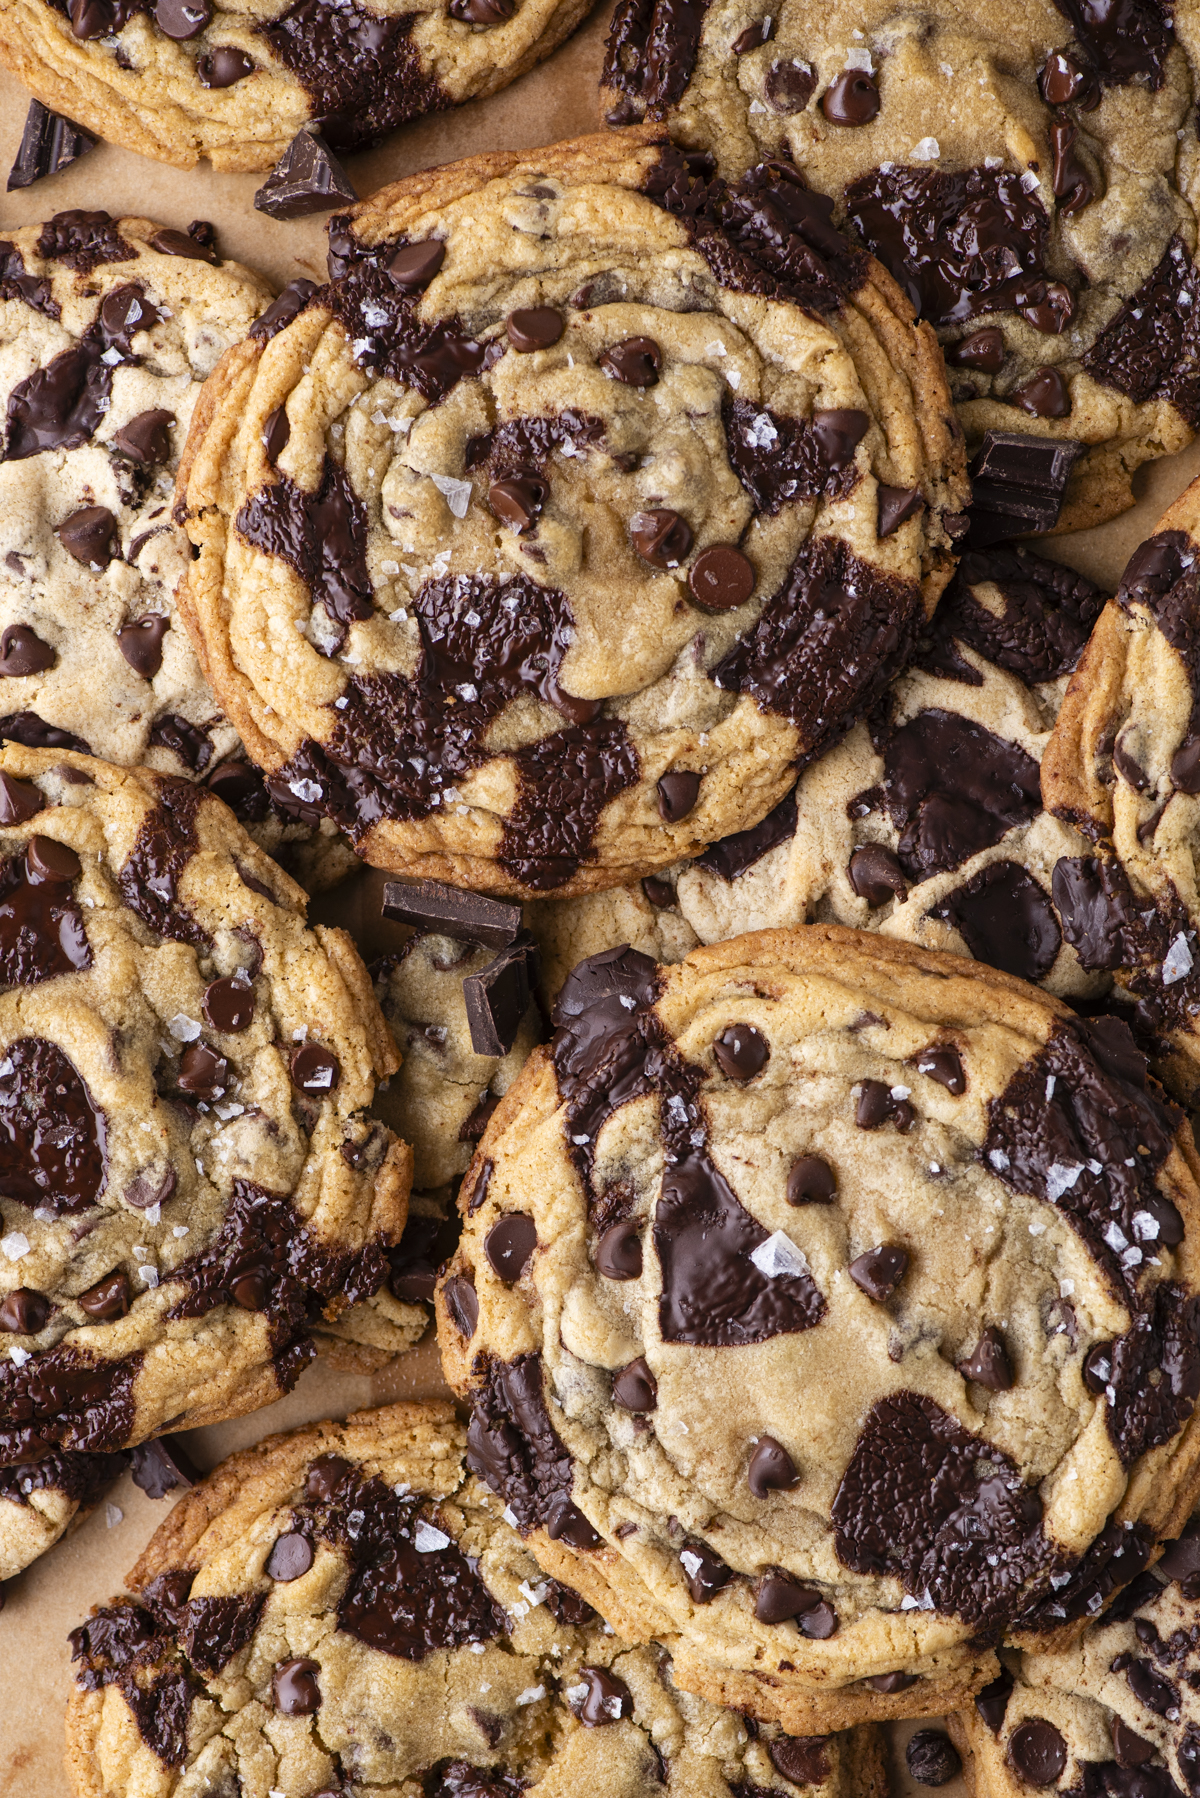
- Chocolate Chips + Chopped Chocolate: Using both gives you the best texture. Chips hold their shape, while chopped chocolate melts into pools throughout the cookie for that bakery-style finish.
How to Make Thick Bakery Style Chocolate Chip Cookies
You can make these giant cookies at home like a pro baker by following my easy step-by-step instructions below, or jump to the recipe card for the full recipe.
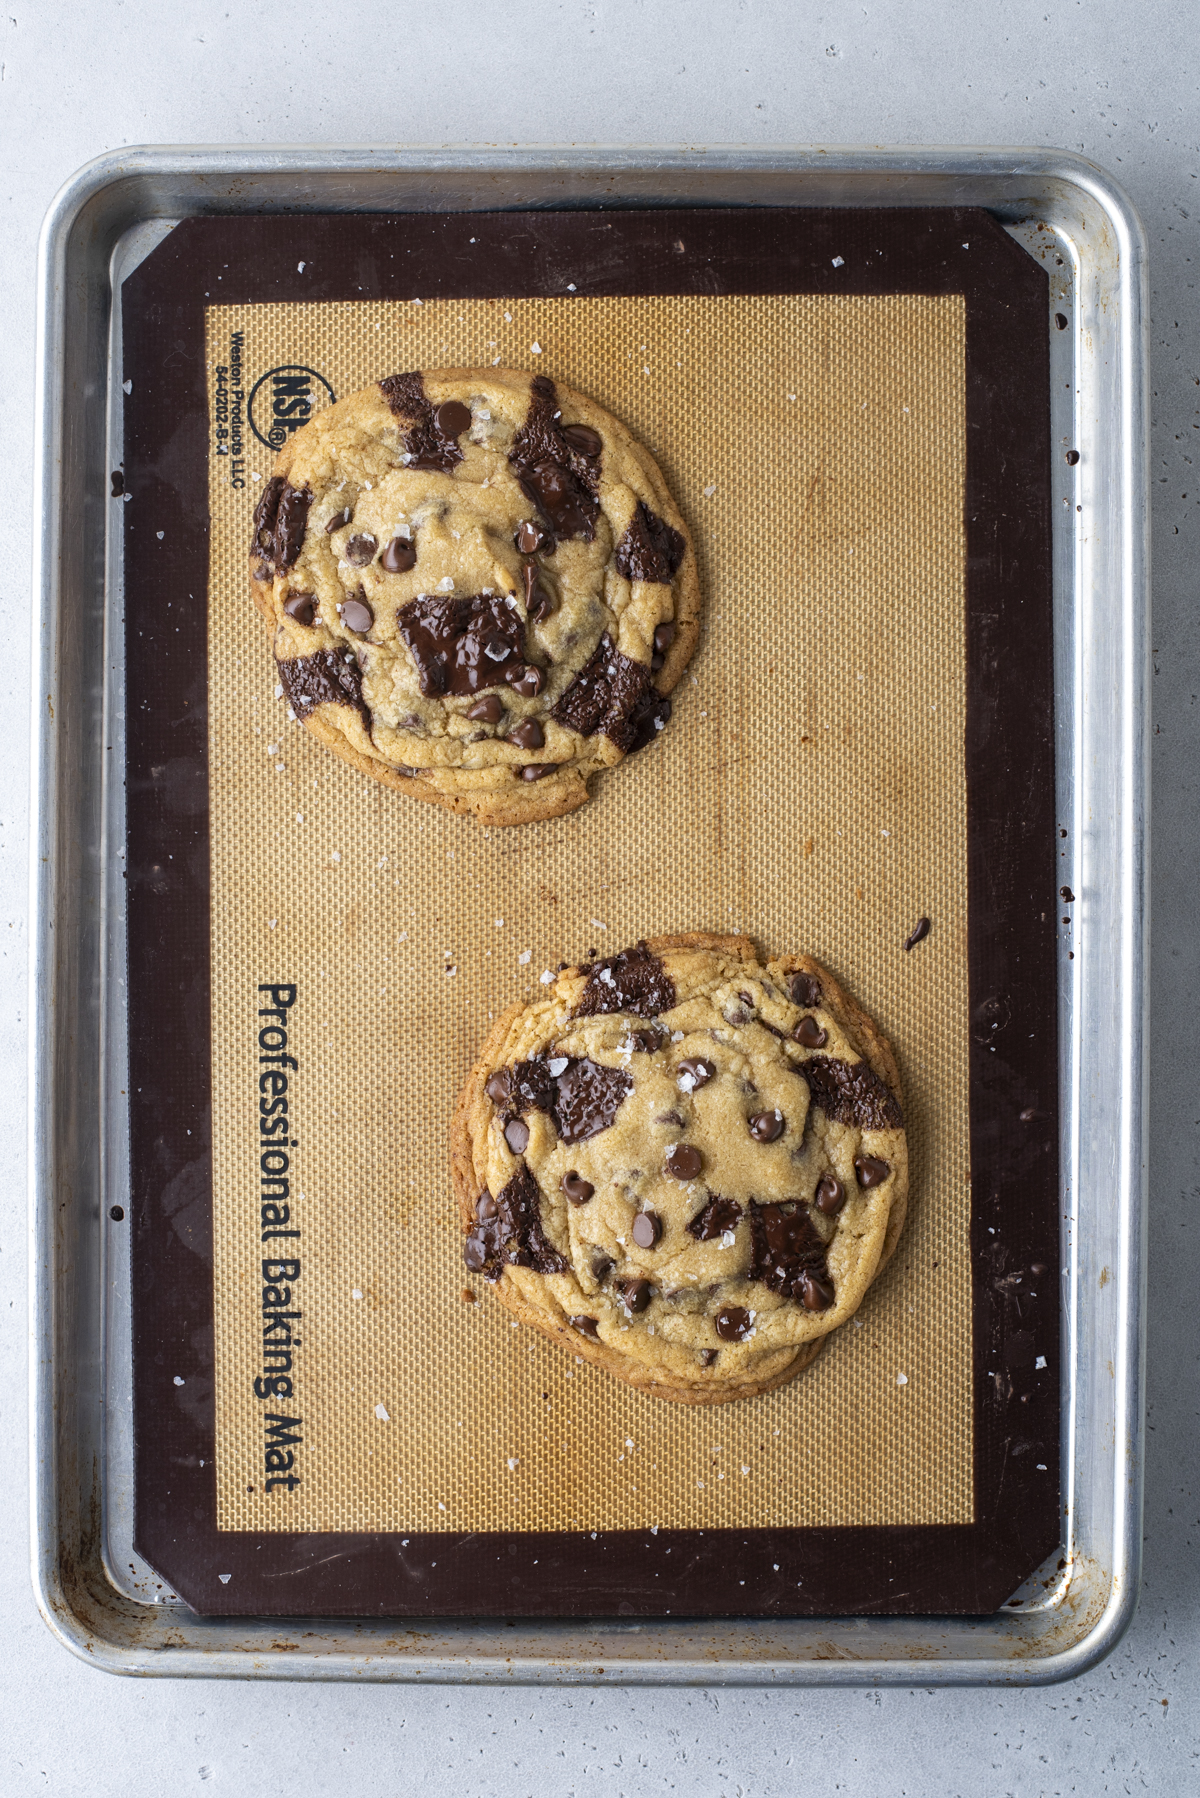
Preheat the oven to 350ºF (180ºC). Line a baking sheet with parchment paper or a silicone baking mat.
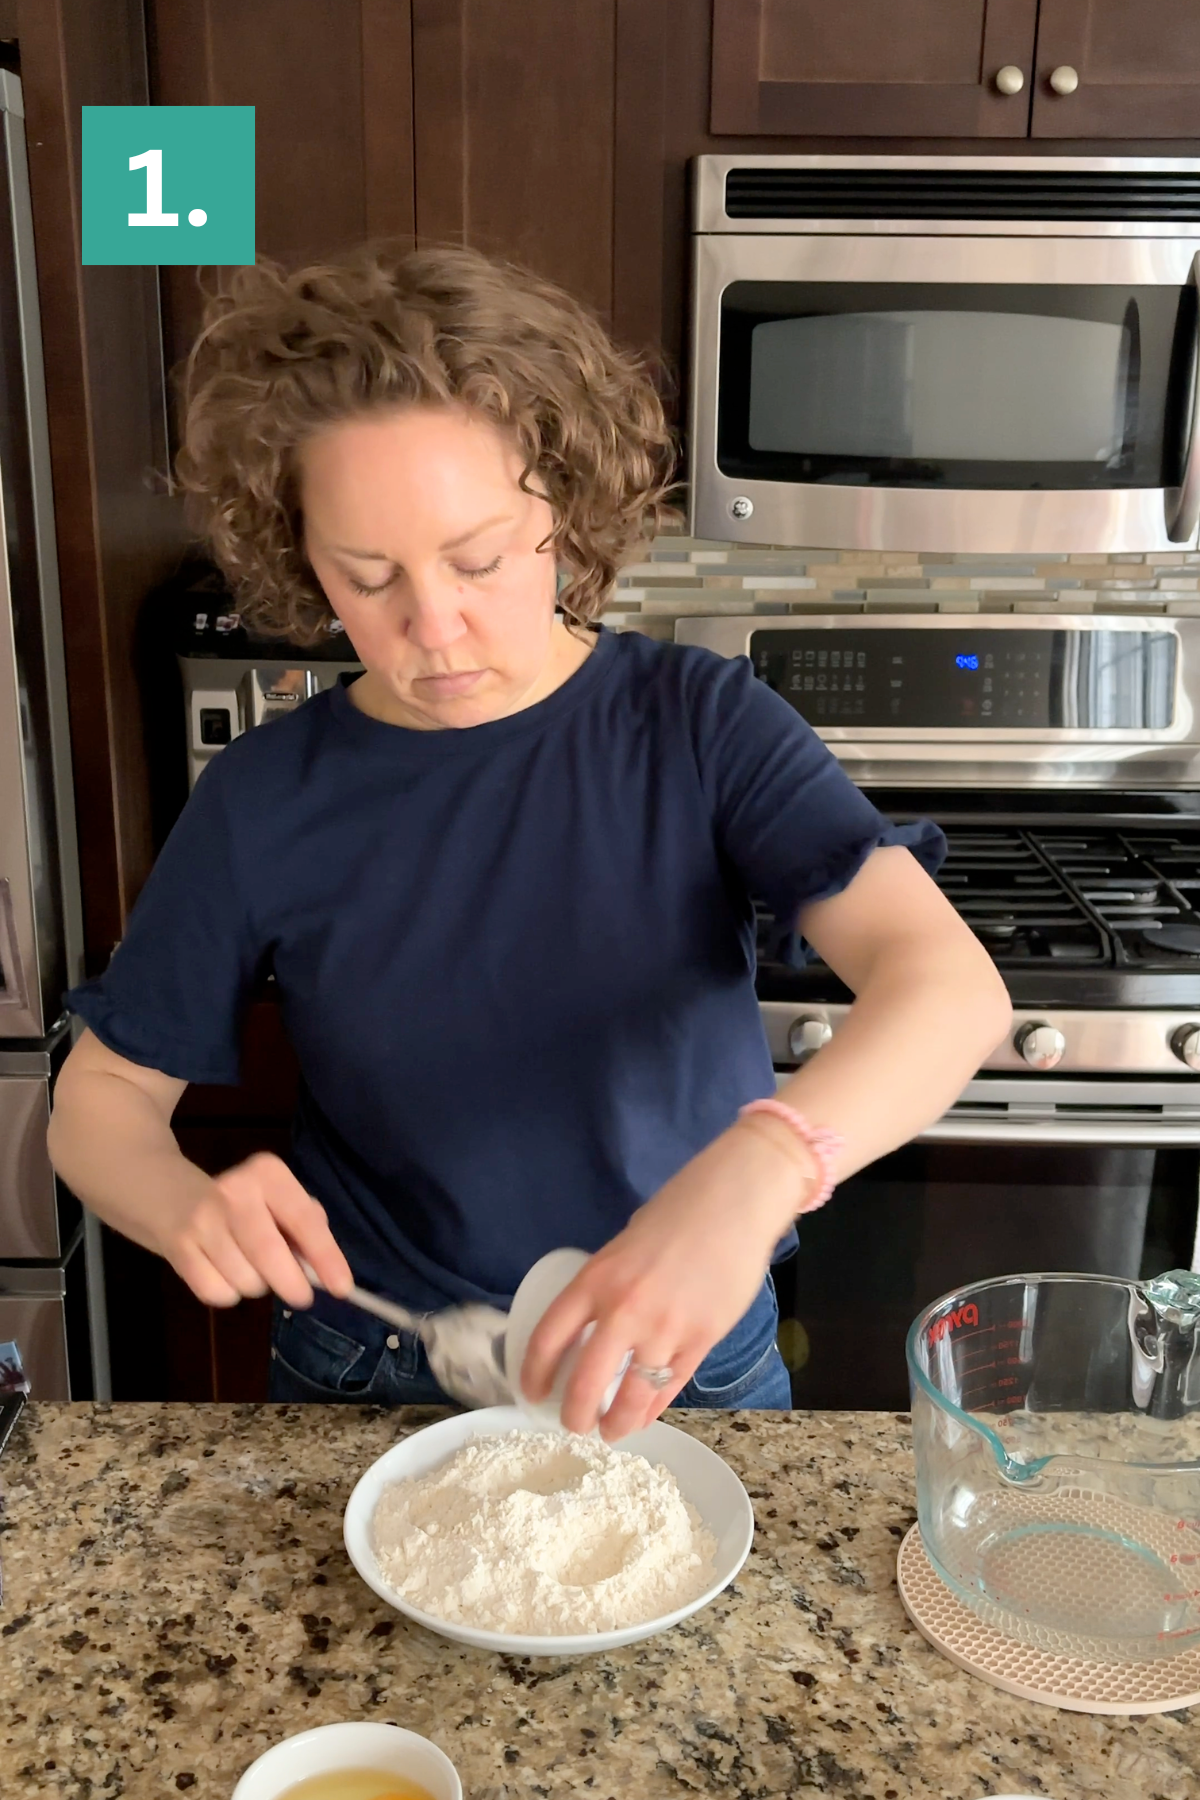
In a medium bowl, whisk together the flour, cornstarch, baking soda, and salt. Set aside.
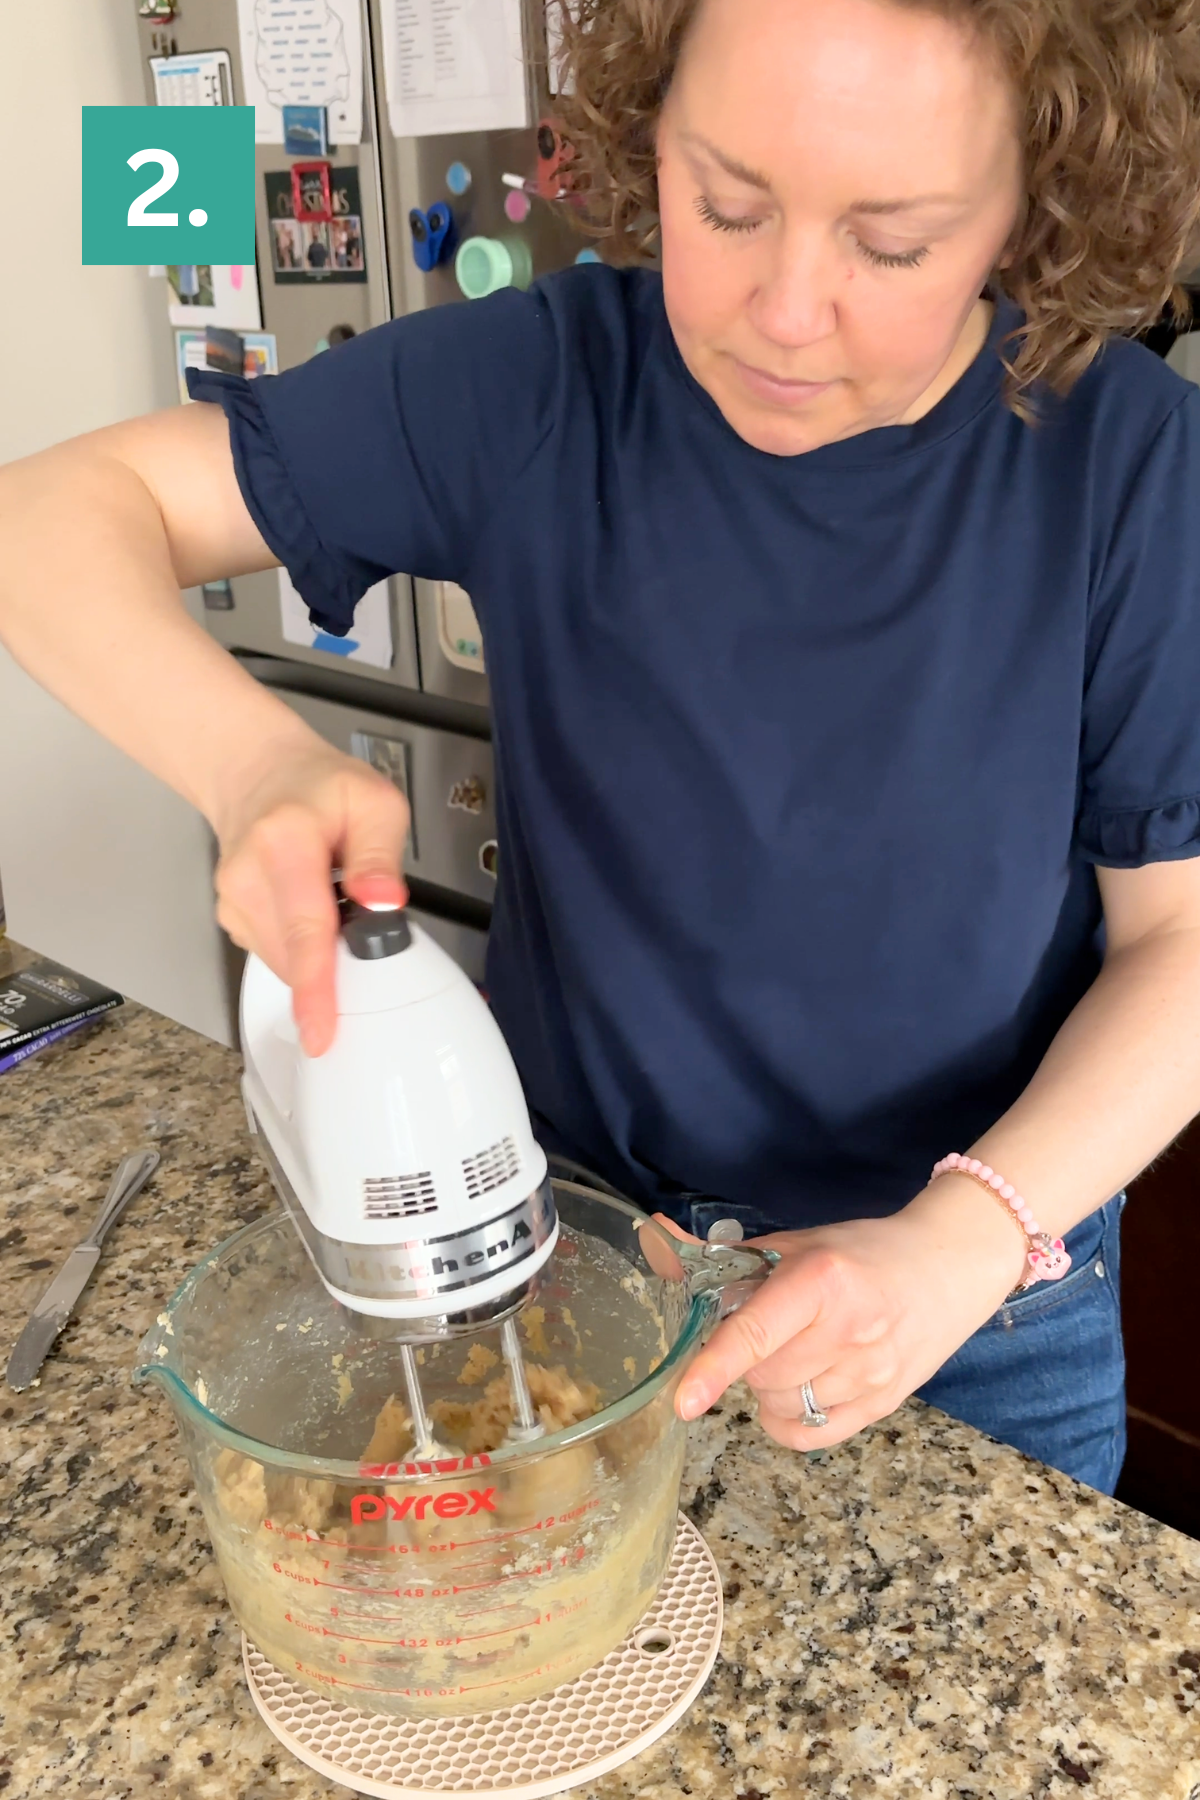
In a large mixing bowl, beat the butter, brown sugar, and granulated sugar on medium speed for 2 minutes, until the mixture is light and fluffy.
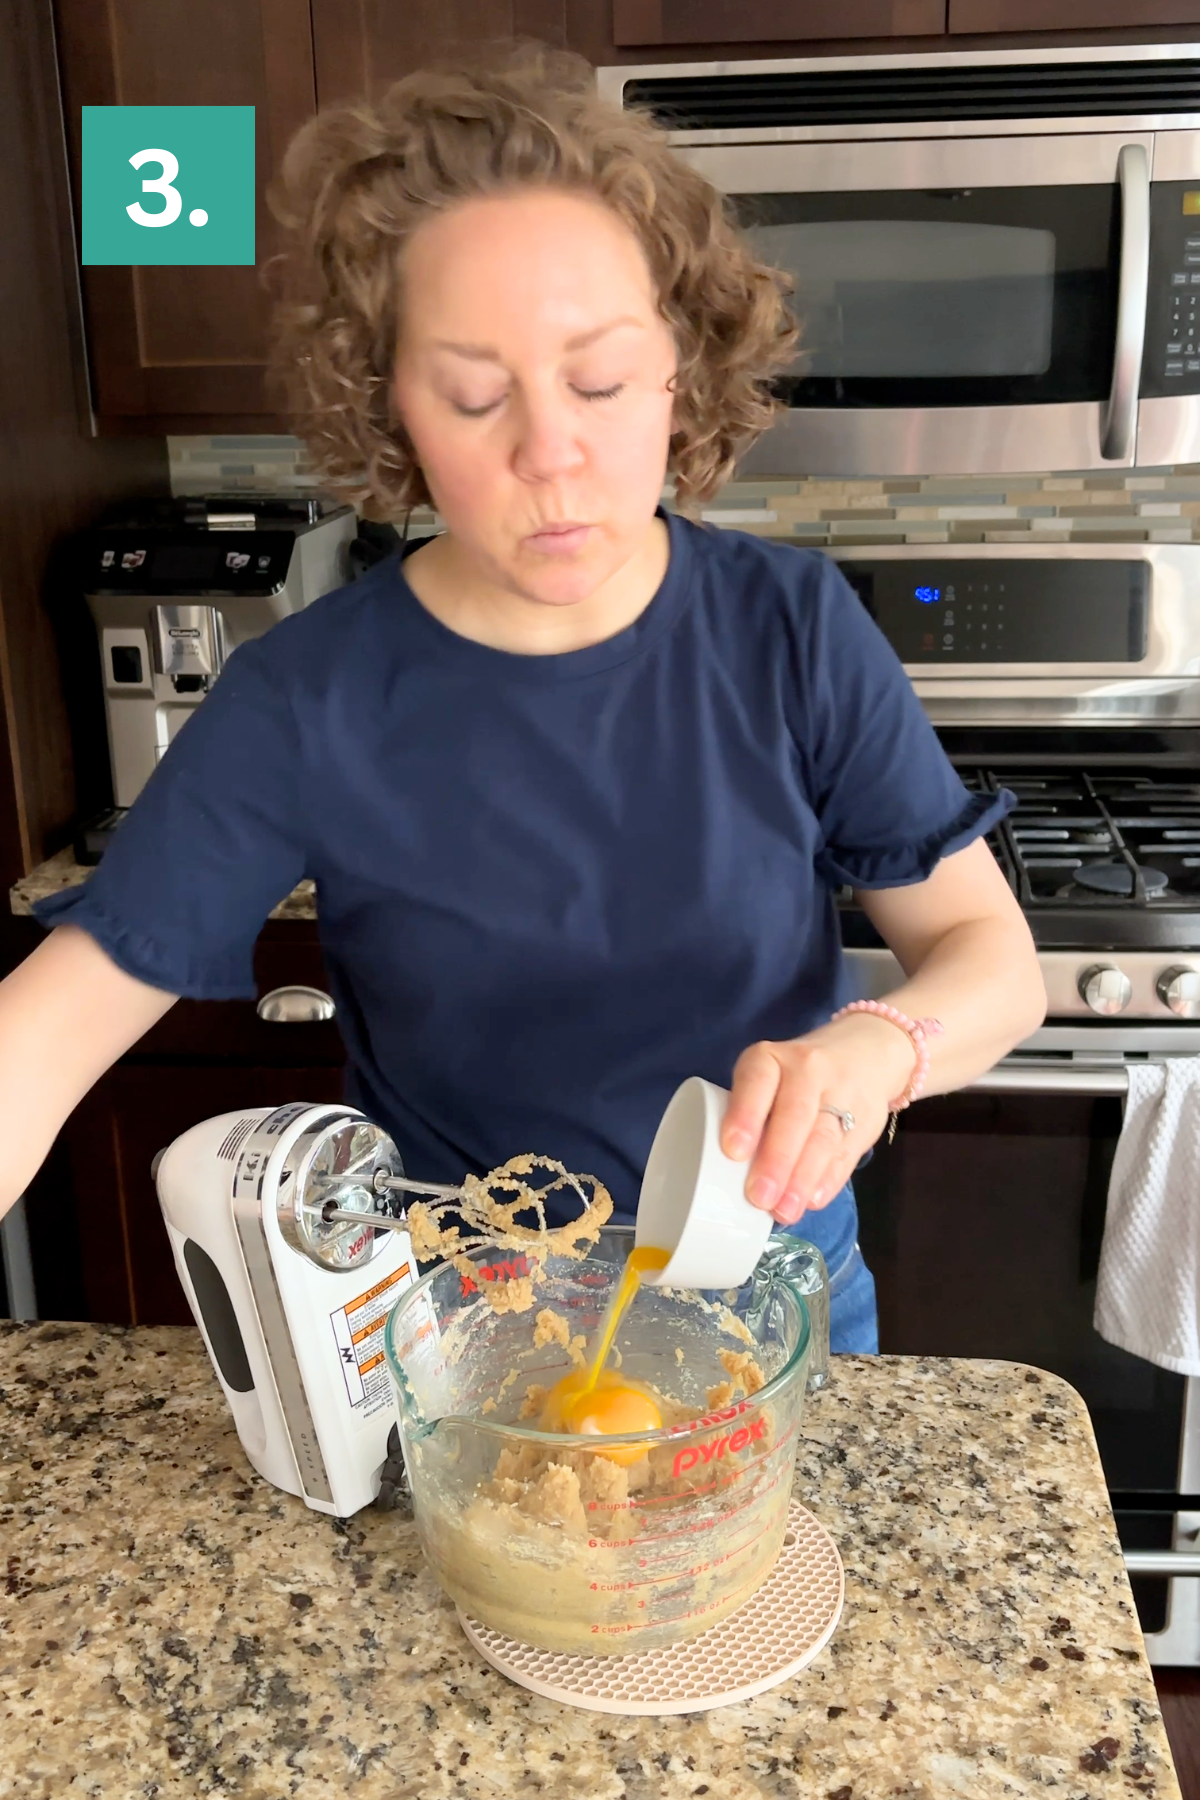
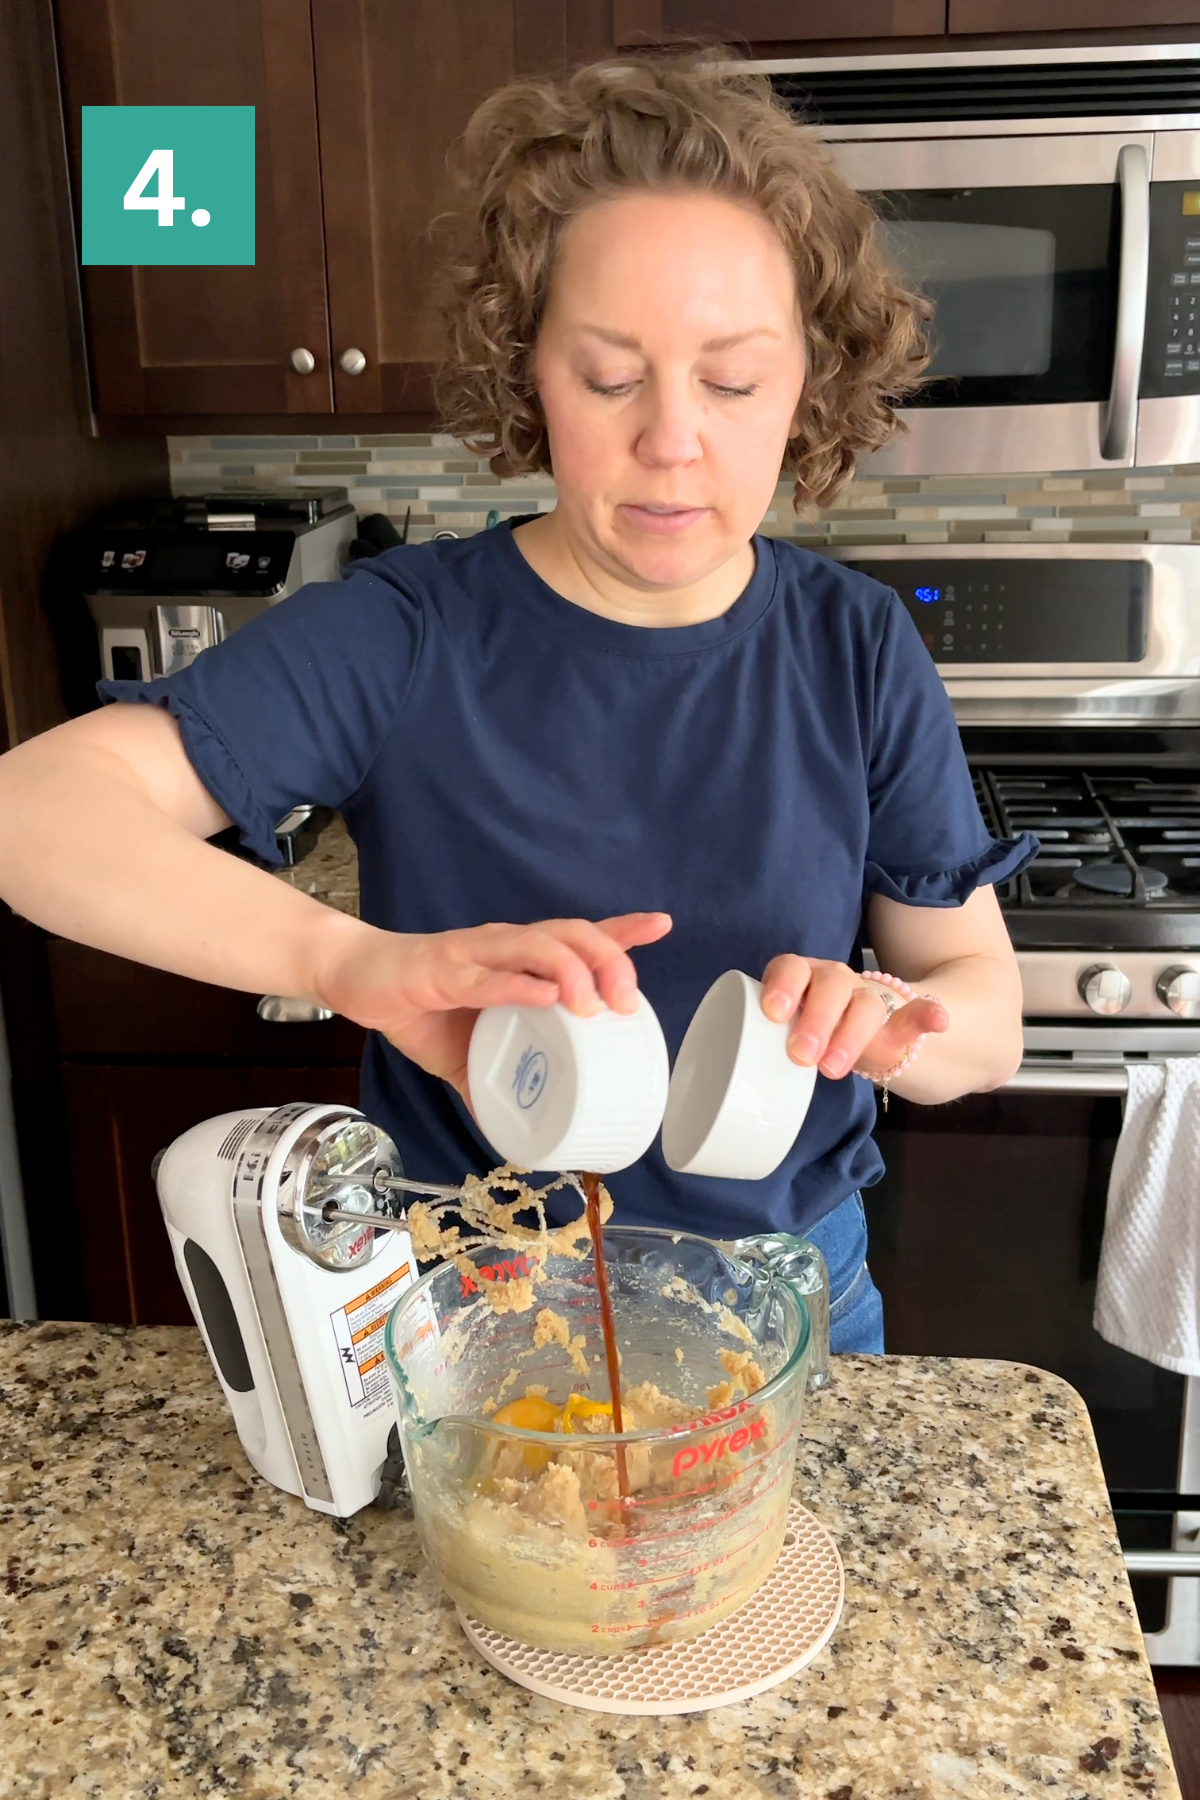
Add the egg, egg yolk, and vanilla extract. Beat for 30 seconds, until fully combined.
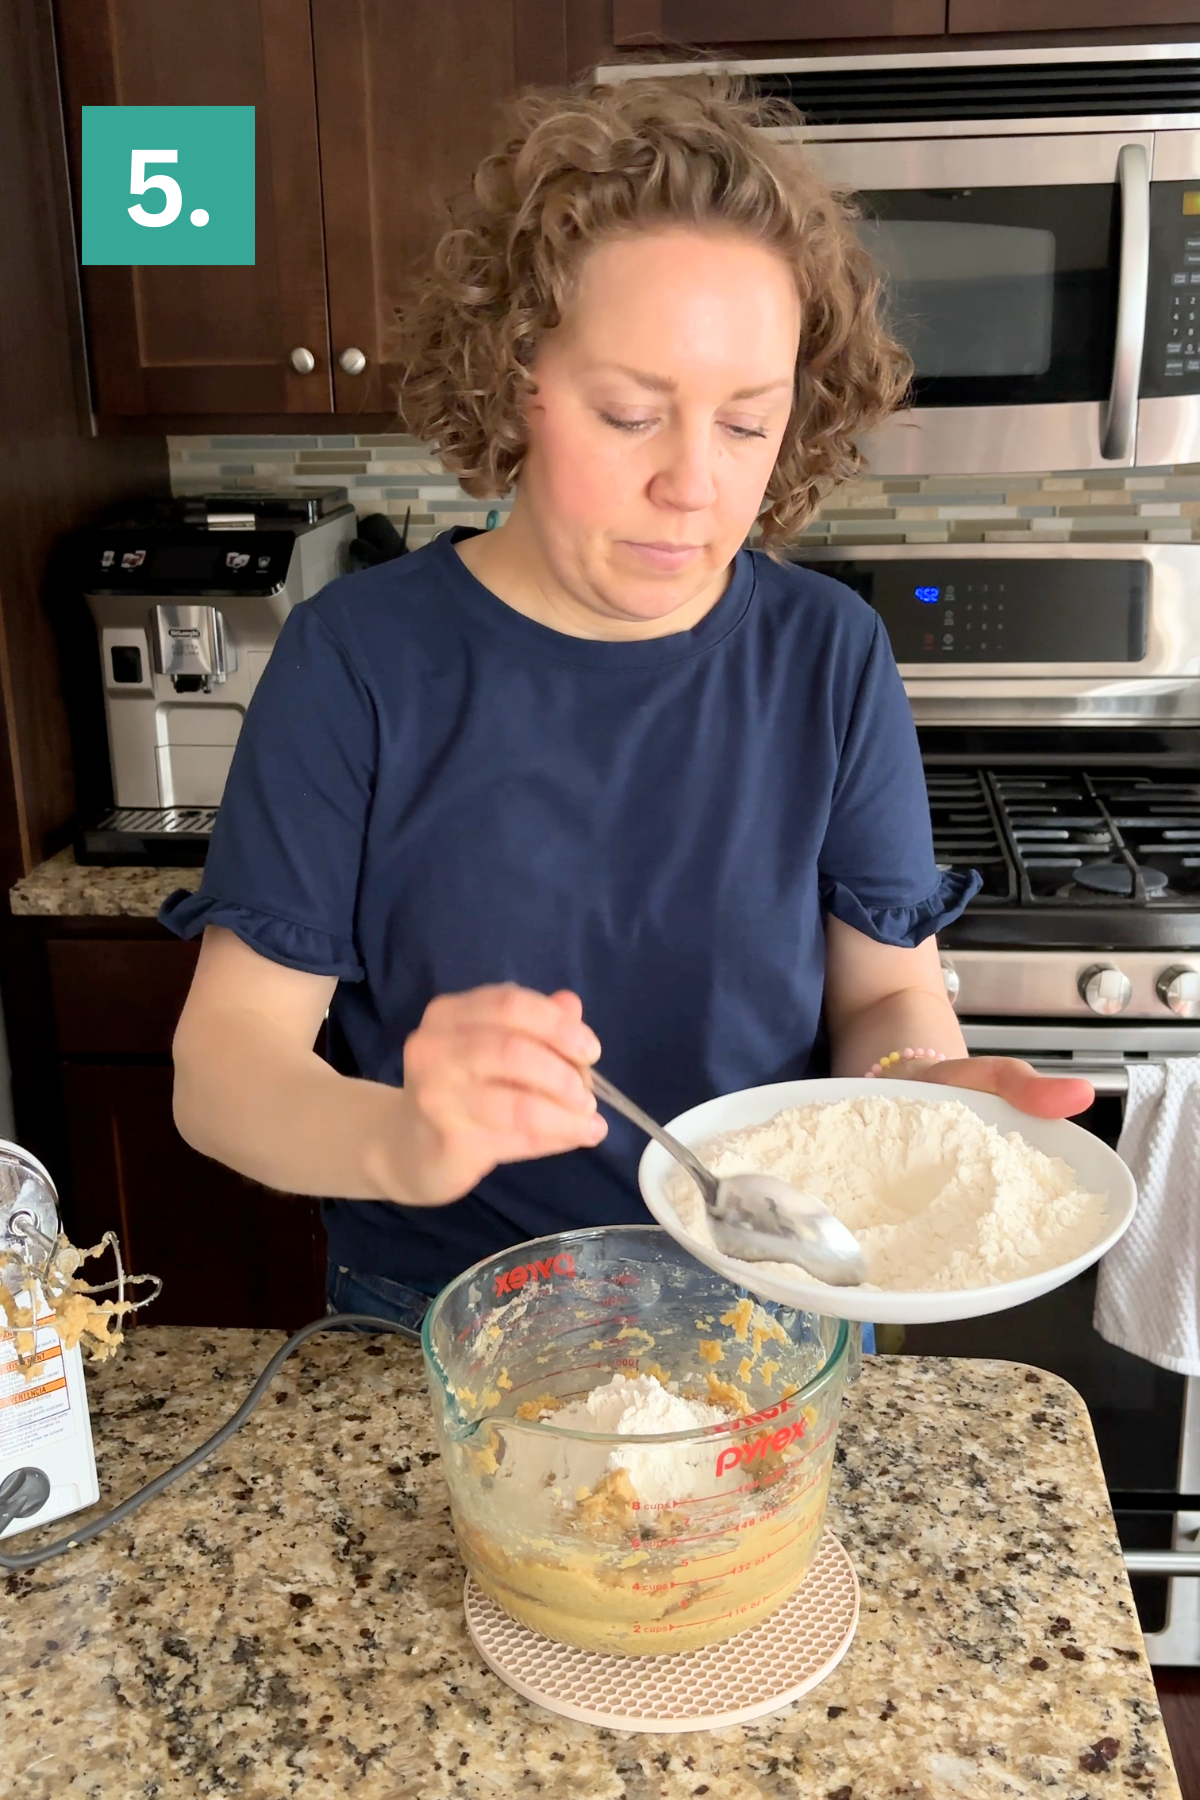
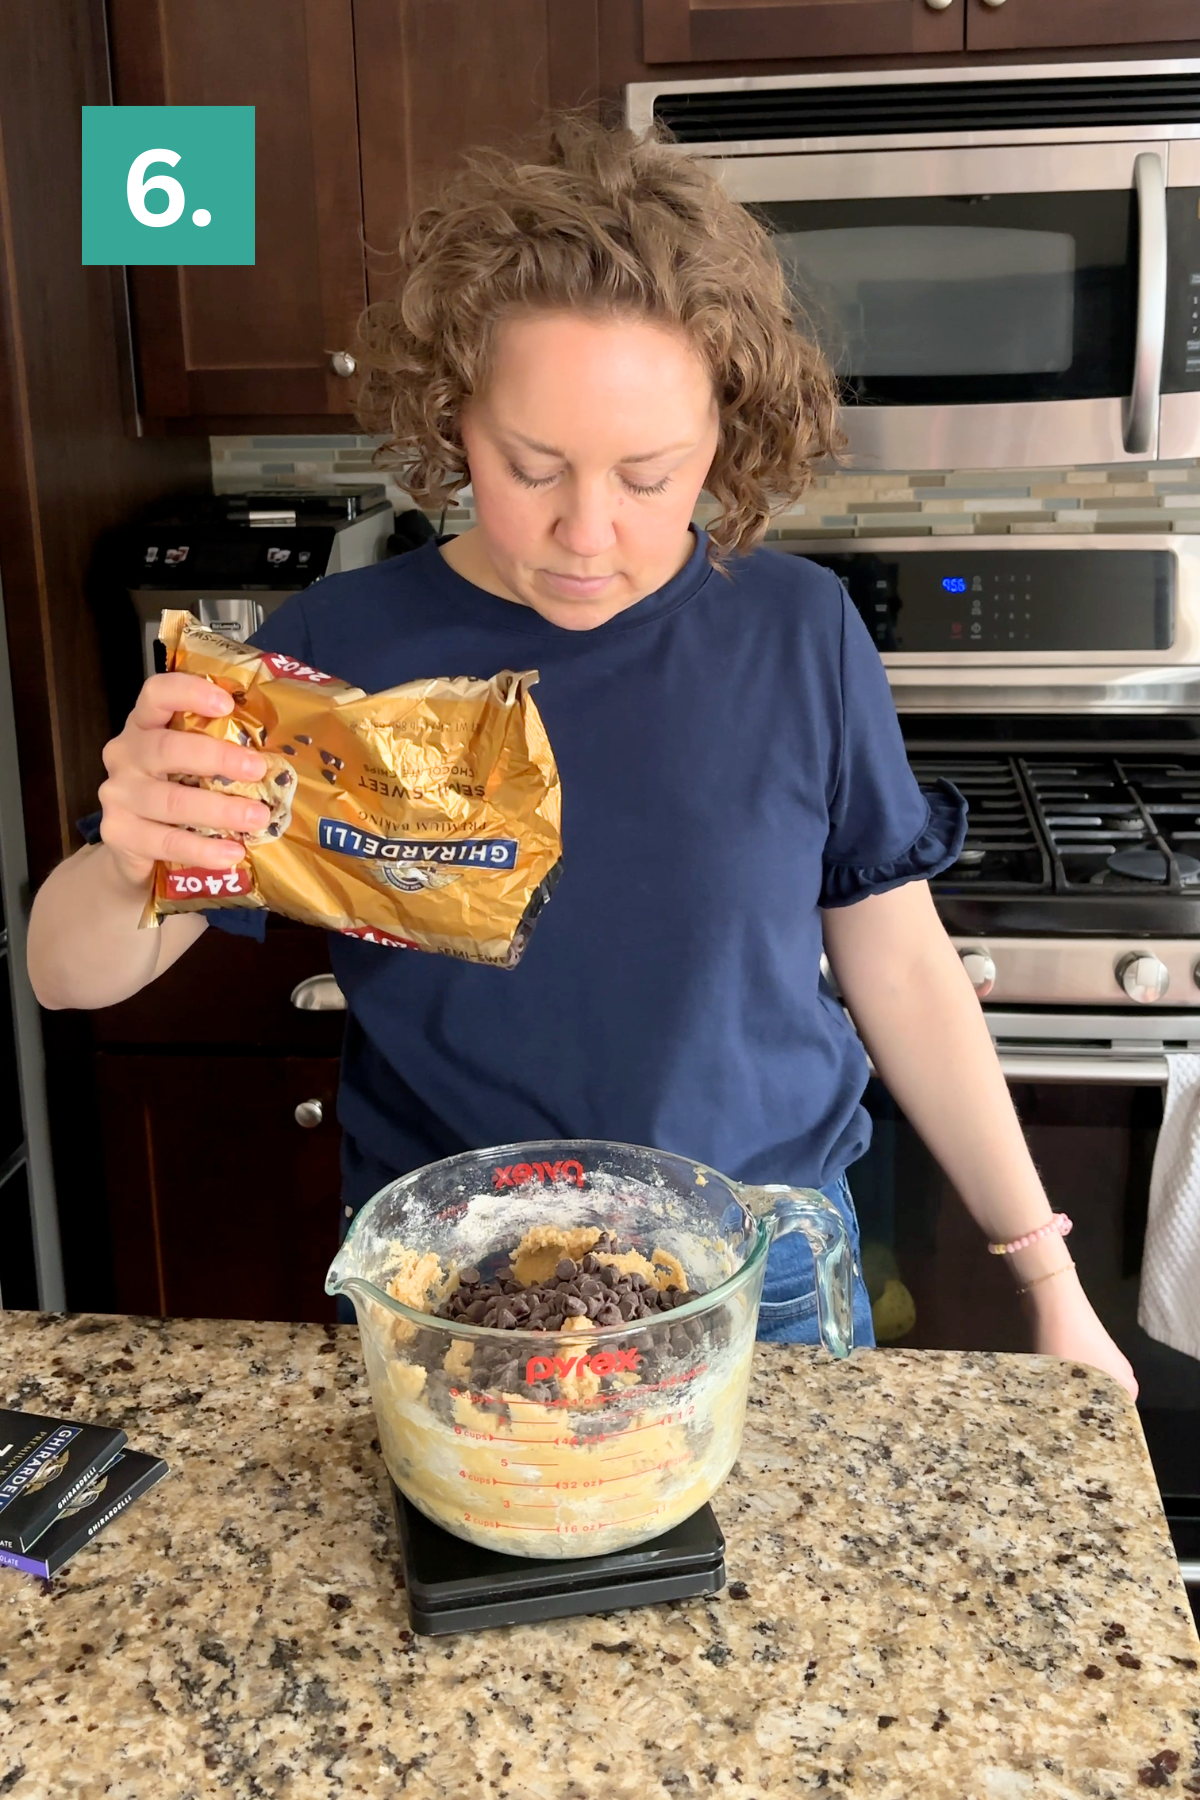
Gradually add the dry ingredients, mixing on low speed until just combined. Add the chocolate chips and mix until incorporated. I like to finish mixing with a spatula to ensure everything is evenly combined. The dough will be thick.
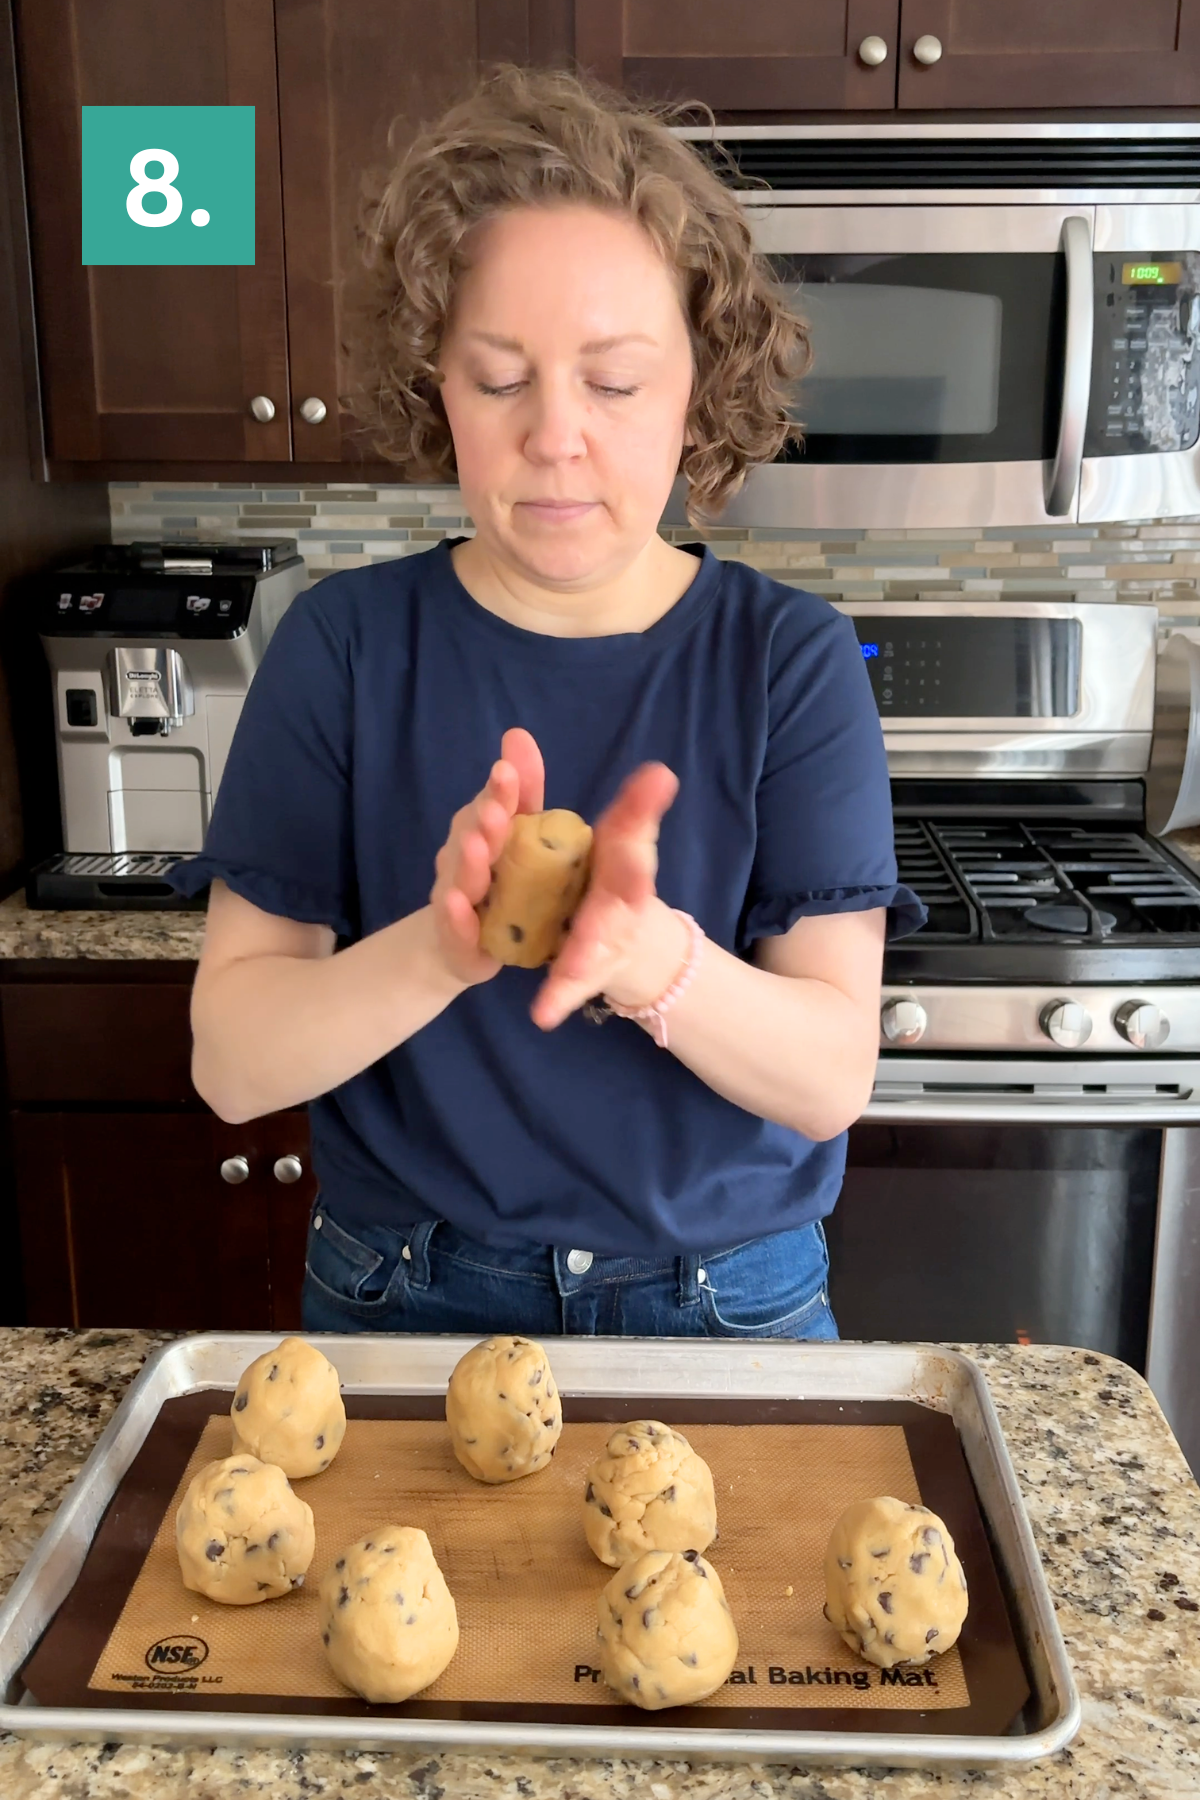
Using a kitchen scale, portion the dough into 5.5 to 5.7 oz balls. Roll each ball between your hands, then shape it so it’s slightly taller than it is wide.

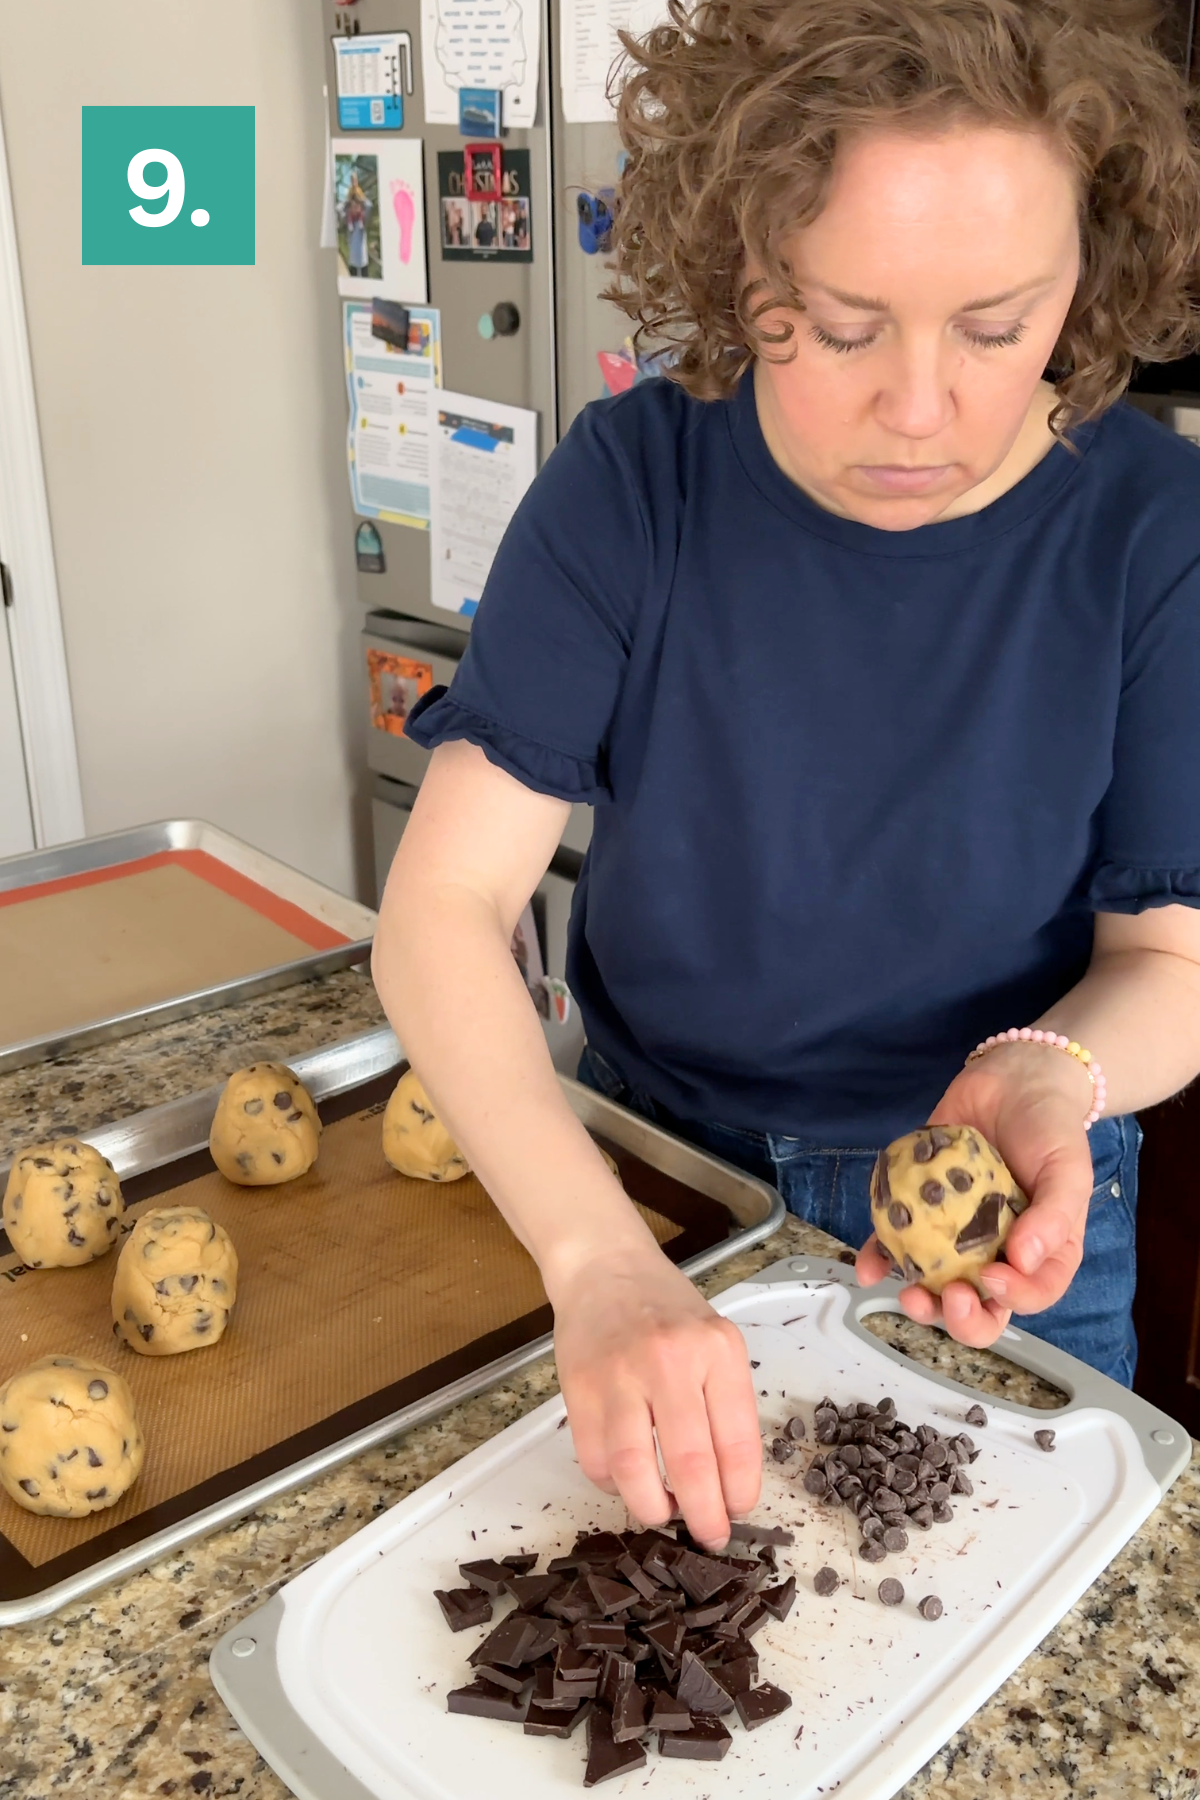
Chop the chocolate bar into small pieces, then press the pieces and a few extra chocolate chips onto the outside of each dough ball.
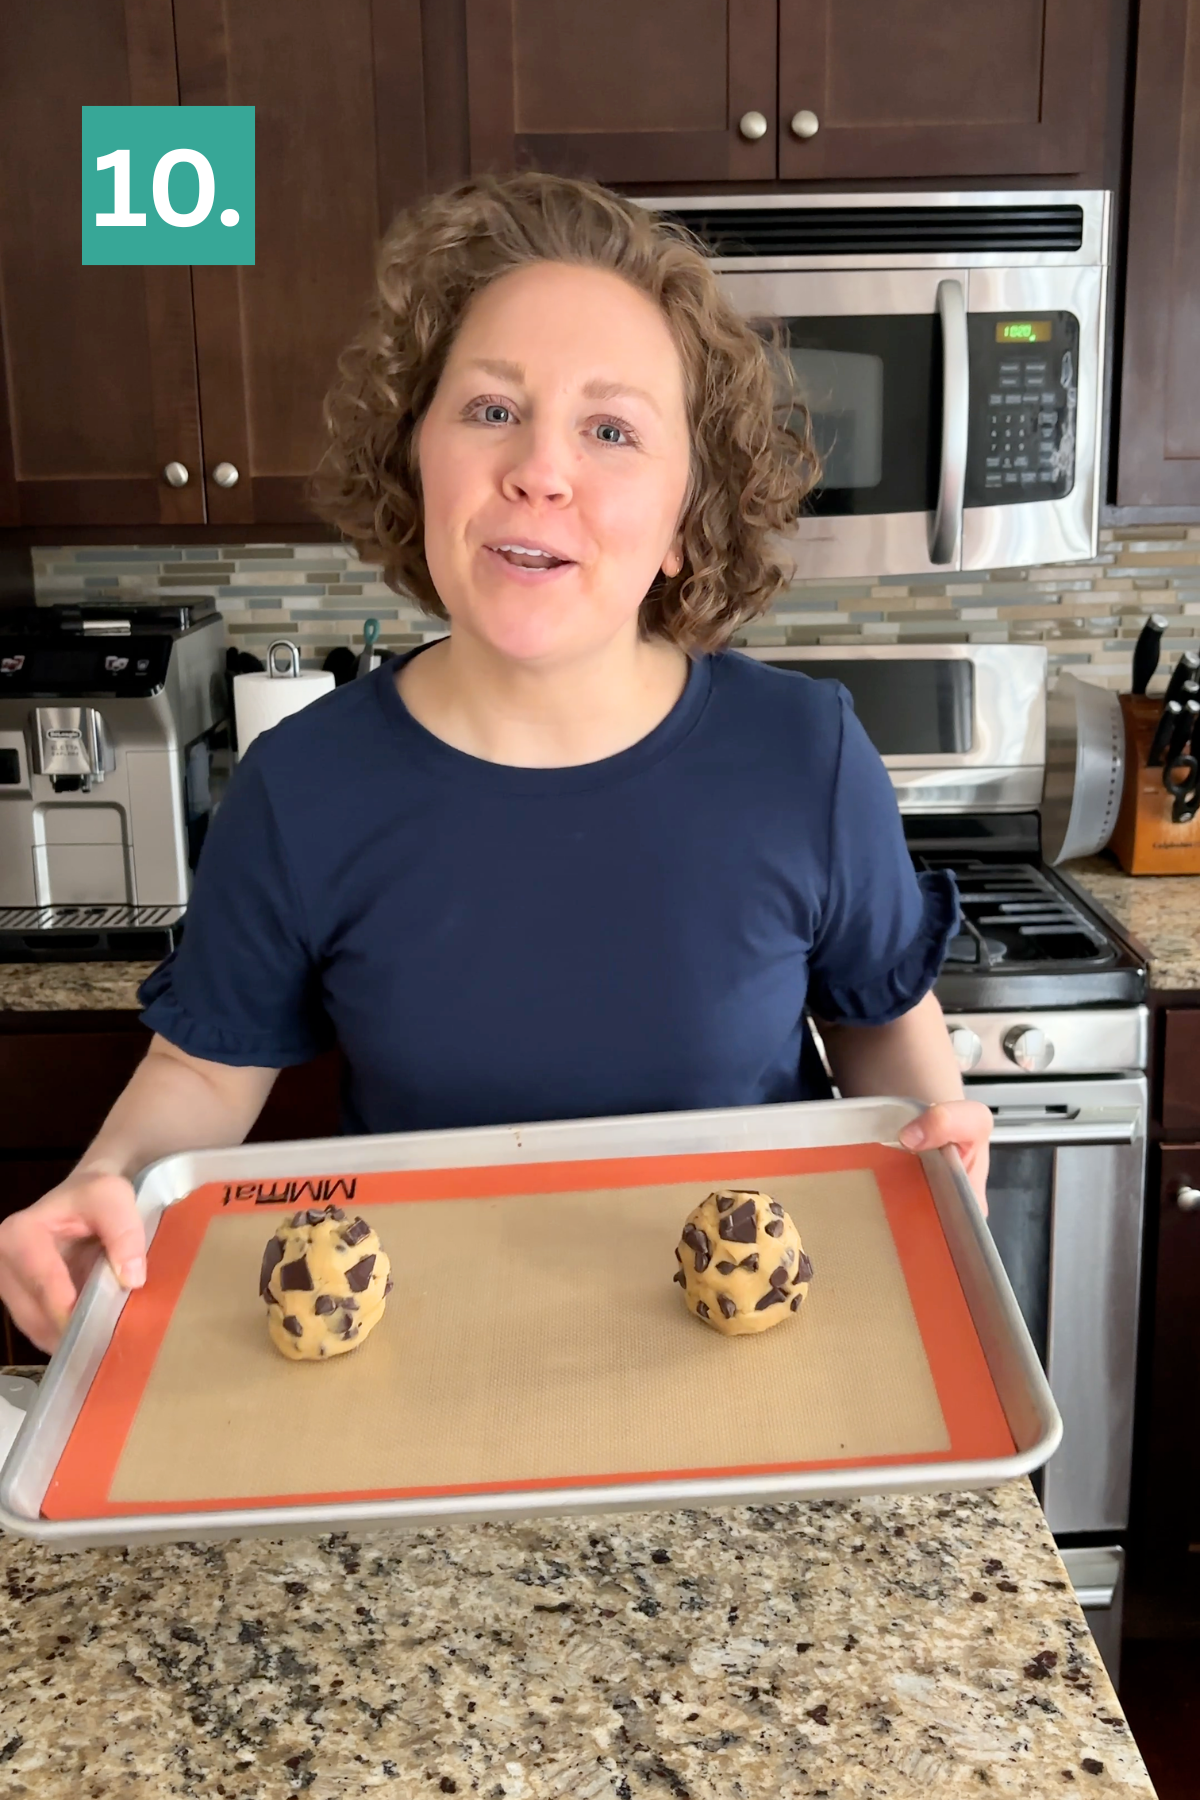
Place 2 cookies at a time on the baking sheet. Bake for 15–18 minutes. I pull mine at 15 minutes—the centers will look slightly underdone but will set as they cool.
Sprinkle with flaky sea salt. Allow the cookies to cool completely on the baking sheet before transferring.
How to Shape Bakery Cookies
Shaping the dough is a simple step that makes a big difference in the final result.
Instead of rolling the dough into a smooth ball, shape it so it’s slightly taller than it is wide. This encourages the cookie to bake upward instead of spreading outward.
This is the same concept I use when making bakery-style muffins—starting with height helps create that thick, domed look once baked.
Troubleshooting Chocolate Chip Cookies
Problem #1: Cookies Spread Too Much
If your cookies are spreading too much, the most common cause is butter that’s too warm. When butter is overly soft or slightly melted, the dough will spread quickly in the oven before it has a chance to set. Too much baking soda can also contribute to excess spread, as it encourages the cookies to expand more. Another factor is shaping—if the dough balls are rolled smooth and flat instead of tall, the cookies will naturally bake wider. For thicker cookies, make sure your butter is at true room temperature (soft, but not greasy), measure baking soda carefully, and shape the dough so it’s taller than it is wide.
Problem #2: Cookies Are Too Cakey
If your cookies have a lighter, more cake-like texture instead of being chewy, it usually means there’s too much structure in the dough. This can happen if too much flour is added, the dough is overmixed, or there’s too much cornstarch or leavening. Cakey cookies will feel soft and airy rather than dense and rich. To fix this, measure your flour accurately, mix just until the ingredients are combined, and avoid adding extra dry ingredients.
Problem #3: Cookies Are Too Crispy
If your cookies turn out too crispy—especially around the edges—it’s most likely due to baking time. Even an extra minute or two in the oven can push the edges from lightly crisp to overly crunchy. In my testing, chilling the dough also led to crispier edges because the cookies needed a longer bake time to cook through. For the best texture, bake just until the edges are set and the centers still look slightly underdone. The cookies will continue to set as they cool, giving you soft centers with lightly crisp edges instead of crunchy ones.
How to Store Bakery Style Chocolate Chip Cookies
Keep these cookies fresh by storing them in an airtight container at room temperature. They’ll stay soft and chewy for up to 5 days this way. Toss a slice of bread in the container if you want extra insurance against drying out, the cookies will pull moisture from the bread instead of losing their own.
For longer storage, the freezer is your best friend. Stack cooled cookies between layers of parchment paper in a freezer safe container or bag, and they’ll keep for up to 3 months. Let them thaw at room temperature for about 20 minutes before eating, or microwave for 10 to 15 seconds if you want that fresh from the oven feel.
Frequently Asked Questions
No—and in this recipe, I actually don’t recommend it. I tested baking the dough right away, after a few hours of chilling, and after chilling overnight. The chilled dough required a longer bake time, which made the edges noticeably crispier. Baking the dough right away gave the best balance of soft centers and lightly crisp edges.
To make smaller cookies, I recommend following my chocolate chip cookie recipe.
Weighing the dough ensures all of your cookies are the same size, which helps them bake evenly. It’s also how you get that consistent bakery-style look. For this recipe, aiming for 5.5 to 6 oz per cookie makes a noticeable difference in both appearance and texture.
Yes. Portion the dough into balls, then freeze. When you’re ready to bake, you can bake from frozen—just add a few extra minutes to the bake time. Keep in mind that frozen dough may bake slightly thicker and could develop more crisp edges due to the longer bake time.
A mix of chocolate chips and chopped chocolate gives the best result. Chocolate chips hold their shape, while chopped chocolate melts into pools throughout the cookie. I recommend using high-quality chocolate for the best flavor and texture.
Oven (Best for Bakery-Style Cookies): Warm at 300°F for 3–5 minutes on a baking sheet. This brings back soft centers and lightly crisp edges without drying the cookie out.
Microwave (Quick + Gooey Centers): Heat for 10–15 seconds.
Tap stars to rate!
Bakery Style Chocolate Chip Cookies
Equipment
Ingredients
- 2 ¾ cups (330g) all-purpose flour
- 1 tsp cornstarch
- ½ tsp baking soda
- ½ tsp salt
- 1 cup (226g) unsalted butter, room temperature
- 1 ¼ cups (267g) brown sugar
- ½ cup (100g) granulated sugar
- 1 large egg
- 1 egg yolk
- 2 tsp vanilla extract
- 1 ½ cups (255g) high quality semi-sweet chocolate chips, like Ghirdelli or Guittard
- 3.5-4 oz high quality milk or dark chocolate bar, like Ghirdelli, Guittard or Lindt , chopped or broken into small pieces
- flaky sea salt
Video
Instructions
- This recipe yields eight 5.5-5.7 oz cookies. Preheat the oven to 350ºF (180ºC). Line a baking sheet with parchment paper or a silicone baking mat.
- In a medium bowl, whisk together the flour, cornstarch, baking soda, and salt. Set aside.2 3/4 cups (330g) all-purpose flour, 1 tsp cornstarch, 1/2 tsp baking soda, 1/2 tsp salt
- In a large mixing bowl, beat the butter, brown sugar, and granulated sugar on medium speed for 2 minutes, until the mixture is light and fluffy.1 cup (226g) unsalted butter, 1 1/4 cups (267g) brown sugar, 1/2 cup (100g) granulated sugar
- Add the egg, egg yolk, and vanilla extract. Beat for 30 seconds, until fully combined.1 large egg, 1 egg yolk, 2 tsp vanilla extract
- Gradually add the dry ingredients, mixing on low speed until just combined. Add the chocolate chips and mix until incorporated. I like to finish mixing with a spatula to ensure everything is evenly combined. The dough will be thick.1 1/2 cups (255g) high quality semi-sweet chocolate chips, like Ghirdelli or Guittard
- Using a kitchen scale, portion the dough into 5.5 to 5.7 oz balls. Roll each ball between your hands, then shape it so it’s slightly taller than it is wide.
- Chop the chocolate bar into small pieces, then press the pieces and a few extra chocolate chips onto the outside of each dough ball.3.5-4 oz high quality milk or dark chocolate bar, like Ghirdelli, Guittard or Lindt
- Place 2 cookies at a time on the baking sheet. Bake for 15–18 minutes. I pull mine at 15 minutes—the centers will look slightly underdone but will set as they cool.
- Sprinkle with flaky sea salt. Allow the cookies to cool completely on the baking sheet before transferring.flaky sea salt
Notes


This recipe turned out amazing. It was easy to follow and used ingredients easily available. Picture perfect cookies that taste amazing. Will definitely make these again.
My 13 year old son made these this weekend, a total hit! Turned out just perfect! Used Aldi “specialty” chocolate chunks instead of breaking up a candy bar for the top. Perfection! Thanks Beth!
Honestly no comments, they turned out amazing and were super easy! I’m preparing for a career in culinary arts and just wanted to try a variety of recipes, this was the best by far. Review wise when I made these people who ate them had mixed opinions on the salt, but that’s all personal preference:) will be trying more recipes soon
These are delicious!! Question, which brown sugar do you normally use for chocolate chip cookies? Light or dark?
I personally use light brown sugar.
I have to leave a review because I’ve been trying out so many different chocolate chip cookie recipes and this version is the best! It’s a gorgeous cookie that taste amazing! Thanks so much for sharing!
How long can the dough stay refrigerated before needing to freeze them? The most beautiful cookies were from fresh and refrigerated dough. The frozen dough , the cookie wasn’t as beautiful but the taste was still amazing!
If I could give this recipe more than 5 stars I would!
This is by far THE BEST cookie recipe you will EVER try! Everyone I decided I wanted to share them with really enjoyed them and said they’re the best they’ve ever had! So, hats off you to Beth!!! Ah-mazing as always!! 🩷🍪
I can’t wait to make my next batch, although I’m sure my waistband is saying otherwise. 😂😂
You need to stop making these amazing recipes! My waste line is going to expand, quickly. Lol! These are the BEST Chocolate Chip cookies I’ve ever made! So good!!