This post may contain affiliate links. Please read our disclosure policy.
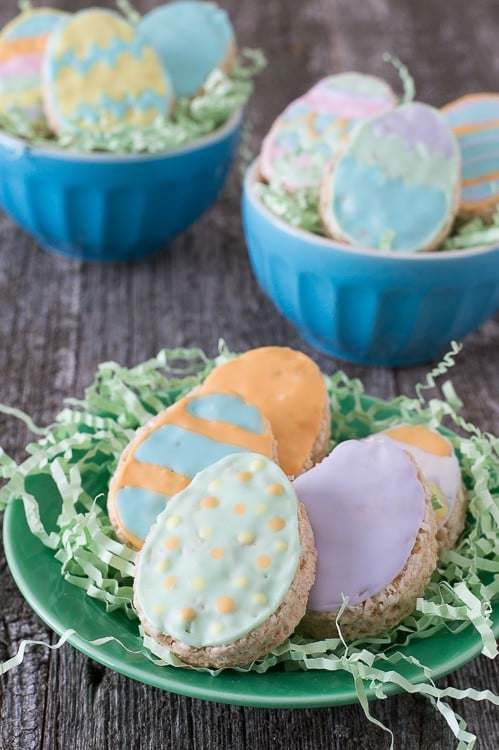
Rice Krispies Easter Eggs – use royal icing to make cute rice krispies easter eggs! These yummy treats are so cute and colorful, they are irresistible!
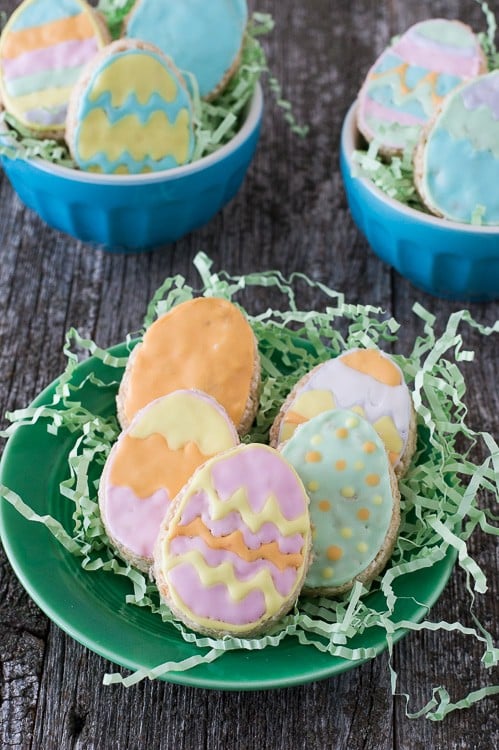
I hope the easter bunny is reading – let’s skip the plastic easter eggs this year.. I’ll take a whole basket full of these Rice Krispies Easter eggs! And if you’re looking for something else to put in my Easter basket, I’d like a few fake ice cream cones and a kitchen aid mixer :)
This recipe uses Rice Krispies Treats – like the ones that come in the crinkly blue package. Mmm, so good and so marshmallow-y. And they make this recipe easy, all you have to go it cut them into egg shapes and decorate!
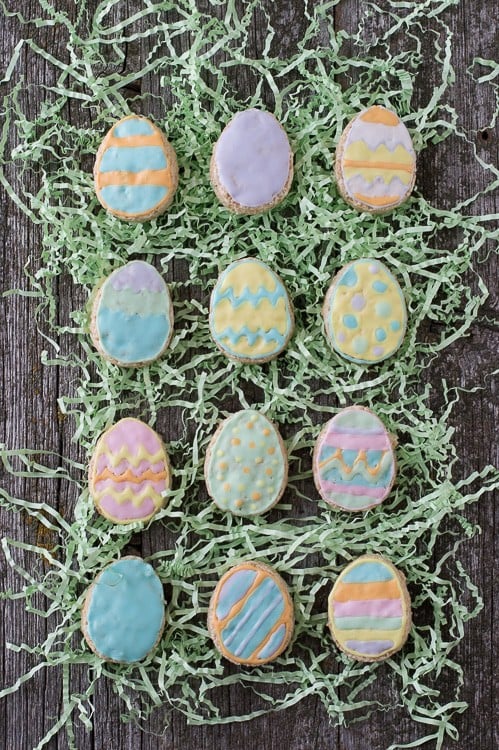
Rice Krispies Easter Eggs Recipe
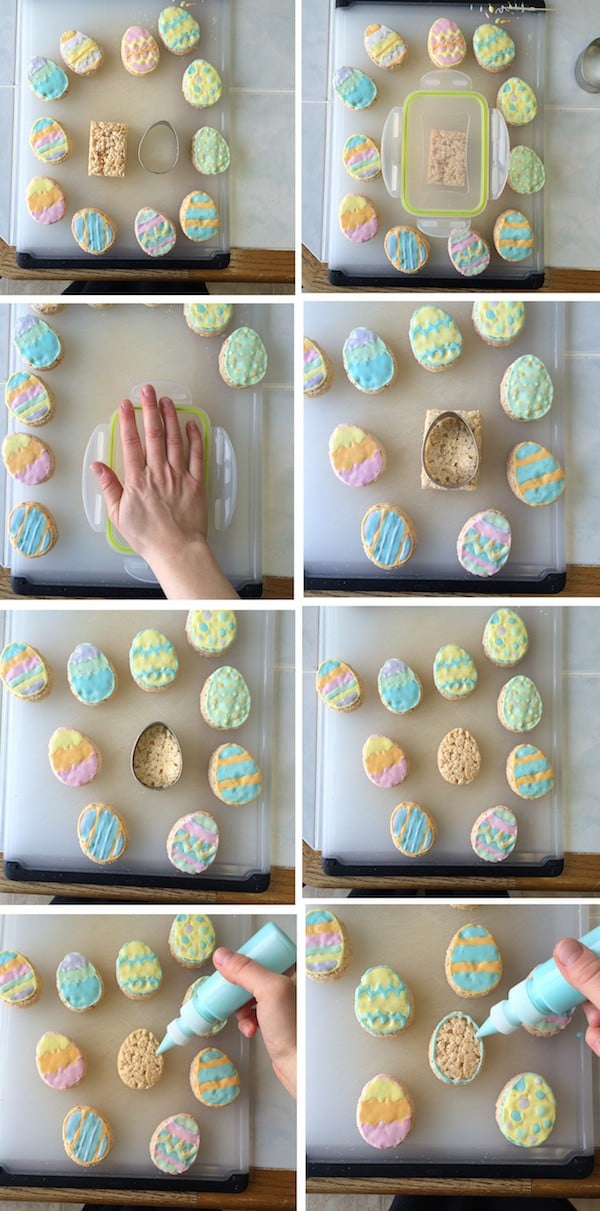
My egg shaped cookie cutter was a little too large for the Rice Krispies Easter Eggs Treat, so I used a lid from an air tight container to flatten the Rice Krispies Treats a bit. Next, take the egg shaped cookie cutter and place it in the center of the Rice Krispies, pressing down. Remove the excess Rice Krispies (either eat them or throw them away) and place the cut out egg shaped Rice Krispies on a baking sheet or other flat surface.
To decorate your Rice Krispies Easter Eggs, prepare the royal icing and use food coloring to dye portions of the icing various pastel colors. Transfer the icing to squeeze bottles, similar to this one. I like using squeeze bottles when working with royal icing because I fee like it gives me more control over the amount of icing released.
Tap stars to rate!
Rice Krispies Easter Eggs
Ingredients
- Rice Krispies Treats
Royal Icing
- 2 cups (227g) powdered sugar
- 1 Tbsp meringue powder
- 2 ½ Tbsp water
- Various food colorings, pink, orange, yellow, green, blue, and purple

Instructions
- Unwrap as many Rice Krispies Treats as you’d like.Rice Krispies Treats
- Use a lid from a tupperware container to press the Rice Krispies Treats down, making them large enough to fit the egg shaped cookie cutter.
- Next, use an egg shaped cookie cutter to cut the Rice Krispies Treats.
- Once all of the treats are cut into eggs, set them aside on a cutting board or other flat surface.
- Combine the powdered sugar, meringue powder, and water in a mixing bowl and mix using an electric mixer on low speed until the icing has a matte appearance, about 5-8 minutes.2 cups (227g) powdered sugar, 1 Tbsp meringue powder, 2 1/2 Tbsp water
- Evenly divide the royal icing among 6 small bowls. Add a small amount of food coloring to each bowl, until you have your desired color. I used pastel colors, so I added a very small amount of each food coloring. If the icing seems too thick at time point, add ¼ tsp of water and mix until combined.Various food colorings
- Transfer each color to a small squeeze bottle.
- Begin to decorate the Rice Krispies eggs with the icing as you desire, get creative! I did various patterns, including stripes, zig-zags, and polka dots. Use a tooth pick to help get the colors evenly distributed and to make sure the icing goes to the edges of the Rice Krispies.
- Allow the icing to set completely before serving or storing the Rice Krispies Eggs in an air tight container.




Those are beautiful and so creative! I hope I have time to make them before Easter! Thanks :)
Maybe the easter bunny will bring some, wink wink :_
These are absolutely adorable, Beth! Send some of these to me, please!
:)
These are so cute! And they look like they’d be really fun to do with kids. :)
Or with anyone who loves to decorate with royal icing!
Those eggs are so cute! I’m not good at all with royal icing, but I really want to get better at it!
I really like using squeeze bottles when I decorate with royal icing, it helps control the icing!
These are seriously adorable! I am a rice krispie treat addict, I cannot keep these things in the house or I will devour all of them. Love this idea way too much, I might have to steal it for Easter! Oh, and I’m with you, I’d love a whole basket full of these.. :)
Let me know if the easter bunny brings you some! :)
This is such an adorable idea! I’d love to have these in my Easter basket as well – so much more original and delicious than plain chocolate. #client
Thanks Kelly!