
This post may contain affiliate links. Please read our disclosure policy.
This homemade ice cream cake recipe is a keeper! I’ve made this recipe more times than I can count, mastering all the tricks to avoid issues like melting, cracking or uneven layers.
When you follow my step-by-step guide, you’ll be shocked at how easy it is to make your own ice cream cake that always wows a crowd!
This tastes just like the DQ cake–you could to so many different combinations of cookies and ice cream!
-Judy
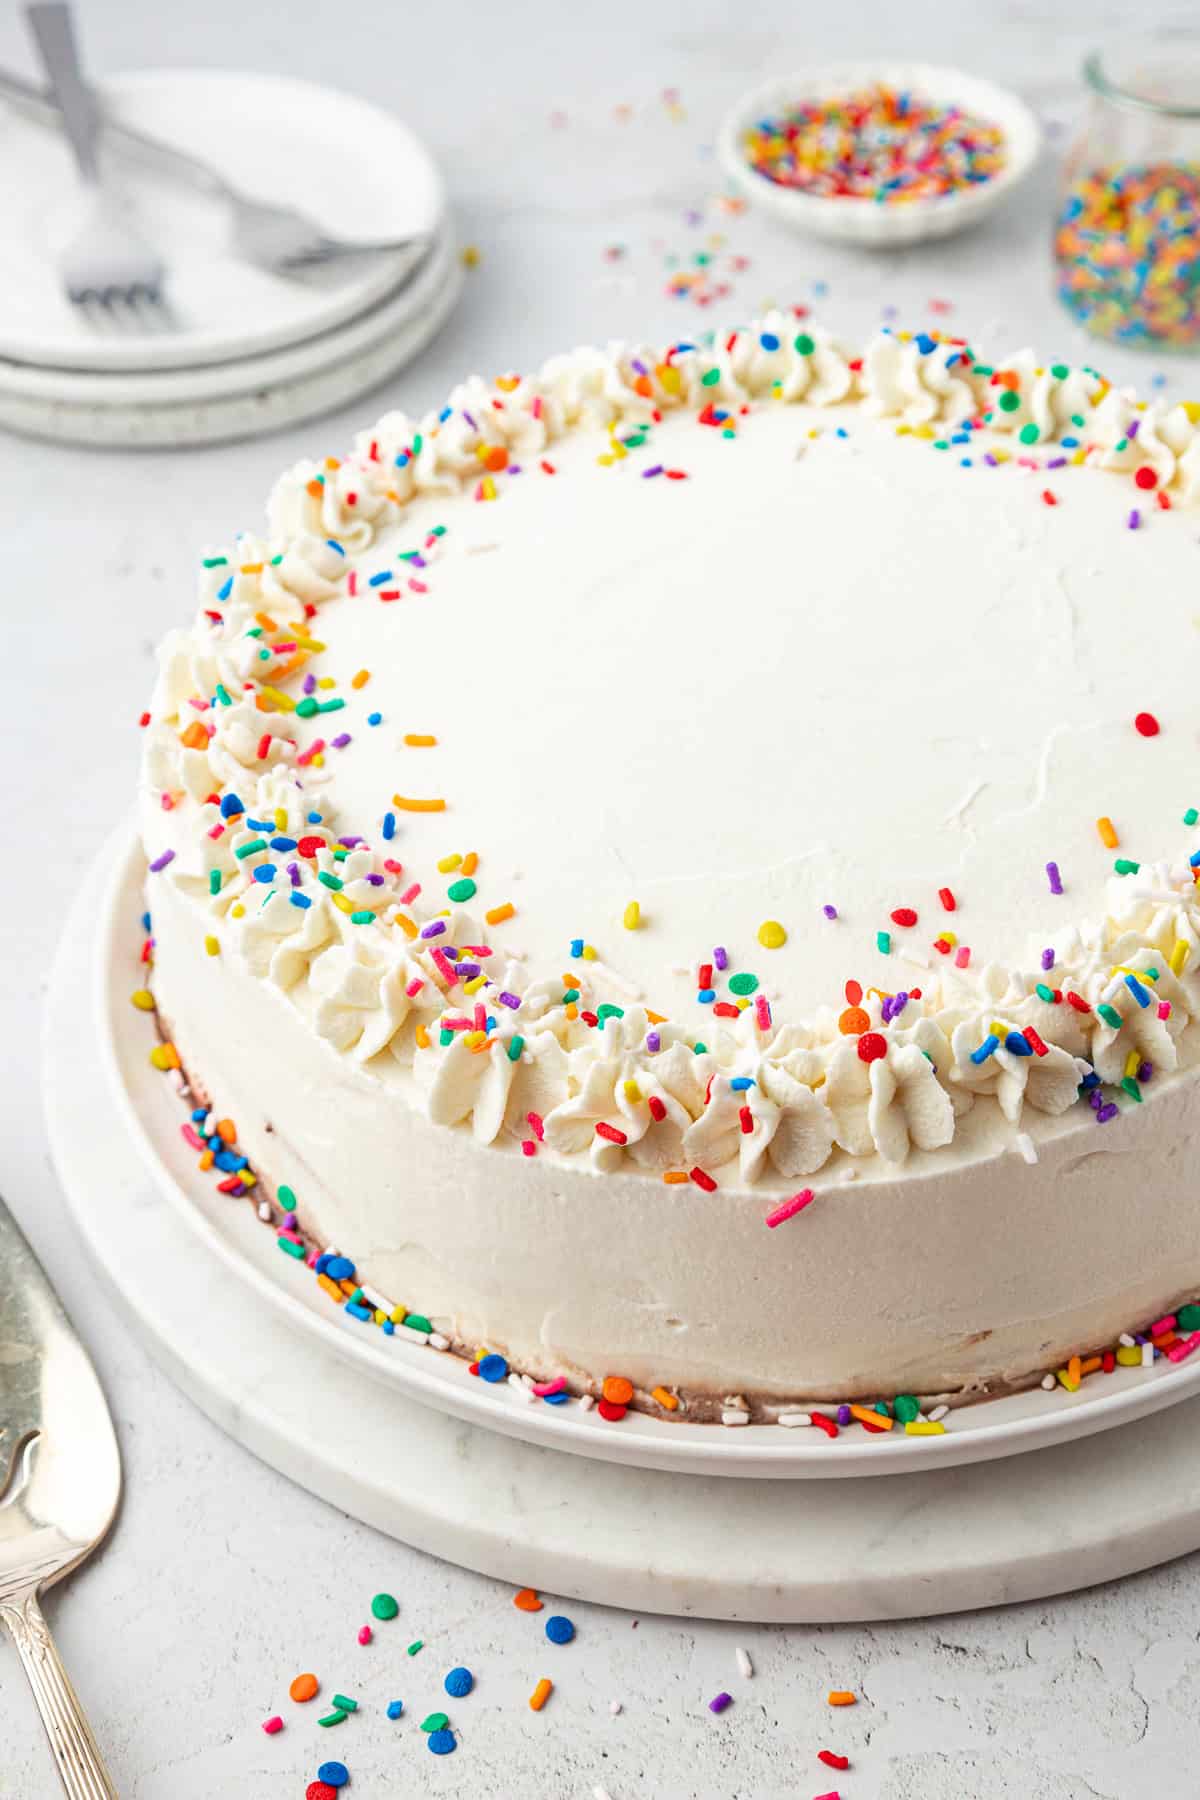
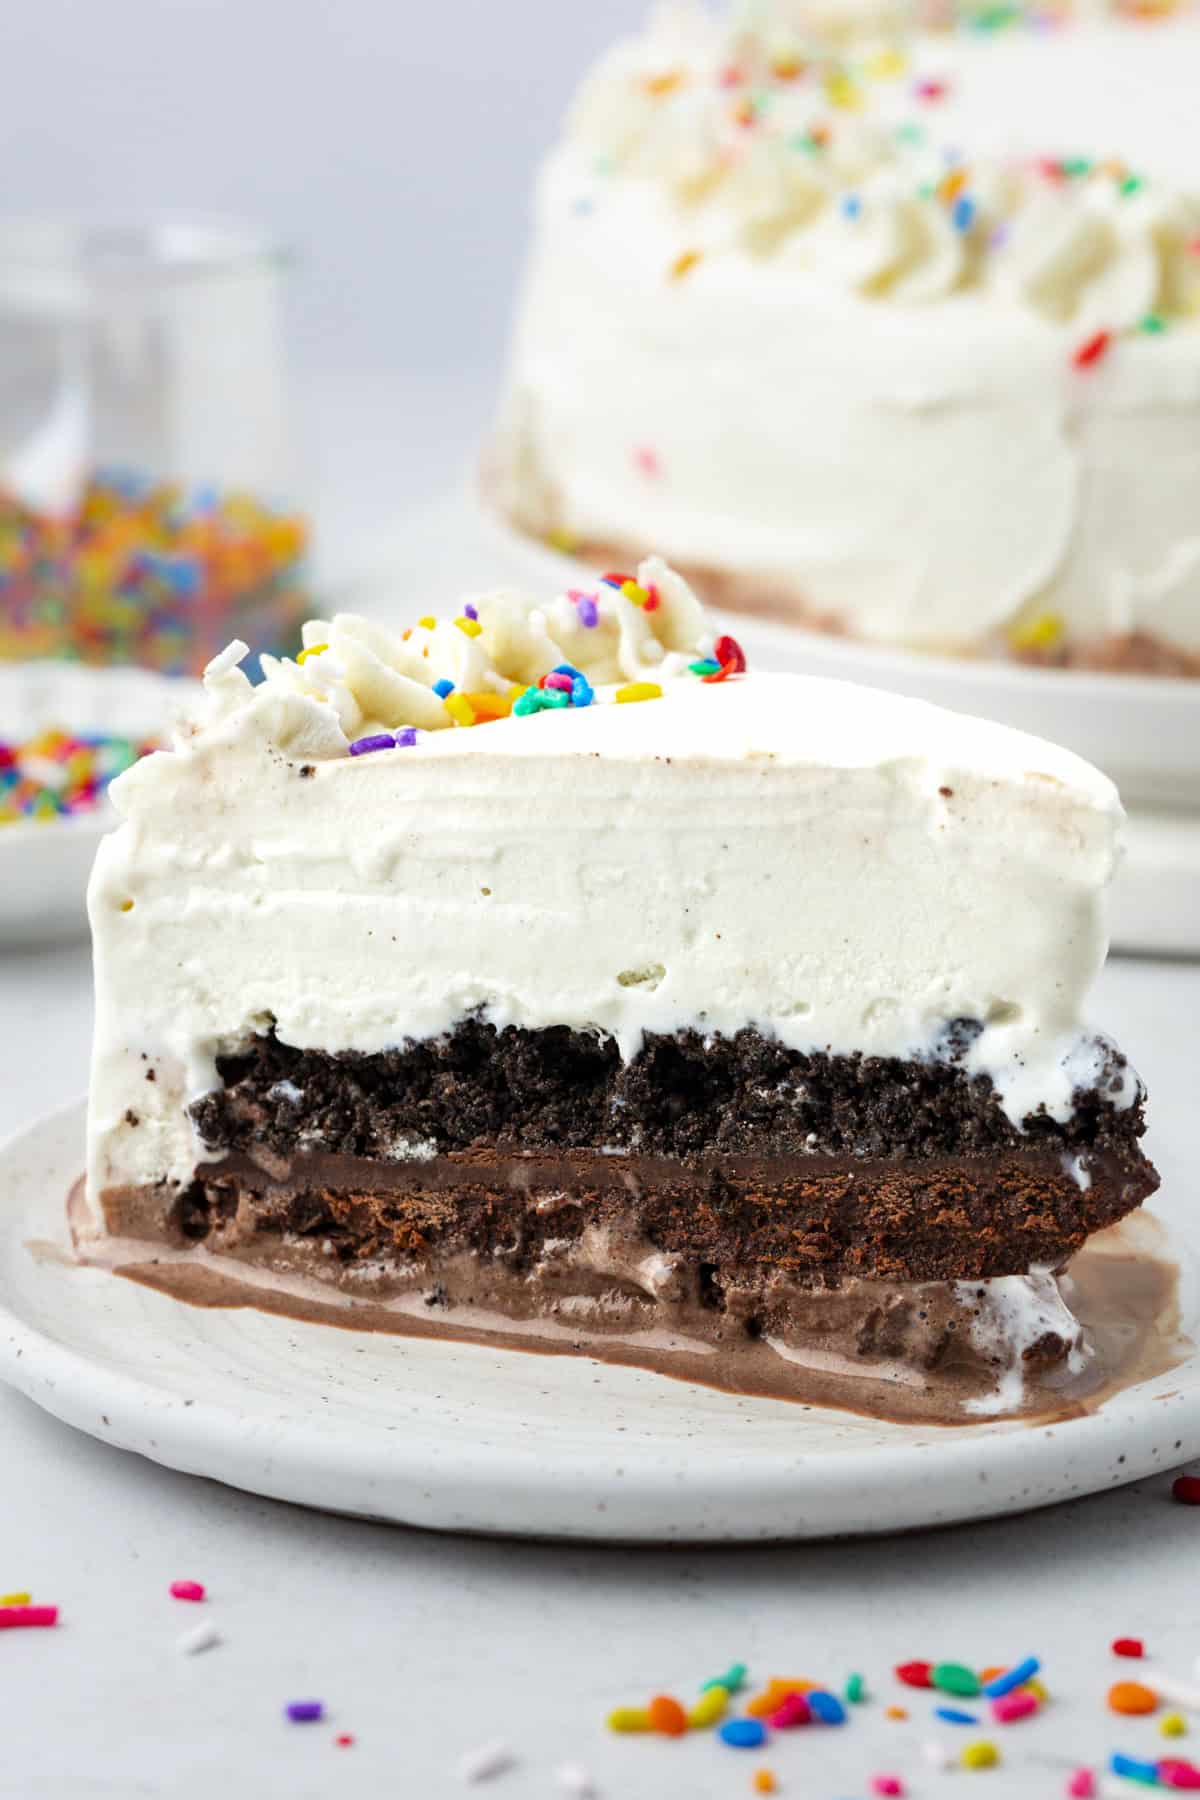
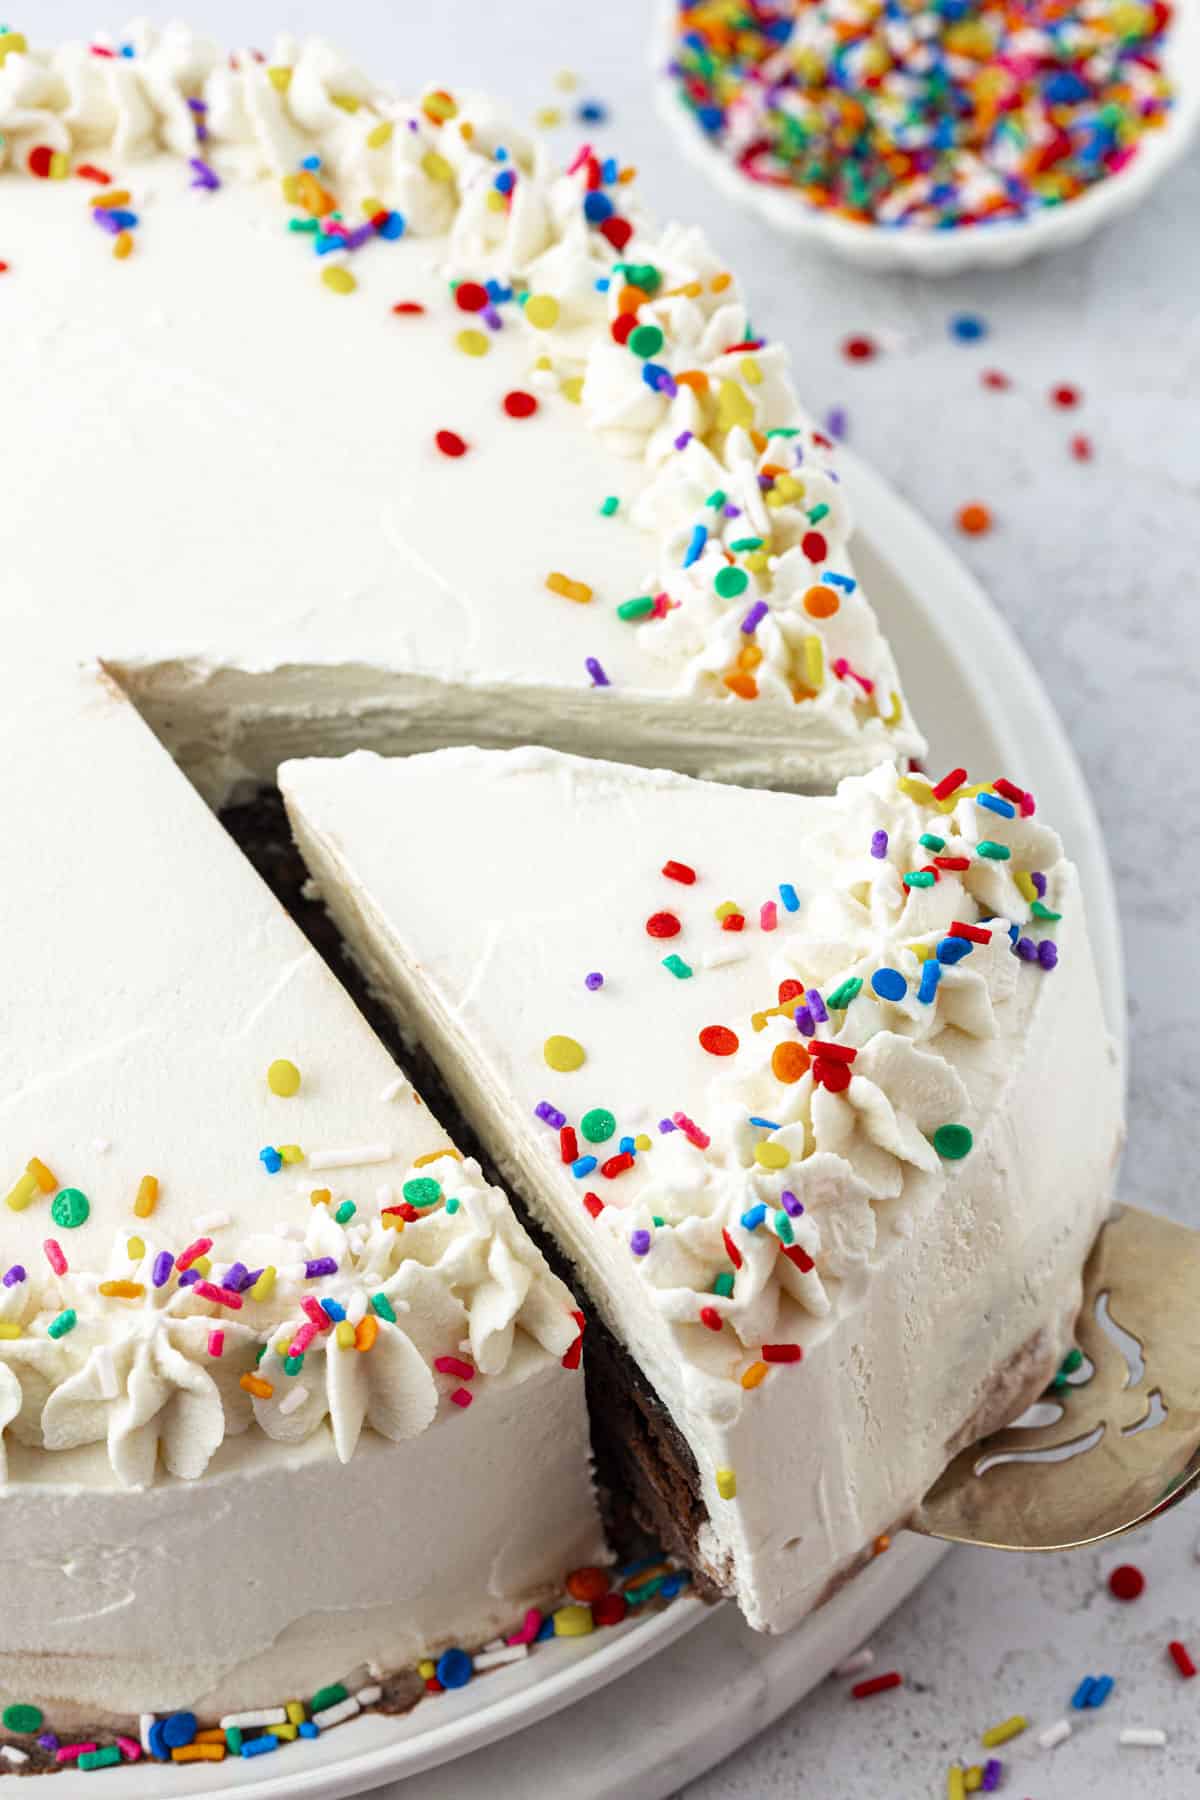
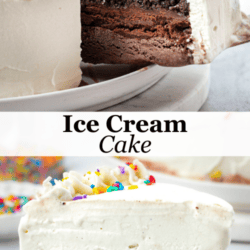
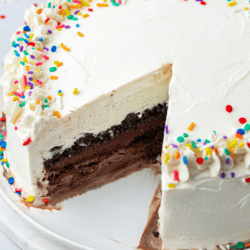
Celebrate with this Homemade Ice Cream Cake!
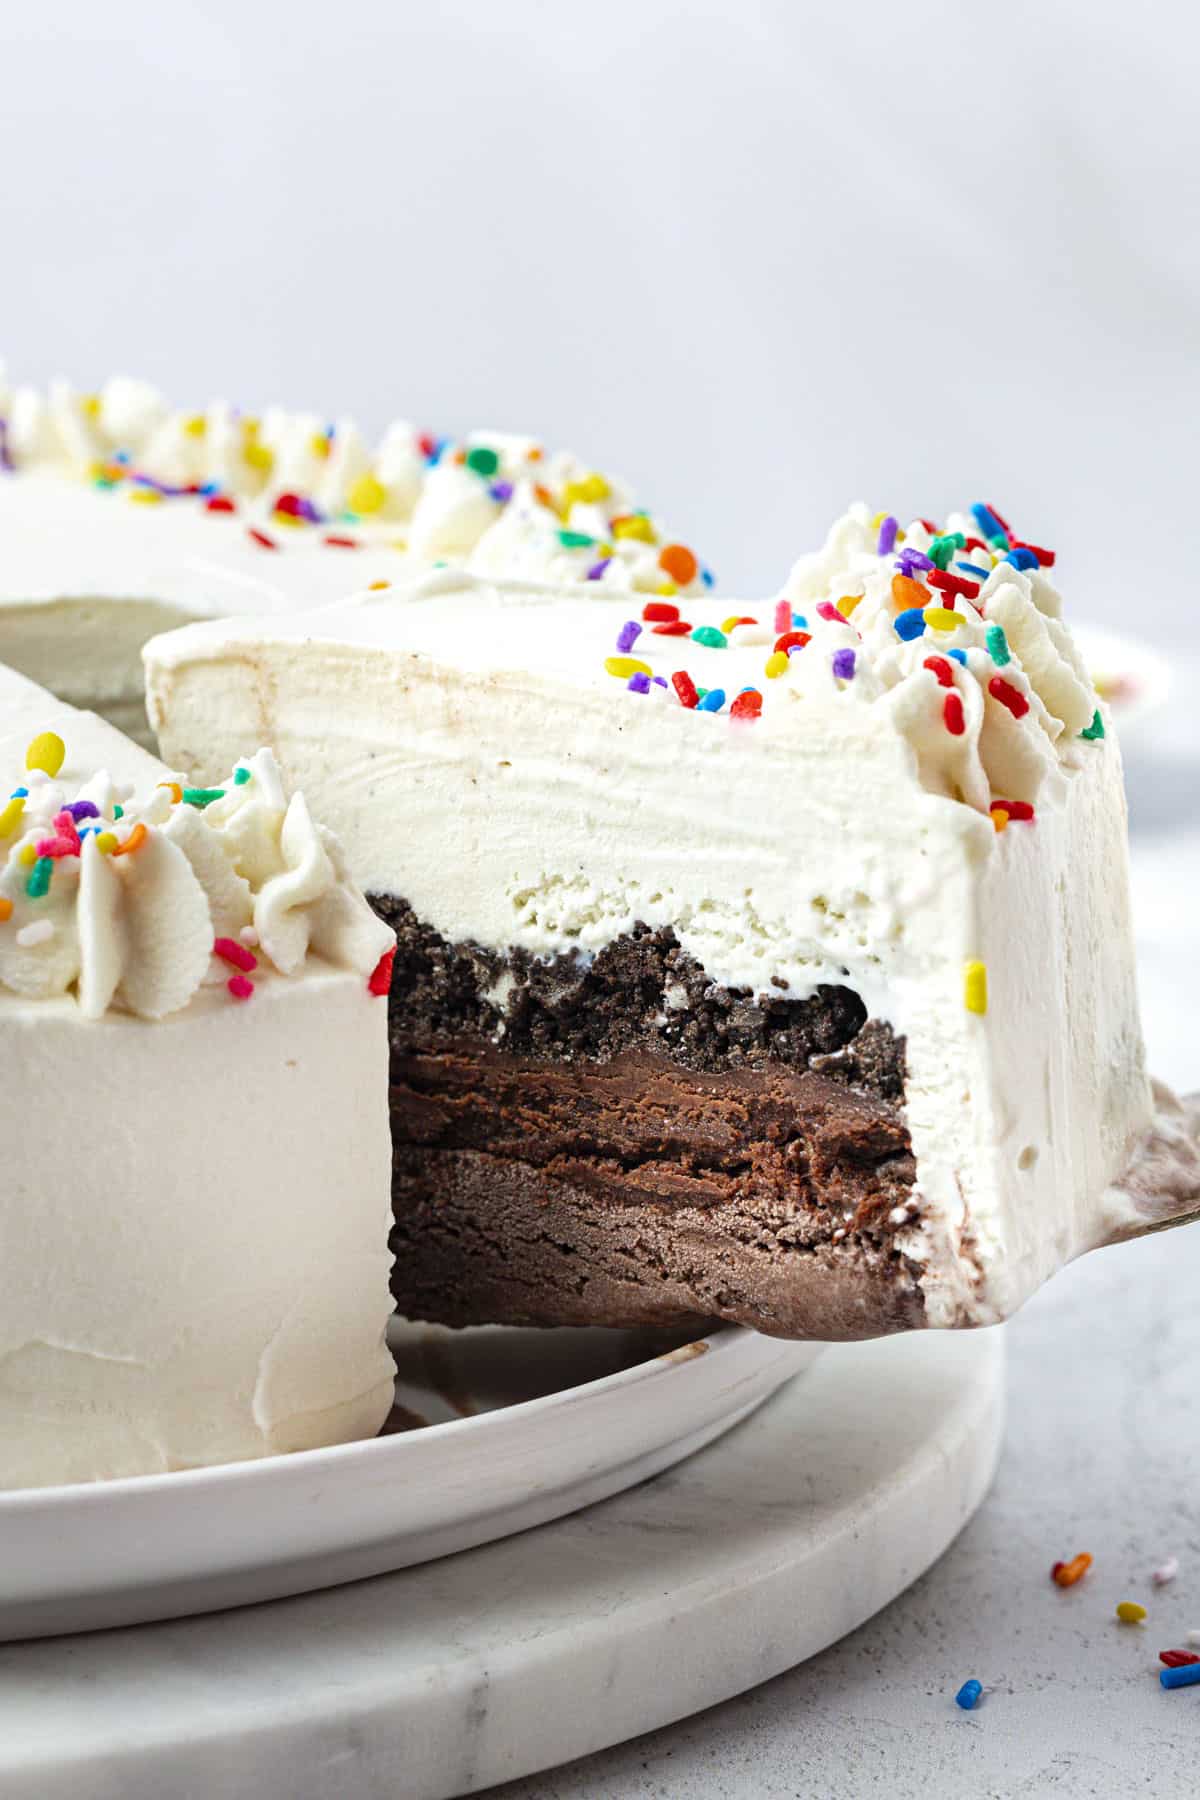
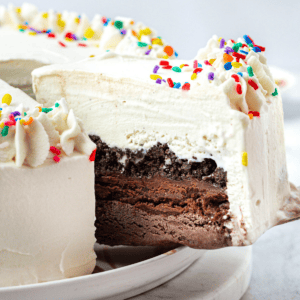
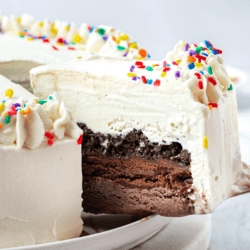
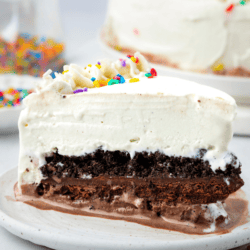
This ice cream cake recipe is made with layers of chocolate ice cream, chocolate fudge ganache, oreo crunch, vanilla ice cream, and finally, whipped cream and sprinkles. My recipe doesn’t have an actual cake layer, and for good reason. The cake layer easily gets soggy and can have texture issues once frozen. Instead, the combination of chocolate ganache and Oreo crunch delivers on taste and texture with smooth, rich chocolate and crunchy cookie bits.
Because I’ve been through all the trial and error making ice cream cakes, I’m going to guide you through the best ways to avoid common issues like melting layers, uneven layer distribution, cracking or breaking, and the dreaded freezer burn. It may sound intimidating, but don’t worry, I have made all the mistakes so you don’t have to! You can follow my 10 easy steps and be a pro the first time.
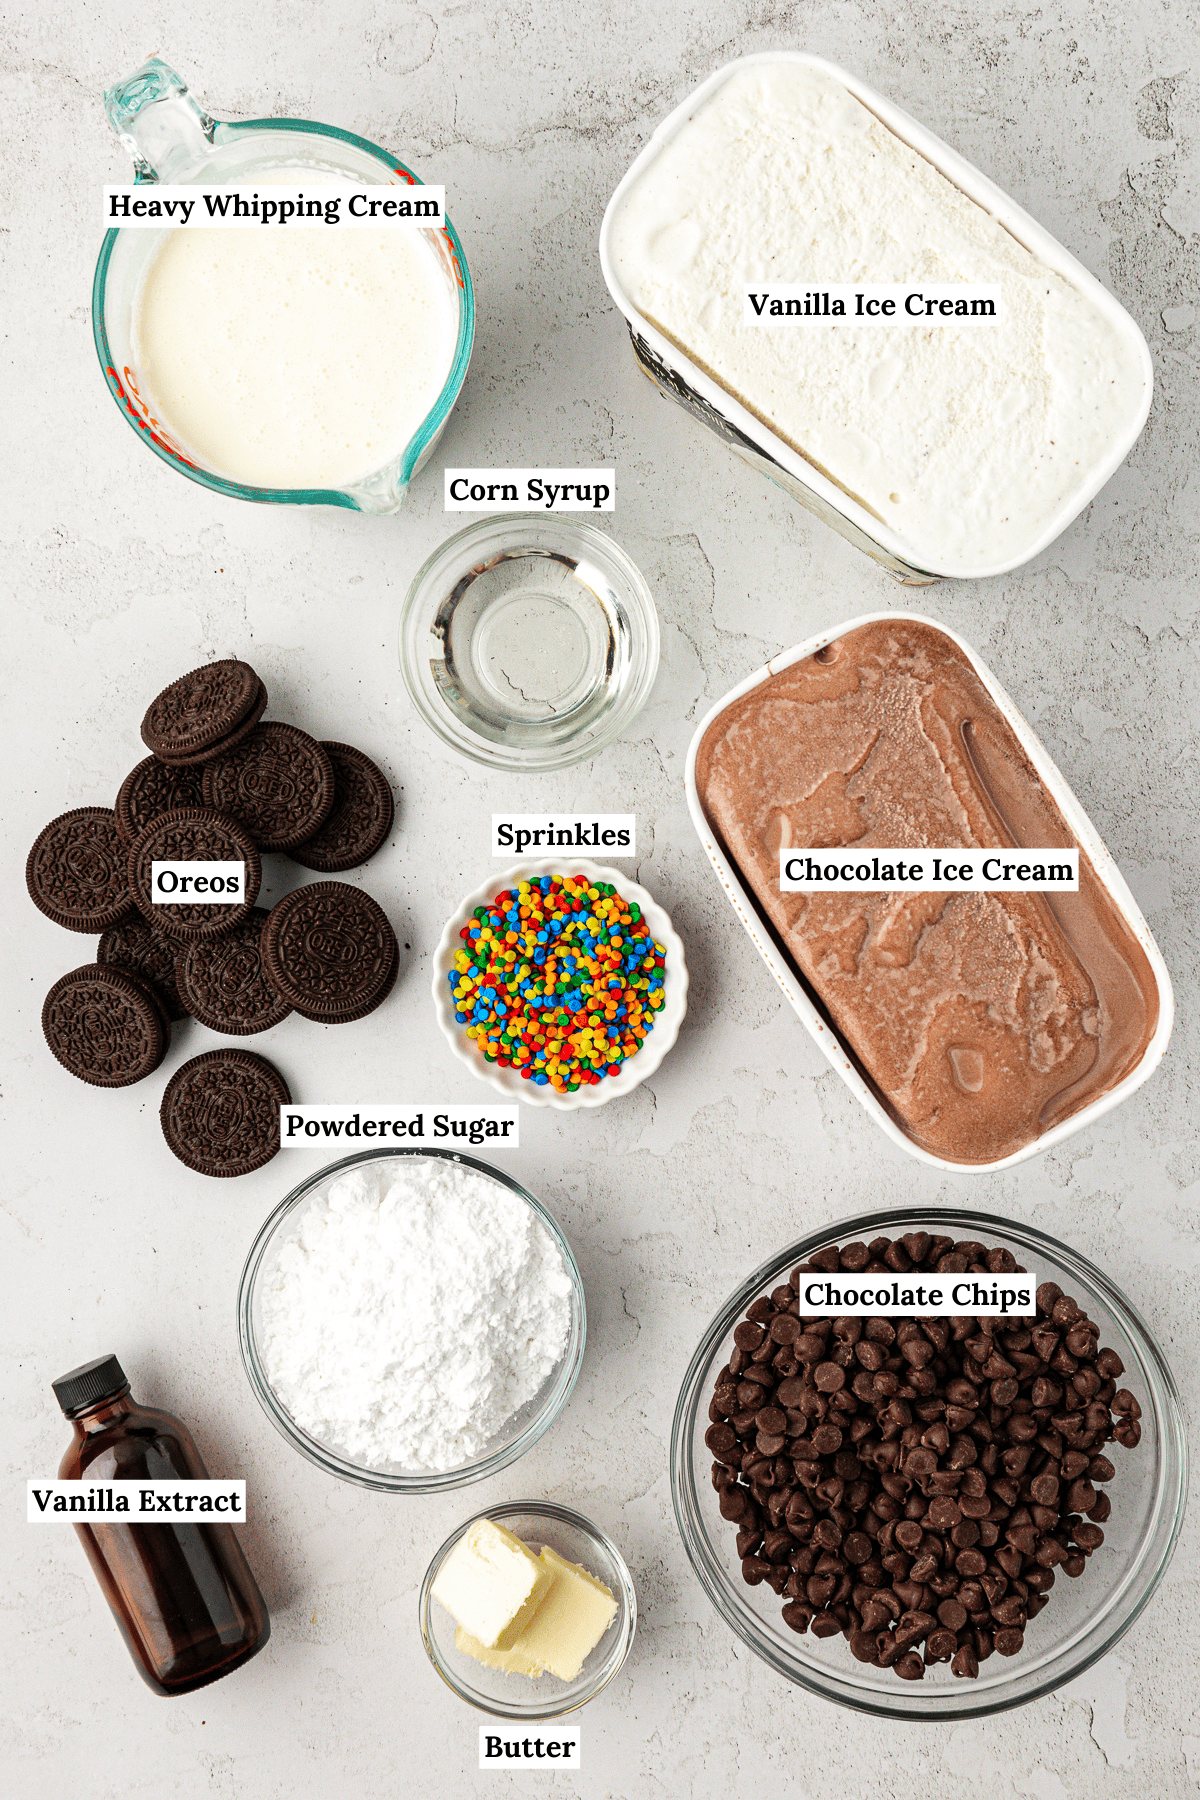
Ice Cream Cake Recipe Ingredients
I don’t know about you, but eating ice cream cake on a hot summer day takes me right back to childhood! It was always a favorite birthday cake, too! Get the full recipe with measurements and step-by-step instructions in the recipe card below. Here’s what you’ll need to make this Oreo ice cream cake:
Layer 1 – Chocolate Ice Cream
- Chocolate ice cream: You can use store-bought ice cream or make your own.
Layer 2 – Chocolate Fudge Ganache
- Heavy whipping cream
- Semi-sweet chocolate chips: use semi-sweet for the correct texture
- Light corn syrup: helps prevent the ganache from freezing into a solid
Layer 3 – Chocolate Crunch
- Oreo cookies: with the cream, crushed into crumbs
- Unsalted butter: melted
Layer 4 – Vanilla Ice Cream
- Vanilla ice cream
Topping
We frost the cake with whipped cream and then top it with sprinkles. For this you’ll need:
- Heavy whipping cream
- Powdered sugar
- Vanilla extract
- Sprinkles
Equipment
- 8 or 9 inch springform pan
- Plastic wrap
- Piping Bag
- Star Tip (like tip 844, Wilton 1M, 2D)
How to Make an Ice Cream Cake
Layers of ice cream, hot fudge sauce, and crunchy cookies come together to make an irresistible ice cream cake that is always a crowd-pleaser. Follow these 10 simple steps:
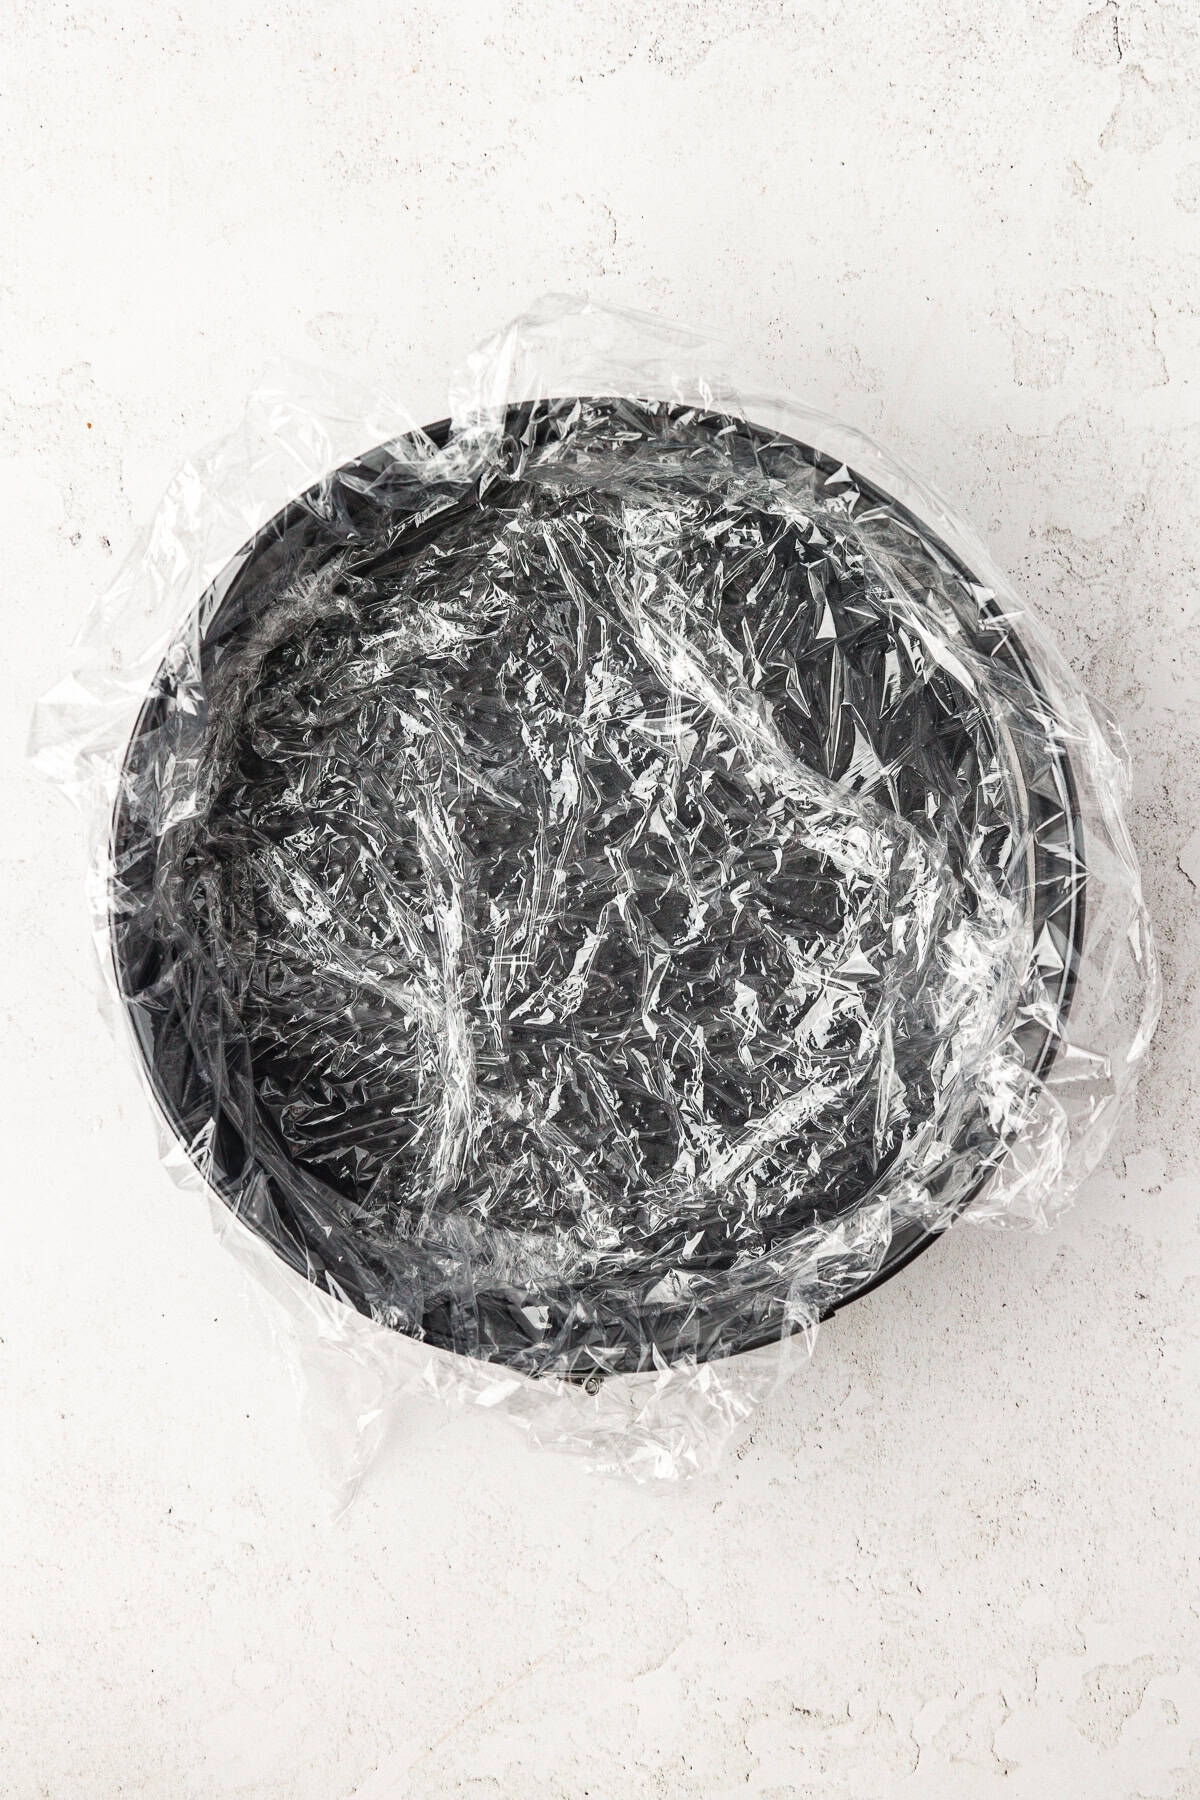
- Prepare the Springform Pan: Line the bottom and sides of an 8 or 9-inch springform pan with plastic wrap. This will help when removing the ice cream cake.
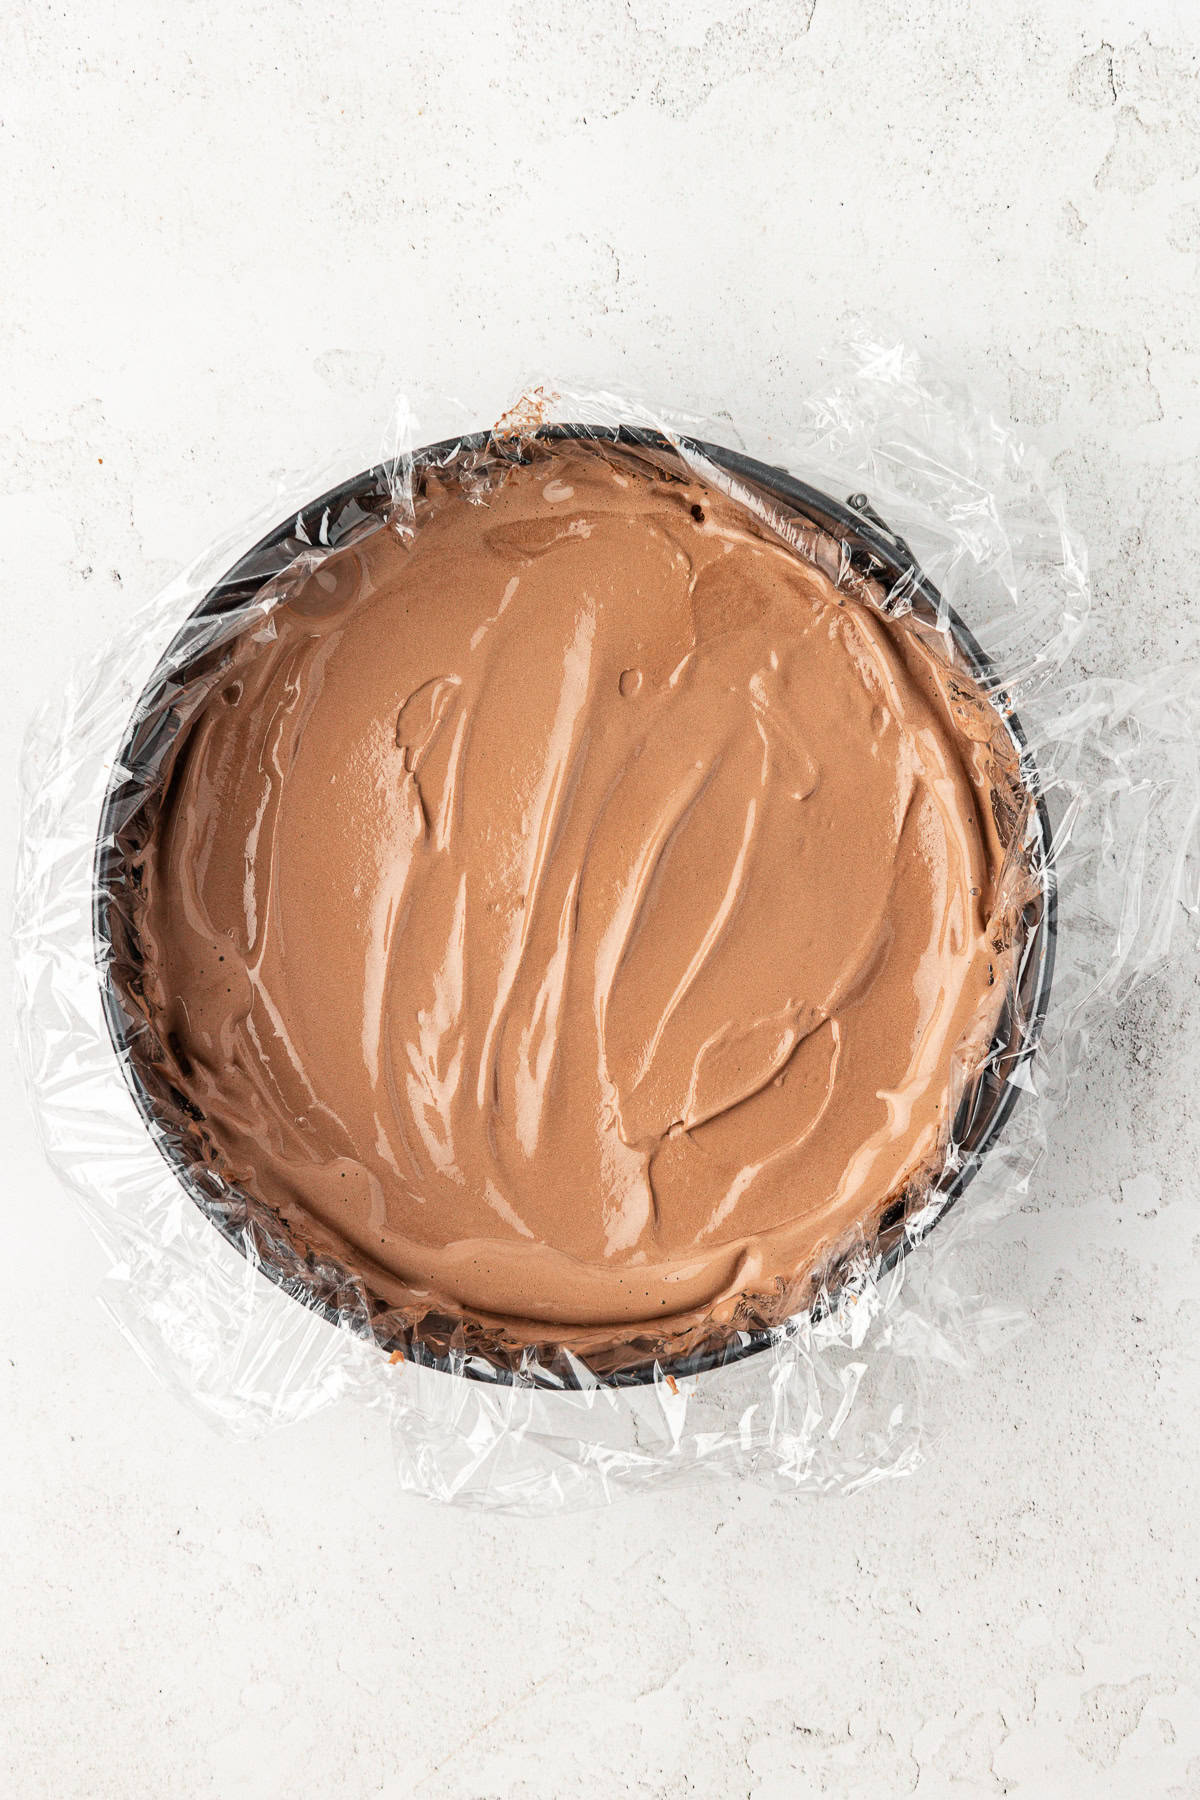
- Layer 1 – Chocolate Ice Cream: Allow the chocolate ice cream to soften slightly at room temperature for about 10-15 minutes. Once softened, spread it into the bottom of the prepared springform pan in an even layer. Smooth the surface with a spatula. Place the pan in the freezer to firm up for 30-60 minutes while you prepare the next layer.
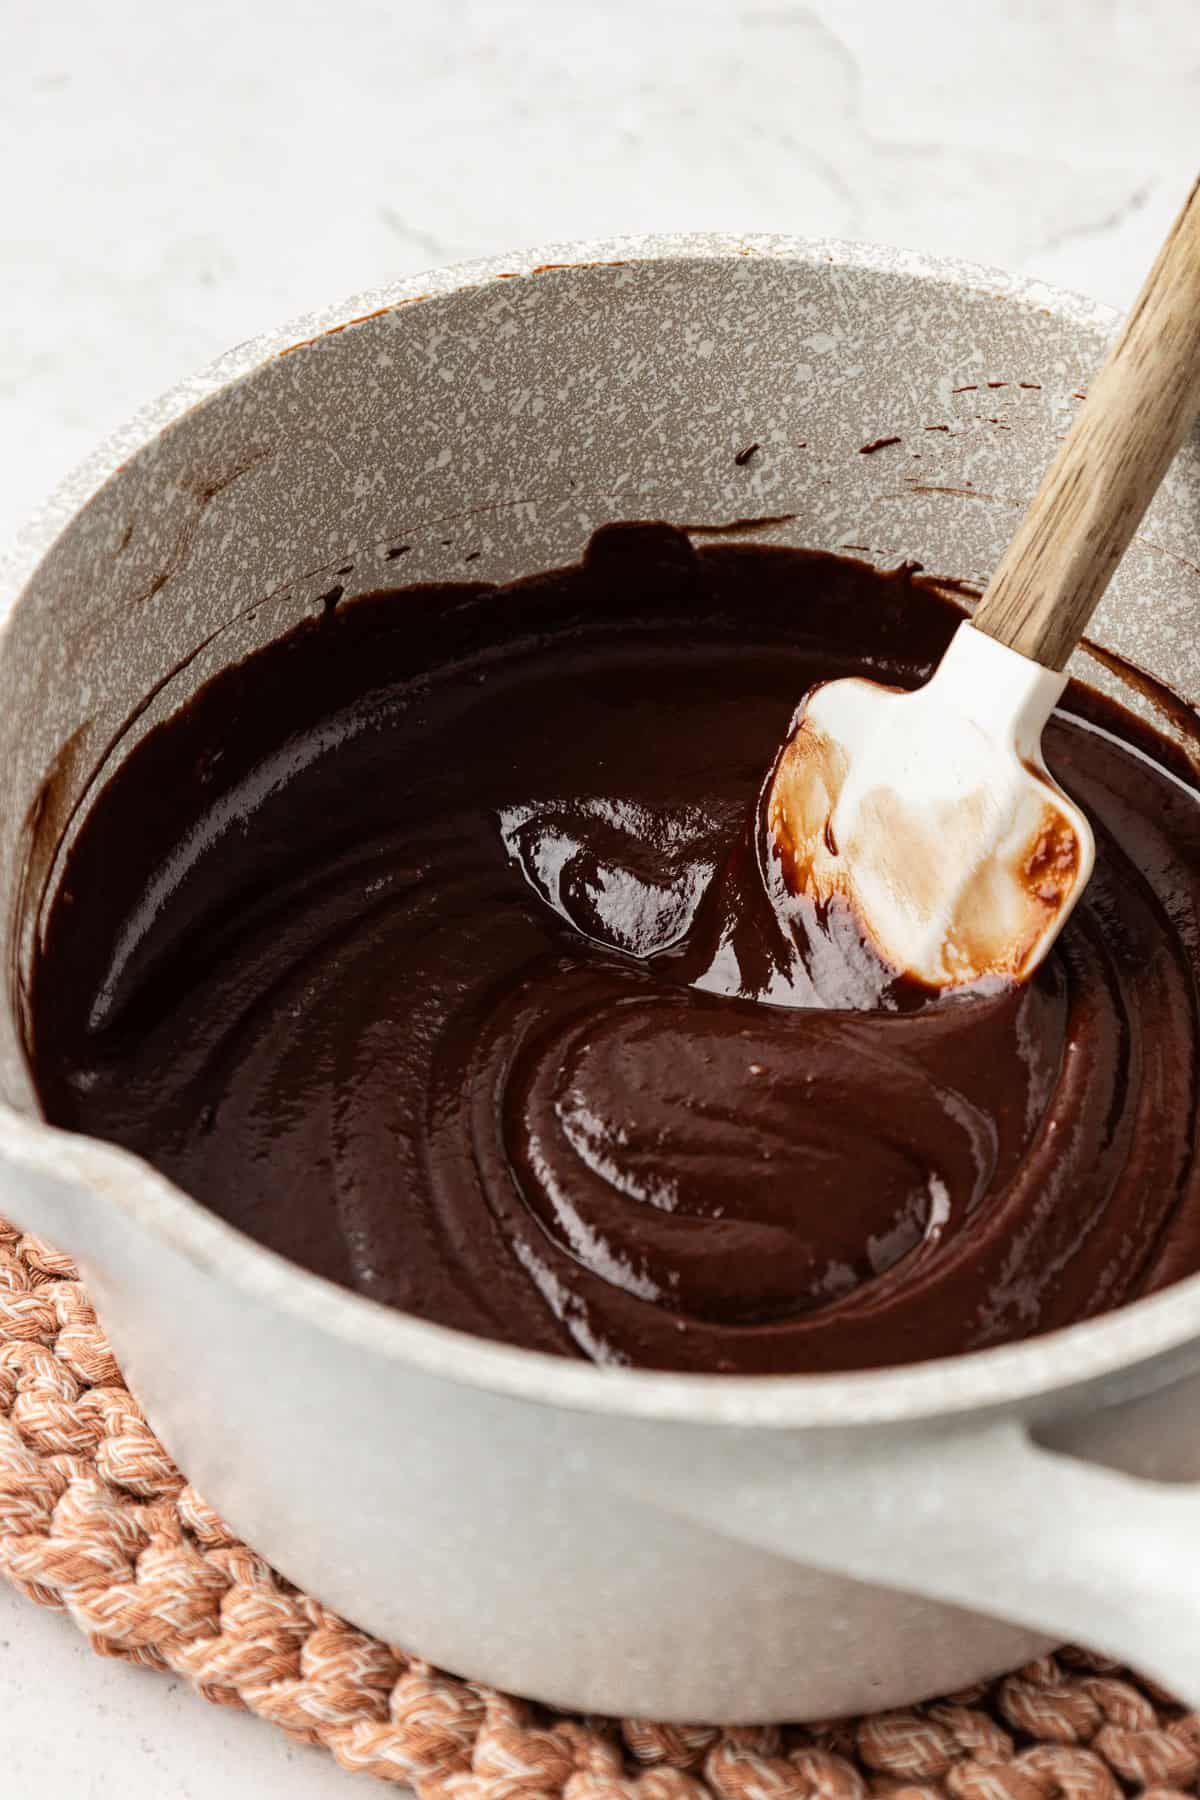
- Layer 2 – Chocolate Fudge Ganache: In a small saucepan, heat the heavy whipping cream over medium heat until it just begins to simmer. Remove from heat and add the semi-sweet chocolate chips and light corn syrup. Let it sit for a minute, then stir until smooth and well combined. Allow the ganache to cool to room temperature. You want it to be thick. While it cools, prepare the chocolate crunch layer.
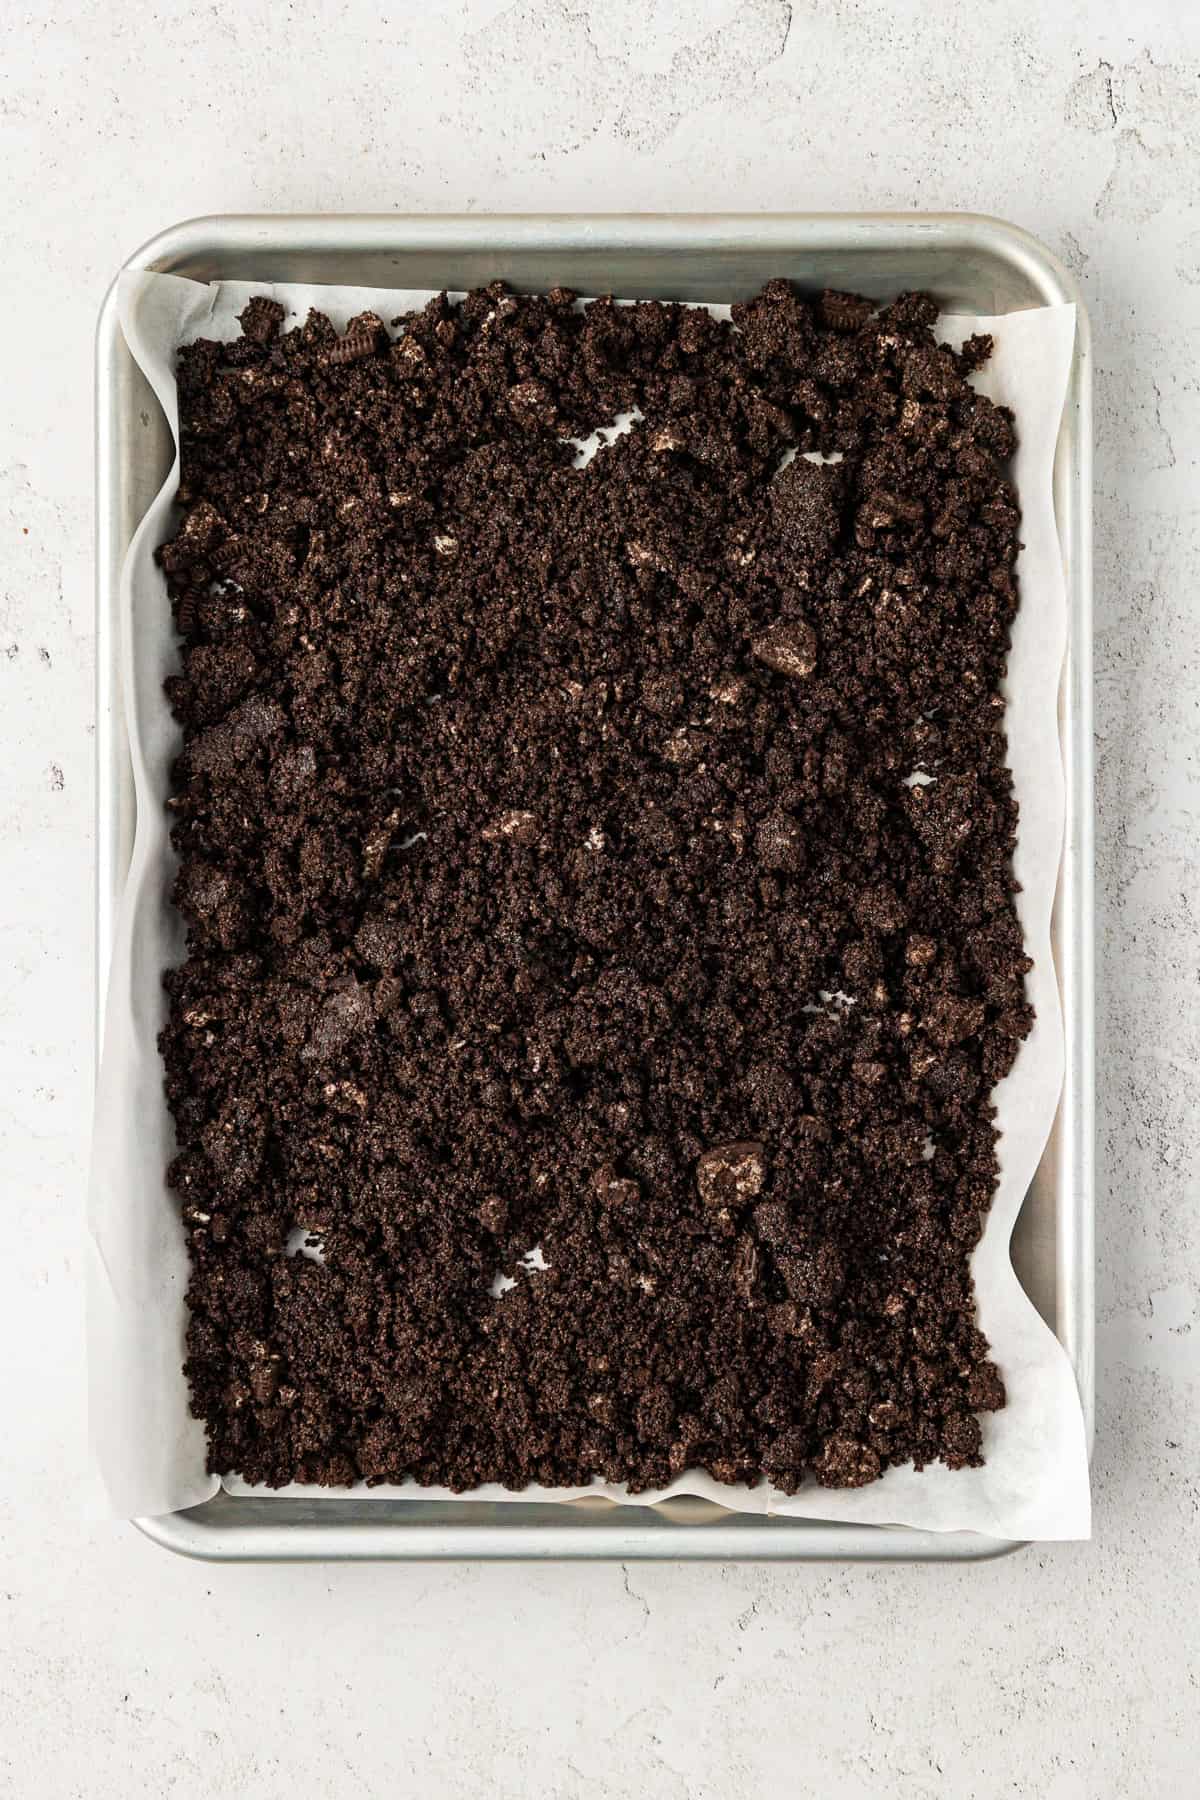
- Layer 3 – Chocolate Crunch: In a bowl, combine the crushed Oreo cookies and melted butter until well-mixed. Spread the mixture evenly onto a baking sheet lined with a silicone mat or parchment paper. Bake at 350ºF (175ºC) for 8-10 minutes until the crumbs are slightly toasted. Remove from the oven and let them cool completely.
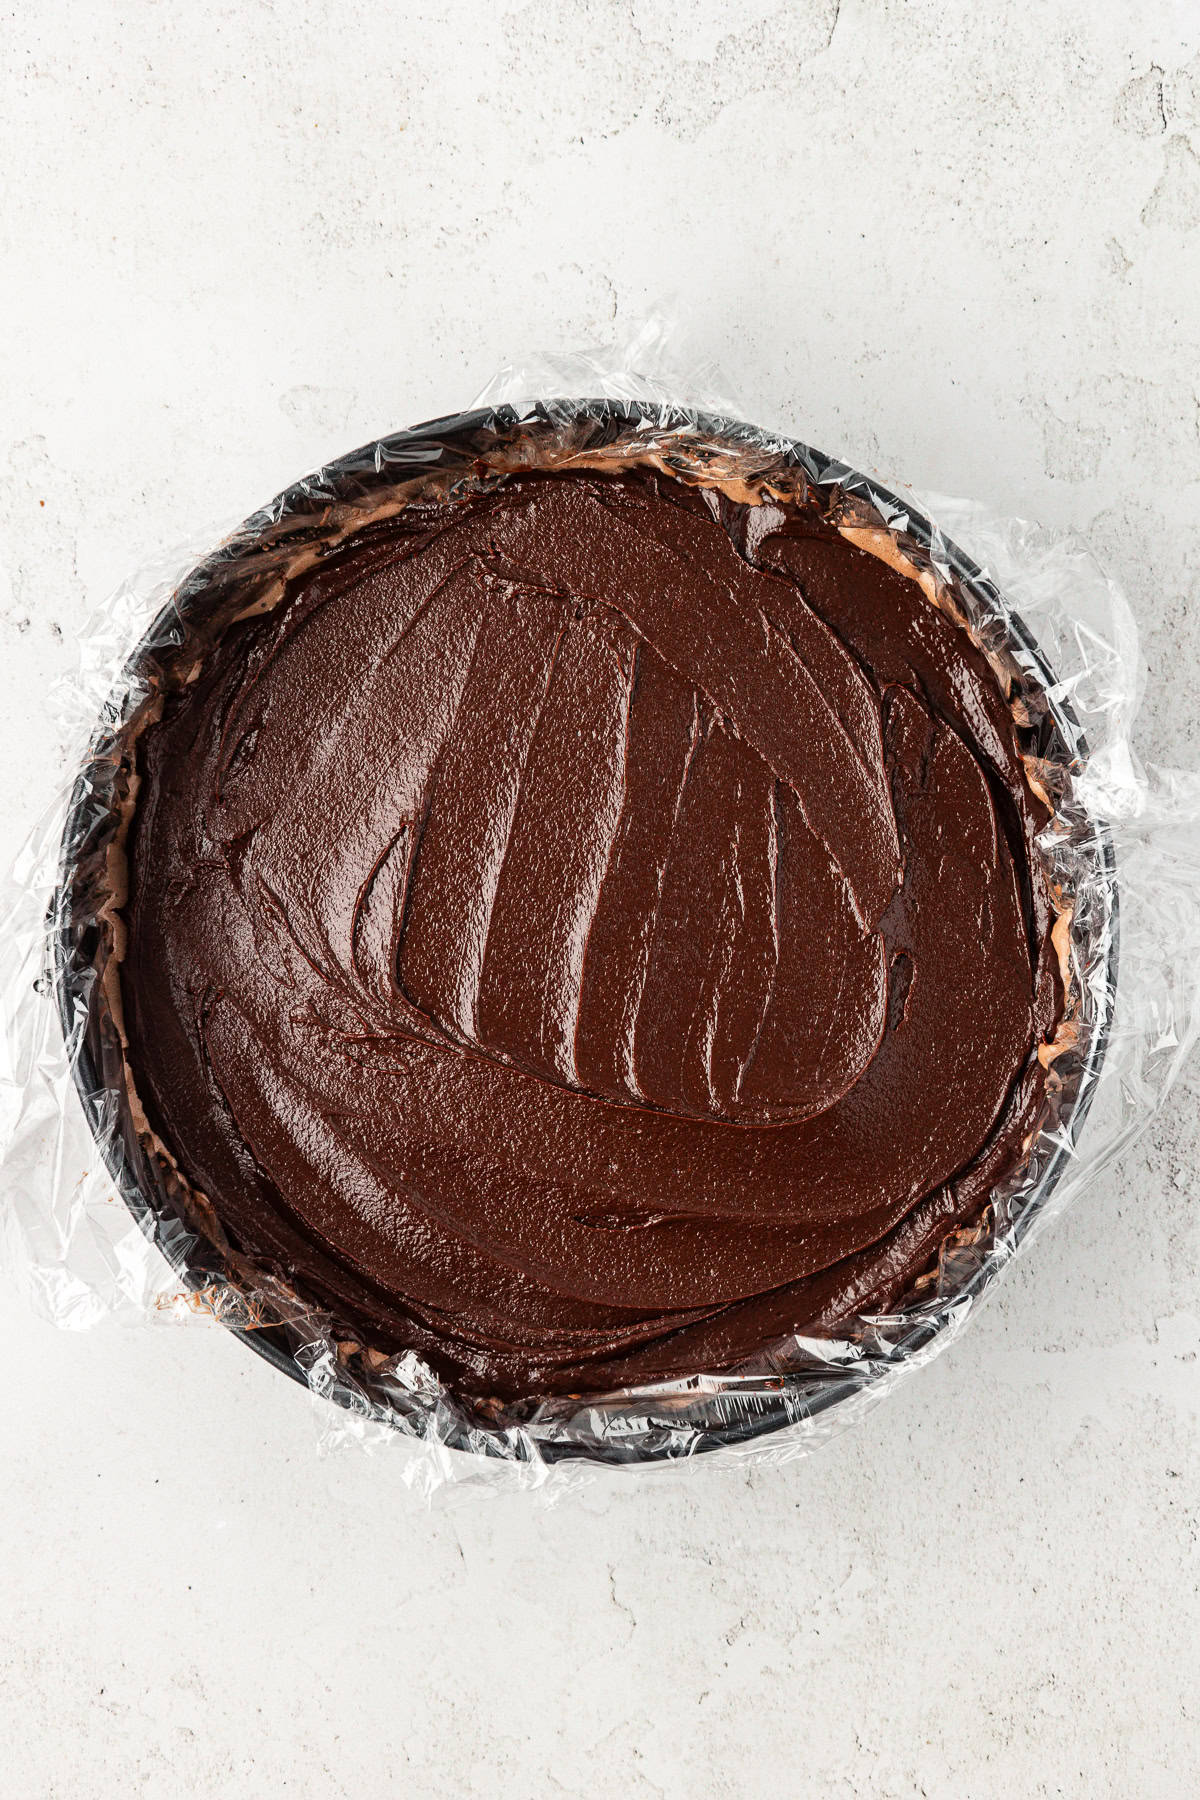
- Finish Layer 2 – Chocolate Fudge Ganache: Pour/Spread the ganache over the chocolate ice cream layer in the springform pan, spreading it evenly with a spatula.
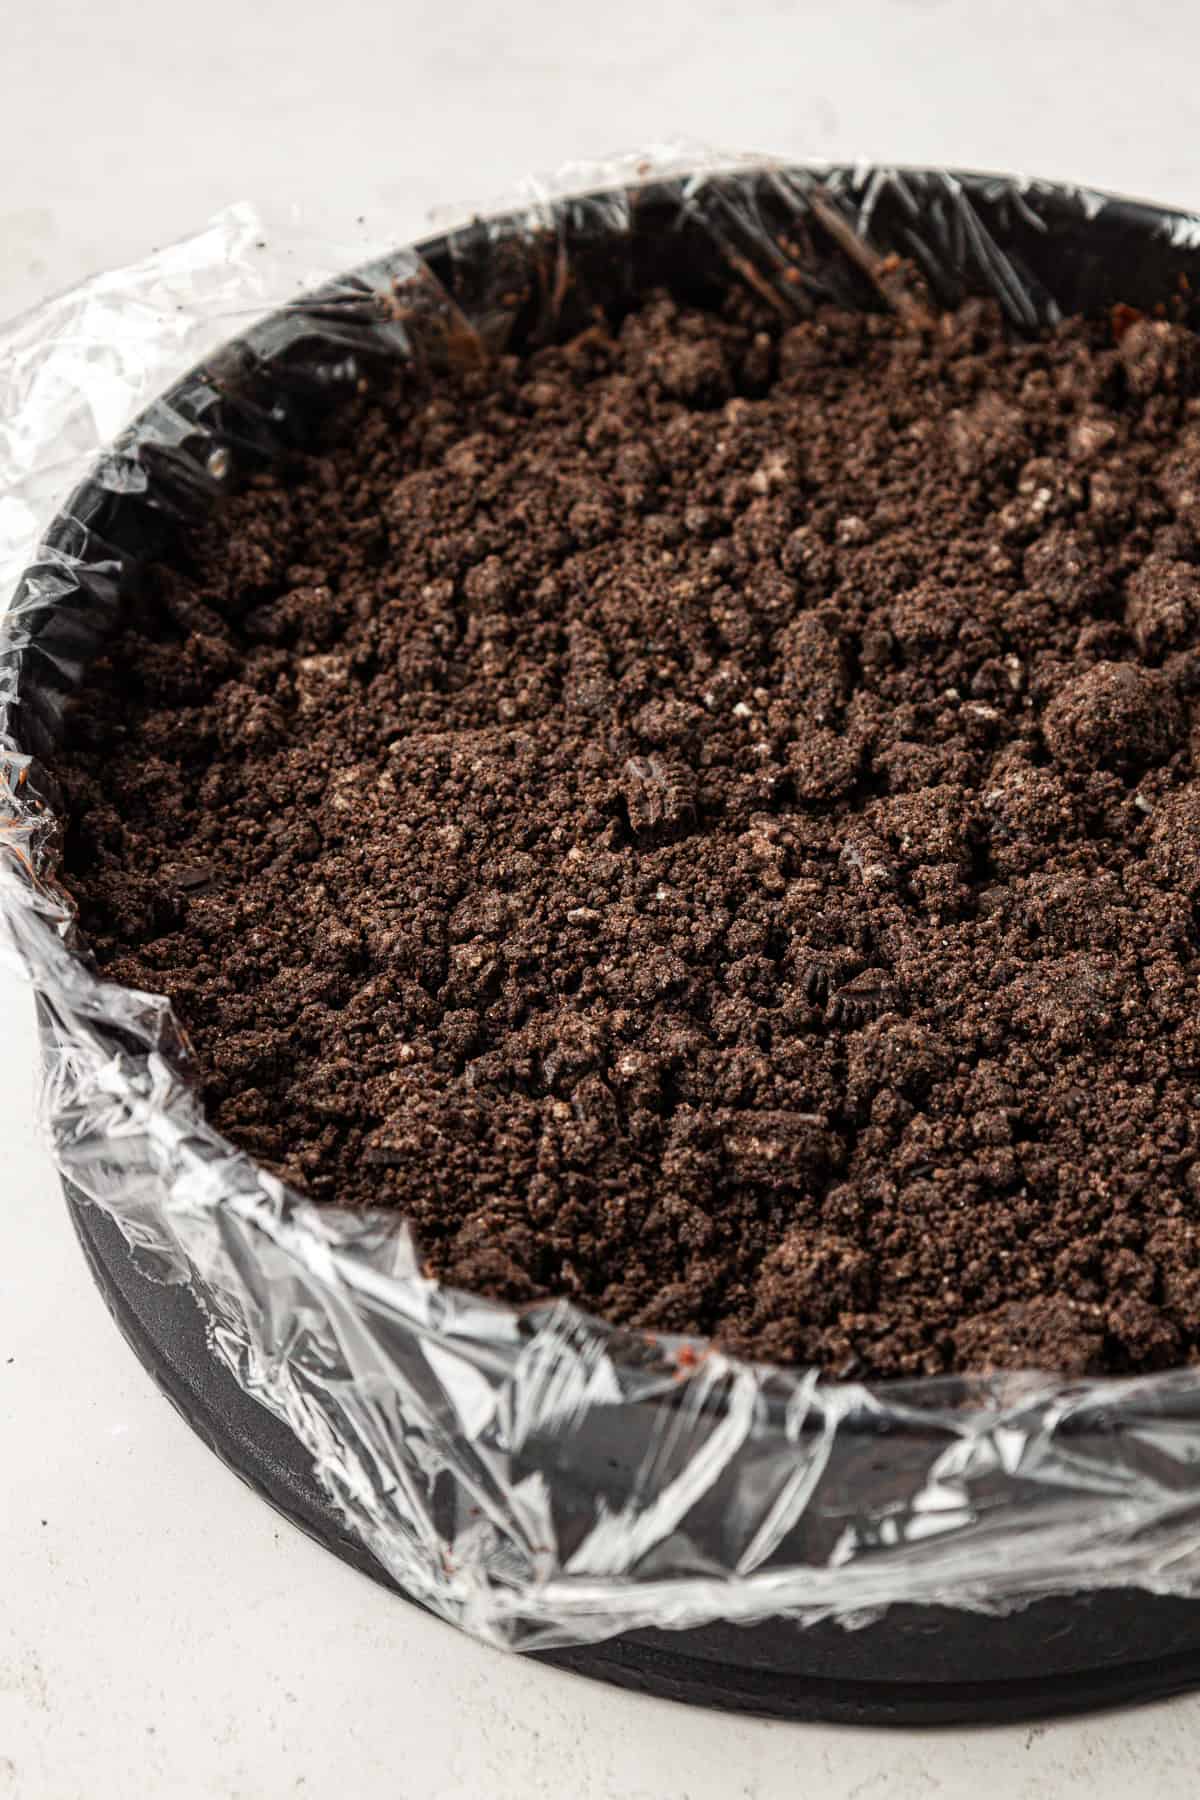
- Finish Layer 3 – Chocolate Crunch: Sprinkle the chocolate crunch layer evenly over the chocolate fudge layer. Cover and return to the freezer for 2 hours.
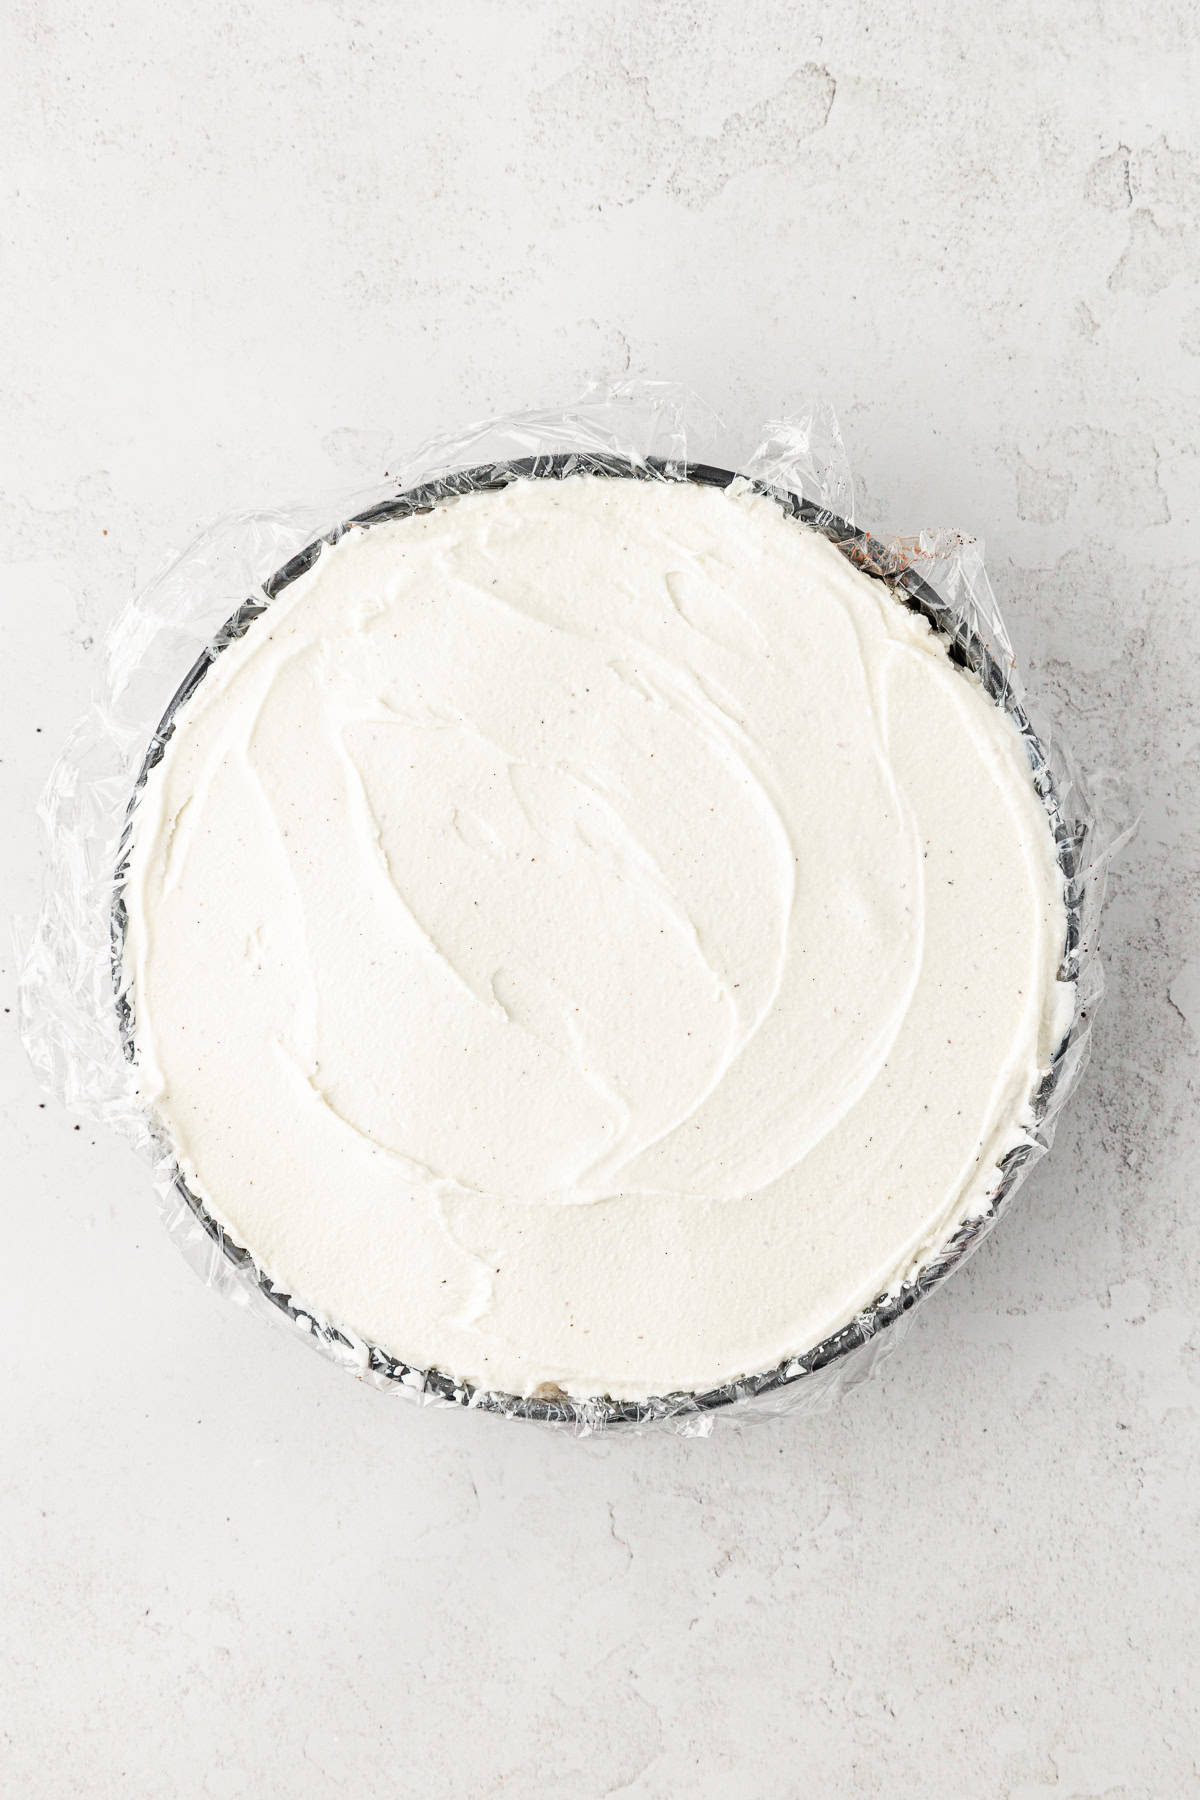
- Layer 4 – Vanilla Ice Cream: Allow the vanilla ice cream to soften slightly at room temperature for about 10-15 minutes. Spread the softened vanilla ice cream evenly over the chocolate crunch layer. Smooth the surface with a spatula. Place the pan back in the freezer and allow the cake to freeze completely, preferably for at least 4-6 hours or overnight.
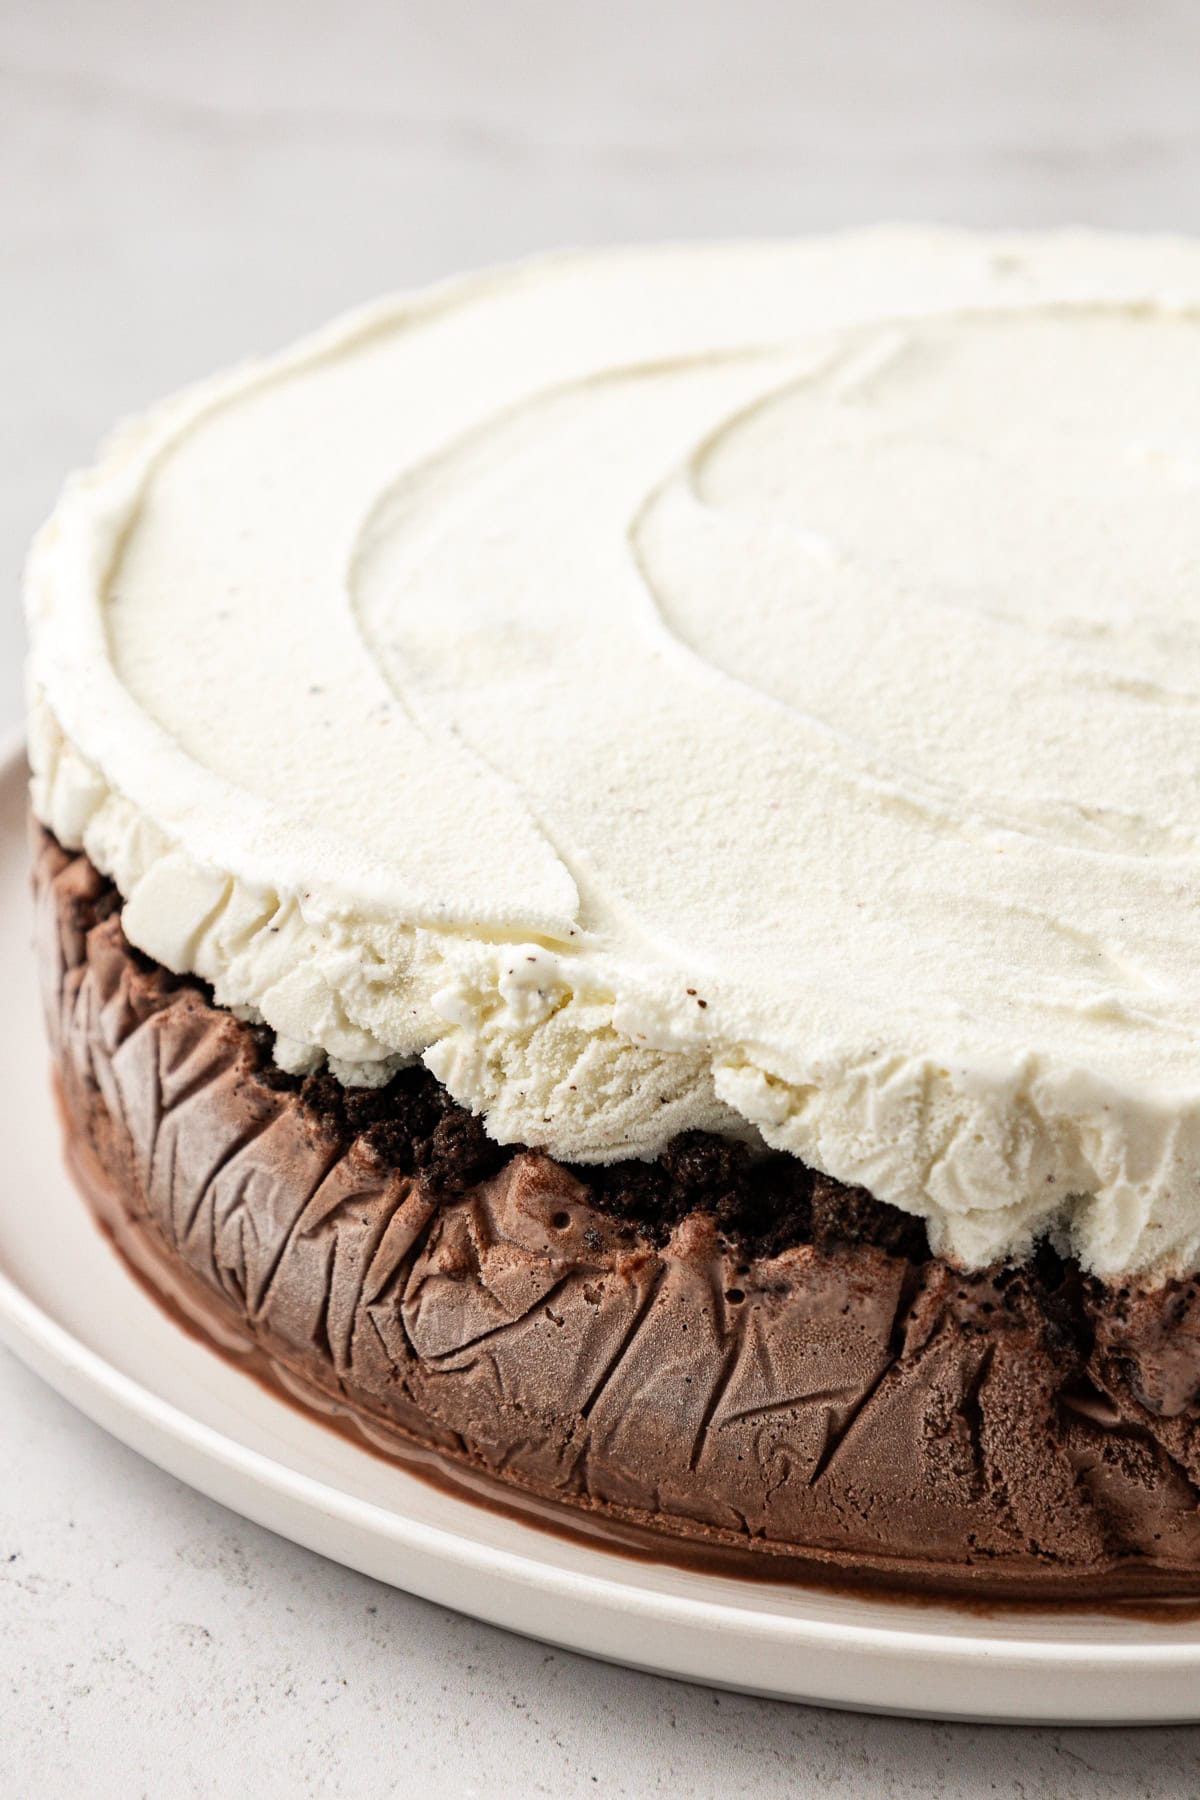
- Undo the springform pan and use the plastic wrap to gently lift the cake from the pan and transfer it onto a cardboard cake circle or serving plate. Return it to the freezer while you prepare the whipped topping.
- Whipped Topping: Place a metal or glass mixing bowl and beaters in the freezer for 15 minutes. Remove the bowl from the freezer. Add the heavy cream, powdered sugar, and vanilla extract, and beat with an electric mixer for 4-5 minutes on high speed, or until stiff peaks form / it’s scoopable with a spoon and holds its shape. Frost the entire cake (sides and top) with the whipped cream frosting using a spatula. Use a piping bag and star tip to decorate the edges of the cake with whipped cream if desired. Decorate with sprinkles as desired. Return the cake to the freezer for 1-2 hours, or longer if desired.
- Serve and enjoy! When ready to serve, let it sit at room temperature for a few minutes to slightly soften for easier slicing.

Tips for How to Make Ice Cream Cake
Throughout my testing and tweaking while crafting this recipe, I have perfected some tips and tricks to make this a success every single time. Follow these tips for best results:
- Prep your kitchen and freezer ahead of time: If you’re doing a lot of baking or anything else to make your kitchen warm, don’t make this cake at the same time. You’ll want your kitchen as cold as possible. Also, take a minute to make sure you have room in your freezer as you’ll be using it throughout the process.
- Line the pan generously: If you leave some extra plastic wrap on the sides of the springform pan when lining it, it will be easier to lift out of the pan.
- Leave time to soften ice cream: When you’re doing the ice cream layers, you’ll need it softened enough to spread it into an even layer, so be sure to leave time for it to soften at room temp for 10-15 minutes.
- Let the chocolate crunch cool completely: Don’t be tempted to add the chocolate crunch layer to the cake before it’s fully cooled. You don’t want to melt your other layers!
- Cut clean slices: When you’re ready to serve, let the cake sit at room temp for a few minutes for easier slicing, and then run your knife under hot water to make nice clean slices.
- Wrap well for storing: When storing the cake, wrap it tightly and make sure there are no open holes to avoid freezer burn.
Easy Ice Cream Cake Recipe Variations
Here are some ideas for changing up this recipe with different flavor combinations:
- Use different flavors of ice cream: You can make this with any of your favorite ice cream flavors, or even make your own ice cream at home. Try my birthday cake ice cream, cookie monster ice cream, or strawberry cheesecake ice cream.
- Add a cake layer: If you really want an actual cake layer, you can add one by using a 9-inch layer of cake (any flavor you want) as the bottom layer. Top that layer with the chocolate fudge ganache and so on.
- Swap the hot fudge and oreos: If you want to try out different flavors, you could swap the hot fudge ganache and crushed oreos for other cookies and sauces. Here are some ideas:
- Crumbled chocolate chip cookies
- Crushed Reese’s peanut butter cups
- Crumbled peanut butter Cookies
- Crushed/chopped brownies
- Crumbled thin mint cookies
- Butterscotch sauce
- Caramel or salted caramel sauce
How to Store DIY Ice Cream Cake
Store the finished ice cream cake in the freezer tightly wrapped with plastic wrap for up to 3 months. After that, ice crystals may begin to form and change the consistency of the cake. Before you serve, take the frozen cake out of the freezer and thaw at room temperature for 15-30 minutes so you can slice and eat it more easily.
Ice Cream Cake Recipe FAQs
The crunchy layer in ice cream cakes is a combination of Oreo or chocolate cookie crumbs plus chocolate fudge ganache which makes that irresistible layer, which is my personal favorite part!
We use whipped cream for the top of the ice cream layer because it freezes really well. Regular icing/frosting may crack or change consistency once frozen.
More Ice Cream Recipes
Tap stars to rate!
Easy Ice Cream Cake Recipe
Equipment
- Plastic wrap
- Star Tip (like Ateco tip 844, Wilton 1M, 2D)
Ingredients
Layer 1 – Chocolate Ice Cream
- 48 oz chocolate ice cream
Layer 2 – Chocolate Fudge Ganache
- ½ cup (118ml) heavy whipping cream
- 2 cups (340g) semi-sweet chocolate chips, must be semi-sweet for the correct texture
- 2 Tbsp light corn syrup, helps prevent the ganache from freezing into a solid
Layer 3 – Chocolate Crunch
- 20 oreo cookies, with the cream, crushed into crumbs
- 3 Tbsp (43g) unsalted butter, melted
Layer 4 – Vanilla Ice Cream
- 48 oz vanilla ice cream
Topping – Frost cake with whipped cream
- 2 cups (473ml) cold heavy whipping cream, 1 pint
- 1 cup (113g) powdered sugar
- 1 tsp vanilla extract
- Sprinkles, for decorating
Video
Instructions
- Prepare the Springform Pan: Line the bottom and sides of an 8 or 9-inch springform pan with plastic wrap. This will help when removing the ice cream cake.
- Layer 1 – Chocolate Ice Cream: Allow the chocolate ice cream to soften slightly at room temperature for about 10-15 minutes. Once softened, spread it evenly into the bottom of the prepared springform pan. Smooth the surface with a spatula. Place the pan in the freezer to firm up for 30-60 minutes while you prepare the next layer.48 oz chocolate ice cream
- Layer 2 – Chocolate Fudge Ganache: In a small saucepan, heat the heavy whipping cream over medium heat until it just begins to simmer. Remove from heat and add the semi-sweet chocolate chips and light corn syrup. Let it sit for a minute, then stir until smooth and well combined. Allow the ganache to cool to room temperature. You want it to be thick. While it cools, prepare the chocolate crunch layer.½ cup (118ml) heavy whipping cream, 2 cups (340g) semi-sweet chocolate chips, 2 Tbsp light corn syrup
- Layer 3 – Chocolate Crunch: In a bowl, combine the crushed Oreo cookies and melted butter until well mixed. Spread the mixture evenly onto a baking sheet lined with a silicone mat or parchment paper. Bake at 350ºF (175ºC) for 8-10 minutes until the crumbs are slightly toasted. Remove from the oven and let them cool completely.20 oreo cookies, 3 Tbsp (43g) unsalted butter
- Finish Layer 2 – Chocolate Fudge Ganache: Pour/Spread the ganache over the chocolate ice cream layer in the springform pan, spreading it evenly with a spatula.
- Finish Layer 3 – Chocolate Crunch: Sprinkle the chocolate crunch layer evenly over the chocolate fudge layer. Cover and return to the freezer for 2 hours.
- Layer 4 – Vanilla Ice Cream: Allow the vanilla ice cream to soften slightly at room temperature for about 10-15 minutes. Spread the softened vanilla ice cream evenly over the chocolate crunch layer. Smooth the surface with a spatula. Place the pan back in the freezer and allow the cake to freeze completely, preferably for at least 4-6 hours or overnight.48 oz vanilla ice cream
- Undo the springform pan and use the plastic wrap to gently lift the cake from the pan and transfer it onto a cardboard cake circle or serving plate. Return it to the freezer while you prepare the whipped topping.
- Whipped Topping: Place a metal or glass mixing bowl and beaters in the freezer for 15 minutes. Remove the bowl from the freezer. Add the heavy cream, powdered sugar, and vanilla extract, beat with an electric mixer for 4-5 minutes on high speed, or until stiff peaks form / it’s scoop-able with a spoon and holds its shape. Frost the entire cake (sides and top) with the whipped cream frosting using a spatula. Use a piping bag and star tip to decorate the edges of the cake with whipped cream if desired. Decorate with sprinkles as desired. Return the cake to the freezer for 1-2 hours, or longer if desired.2 cups (473ml) cold heavy whipping cream, 1 cup (113g) powdered sugar, 1 tsp vanilla extract, Sprinkles
- When ready to serve, let it sit at room temperature for a few minutes to slightly soften for easier slicing.


This tastes just like the DQ cake–you could to so many different combinations of cookies and ice cream. I personally did not frost the cake with the whipped topping and thought it was just right!!
I would like to make this in a smaller 6 inch pan.
I just don’t need to make one this big. If the answer is yes, which I’m sure probably is. Do you have a recommendation to how many ounces of ice cream I would need of each flavor?
Thanking you in advance for your help.
I’m not 100% sure since I haven’t made it in a smaller pan myself, but maybe 2-3 cups of each flavor?
Tried this cake and followed each step carefully! We loved it!
There isn’t an issue when you freeze the whip cream? I guess I thought whip cream didn’t freeze well (I’d like to be wrong about this)!