
This post may contain affiliate links. Please read our disclosure policy.
Gluten-free sugar cookies that are just as good, if not better, than regular sugar cookies! As a baker who has been gluten free since 2006, I test and perfect each recipe until it’s share-worthy, and this gf sugar cookie recipe is a winner!
FINALLY!! A good GF cut out sugar cookie that tastes like the cookies mom made growing up.
-Abby

You Will Love These Gluten Free Cut Out Cookies
If you thought that being on a gluten-free diet meant saying good-bye to soft and chewy cut-out sugar cookies, this easy gluten-free sugar cookie recipe is here to save the day.
It has that signature sweet sugar cookie flavor, the irresistible soft texture, and they’re the perfect blank canvas for cutting into shapes and topping with colorful icing.
There’s no need to buy any fancy flours or hard-to-find gums or starches, either. Just pick up a bag of gluten-free all-purpose flour at any grocery store, along with all the standard sugar cookie ingredients, and you’re good to go! My favorite gluten free all-purpose flour is King Arthur’s Gluten Free Measure for Measure Flour.
For more classic gluten-free recipes, try my Gluten Free Blueberry Muffins, Gluten Free Chocolate Chip Cookies, and Gluten-Free Chocolate Cupcakes too!

What You’ll Need for Gluten Free Sugar Cookie
Scroll down to the recipe card below this post for ingredient quantities and full instructions.
Gluten Free Sugar Cookies
- Gluten-free all-purpose flour – Do not use a single gluten-free flour like almond flour or coconut flour for this recipe; it won’t work!
- Baking powder
- Salt
- Unsalted butter – Let this soften to room temperature.
- Granulated sugar
- Egg – The egg should be at room temperature, too.
- Vanilla extract
- Almond extract – Almond extract is key to that traditional sugar cookie flavor.
Buttercream Frosting for Gluten-Free Sugar Cookies
- Unsalted butter – This butter should also be softened so it can be whipped into a creamy frosting.
- Powdered sugar
- Vanilla extract
- Almond extract
- Milk – Heavy cream is fine, too.
- Gel food coloring – Gel food coloring will help you achieve vivid hues without introducing a lot of extra liquid into the frosting.
Royal Icing for Gluten-Free Sugar Cookies
- Powdered sugar – Sift this to keep lumps out of the icing.
- Milk or warm water
- Corn syrup – Use light corn syrup for this recipe.
- Vanilla or almond extract
- Gel food coloring
What Flour Is Best for Gluten Free Sugar Cookie?
I recommend King Arthur’s Gluten-Free Measure-for-Measure Flour, which is what I use in all of my baking. It mixes, bakes, and tastes just like traditional all-purpose flour, so there are no surprises!
How to make Gluten Free Sugar Cookies
Once you make the cookies, choose one of the icing options to top them—don’t make both unless you double the cookie recipe!
Make the Cookies
- Mix the dry ingredients. In a large bowl, whisk together the gluten-free flour, baking powder, and salt.
- Mix the wet ingredients. In another mixing bowl, use an electric mixer to cream the butter and sugar for 90 seconds. Add the egg and extracts, then beat for 1 minute more.

- Combine the wet and dry ingredients. Add the flour in three portions, mixing just until it’s incorporated. The dough will be crumbly, but that’s okay; use your hands to knead it together for 20 to 30 seconds.
- Chill. Divide the dough into two portions and pat them into discs. Wrap each in plastic wrap and refrigerate for at least an hour, or up to two days.
- Roll out the dough. Preheat your oven to 350ºF and take one disc of dough out of the refrigerator. On a silicone baking mat or lightly floured surface, roll the dough out to 1/4-inch thick.

- Cut out the cookies. Cut the cookies with cookie cutters, then pull away the scraps and use a spatula to transfer the cut cookies to a baking sheet lined with a silicone baking mat. (You can pat together the scraps and roll them out to cut again, but if they feel warm, you should refrigerate them first or the cookies you cut from it will spread.)
- Bake. Bake the cookies for 9 to 10 minutes, rotating the sheet halfway through the cooking time if your oven tends to cook unevenly. The cookies will still be pale when they’re done baking, but keep in mind that they’ll continue to bake from the residual heat on the baking sheet.

- Cool. Let the cookies cool for 10 minutes on the baking sheet, then transfer them to a wire cooling rack. They should be completely cool before you frost them.
- Repeat. Repeat the process with the remaining dough, using either a second baking sheet or letting the first baking sheet cool.
Make Buttercream Frosting
- Beat the butter. Place the softened butter in a mixing bowl and use an electric mixer to beat it for 90 seconds, or until it’s fluffy.
- Add the remaining ingredients. Slowly beat in 2 cups of powdered sugar, then the extracts. Taste and add more powdered sugar a cup at a time. If the frosting is too thick, add a tablespoon of milk or heavy cream.
- Color the frosting. Decide how many colors you want and divide the frosting into bowls accordingly. Color each bowl of frosting with a small amount of gel food coloring.
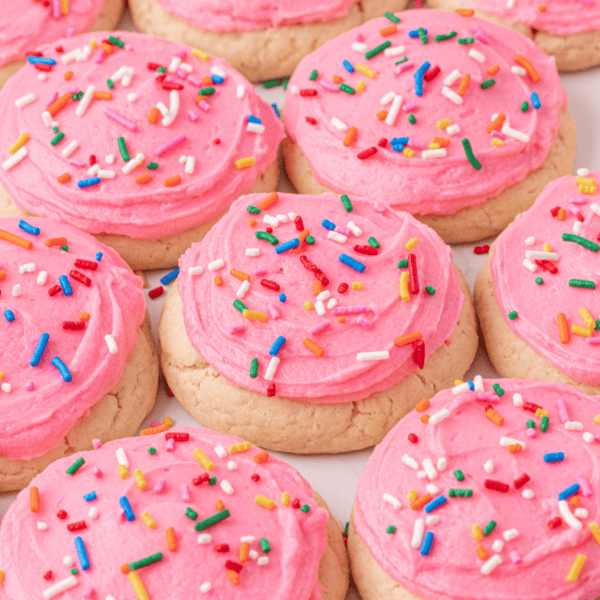
- Decorate the sugar cookies. Scoop the frosting into piping bags fitted with small round tips or spread the frosting onto the cookies. Add sprinkles immediately after frosting so they stick, then let the frosting harden for several hours or overnight.
Make Royal Icing
- Mix the icing. Combine all of the icing ingredients except the gel coloring in a mixing bowl and mix with a spatula or mixer until the icing is smooth, adding milk or water a teaspoon at a time if it’s too thick.
- Color the icing. Divide the icing into bowls and color each with gel food coloring. Transfer the icing to piping bags or squeeze bottles and decorate the cookies.

How to Make No-Chill Gluten Free Cut Out Cookies
If you’re short on time and can’t wait for the gluten-free sugar cookie dough to chill, you can use this no-chill method.
Instead of using softened butter, use cold butter. Then, work fast. As long as you mix, roll, and cut the dough quickly, it will still be cold enough to maintain its shape when baking right away. I do recommend that you chill the dough in the fridge between baking the batches, though—either in a disc or cut into shapes.

Gluten Free Sugar Cookie Recipe Tips for Success
I recommend visiting my cut-out sugar cookie post for lots of pointers on cutting, decorating, and storing these gluten-free sugar cookies. Here are some of my most important tips:
- Measure the flour properly. Don’t scoop it into the measuring cup or you’ll end up with dry, crumbly cookies. Instead, spoon the flour into the cup and use a butter knife to sweep off any excess.
- Keep the dough cold. This is how you’ll get your cookies to hold their shape when they bake.
- Let the icing or frosting harden. If you pack up your cookies before these set, your cookies will be ruined. I usually place my cookies on baking sheets and cover them with lids or tent them with foil.
Gluten Free Sugar Cookies Storage
Once the frosting is set, store your gluten-free sugar cookies in an airtight container at room temperature for about three days.
Can These Gluten Free Sugar Cookies be Frozen?
You can freeze the unbaked cookie dough or the baked, unfrosted gluten-free sugar cookies for up to 3 months. Let the dough thaw in the refrigerator before you use it, or if you freeze the baked cookies, let them thaw at room temperature before decorating.

Gluten Free Cut Out Cookies FAQs
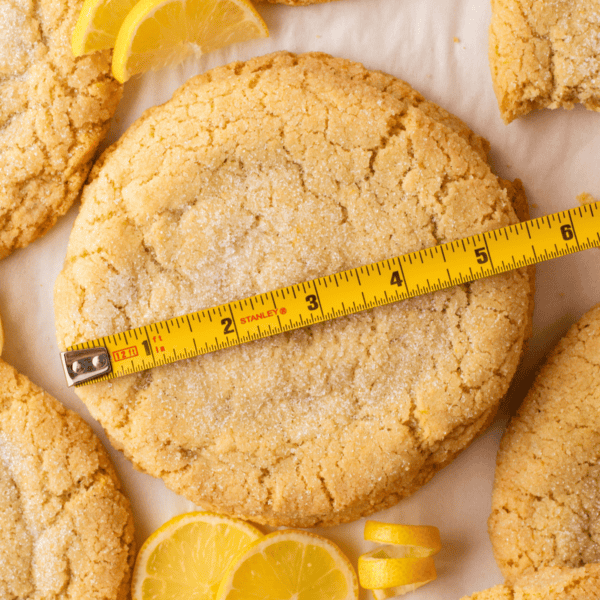
I think the perfect sugar cookie is somewhere in between, and that’s what this gluten-free sugar cookie recipe will give you if you make it as written. You can roll the dough out slightly thicker for softer cookies, or either roll it out thinner or bake the cookies longer if you prefer them crispy.
Gluten-free flours typically lack the binding properties of wheat flour. To help your cookies hold together, be sure to use a flour that has xanthan gum in the mixture. This ingredient mimics the binding effect of gluten.
Be sure to properly measure the flour, as too much flour can make the cookies dry and crumbly.
Gluten-free cookies can become puffy due to factors like the flour blend used, excessive leavening agents, lack of binders, overmixing, high baking temperature, warm dough, and shaping.
To make gluten-free cookies less crumbly, use a quality flour blend that contains xanthan gum, chill the dough, avoid overmixing, adjust moisture, shape carefully, bake at the right temperature, and cool properly.
This recipe was a huge hit in our home! We’re just dabbling into gluten-free recipes, and everyone thought these were delicious! I followed the recipe exactly, (using a kitchen scale to measure flour as recommended). Everything was perfect. Slight crunch, but soft and chewy inside. So good! Thank you for an amazing recipe! It’s a keeper. 🥰
-Julie

Tap stars to rate!
Gluten Free Sugar Cookies Recipe
Ingredients
Cookies
- 2 ¼ cups (270g) gluten free all purpose flour, I recommend King Arthur’s Gluten Free Measure for Measure Flour
- 1 tsp baking powder
- ¼ tsp salt
- ½ cup (113g) unsalted butter, softened
- 1 cup (198g) granulated sugar
- 1 large egg
- 1 tsp vanilla extract
- ½ tsp almond extract
Buttercream Frosting
- 1 ½ cups (339g) unsalted butter, softened
- 3-4 cups (340-454g) powdered sugar
- 1 tsp vanilla extract
- 1 tsp almond extract
- 1 Tbsp milk, or heavy cream works great too
- Gel food coloring
Or Royal Icing
- 2 cups (227g) powdered sugar, sifted after measuring
- 2 Tbsp milk or warm water
- 1 Tbsp corn syrup
- ½ tsp vanilla or almond extract
- Gel food coloring
Video
Instructions
Cookies
- Readers who are having trouble with this recipe are not measuring the flour correctly. The most accurate way to measure flour is to use a kitchen scale, weighing it in grams. If you don’t have a kitchen scale, follow this method: Aerate the flour with a whisk or spoon. Flour becomes heavy and compact as it sits. Aerating is the same as fluffing the flour, but not the same as sifting it. Do not sift the flour unless the recipe specifically calls for it.Use a spoon to sprinkle the flour into the measuring cup. Do not tap the cup against the counter, as this will compact the flour. Use the back of a butter knife to level off the excess.
- In a large bowl, combine the gluten free flour, baking powder and salt. Mix with a spoon or fork. Set aside. Be sure to measure the flour using the spoon and level method or measuring by grams.2 ¼ cups (270g) gluten free all purpose flour, 1 tsp baking powder, ¼ tsp salt
- In a mixing bowl, combine the room temperature butter and sugar, beat with an electric mixer for 90 seconds. Add in the egg, vanilla & almond extracts and beat for 1 minute. Add the flour in thirds, mixing just until the flour is incorporated. The dough will initially look crumbly almost sandy. But continue to mix until the mixture is thick and sticks together. Use your hands to gently knead the dough together at the very end of the mixing process – knead for only 20-30 seconds. This dough is very thick!1/2 cup (113g) unsalted butter, 1 cup (198g) granulated sugar, 1 large egg, 1 tsp vanilla extract, ½ tsp almond extract
- Divide the dough into 2 flat discs, cover each with plastic wrap and place in the fridge for at least 1 hour to chill. The dough can be left in the fridge to chill for up to 2 days.
- After chilling, remove one disc and allow it to sit on the counter for 5-10 minutes before rolling. Preheat the oven to 350ºF.
- On a very lightly floured surface (and I mean minimal) use a rolling pin to roll the dough to 1/4 inch thick. Frequently I will roll my dough on a silicone baking mat to eliminate the need to use flour. Use cookie cutters to cut out your desired shapes. Remove the dough scraps and use a spatula to transfer the shapes to a baking sheet lined with a silicone baking mat. Bake for 9-10 minutes. If your oven has a hot spot, rotate the cookie sheet half way through. The cookies will be pale in color – but will continue baking slightly once removed from the oven. Allow the cookies to cool on the baking sheet for at least 10 minutes. Then move to a cooling rack. Repeat the process with the remaining dough. If your dough is out of the fridge for too long, wrap it and chill it in the fridge for 15 minutes. Allow the cookies to cool completely before frosting them.
Buttercream Frosting
- Place the softened butter in a mixing bowl, beat using an electric mixer for 90 seconds.1 ½ cups (339g) unsalted butter
- Gradually add the powdered sugar, I usually do 2 cups at a time, and add the vanilla and almond extracts, beat again. Taste the frosting to see if you want it sweeter. I liked the way mine turned out with 4 cups of powdered sugar. If the frosting is too thick add 1 tbsp of milk or heavy cream, beat until creamy.3-4 cups (340-454g) powdered sugar, 1 tsp vanilla extract, 1 tsp almond extract, 1 Tbsp milk
- Decide how many colors you want and divide the frosting into bowls accordingly. Add a small amount of gel food coloring to each bowl, using a spoon or spatula to mix until the color is even.Gel food coloring
- Use piping bags fit with small round tips to pipe the frosting on or use spreaders to spread on the frosting. Add sprinkles if desired. Allow the frosting to harden for several hours or overnight. I usually place my cookies on baking sheets and cover with lids or tent with tin foil.
Royal Icing
- In a medium to small sized mixing bowl, combine all of the ingredients (minus the gel food coloring) and mix with a spatula or mixer until smooth. Add more milk or water, 1 tsp at a time, if the frosting is too thick. Divide into bowls and add gel food coloring. Transfer to piping bags or squeeze bottles to easily decorate the cookies.2 cups (227g) powdered sugar, 2 Tbsp milk or warm water, 1 Tbsp corn syrup, ½ tsp vanilla or almond extract, Gel food coloring
Notes


First time trying sugar cookies gluten free and this recipe is a keeper! Will definitely be making it again, we just used store bought icing
I made these cookies for a friend that is gluten intolerant and they are even better than the ones I made with wheat flour!
Amazing cookies!! My best friend is gluten free and we wanted to decorate Christmas cookies this year, so I made these as my first GF baking experience ever. 10/10
Followed the directions and they turned out perfect! Weighing is key! Decorated with royal icing.