
This post may contain affiliate links. Please read our disclosure policy.
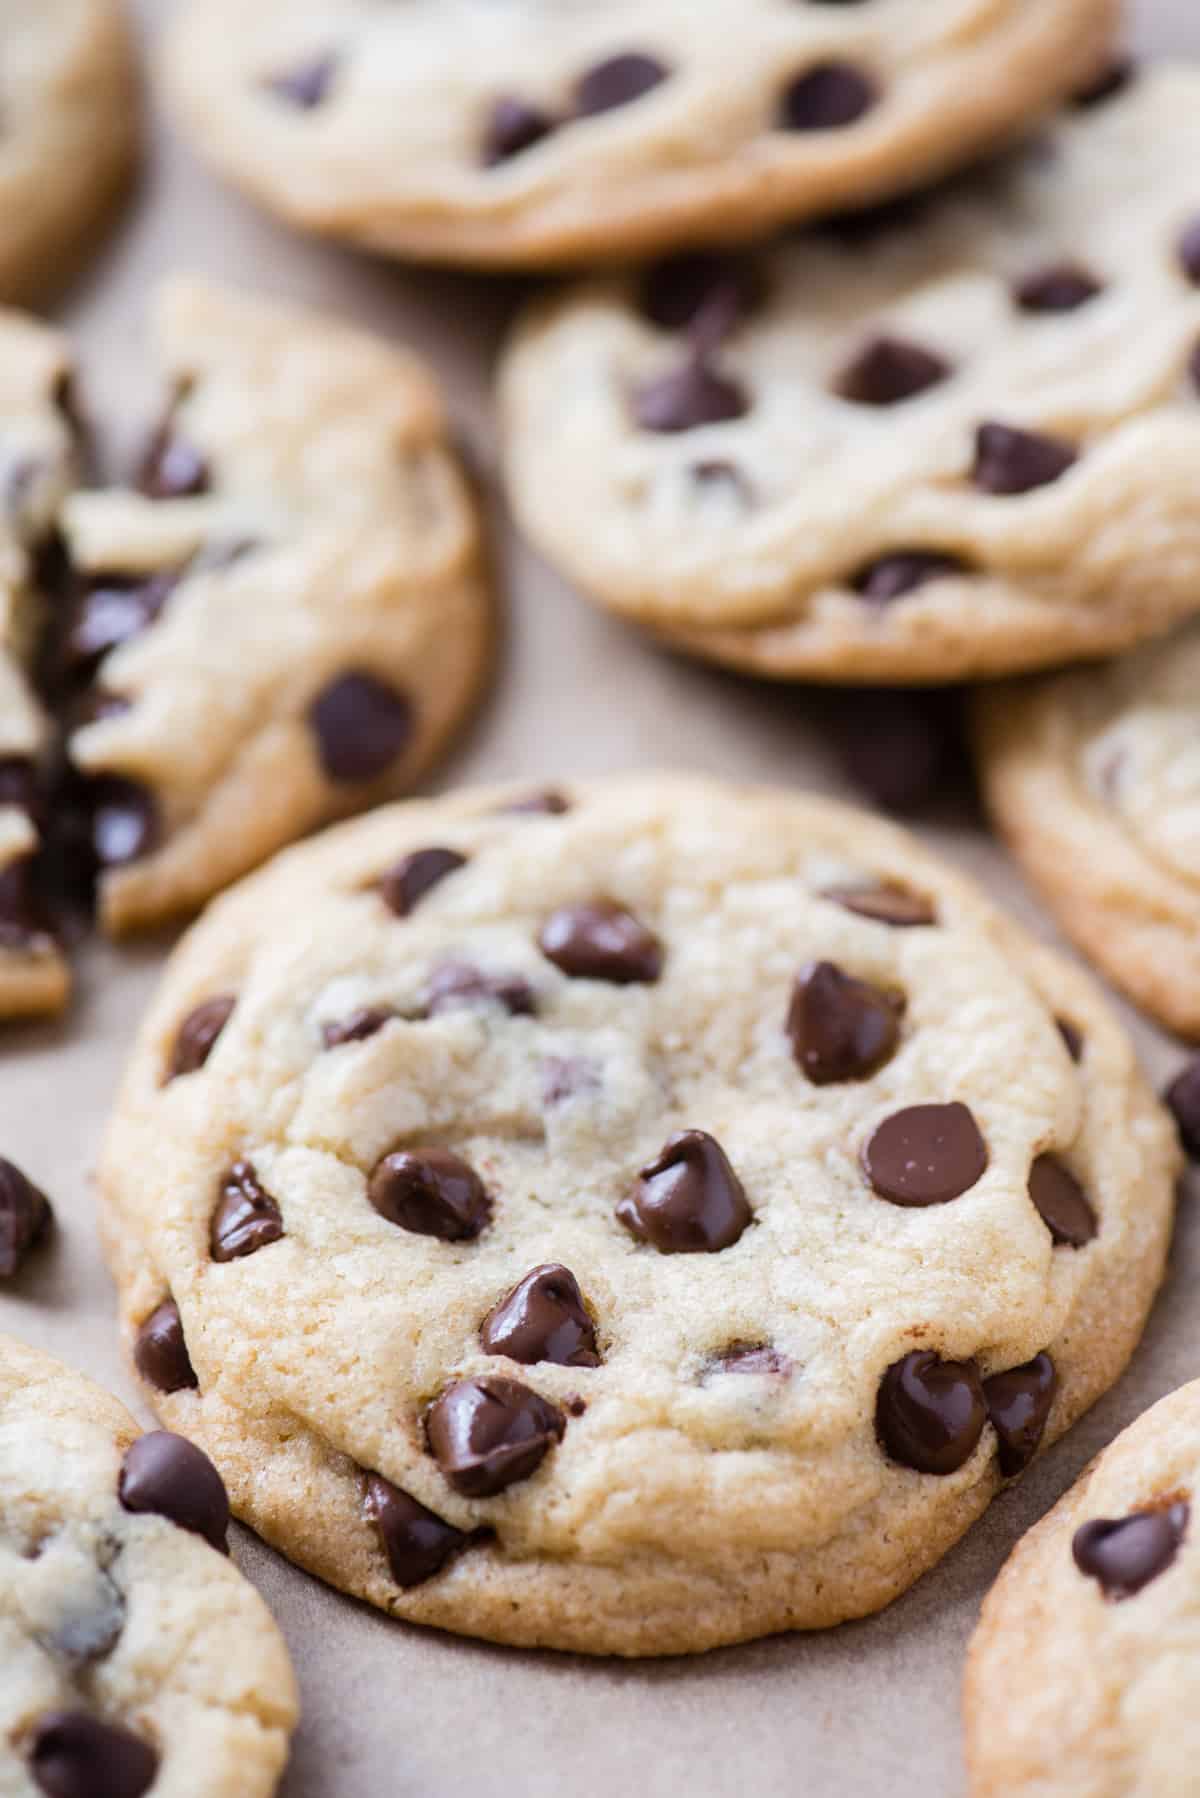
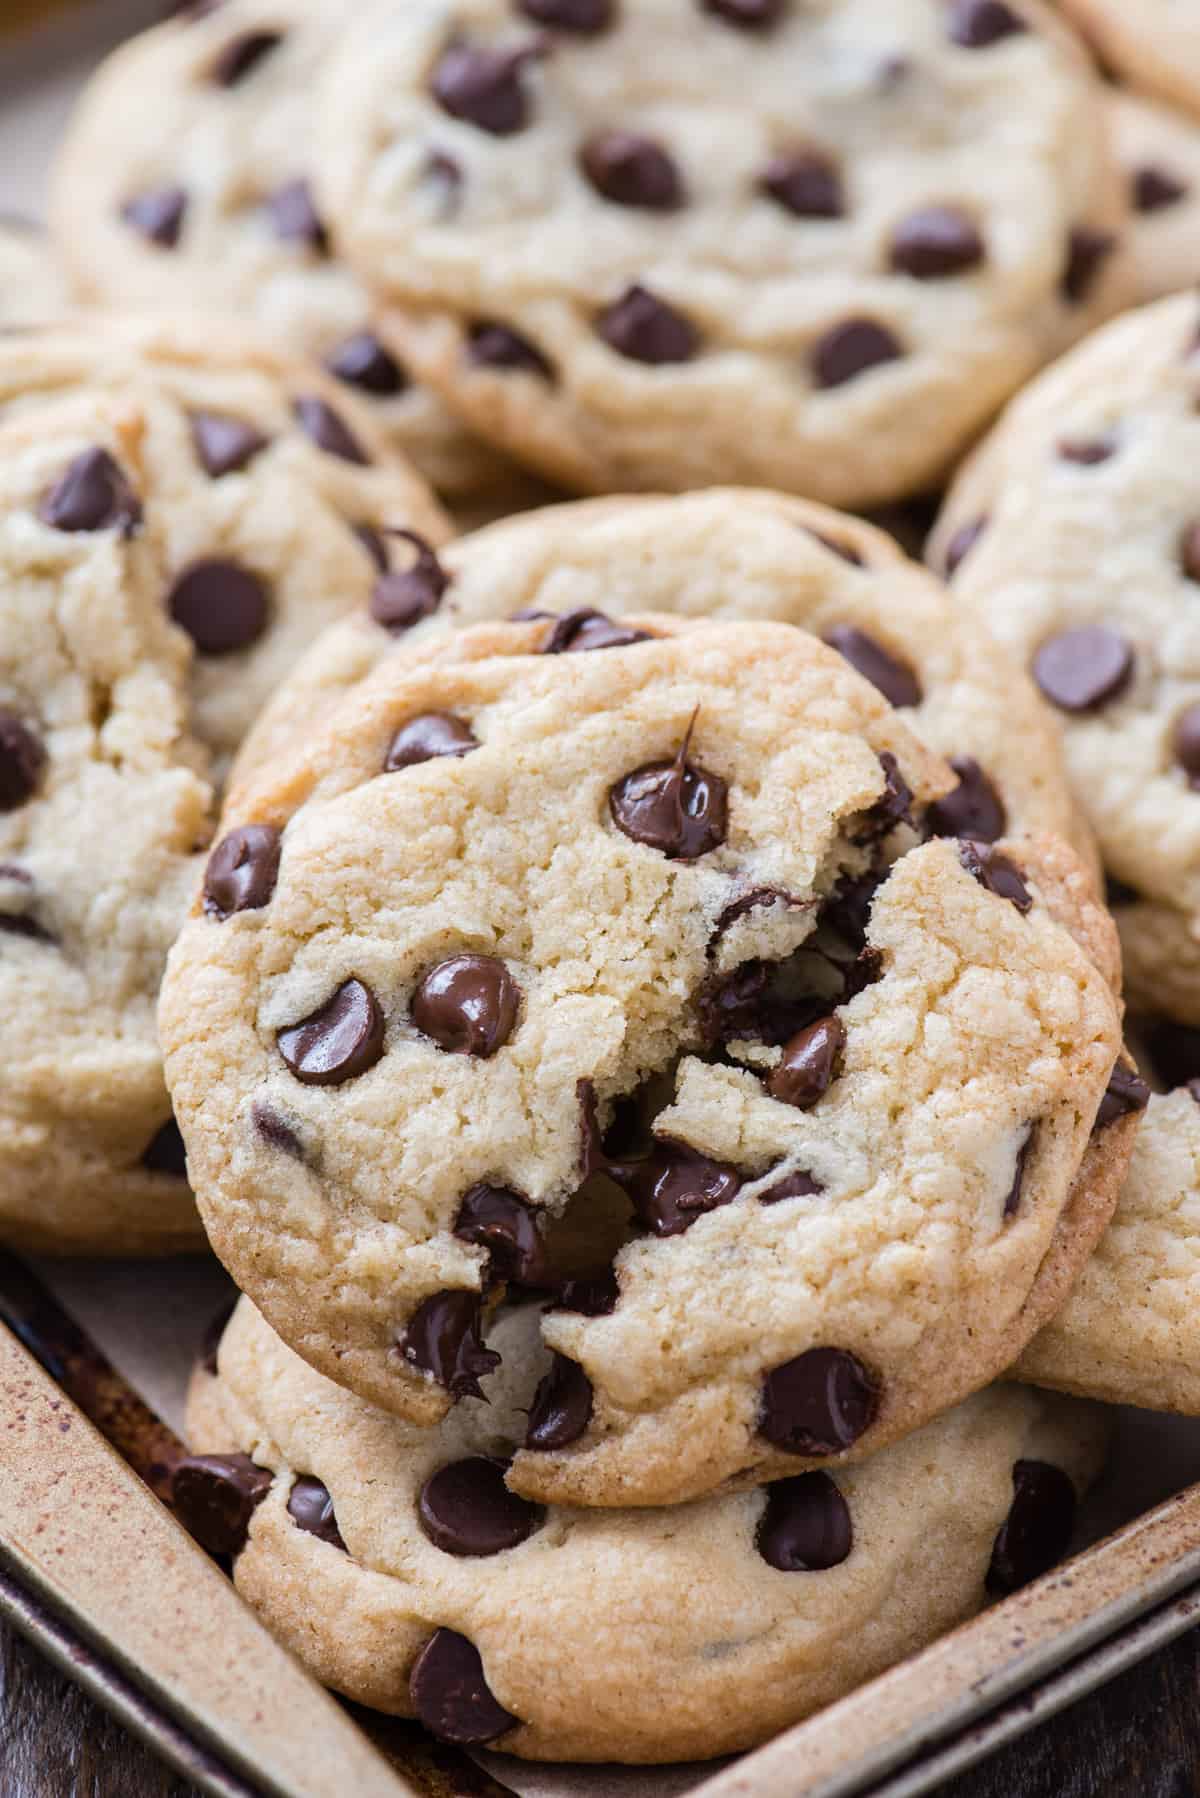
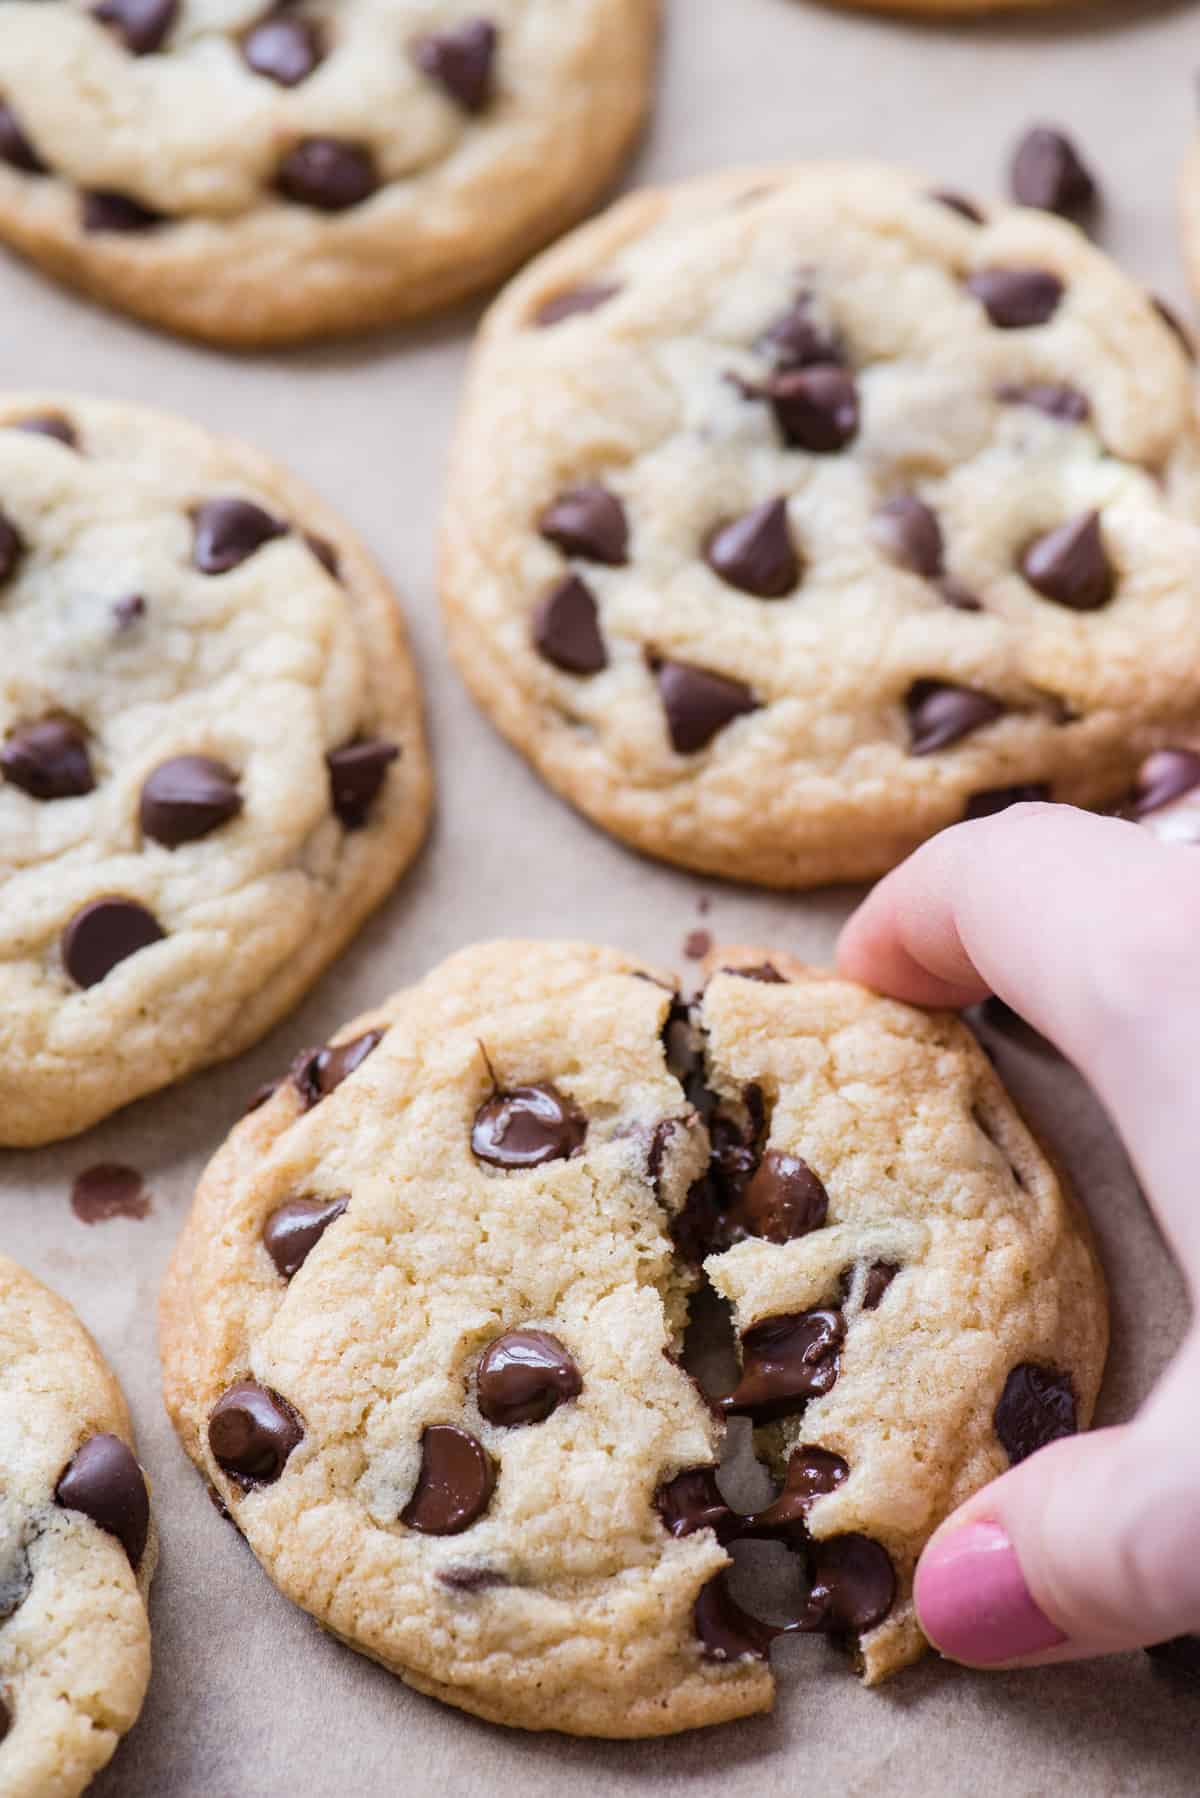
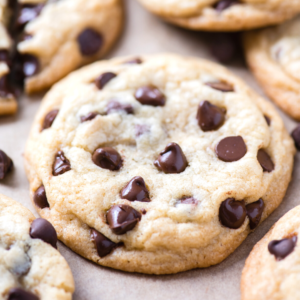
Easy chocolate chip cookies are ready to bake in 10 minutes because you don’t chill the dough! Our cookies are chewy with crispy edges and soft insides! They stay thick and don’t spread too thin, learn our quick tips for making chocolate chip cookies!
I loved the recipe! It was absolutely scrum-didily-umptious, I nearly ate the whole tray!
-Sara
What Causes Chocolate Chip Cookies to Spread
Quick answer: lots of things.
- Not enough flour. If there isn’t enough flour or structure to the cookie dough, the fat will melt fast, causing the cookies to spread.
- Too much sugar / too much butter: too much of these ingredients and too little flour mess with the structure of the cookie. It’s about finding the perfect balance.
- Melted butter and not refrigerating the dough. Since our recipe doesn’t call for refrigerating the cookie dough before baking it’s crucial to use SOFT not melted butter.
- Greased cookie sheets. Do not grease your cookie sheets, use parchment paper or silicone baking mats. Greased cookie sheets encourage cookies to spread.
- Oven temperature. Too high, too low, or hot spots in your oven.
- Cookie sheets that are warm. This can happen if you are using the same cookie sheet without allowing it to cool between batches. If I am using the same cookie sheet to bake all my cookies, I place it in the fridge for 2 minutes between batches. Ideally, I like to use 2 cookie sheets, so one can cool with cookies on it while the other one is in the oven.
For best results, use a high quality name brand all purpose flour like Gold Medal, Pillsbury, or King Arthur. I have made this recipe with Aldi all purpose flour and the cookies spread a lot more and the results weren’t as great as when I made this recipe with a name brand flour.
How to Properly Measure Flour
- Fluff the flour with a fork
- Use a spoon to scoop the flour into your measuring cup
- Use a butter knife to level off the flour in the measuring cup
Sticking the measuring cup straight into the bag of flour will result in too much flour to be packed into the cup, which can result in dry cookies.
Chocolate Chip Cookie Ingredients
- all purpose flour: flour is necessary to build structure in cookies
- cornstarch: helps to produce chewy but soft cookies
- baking soda: helps to leaven and lift the dough
- salt: enhances the other flavors
- chocolate chips: I used semi-sweet chocolate chips
- unsalted butter: adds flavor and tender texture
- brown sugar: adds sweetness & flavor, keeps the cookies moist and adds chewiness
- granulated sugar: adds sweetness, flavor and encourages browning
- egg: binds the cookies together by providing structure
- vanilla extract: adds flavor

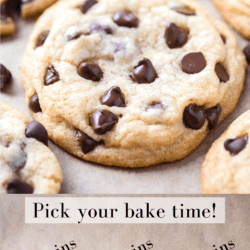
Baking Time Suggestions
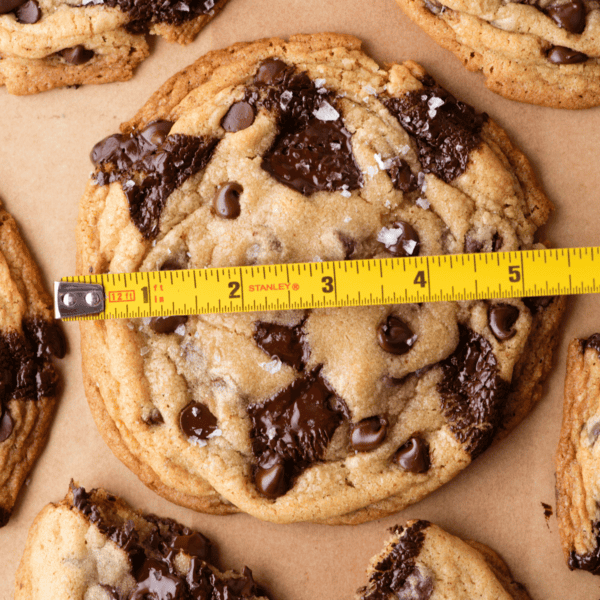
For the cookies in the photos, the dough balls were about 3-4 heaping tablespoons (golf ball sized), so that’s a large cookie! I baked those for 15 minutes – just until the edges of the cookies would begin to turn firm up and brown slightly. The result is a soft and chewy chocolate cookie!
If you make smaller dough balls, you should reduce the baking time otherwise the cookies will be over done.
Use the photo below to determine the amount of bake time you prefer.
- 13 minutes: more pale in color, no crispy edges, very soft & chewy
- 15 minutes: browning around edges, crispy edges, soft & chewy inside
- 17 minutes: more browning, crispier edges, still soft & chewy but has more crunch
For a regular sized dough ball (about 2 tbsp of dough) bake the cookies for 10-13 minutes.

Total Time Required
- 5 minutes to make the cookie dough
- 13-17 minutes to bake the cookies
- 15 minutes to cool the cookies
How to Store Cookies
Store these cookies in an airtight container on the counter for up to 5 days. To ensure that cookies stay soft for days, place a piece of bread in the container. The moisture from the bread will be absorbed by the cookies.
How to Freeze Cookie Dough
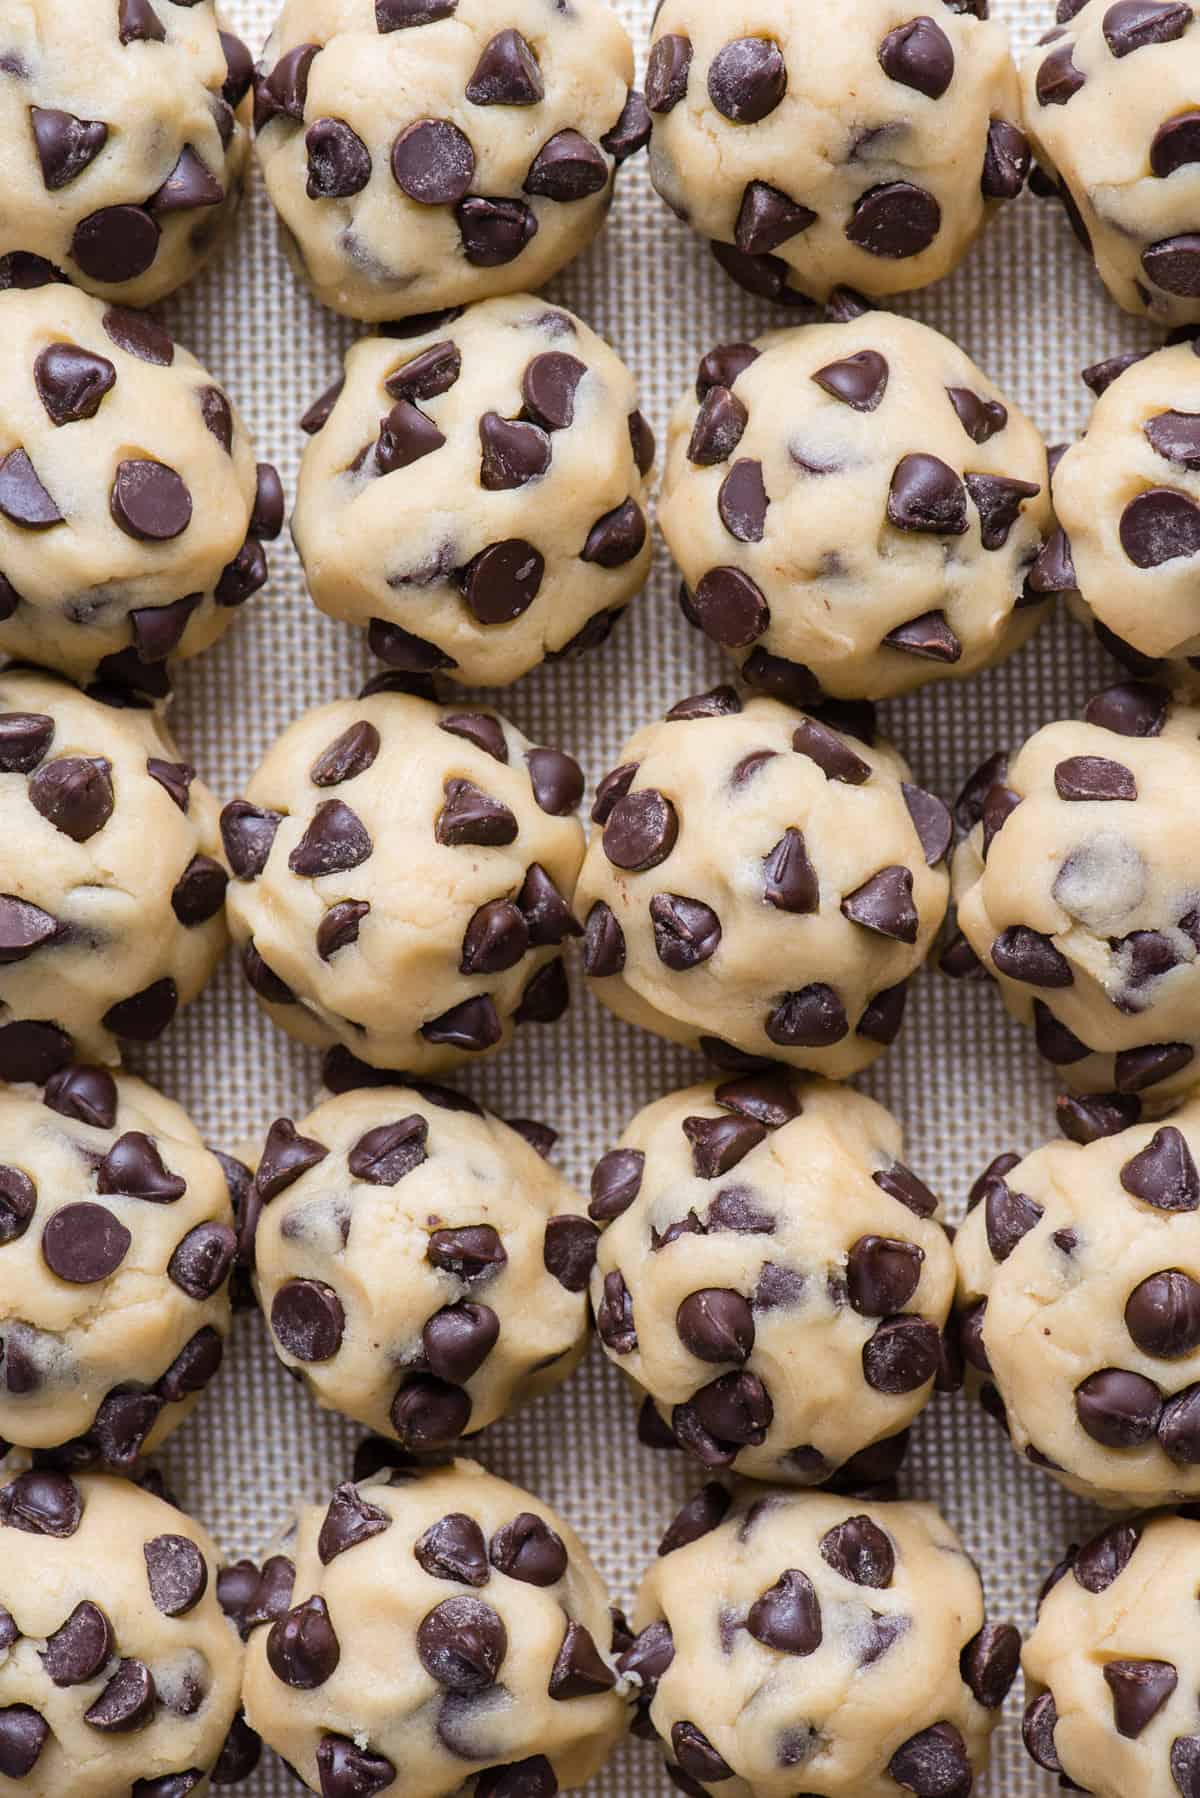
- Portion the dough into cookie dough balls. Press chocolate chips into the outside of the dough.
- Place them on baking sheet lined with a silicone mat. You can place the dough balls close together since you won’t be baking them.
- Place the baking sheet in the freezer until the cookies are frozen solid, about 1 hour.
- Remove the baking sheet from the freezer and transfer the frozen cookie dough balls to a ziplock freezer bag. Label the bag with baking directions.
- Freeze the cookie dough for up to 3 months.
To bake: remove the dough from the freezer. Pre-heat the oven to 350ºF. Bake for 13-17 minutes. Frozen cookies may need to bake for 1-2 minutes longer.
How to Make Gluten Free Chocolate Chip Cookies
I have made these cookies multiple times with King Arthur’s Gluten Free Measure for Measure Flour with great success. If you’re looking for another way to make these gluten free, try coconut flour chocolate chip cookies.
Recommended Cookie Baking Tools
I use a cookie scoop that is 1.6” in diameter, this is technically considered a small cookie scoop. When I use it, I scoop the dough so it’s heaping over the scoop. A good estimate is to make golf ball sized cookie dough balls.
I specifically like this brand of cookie sheets because they are light aluminum, which encourages even baking and browning. The half sheet size is perfect and the silicone baking mats fit perfectly on them. I recommend using shiny, heavy cookie sheets that have very low or no sides. Avoid dark aluminum sheets because they can cause overcooking.
Pro Tip: To ensure even baking, place only 1 cookie sheet in the oven at a time.
Tips for Making the Perfect Chocolate Chip Cookies
- Properly measure the all purpose flour using the spoon and sweep method.
- Use room temperature butter for easier creaming of the butter and sugar.
- Use a cookie scoop to form uniform balls.
- Press chocolate chips on the outside of the dough balls before baking for a loaded cookie presentation like the photos!

So good! I made these and the whole family said they were the best that I’ve made, will be making these to replace the recipe I usually use. Thanks so much for sharing the recipe!
-Kate
More Cookie Recipes
Tap stars to rate!
Chocolate Chip Cookies
Ingredients
- 3 cups (360g) all purpose flour
- 2 tsp cornstarch
- 1 tsp baking soda
- ¼ tsp salt
- 2 cups (340g) semi-sweet chocolate chips
- 1 cup (226g) unsalted butter, room temperature, equal to 2 sticks
- 1 ¼ cups (267g) brown sugar
- ¼ cup (50g) granulated sugar
- 2 large eggs, room temperature
- 1 tsp vanilla extract
Video
Instructions
- Preheat the oven to 350º F. Line a cookie sheet with a silicone baking mat or parchment paper.
- In a mixing bowl combine the flour, cornstarch, baking soda, salt, and 1 cup of chocolate chips. Set aside.3 cups (360g) all purpose flour, 2 tsp cornstarch, 1 tsp baking soda, 1/4 tsp salt, 2 cups (340g) semi-sweet chocolate chips
- In a larger mixing bowl combine the butter, brown sugar, and granulated sugar. Beat on medium speed for 2 minutes. You want this mixture to be fluffy and pale in color.1 cup (226g) unsalted butter, room temperature, 1 1/4 cups (267g) brown sugar, 1/4 cup (50g) granulated sugar
- Add in the eggs and vanilla extract, beat for 30 seconds.2 large eggs, 1 tsp vanilla extract
- Gradually mix in the dry ingredients, mixing on low speed. The dough will be thick. I like to finish mixing the flour into the dough by hand with a spatula.
- Use a cookie scoop to form golf ball sized cookie dough balls, roll into a smooth ball between your hands. Press the remaining 1 cup of chocolate chips on the outside of the dough balls. I like to load mine with chocolate chips! Place about 8 cookies on a cookie sheet lined with a silicone baking mat at a time. I recommend only baking 1 cookie sheet at a time for even baking.
- For the cookies in the photos, the dough balls were about 3 heaping tablespoons (golf ball sized), so that’s a large cookie! I baked those for 15 minutes – just until the edges of the cookies would begin to turn firm up and brown slightly. The result is a soft and chewy cookie! If you make smaller dough balls, you should reduce the baking time since the baking estimates are for golf ball sized dough balls.
- Baking time estimates for golf ball sized dough balls (3-4 tbsp dough):∙13 minutes: more pale in color, no crispy edges, very soft & chewy∙15 minutes: browning around edges, crispy edges, soft & chewy inside∙17 minutes: more browning, crispier edges, still soft & chewy but has more crunchBaking time estimates for regular sized dough balls (2 tbsp of dough) bake for 10-13 minutes.
- Allow the cookies to cool for 15 minutes on the baking sheet before removing.
Notes
- I have made these cookies multiple times with King Arthur’s Gluten Free Measure for Measure Flour with great success.
- For best results, use a high quality name brand all purpose flour like Gold Medal, Pillsbury, or King Arthur. I have made this recipe with Aldi all purpose flour and the cookies spread a lot more and the results weren’t as great as when I made this recipe with a name brand flour.
- Properly measure the all purpose flour using the spoon and sweep method.


Hi! I cant wait to try these out. What would you recommend for a convection oven? It’s all that I have and every time I try to make cookies the cooking times and texture get messed up. Please help!!
Hi Kay! Do you have a counter top convection oven (like the size of a toaster oven) or do you have a regular sized oven that is convection vs conventional (traditional)? If it’s a regular sized convention oven, reduce the oven temp by 25ºF and watch the bake time more closely!
Can I use macadamia nuts instead of chocolate chips?
Yes, definitely!
I enjoyed the cookies and they were soft in the middle and crunchy on the outside, but I had a problem with putting the chocolate chips on the outside, it was hard to do and keep them from falling off and it just seemed like it was too many chocolate chips and two messy to eat afterwards. I think I’ll put the whole two cups inside next time
Made these on the weekend and they are exactly as you described….crispy on the outside, soft and chewy inside. This recipe is a keeper. Oh, and I just threw both cups of chips right into the dough and mixed them in.
I’m so glad you loved the recipe! If you’re able to can you add a photo of your cookies to this pin? It’s fun to see the recipe recreated and it encourages others to make the recipe too! Thank you! https://www.pinterest.com/pin/41025046596135242/
These are so fast! Great for when a craving hits. The 3TB cookies were my favorite. I also tried making them 1.5 TB & reducing the time but the larger cookies had a better texture. They were still soft on Day 3, then they were gone :)
What can I substitute the cornstarch
I would advise adding the amount of cornstarch as written. Cornstarch helps to keep the cookies soft!
what would the baking time be for mini sized cookies?
Hi Amani! It really depends on how big the dough balls are, so I can’t give an accurate estimate without knowing that!
I make this cookies every month, and also for the December challenge, they are a win win! Last year I tried at least 13 recipes….until found THE Recipe
Great recipe. I made 2 1/2 tablespoon size balls, (32 cookies) and I just mixed all of the chocolate chips into the batter at one time . I baked them for about 15 or 16 minutes so they were a little bit more brown than your photo, however they were still soft inside. I also made a batch using M&Ms instead of chocolate chips.
My cookies came out puffed up and tall. They didnt spread out. Looks like muffins. Im sad.
How did you measure the flour? The most accurate way to measure flour is to use a kitchen scale, weighing it in grams.
If you don’t have a kitchen scale, follow this method.
• Aerate the flour with a whisk or spoon. Flour becomes heavy and compact as it sits. Aerating is the same as fluffing the flour, but not the same as sifting it. Do not sift the flour unless the recipe specifically calls for it.
• Use a spoon to sprinkle the flour into the measuring cup. Do not tap the cup against the counter, as this will compact the flour.
• Use the back of a butter knife to level off the excess.