
This post may contain affiliate links. Please read our disclosure policy.
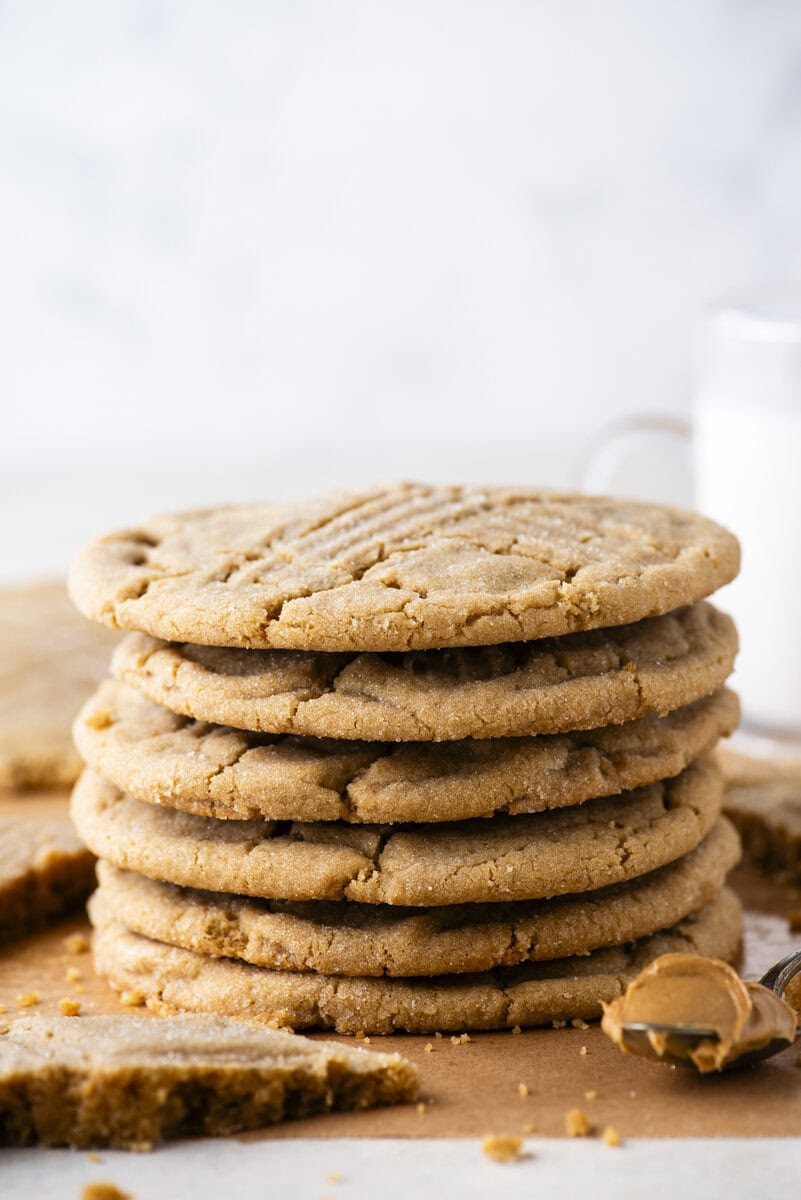
After my thick chocolate chip cookies, the most requested recipe was peanut butter, so I set out to make a version that was bigger, softer, and actually stayed chewy. If your peanut butter cookies have ever turned out dry or crumbly, this is the fix. I took my original recipe and adjusted the sugar ratio, added an extra egg yolk, reduced the flour, and tested chill times to control the texture. Then I baked them in multiple shapes and styles and had my audience vote on their favorite. This is the version that delivered every time.
How I Made My Peanut Butter Cookies Chewier and Larger
After I shared my thick chocolate chip cookies, the number one request I got was for a peanut butter version. Not just any peanut butter cookie, but one that was bigger, softer, and had that same bakery-style feel. I already had a peanut butter cookie recipe on my site, but I knew I wanted to push it further. The goal was simple. Make it chewier and make it larger without losing structure.
I started by adjusting the core ingredients based on how cookies actually behave. I increased the brown sugar and reduced the granulated sugar to add more moisture and chew. I added an extra egg yolk for richness and chew, slightly reduced the flour to soften the structure, and removed the baking powder to avoid a cakey texture. Each change was intentional, and each batch told me what was working and what needed to be adjusted.
Testing Different Techniques
From there, I tested how the dough behaved in real baking conditions.
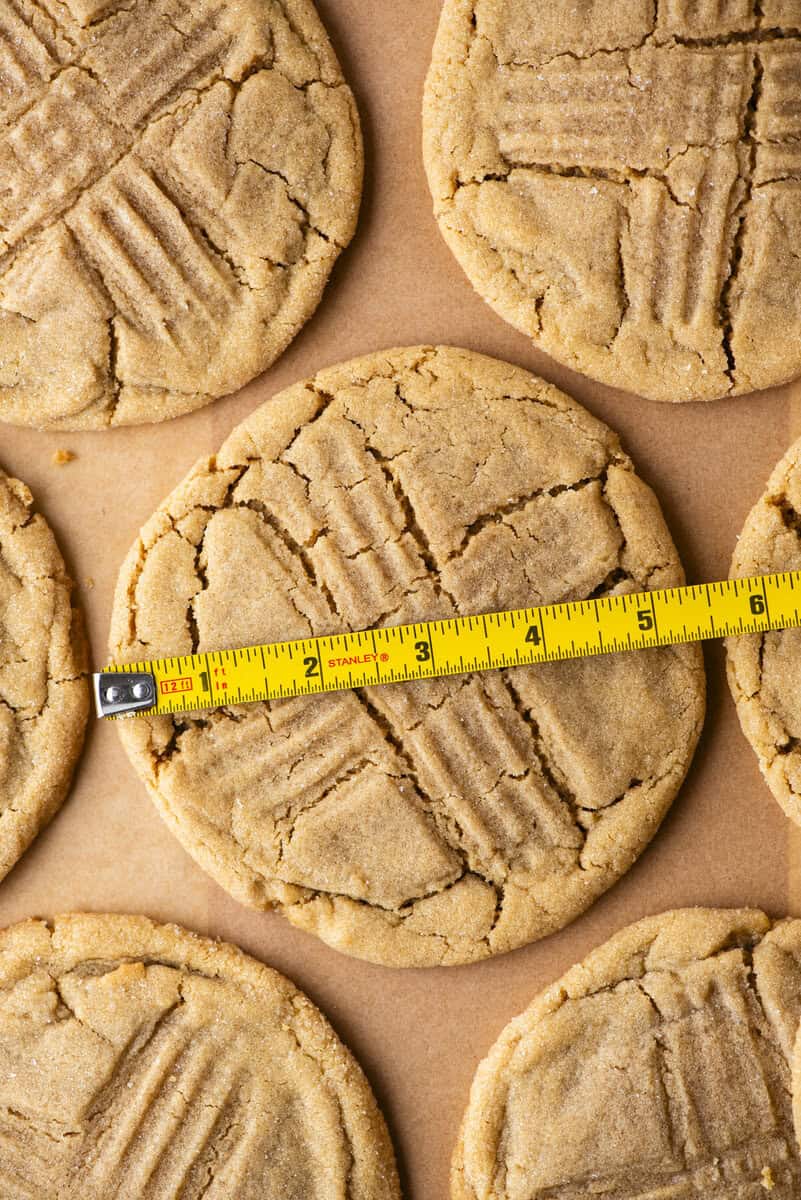
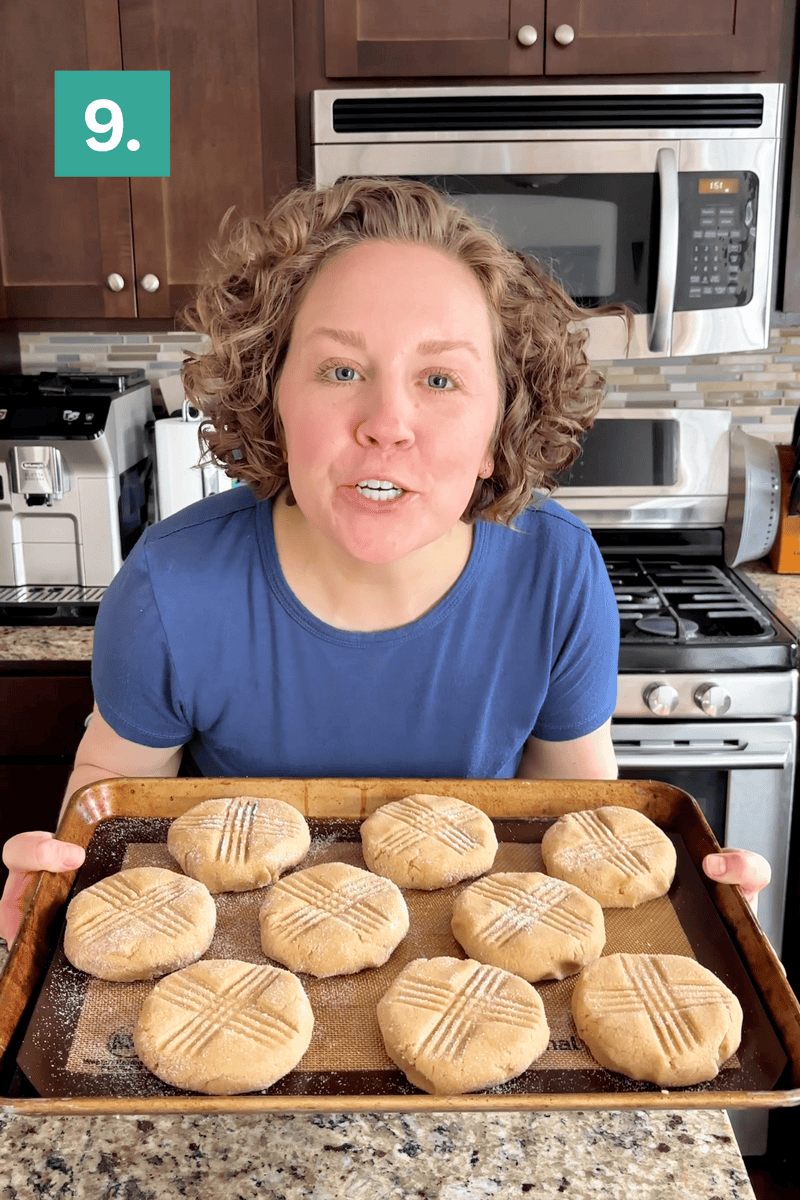
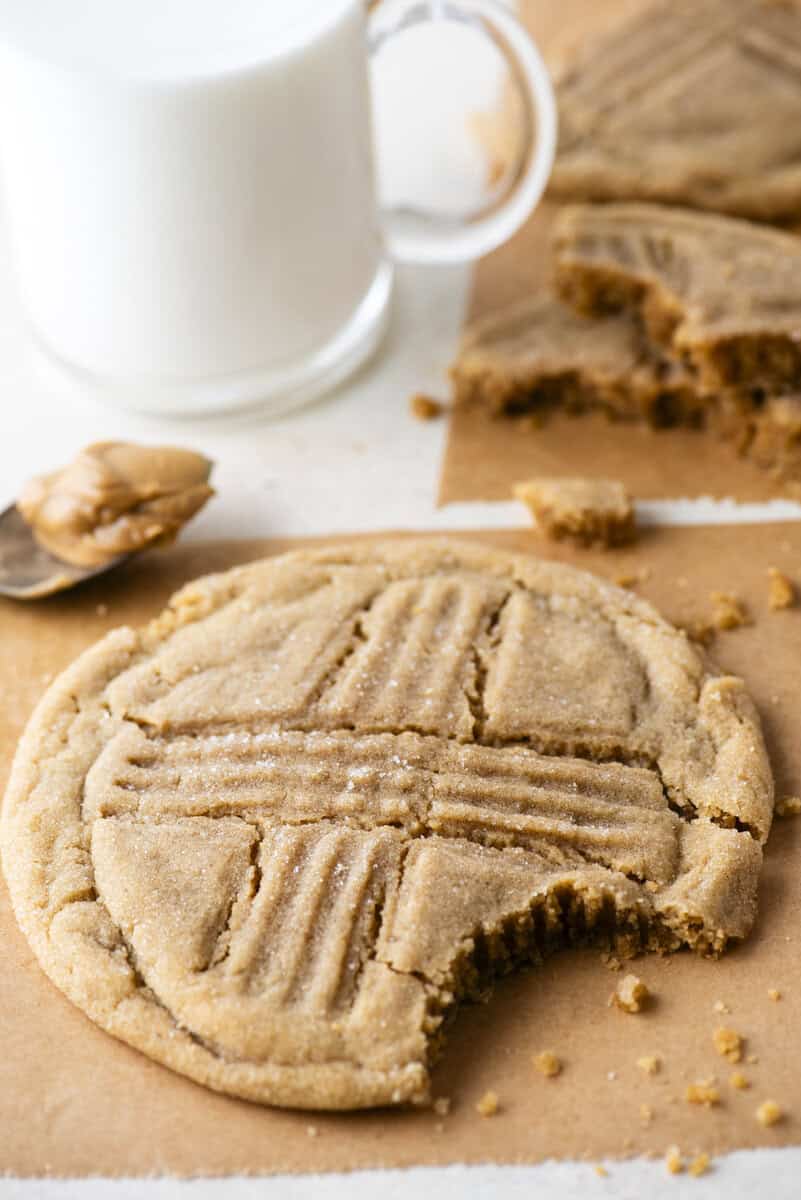
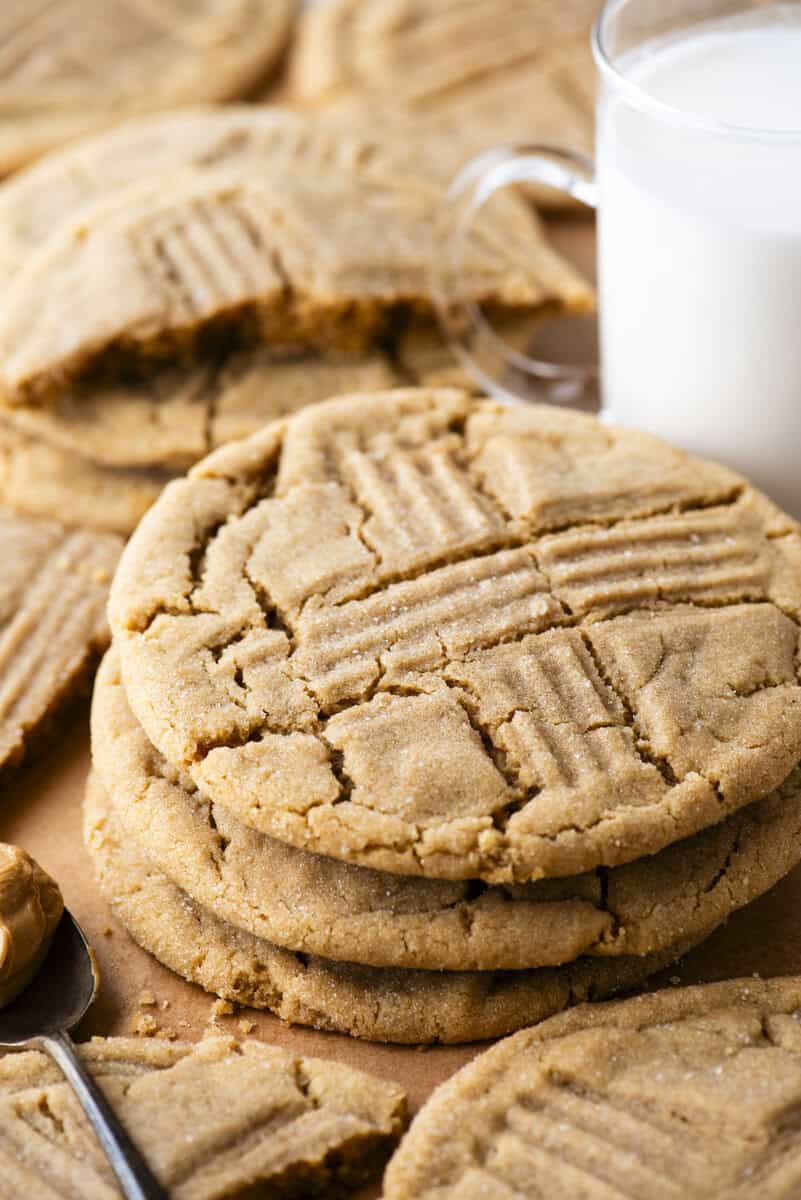
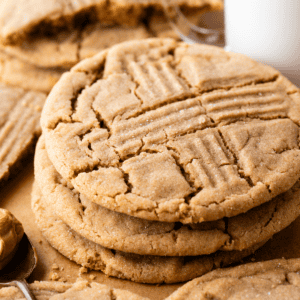
Shape and Size: I tried baking the dough as tall balls, slightly flattened cookies, and fully pressed pucks. The tall balls stayed too domed, while thinner cookies spread too much. The best result came from pressing the dough into a 3.5 inch puck, which gave the cookies enough surface area to bake evenly while still staying thick.
Chill vs No Chill: I tested baking the dough right away, after 30 minutes, and after 1 hour in the fridge. Baking right away worked, but the cookies spread more and didn’t have the same structure. Chilling for 1 hour made the biggest difference, giving the cookies a thicker shape and better texture.
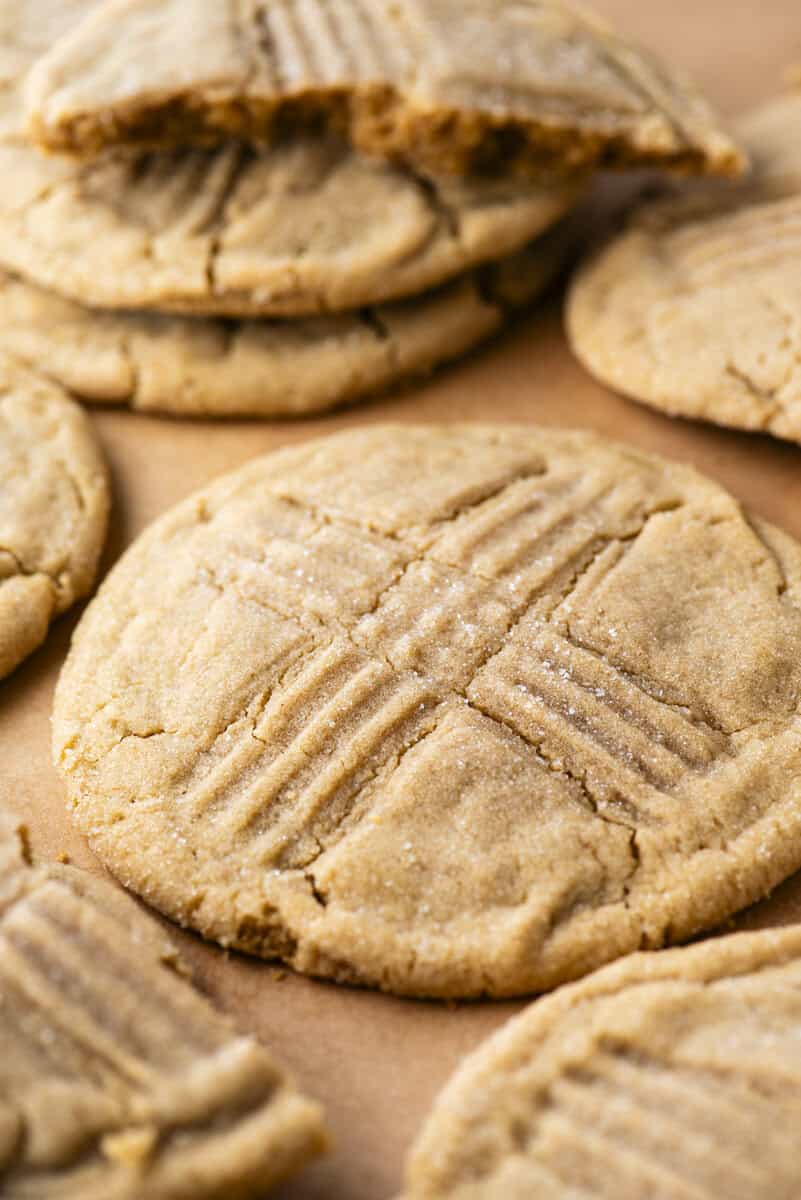
Criss Cross vs No Fork: I also tested the classic criss cross fork pattern versus leaving the tops plain. Some cookies were pressed with a fork before baking, while others were left smooth or only lightly flattened. The fork pattern not only gave that classic peanut butter cookie look, but it also helped the cookies spread more evenly.
Pan Slam: I also tested when to slam the pan to create crinkles. Slamming the pan right after baking created the best texture and appearance. Waiting too long or skipping this step resulted in a smoother, less interesting top.
Then I shared all the options with my Instagram audience and had them vote on their favorite. Cookies #7, #1, and #4 were the clear leaders, with #7 coming out on top for its thickness, classic criss cross pattern, and crackly finish.

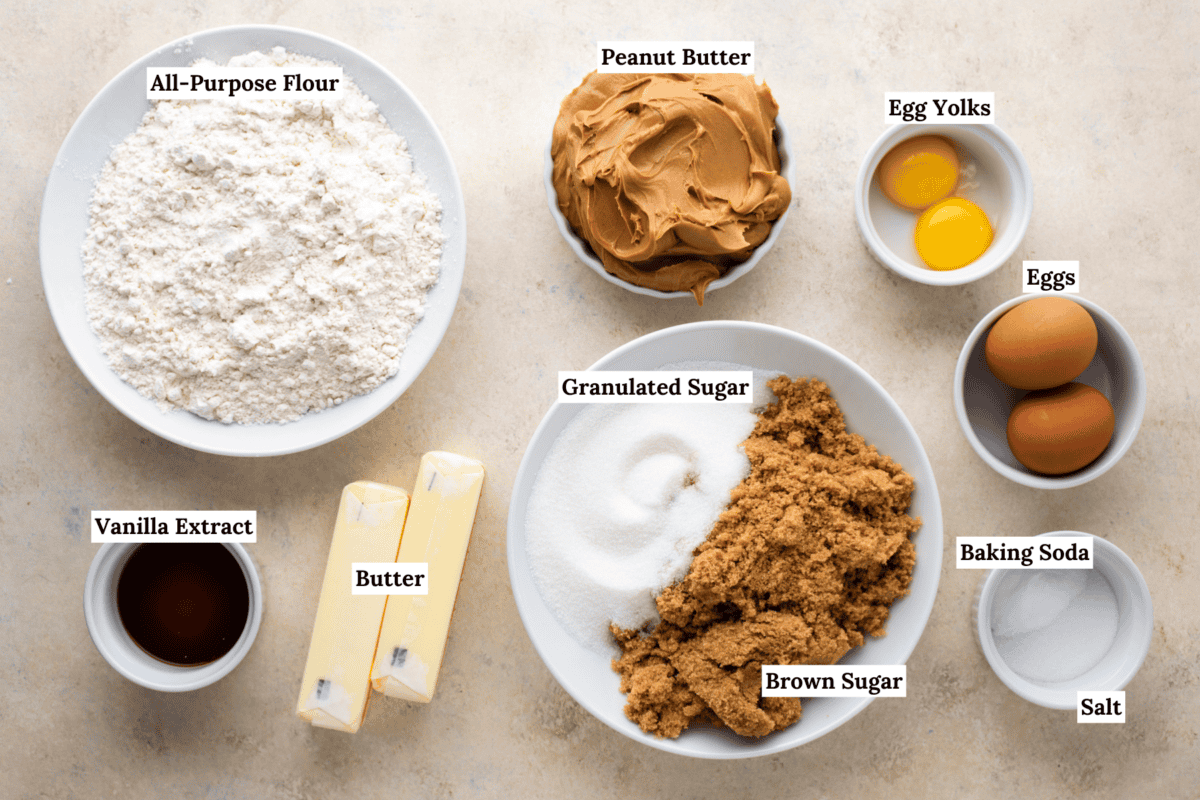
Key Ingredients
Here is an overview of the key ingredients in this recipe and what they do. You can also jump to the recipe card below for the full recipe.
- Peanut Butter: Use a creamy, no stir peanut butter to keep the cookies thick and structured.
- Brown Sugar: Adds moisture and creates that soft, chewy texture that lasts after baking.
- Eggs and Egg Yolks: Extra yolks add richness and help create a dense, soft center.
- Butter: Gives flavor and helps the cookies spread just enough.
- Flour: Balanced to keep the cookies thick without drying them out.
- Baking Soda: Helps the cookies spread while keeping a chewy texture.
How to Make Giant Peanut Butter Cookies
Follow my simple step-by-step instructions for giant peanut butter cookie success. For the full recipe, jump to the recipe card below.
Combine dry ingredients: In a medium bowl, whisk together the all-purpose flour, baking soda, and salt. Set aside.
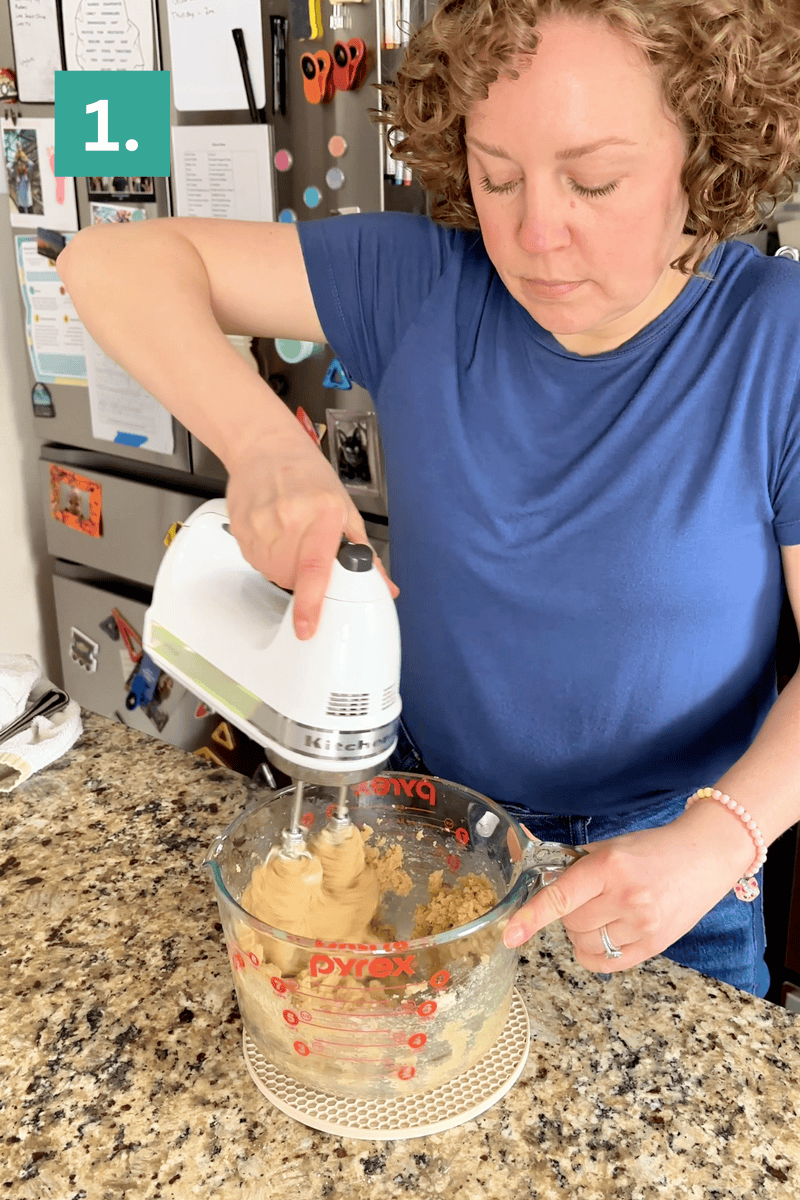
Beat butter and sugar: In a separate mixing bowl, beat the butter, brown sugar, and granulated sugar with an electric mixer for 2–3 minutes, until smooth and fluffy.
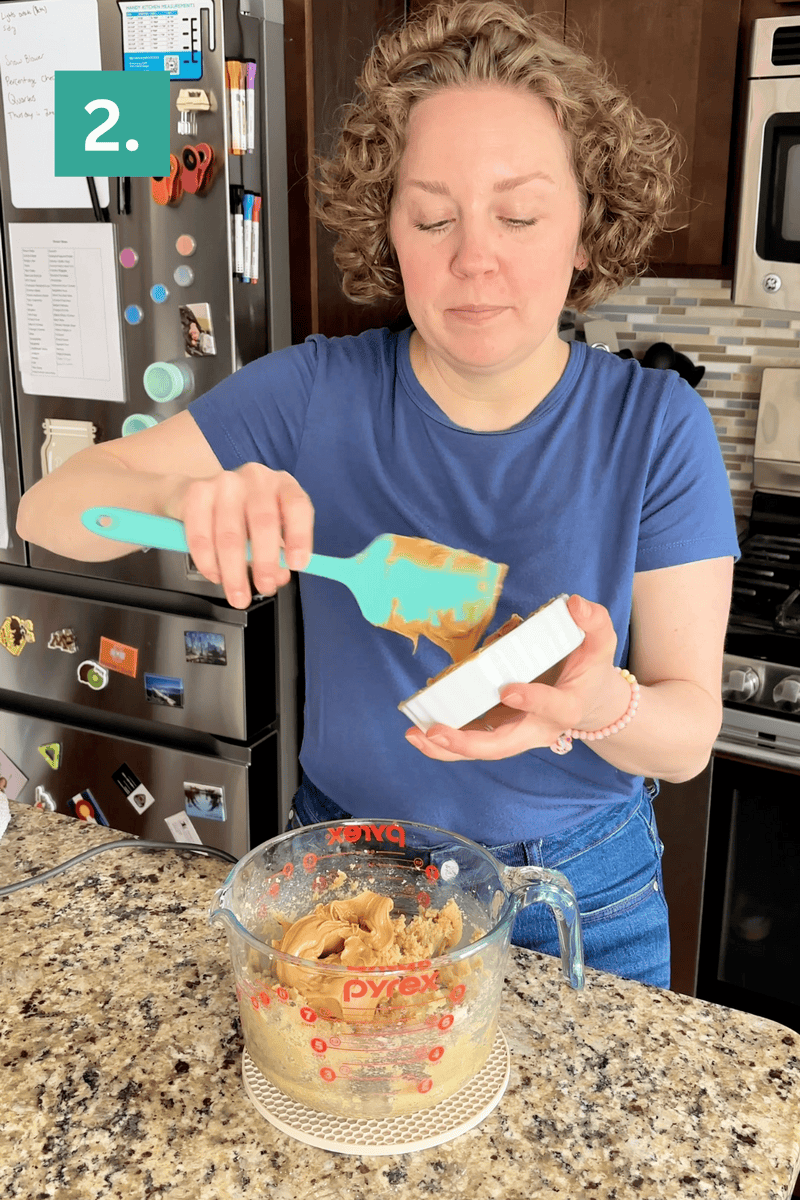
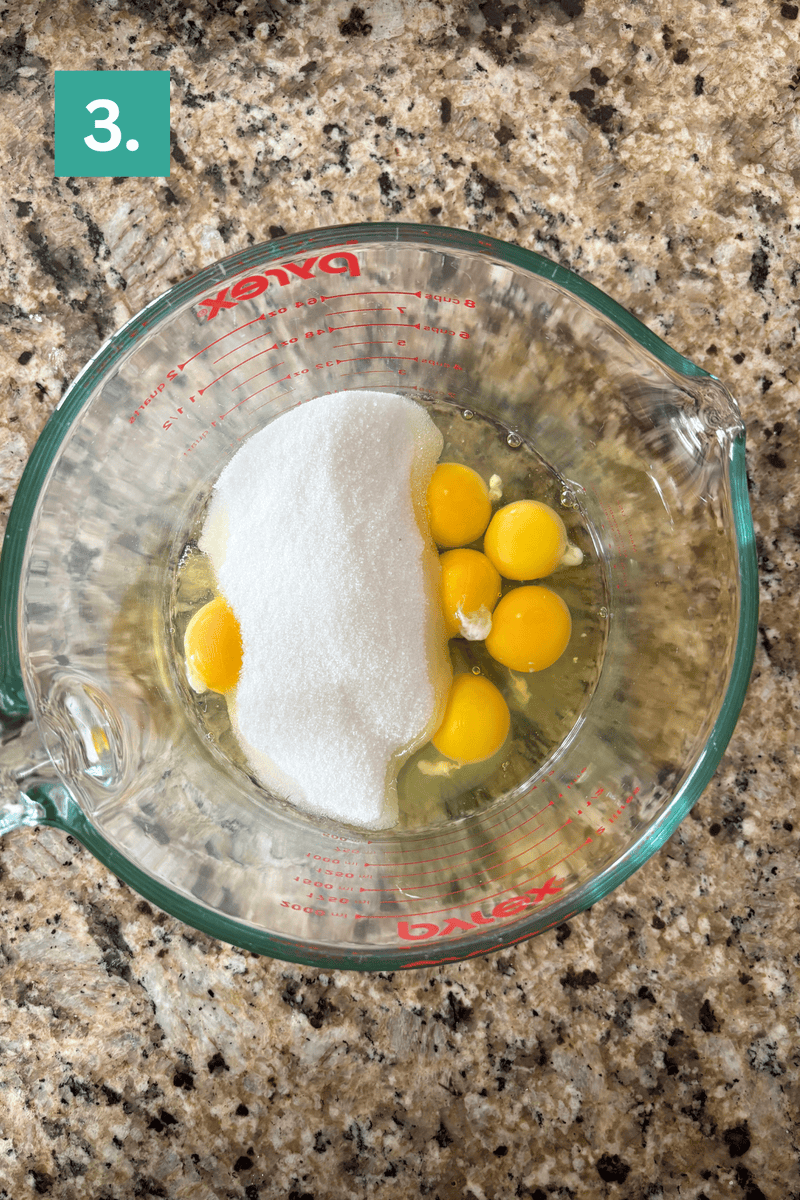
Mix in wet ingredients: Add the peanut butter, eggs, egg yolks, and vanilla extract. Beat again until fully combined.
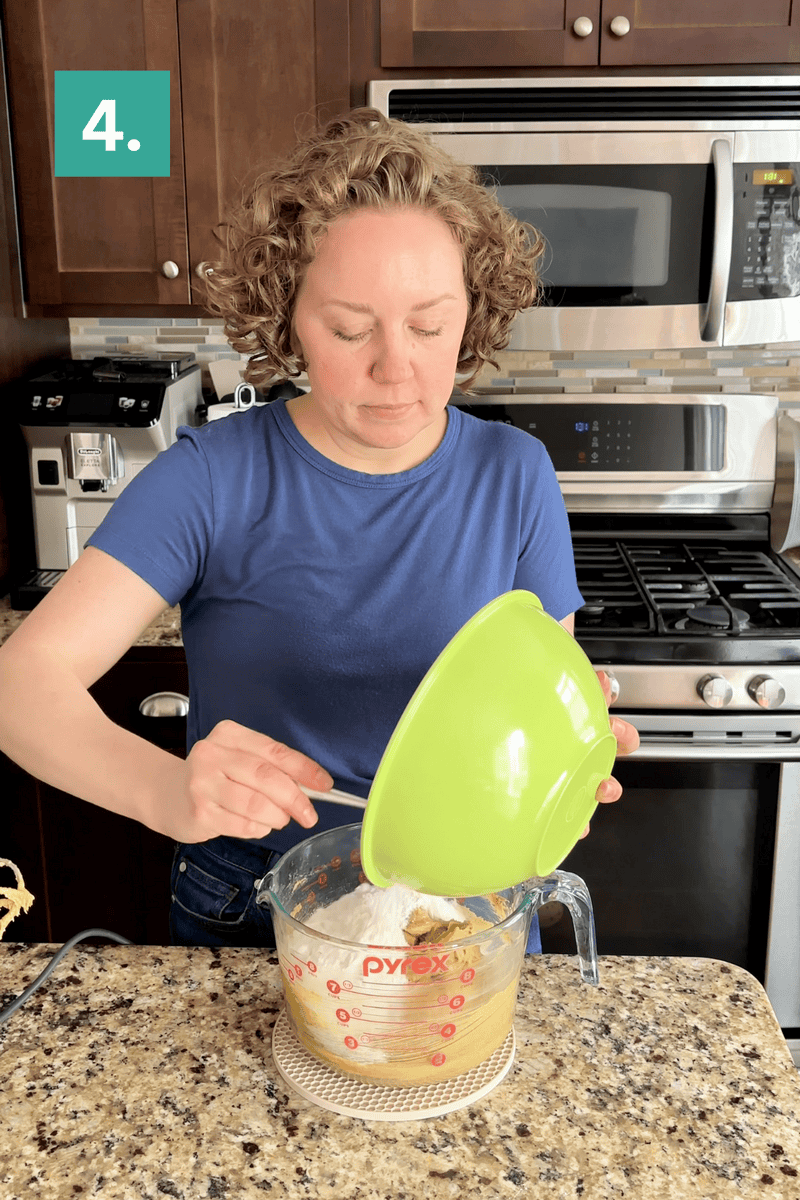
Combine all ingredients: Gradually add the dry ingredients, mixing on low speed just until incorporated.
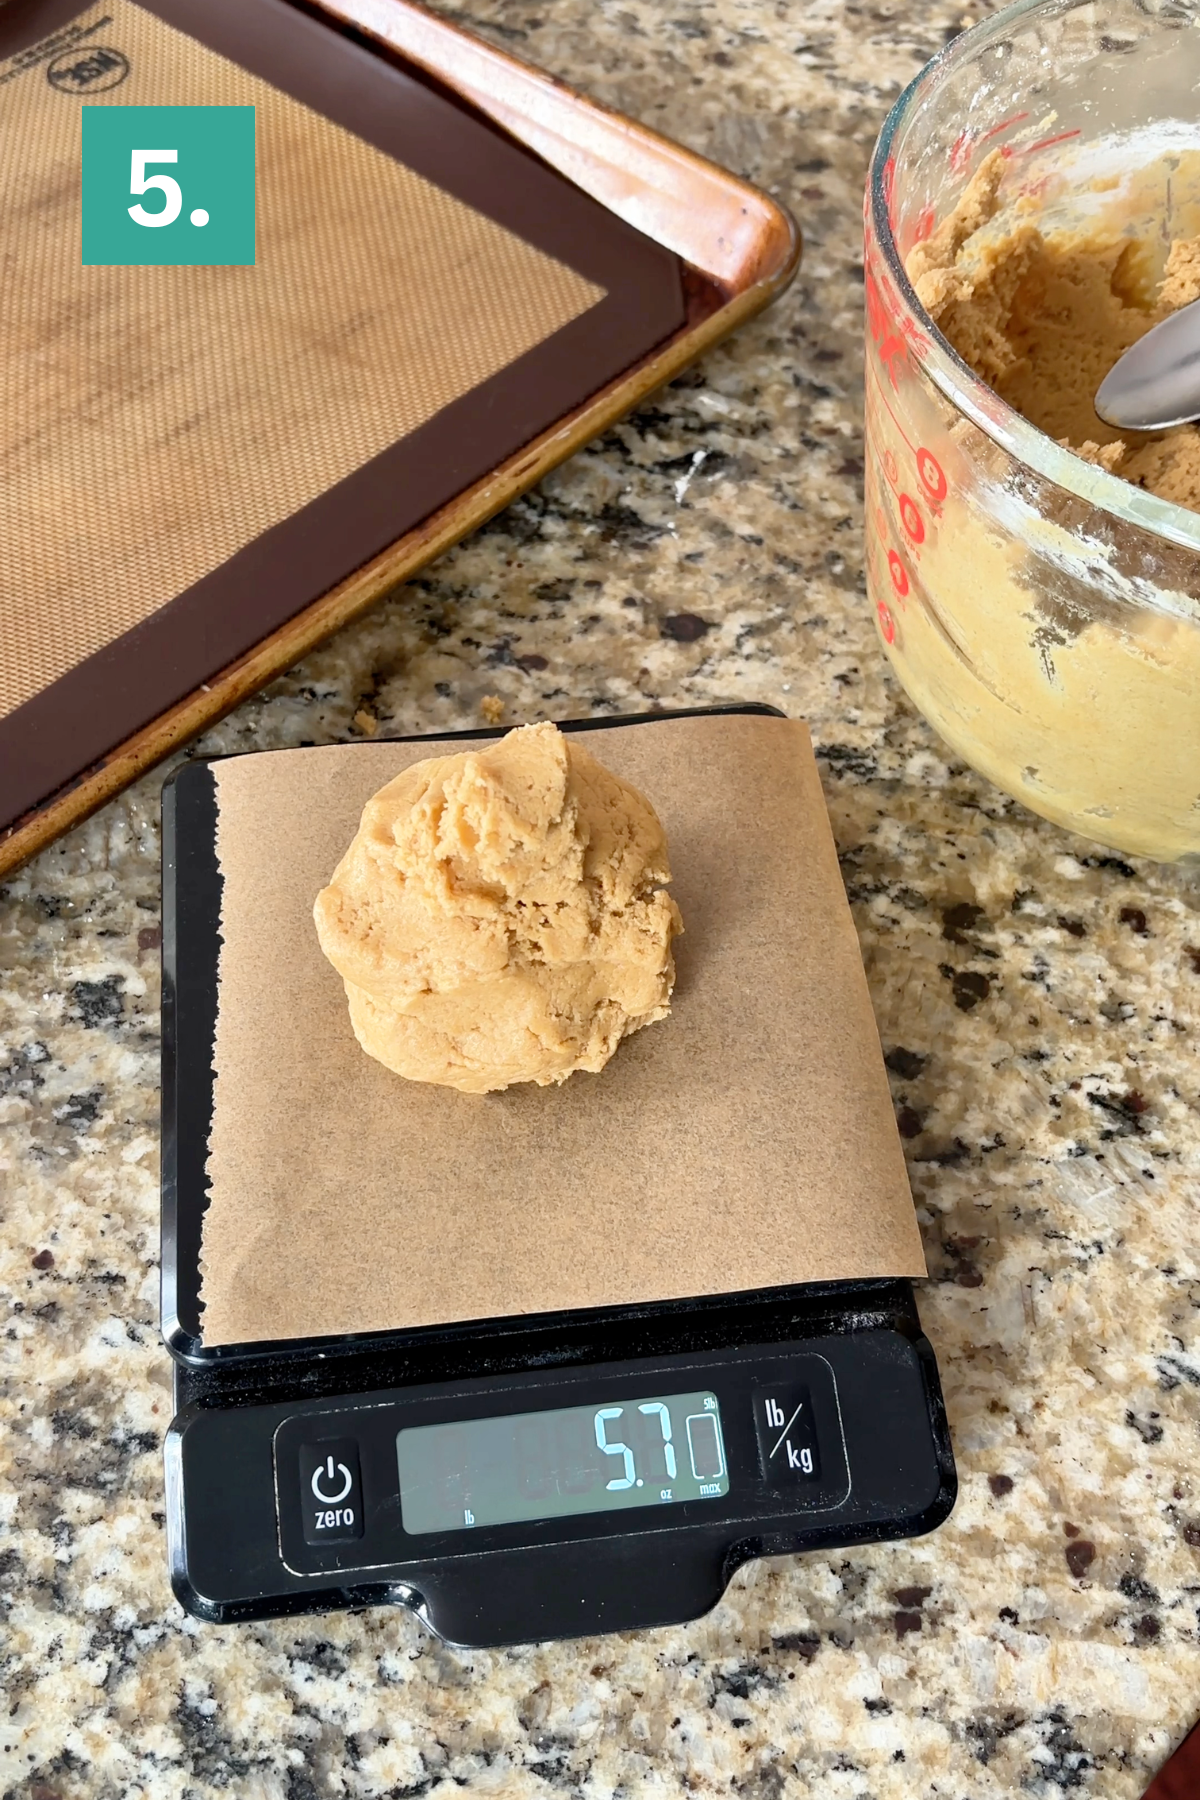
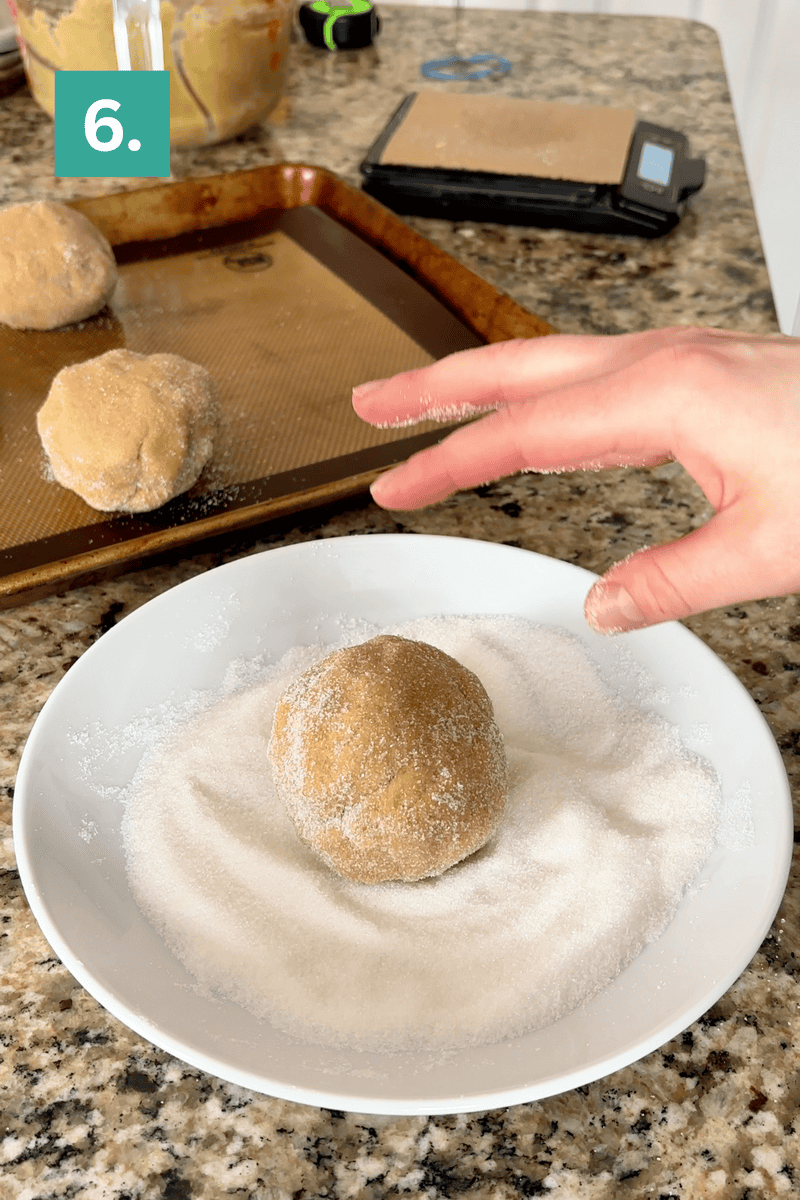
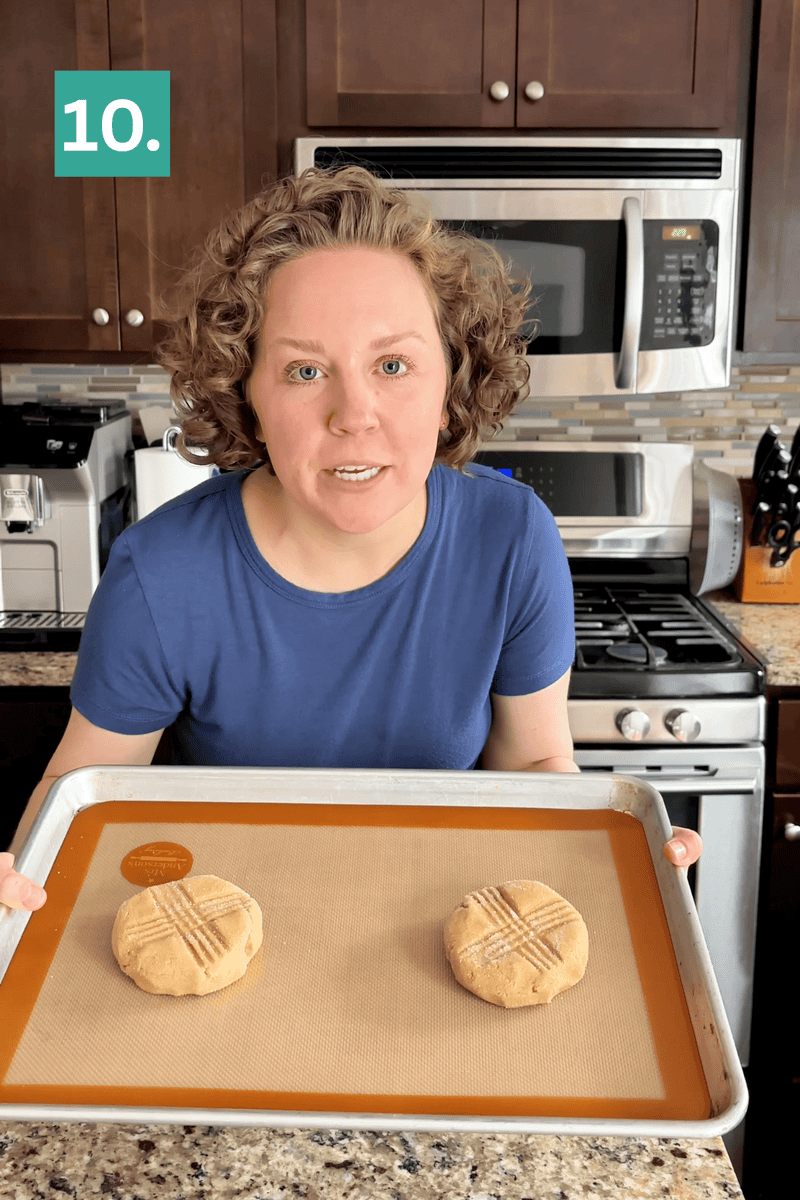
Portion dough and chill: Use a kitchen scale to portion the dough into 5.7 oz balls (you should get about 9). Roll each into a ball, then coat in granulated sugar.
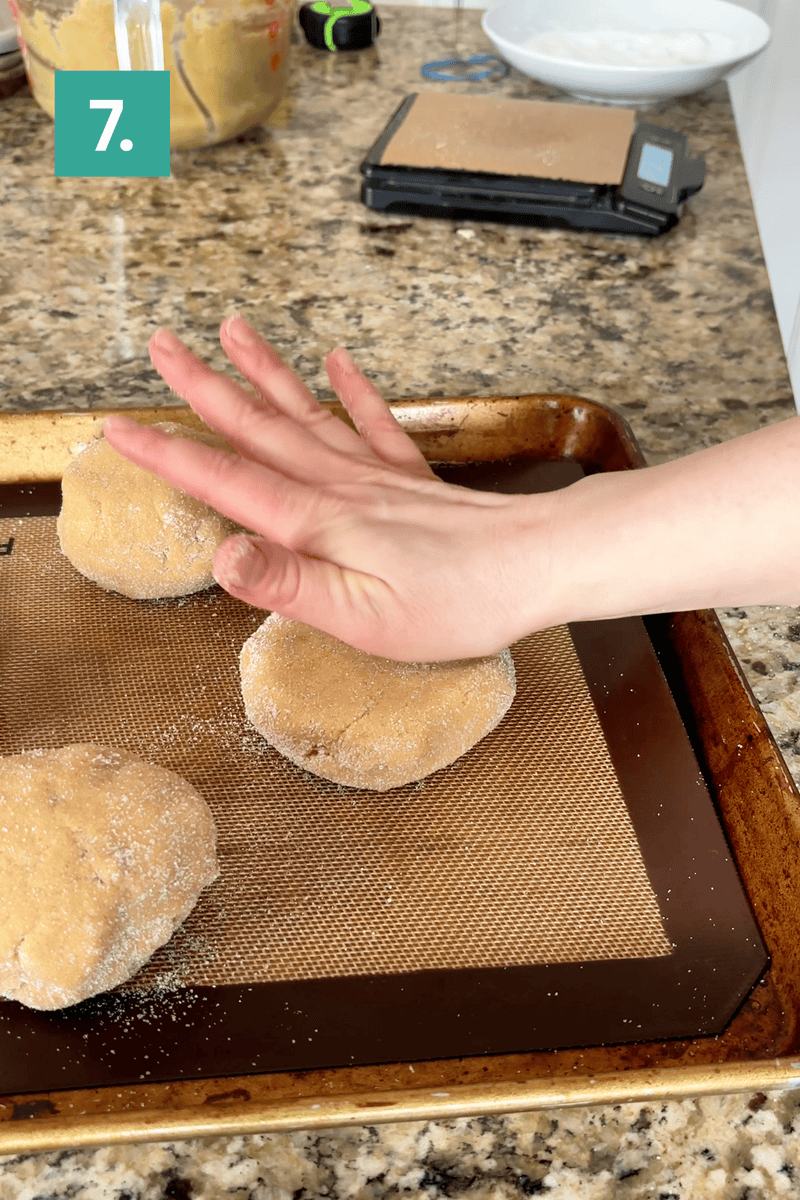

Place on a baking sheet and gently press each one into a 3.5-inch puck. Use a fork to create the classic crisscross pattern. Refrigerate the dough for 1 hour.
Prep oven and baking sheet: After chilling, preheat the oven to 350°F (180°C). Line a baking sheet with a silicone mat or parchment paper.
Bake: Place 2 cookies per baking sheet, leaving space for spreading. Bake for 12–14 minutes, or until the edges are set.

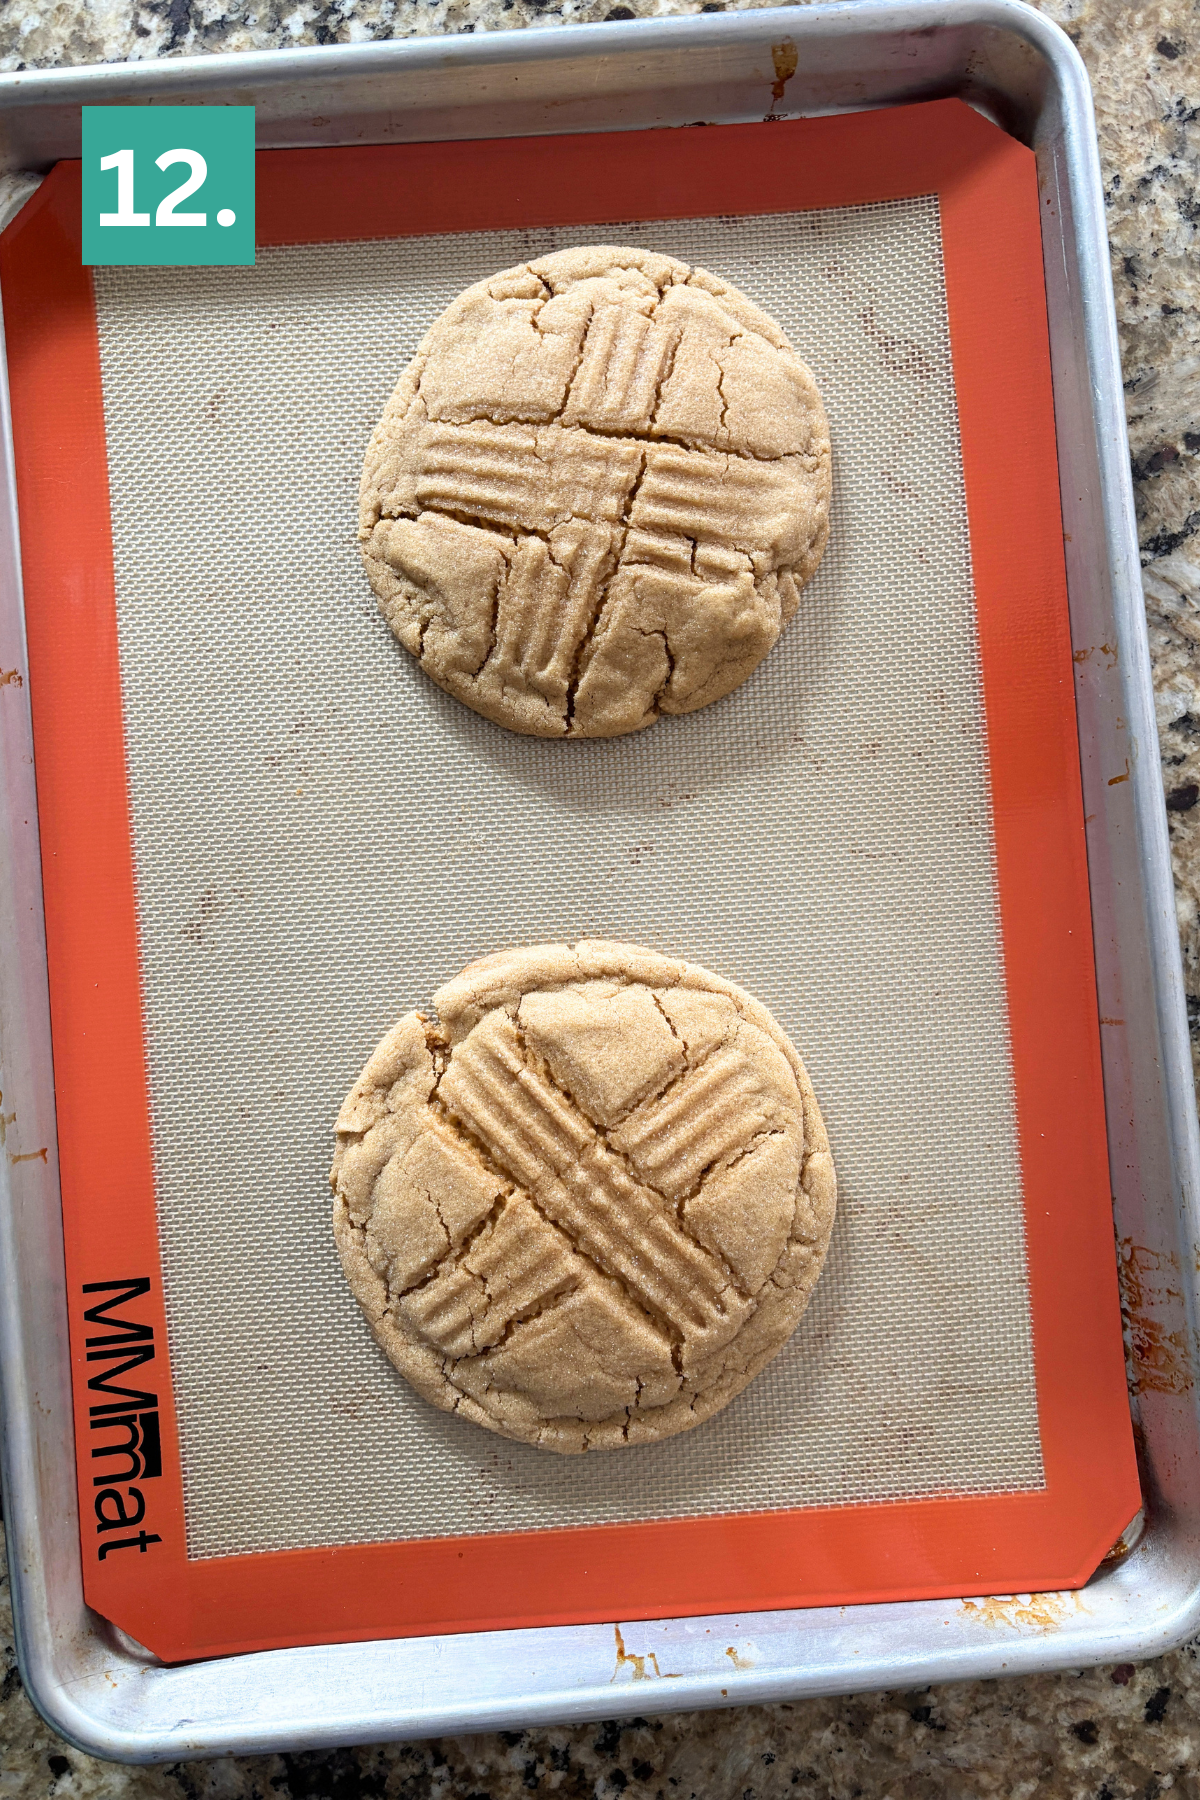
Slam: As soon as the pan comes out of the oven, firmly slam it on the counter to create a crackly texture. Let the cookies cool completely on the pan before removing.
Pro Tips From My Testing
- Chilling the dough for 1 hour makes a big difference in both texture and structure. It helps the cookies bake up thicker and keeps them from spreading too much.
- Use a kitchen scale to portion the dough into even balls. This ensures all the cookies bake at the same rate and gives you that consistent, bakery-style look. I found that around 5.7 oz per cookie was the sweet spot for size and thickness.
- Pressing the dough into a 3.5 inch puck helps the cookies bake evenly while still staying thick in the center. If they’re too thick, they stay domed, and if they’re too thin, they spread too much.
- Rolling the dough in sugar adds a subtle crunch to the outside and helps enhance the crackly texture. Using a fork to create the criss cross pattern not only gives that classic peanut butter cookie look, but also helps the cookies spread evenly.
- As soon as the pan comes out of the oven, firmly slam it on the counter. This creates those crinkly edges and helps settle the centers so they stay soft and chewy.
Make Them Your Own
If you don’t love the classic criss cross look or you prefer a puffier peanut butter cookie, you have options. I tested a lot of variations, and small changes in shaping and timing made a big difference in how the cookies turned out.
If you want a thicker, slightly domed cookie, skip the rolling in sugar, fork and shape the dough into a ball or a smaller puck (like #3). A 3 inch puck without fork lines will still bake up thick with a soft center, especially if you slam the pan right after baking to create some crinkles. This gives you a more modern, bakery-style look without the traditional pattern.
If you prefer a more rounded, puffy cookie, bake the dough as a ball and skip pressing it down (#2). Just know it will stay more domed and won’t spread as much. This version has a softer, thicker center but a simpler appearance.
If you like a balance between thick and structured, you can roll the dough in sugar, lightly flatten it, and add fork lines without pressing too firmly (#5). This gives you a subtle criss cross pattern while still keeping some height.
If you want to skip chilling, you can bake the dough right away. The cookies will spread a bit more and won’t be quite as thick, but they still taste great (#1). If you chill the dough for an hour, you’ll get a thicker cookie with a more controlled shape.
The version in the recipe is the one that checked every box for me, but this dough is flexible enough to adjust based on the look and texture you prefer.
More Cookie Recipes
- Chocolate Chip Cookies
- Homemade Oatmeal Raisin Cookies
- The Best Oatmeal Cookie You’ll Ever Try
- Chocolate Cookies
Tap stars to rate!
Giant Peanut Butter Cookies
Ingredients
- 2 ⅔ cups (320g) all-purpose flour
- 1 tsp baking soda
- 1 tsp salt
- 1 cup (226g) unsalted butter, room temperature
- 1 ½ cups (320g) brown sugar
- ½ cup (100g) granulated sugar, plus extra for rolling the cookies
- 1 ½ cups (405g) creamy peanut butter
- 2 large eggs
- 2 egg yolks
- 2 tsp vanilla extract
Video
Instructions
- In a medium bowl, whisk together the all-purpose flour, baking soda, and salt. Set aside.2 ⅔ cups (320g) all-purpose flour, 1 tsp baking soda, 1 tsp salt
- In a separate mixing bowl, beat the butter, brown sugar, and granulated sugar with an electric mixer for 2–3 minutes, until smooth and fluffy.1 cup (226g) unsalted butter, 1 ½ cups (320g) brown sugar, ½ cup (100g) granulated sugar
- Add the peanut butter, eggs, egg yolks, and vanilla extract. Beat again until fully combined.1 ½ cups (405g) creamy peanut butter, 2 large eggs, 2 egg yolks, 2 tsp vanilla extract
- Gradually add the dry ingredients, mixing on low speed just until incorporated.
- Use a kitchen scale to portion the dough into 5.7 oz balls (you should get about 9). Roll each into a ball, then coat in granulated sugar. Place on a baking sheet and gently press each one into a 3.5-inch puck. Use a fork to create the classic crisscross pattern. Refrigerate the dough for 1 hour.
- After chilling, preheat the oven to 350°F (180°C). Line a baking sheet with a silicone mat or parchment paper.
- Place 2 cookies per baking sheet, leaving space for spreading. Bake for 12–14 minutes, or until the edges are set.
- As soon as the pan comes out of the oven, firmly slam it on the counter to create a crackly texture. Let the cookies cool completely on the pan before removing.
Notes
- Gluten-Free: Use a 1:1 gluten-free baking flour blend in place of all-purpose flour. I used King Arthur’s Measure for Measure Gluten Free Flour with great results.
- To Store: Store cookies in an airtight container at room temperature for up to 4 days. They stay soft and chewy, especially if slightly underbaked.
- To Make Ahead: Prepare the dough, portion into balls, form pucks, add the criss cross pattern and refrigerate (covered) for up to 24 hours before baking. Roll the pucks in granulated sugar and bake. The cookies made me puffier and thicker from refrigerating.
- To Freeze: Freeze unbaked dough balls in an airtight container for up to 3 months. Bake from frozen, adding 1–2 extra minutes. Baked cookies can also be frozen and thawed at room temperature.


Can I use salted Irish butter?
Yes, I would just omit the additional salt.
Can this recipe be used to make puffy tender peanut butter cup blossoms?
Follow my recipe for peanut butter blossoms.
Thank you for the best peanut butter cookie recipe I’ve ever made! Beth you are a baking genius thank you so much for sharing this recipe! Yummy!