
This post may contain affiliate links. Please read our disclosure policy.
 Cherries are my best friend and nemesis. Talk about being like Katy Perry. Get it? Haha.
They are my best friend when I’m just popping them in my mouth to eat and can spit out the pit.
They become my nemesis when I need to get the pit out with the cherry still somewhat intact.
 I know I could buy a cherry pitter, but it seems kind of silly because it’s going to sit unused for 9+ months out of the year. And I really don’t need another appliance taking up space in our tiny house. Plus I already have a prop addiction so I guess my fingers are losing this battle because they are just going to have to pit the cherries themselves.
I usually just cut the cherry in half and then dig out the pit from one of those sides. Ryan has a more creative technique. He likes to cut the cherry 4 times, cutting around the pit in a square or rectangle.
 I was browsing youtube for creative ways to pit a cherry and there are a ton of ideas! I wish I would have used some of those techniques when I made this cake. I guess I thought there wasn’t another way to pit a cherry unless I had a cherry pitter. Here are some I found:
A paper clip – undo the paper clip so you have an s-shape and use the larger end to cut a circle around the pit, entering where the stem is.
A bottle and a skewer/chopstick – Place the cherry on the neck of a skinny bottle. Use the skewer/chopstick to push the pit down into the bottle.
A piping tip – Push the piping tip into the cherry entering where the stem was. The cherry should go inside the piping tip, then pull it out and discard of the pit.
Do you have any other unique ways to pit a cherry? I am definitely going to try the bottle and skewer technique next time!
 This cake can be broken down into 4 steps – bake, fill, frost and garnish.
We recently shared a tutorial on how to bake a cake and later this week we’ll be sharing a tutorial on how to make buttercream. Definitely utilize those resources to help you along the way!
After you bake the cake layers, which I HIGHLY recommend using a homemade bake even strip during the baking process, and after you whip up the buttercream, the next step is to fill the cake.
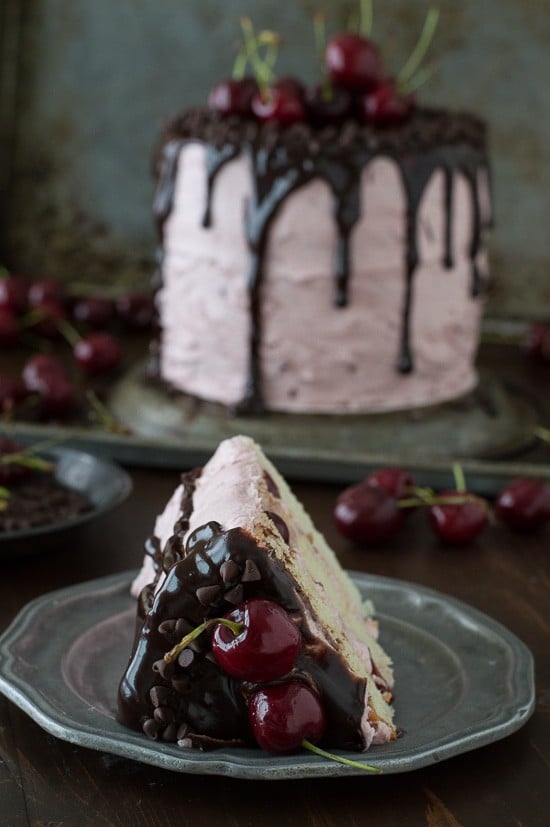
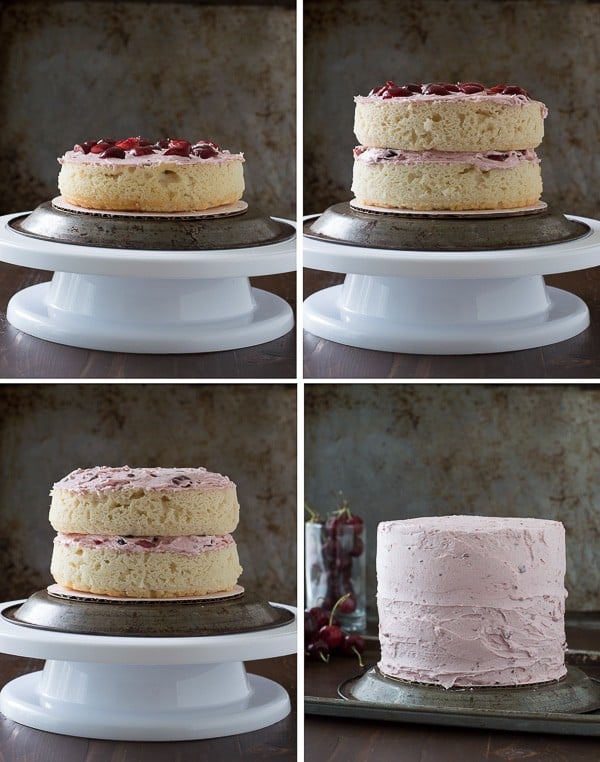 Take the first cake layer and place it on a cardboard cake circle that has been smeared with a little buttercream, this will help the cake stick to the circle and not move around. Add your desired amount of buttercream on top of the first layer. Add a handful of chopped cherries, spreading them around the cake, then carefully add a bit more buttercream, kind of helping to seal in the cherries. Adding more buttercream on top of the cherries will prevent cherry juice from leaking into the cake layers and dying the cake.
A quick tip – To ensure that you have the same amount of buttercream in-between each layer, measure the buttercream in a measuring cup! For example, put 1/4 cup of buttercream in-between each layer.
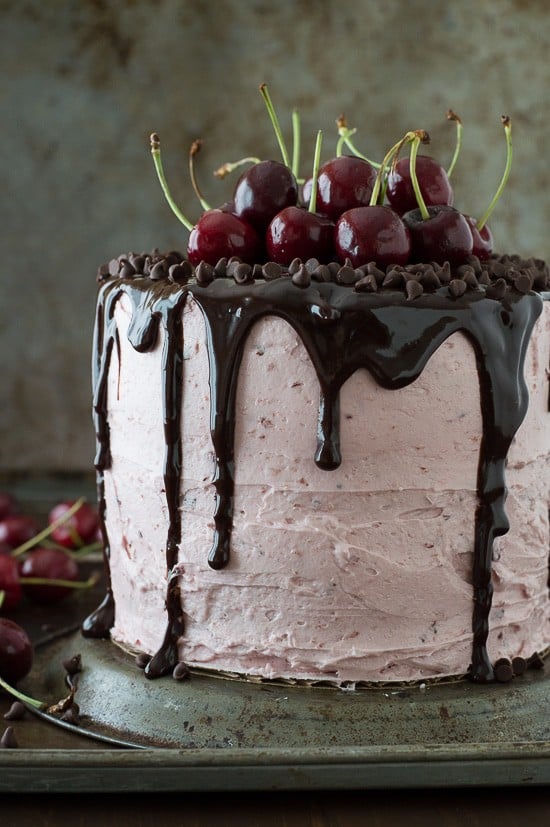
Onto the third step, frost the cake. Add an even coat of buttercream on the sides and top of the cake. Don’t be skimpy on the frosting here! After you frosted the cake, place it in the refrigerator for 20-30 minutes to chill.
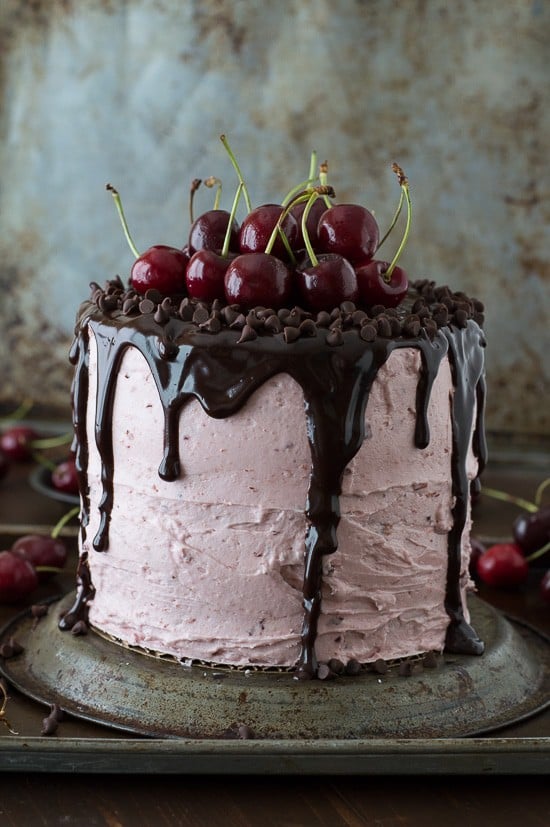
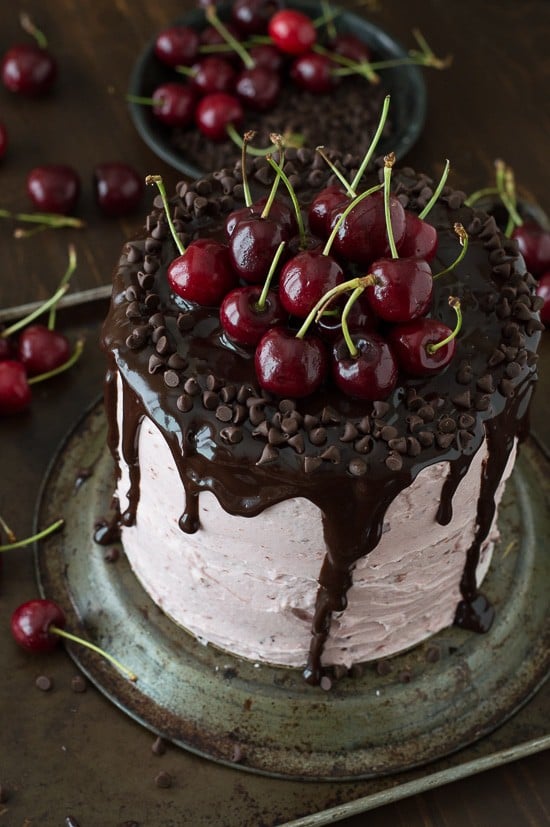
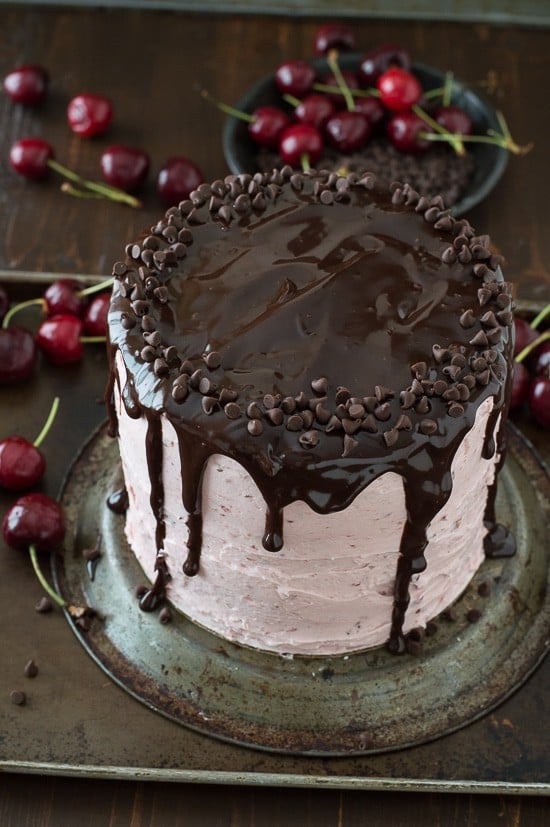
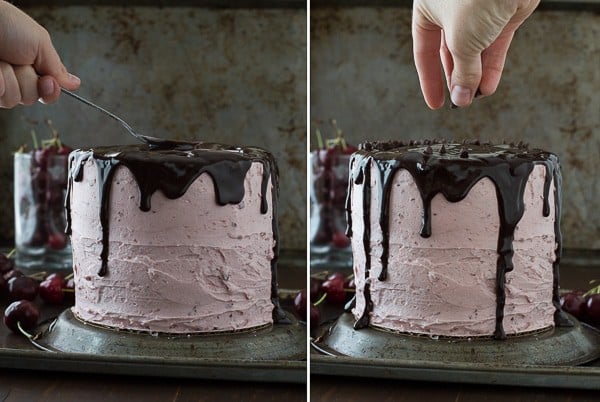 Fourth step – garnish. Once the chocolate ganache is room temperature, use a spoon to drizzle the ganache around the edges of the cake, allowing it to naturally drizzle down the sides. Once the edges have ganache, now go back and fill in the middle, adding more ganache and using a spoon to spread it smooth. After the ganache has set for 10-15 minutes, add mini chocolate chips around the outside of the cake and place cherries in the middle of the cake.
Tap stars to rate!
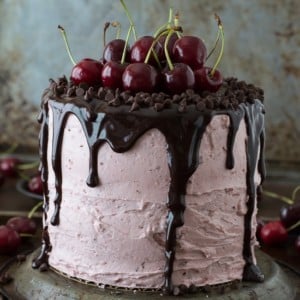
Fresh Cherry Cake with Chocolate Ganache
Ingredients
White Cake (repeat this recipe for each layer - that way you can decide how many layers you want)
- 3 Tbsp (43g) butter, softened
- 5 ½ Tbsp (68g) sugar
- 1 ½ large egg whites
- ¼ cup (57g) sour cream
- ½ tsp vanilla extract
- ½ cup + 1 Tbsp (68g) all purpose flour
- ¾ tsp baking powder
- ¼ tsp salt
Cherry Buttercream (this recipe makes enough frosting for a 3 layer cake)
- 1 cup (226g) butter, 2 sticks
- ½ cup (118ml) vegetable shortening
- 1 tsp vanilla extract
- 7 cups (791g) powdered sugar
- ½ cup cherry puree
- ¼ cup (40g) chopped cherries, to go in-between each layer
Chocolate Ganache
- ½ cup (85g) chocolate chips
- ¼ cup (59ml) heavy cream
To top the cake
- Mini chocolate chips
- Cherries
Instructions
White Cake
- Preheat the oven to 350º F.
- Using butter, grease the bottom and sides of an 6 inch round cake pan or springform pan and line the bottom with a round piece of parchment paper. To ensure even baking, place a bake even strip around the pan. You can make your own homemade bake even strip by cutting a towel or shirt to fit the size of your pan. Get the fabric really wet, then squeeze out the dripping water but do not squeeze it too dry. Secure the fabric around the pan with a safety pin.
- In a mixing bowl, combine the butter and sugar, beat using an electric mixer until fluffy. Add in the egg whites, beat again.3 Tbsp (43g) butter, 5 1/2 Tbsp (68g) sugar, 1 1/2 large egg whites
- Add in the sour cream and vanilla extract, mix until smooth.1/4 cup (57g) sour cream, 1/2 tsp vanilla extract
- In a smaller bowl, combine the flour, baking powder and salt, gently mix with a spoon. Gradually add half of the flour mixture to the wet ingredients, do not dump it in, rather take spoonfuls of the flour mixture and gently shake it over the wet ingredients, as if you were sifting in the flour. Fold in the mixture until no flour remains. Repeat with the other half of the flour, folding it in and scraping the sides and bottom of the bowl to incorporate everything. Scrape the batter into the prepared cake pan, using a spatula to evenly spread it out.1/2 cup + 1 Tbsp (68g) all purpose flour, 3/4 tsp baking powder, 1/4 tsp salt
- Bake for 23-25 minutes, or until a toothpick inserted in the center comes out clean.
- Once the cake is done, allow it to cool in the pan on a cooling rack for 10 minutes. After 10 minutes, carefully remove the cake from the pan. If using a springform pan, remove the sides and bottom. Allow the cake to cool completely on a cooling rack. Once cool, remove the parchment paper round from the bottom of the cake. If you need to level the top of your cake, do so now using either a cake lever or knife. Make sure the cake is completely cooled, then wrap the cake in plastic wrap and place it in the refrigerator. This cake is good for up to one week like this.
Cherry Buttercream
- Pit cherries to make cherry puree. Place the cherries in a blender and puree until smooth. Measure 1/2 cup of puree and set aside.
- In a mixing large bowl, combine the butter and vegetable shortening, beat using an electric mixer until fluffy, 2 minutes.1 cup (226g) butter, 1/2 cup (118ml) vegetable shortening
- Add in the vanilla extract and cherry puree, beat using electric mixer.1 tsp vanilla extract, 1/2 cup cherry puree
- Begin to add the powdered sugar, about 1-2 cups at a time, mixing by hand first, then with the electric mixer. Continue adding powdered sugar until the frosting tastes good and isn't too wet.7 cups (791g) powdered sugar
Chocolate Ganache
- Place chocolate chips in a medium heat-proof bowl.1/2 cup (85g) chocolate chips
- In a small pot over low heat, heat the heavy cream until just before boiling.1/4 cup (59ml) heavy cream
- Pour the heavy cream over the chocolate chips. Allow the mixture to stand for 1-2 minutes.
- Use a spatula to stir the mixture until smooth.
- Allow the ganache to come to room temperature before adding it to the cake.
To assemble the cake
- Spread a small amount of buttercream on a 6 inch round cardboard cake circle. Place your first layer of cake on top of the cardboard. Put buttercream on top of the first layer and spread it as even as possible with an offset spatula. Decide how much or how little frosting you want in-between each layer.
- Evenly place chopped cherries on top of the buttercream.1/4 cup (40g) chopped cherries
- Spread more buttercream on top of the cherries. This will help seal the cherries into the buttercream and prevent the juice from seeping into the cake.
- Repeat this process for each layer of cake. Once all of the layers are stacked and frosted, it’s time to do a crumb coat. The crumb coat will help seal the crumbs in. Using your offset spatula, spread a thin layer of buttercream around the sides and the top of the cake. It’s easiest to start off with more frosting on the cake and remove some as needed.
- Place the entire cake in the fridge for 20 minutes to harden the crumb coat.
- Begin to add the second layer of frosting, starting with the top of the cake and working your way down to the sides. Try to get the buttercream as even as possible around the cake. Place the cake in the fridge for 20-30 more minutes.
- Once the ganache is room temperature, use a spoon to drizzle the ganache around the sides of the cake, allowing it to drip down the sides. Fill in the middle of the cake with ganache and spread evenly with the back of the spoon. Allow the ganache to set for 10 minutes.
- Place mini chocolate chips around the outside of the cake.Mini chocolate chips
- Add cherries to the center of the cake.Cherries
- Serve and enjoy.
Notes


Do you have to use fresh cherries? Has anyone used maraschino cherries from a jar?
Maraschino cherries from the jar have a lot of excess liquid, so be sure to drain them REALLY well before adding them!
I only really have time to decorate it the day of so wondering if you think I can make the cake part the day before and store them in the fridge?
Yes, definitely! Wrap the cake rounds in plastic wrap and store in the fridge until frosting.
Hi this is gorgeous! I can’t make it or eat it as I’m gluten and lactose intolerant but I would love to paint it. May I? I’ll give you credit of course if I post my painting on social media of course. Thanks, Gwendolyn
Yes!
Will be making this for my husband’s birthday! I had one question, do I have to use vegetable shortening for the buttercream? I mean, can I skip it?
Yep, you can totally skip it and just use butter in place of it.
Hello Beth! I really wanted to make This cake. I didn’t have 6 inch so I used two 8 inch. It came kind of flat not springy looking like yours. Can you tell me what I did wrong besides the wrong cake pan sized?
Hi Lauren! The recipe as written is for one 6 inch cake. Did you make the recipe as written and then split it into two 8 inch pans? Because that would result in a very very thin cake. Next time, I would triple the recipe then divide the batter among two 8 inch pans.