This post may contain affiliate links. Please read our disclosure policy.
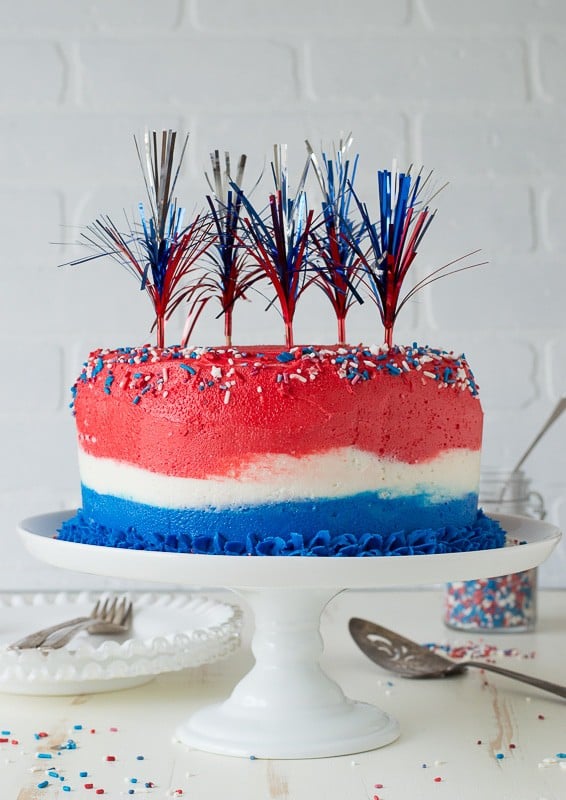 Lots of exciting things are going on with this recipe! Besides the cake being decked out in red, white, and blue, we’re sharing our recipe for a classic white cake. It’s light, fluffy, and has white great color. It’s easy to make and only calls for one ingredient that you might not always have on hand – sour cream. So be sure to pick up a small container and you’ll be on your way to making this cake.
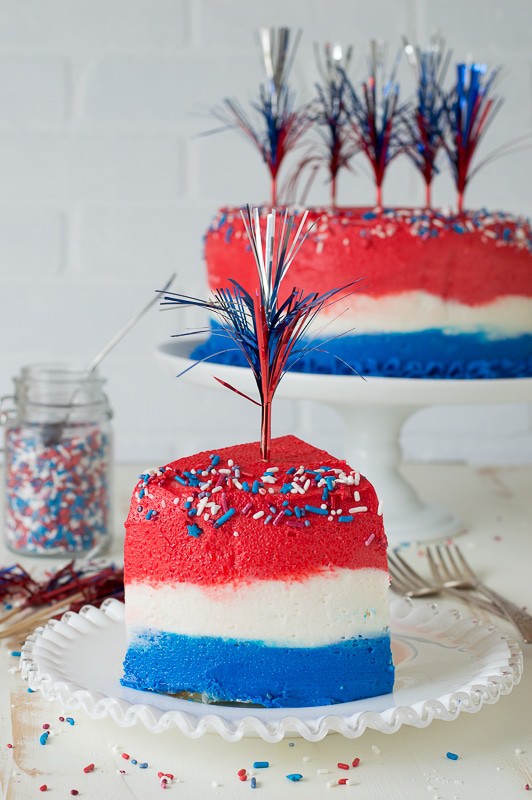
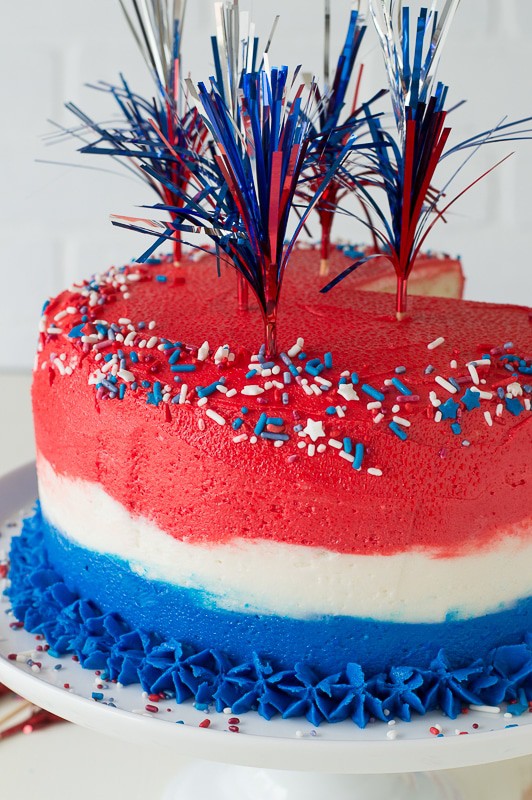 While making this cake I learned that cake, buttercream, and humidity are not friends. Normally I place my cake layers in the freezer before I assemble the cake and then I return the cake to the freezer after I do the crumb coat, and it works great. Except once I pulled the cake out of the freezer, BAM the humidity hit. Can you see the condensation on the cake? Yeah..I guess it was also 78 degrees in my house, and that was with the air on. Maybe I should turn the air down? Nah. I’m too cheap!
If it’s really humid outside when you’re making this cake, I would suggest not putting the cake in the freezer. That will eliminate the chance of any condensation forming.
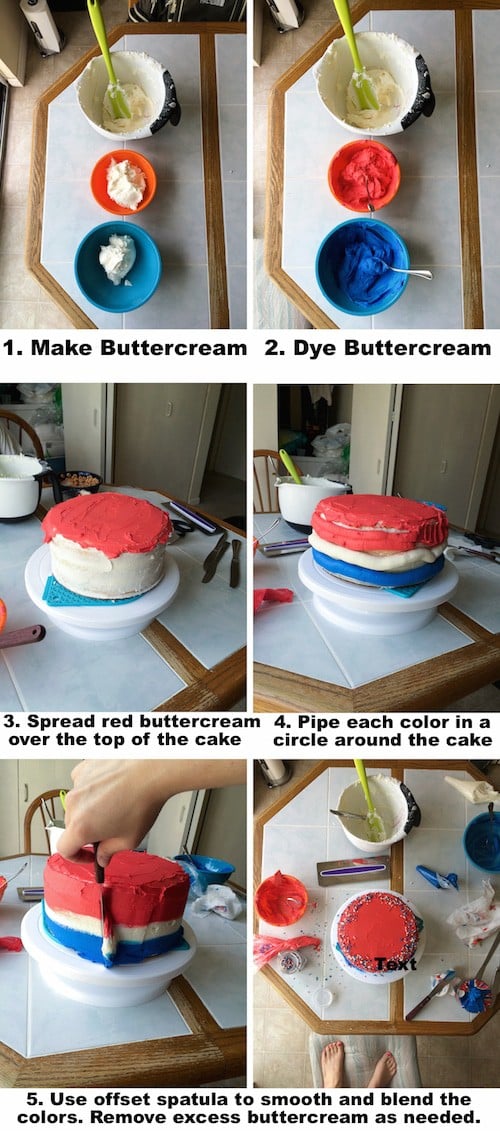
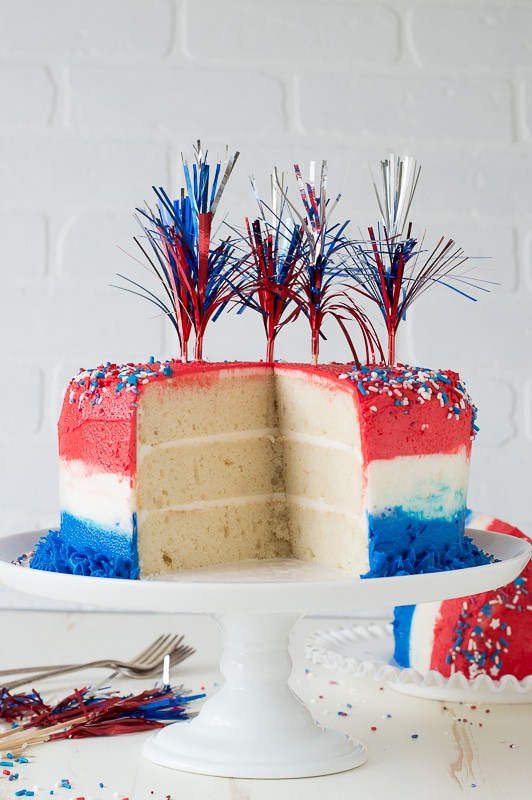 I put together a simple tutorial on how to frost an ombre cake. This is the technique you would use when creating an ombre effect on any cake using any colors. The ombre effect comes together really quickly once the buttercream is on the cake. You can decide if you want your ombre effect to be more separated or blended – it’s all in the spatula.
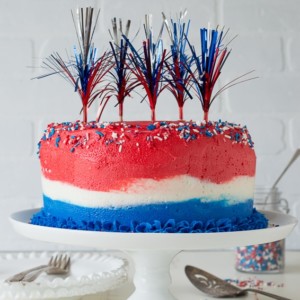
 I jazzed up this cake with some 4th of july sprinkles and 4th of july food picks. I searched for 4th of july tinsel sparklers for a long time and I finally found these ones. They’re great and because they came in a pack of 100, I’ll be set for many 4th of july’s :)
Tap stars to rate!
4th of July Ombre Cake
Ingredients
Cake (repeat this recipe once for each layer)
- 6 Tbsp (86g) butter, softened
- ⅔ cup (132g) sugar
- 3 egg whites
- ½ cup (114g) sour cream
- 1 tsp vanilla extract
- 1 cup + 2 Tbsp (135g) all purpose flour
- 1 ½ tsp baking powder
- ¼ tsp salt
Buttercream
- 1 cup (226g) butter, 2 sticks, softened to room temperature
- 1 cup (236ml) vegetable shortening
- 1 tsp vanilla extract
- 7-10 cups (791-1130g) of powdered sugar
- Red and blue gel food coloring
- 4th of July sprinkles, optional
Instructions
To bake the cake
- Preheat the oven to 350 degrees F. Using butter grease the bottom and sides of an 8 inch round cake pan or springform pan and line the bottom with a round piece of parchment paper. To ensure even baking, place a bake even strip around the pan. You can make your own homemade bake even strip by cutting a towel or shirt to fit the size of your pan. Get the fabric really wet, then squeeze out the dripping water but do not squeeze it too dry. Secure the fabric around the pan with a safety pin.
- In a mixing bowl, combine the butter and sugar, beat using an electric mixer until fluffy. Add in the egg whites, beat again.6 Tbsp (86g) butter, 2/3 cup (132g) sugar, 3 egg whites
- Add in the sour cream and vanilla extract, mix until smooth.1/2 cup (114g) sour cream, 1 tsp vanilla extract
- In a smaller bowl, combine the flour, baking powder and salt, gently mix with a spoon. Gradually add half of the flour mixture to the wet ingredients, do not dump it in, rather take spoonfuls of the flour mixture and gently shake it over the wet ingredients, as if you were sifting in the flour. Fold in the mixture until no flour remains. Repeat with the other half of the flour, folding it in and scraping the sides and bottom of the bowl to incorporate everything. Scrape the batter into the prepared cake pan, using a spatula to evenly spread it out.1 cup + 2 Tbsp (135g) all purpose flour, 1 1/2 tsp baking powder, 1/4 tsp salt
- Bake for 22-26 minutes, or until a toothpick inserted in the center comes out clean. Using a bake even strip will slow down the baking time, so if your cake is still wobbly in the center, allow it to bake longer.
- Once the cake is done, allow it to cool in the pan on a cooling rack for 10 minutes. After 10 minutes, carefully remove the cake from the pan. If using a springform pan, remove the sides and bottom. Allow the cake to cool completely on a cooling rack. Once cool, remove the parchment paper round from the bottom of the cake. If you need to level the top of your cake, do so now using either a cake lever or knife. Wrap the cake really good in plastic wrap and place it in the refrigerator. The cake will be good like this for up to one week.
- 30 minutes to 1 hour before you plan to assemble the cake, place the cake layers in the freezer. This will make them easier to frost.
To make the buttercream
- In a mixing bowl, combine the butter and vegetable shortening, beat using an electric mixer until fluffy. Add in the vanilla extract. Begin to add the powdered sugar, about 2-3 cups at a time, mixing by hand. Continue adding powdered sugar until the frosting no longer looks wet and tastes good to you. Then beat the frosting with the electric mixer one last time to make sure the powdered sugar is really incorporated.1 cup (226g) butter, 1 cup (236ml) vegetable shortening, 1 tsp vanilla extract, 7-10 cups (791-1130g) of powdered sugar
To frost the cake
- Divide the frosting into 3 bowls, putting more frosting into 2 of the bowls and less frosting in one. Dye one of the bowls with more frosting red. Leave the other bowl with more frosting white. Dye the bowl with the smallest amount of frosting blue.Red and blue gel food coloring
- I like to assemble my cakes on a turntable. Using the white frosting for the inside of the cake, spread a small amount of buttercream on a 8 inch round cardboard circle. Place your first layer of cake on top of the cardboard. Put buttercream on top of the layer and spread it as even as possible with an offset spatula. Repeat for each layer of cake. Once all of the layers are stacked, it’s time to do a crumb coat. The crumb coat will help seal the crumbs in. Using your offset spatula, spread a thin layer of buttercream around the sides and the top of the cake.
- Place the entire cake in the freezer for 20 minutes. While the frosting is hardening on the cake, prepare the piping bags. Cut off the ends of 3 piping bags, making a 1/2 to 1 inch hole in each bag. Fill each bag with buttercream, one with red, one with white, and one with blue.
- Using some of the red buttercream, spread it evenly over the top of the cake, going down the sides a little. Next, pipe each color of frosting in a circle around the cake, with blue at the bottom, white in the middle, and red at the top.
- Use an offset spatula to smooth and blend the colors. As you smooth, you will need to remove excess buttercream as needed. Continue to smooth using your spatula until you have you desired look.
- Add 4th of july sprinkles around the top of the cake.4th of July sprinkles
- Pipe a blue border around the bottom of the cake if desired.
- Serve and enjoy.
Notes



What a fun and festive cake for the 4th of July. Wish I could have a piece.
In my books, white cake is the only cake worth eating. I just can’t get into chocolate cake. This cake is SO much fun and the perfect way for me to take my new American-ness by the horns.
Whatever that means. Pinned!
Oh yeah! You Canadian!
Another amazing Beth creation! Love seeing the cake from your behind the blog post! Sharing now!!
Thanks for sharing Amy!
So pretty and perfectly fesetive – this would be the star of any July 4th party!
This is a stunning cake, so festive! I couldn’t see the condensation until you pointed it out ;)
Oh darn! Shouldn’t have said something, hehe :)
I love love love how adorable this cake is!
That’s really a great idea for the summer holidays! Looks so good.
Oh, I love the fun layers of frosting on the sides! Perfect 4th of July treat for sure! And yes, frosting and humidity are not friends. I actually never freeze or refrigerate my layers for this very reason. A thin layer of frosting works wonders every time to seal all those crumbs in if you let it sit for about 20 minutes.
I’m going to try that technique tomorrow!
I am loving all your 4th of July treats!! Humidity does not mix with buttercream and it’s so annoying! I guess that is another good thing about California! We are lucky to have little humidity
I can’t even imagine a world without humidity, you’re lucky!
What a pretty cake for the 4th!! I love ombre and I would have loved to see the sparklers!! LOL
Haha, next year!